Welcome to the World!

I’ve been anxiously waiting to post this project!  I’ve been on pins & needles ever since a friend told me that he was expecting a baby girl that was due in a few weeks!  Well the day finally came, and a sweet little baby girl was born today!  I made this card the day he told me it was a girl.  Now I can finally give it to him, and show you.
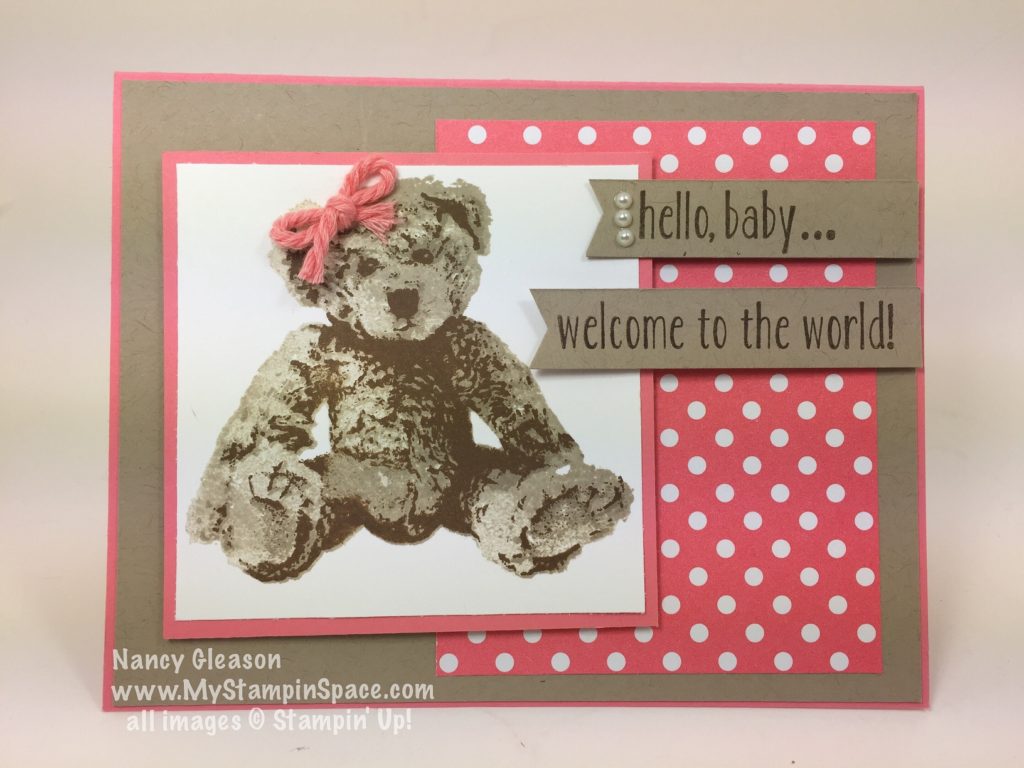
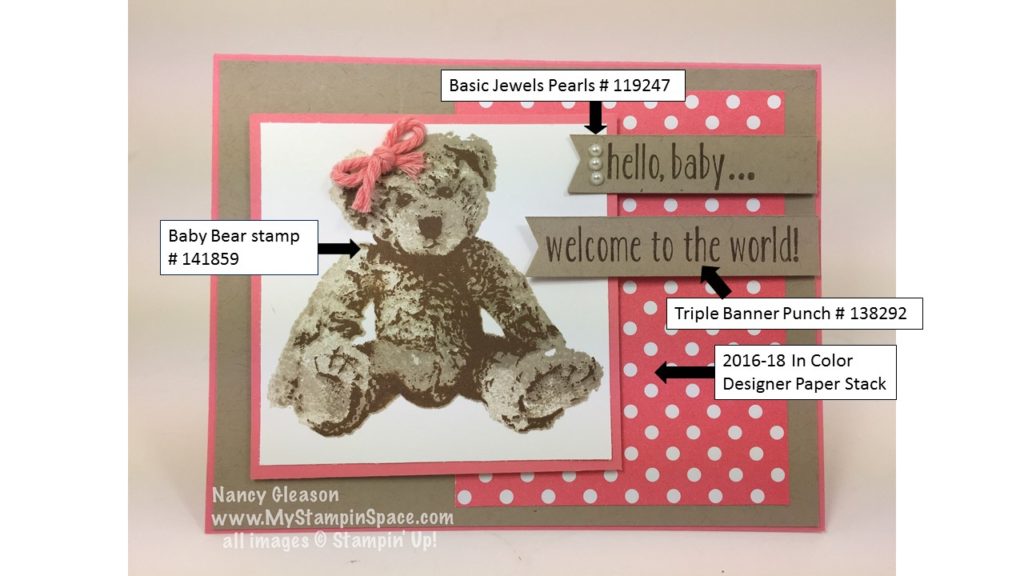
Baby Bear is the stamp set that I used to make this realistic, life-like stuffed animal bear.  A triple stamp, I used Sahara Sand, Crumb Cake and Early Espresso ink for each layer of the bear to create that realistic effect.  My paper is Flirty Flamingo card stock for the card base, with a Crumb Cake layer.  Flirty Flamingo DSP and another layer of Flirty Flamingo cardstock with a Whisper White image panel.  The sentiments were stamped in Early Espresso ink on Crumb cake banners.  A row of pearls and a bakers twine bow adorn this card.

Any time I used a card base other than Whisper White or Very Vanilla, I like to make an inside panel to write on.  My inside also contains another sentiment, with just enough white space to include a handwritten note.
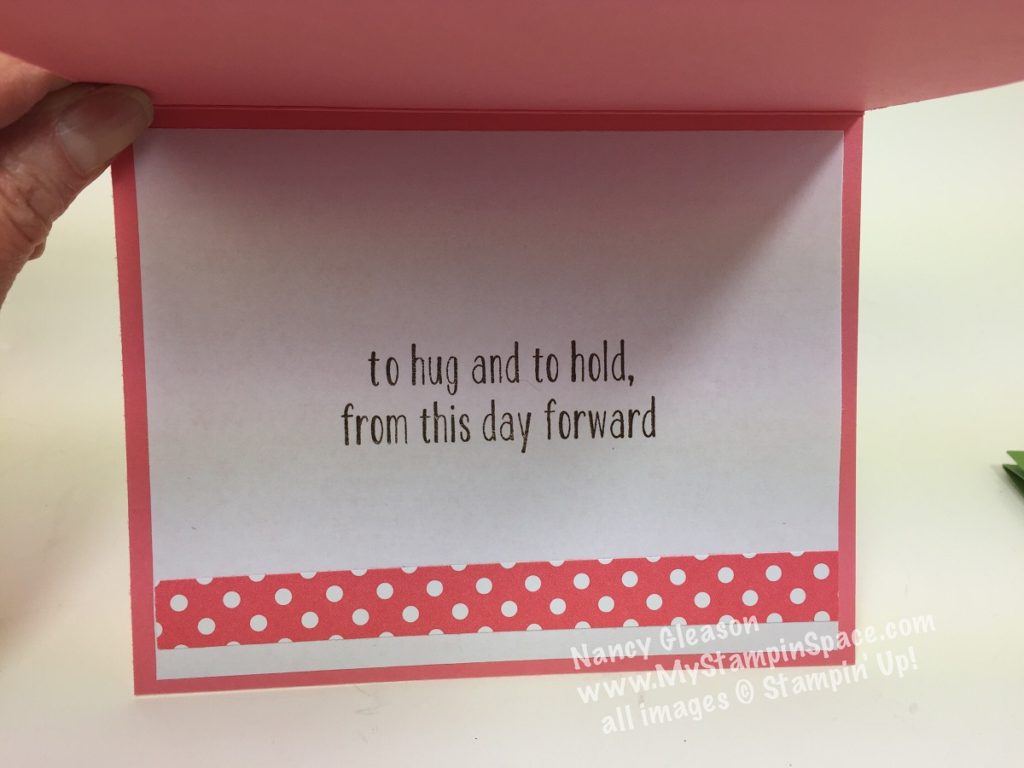
I used another strip of DSP so the inside and the outside coordinate.  And I just LOVE this sentiment!

Here’s a map of the products I  used to create this card:
I’m so glad that my friend is a Dad with a precious little babe to love and to hold.

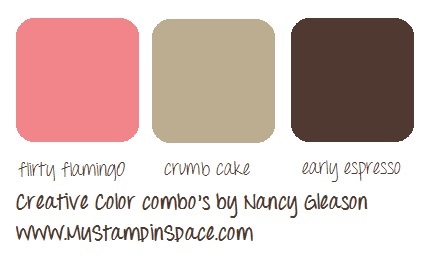
If you love this creative color combo, please save this pic for your reference:
Baby Bear is such a versatile stamp set too!  If you’d like to order any of the products I used, click here to shop my store.  You can also click on any of the hi-lighted items in the description above.

Sale-A-Bration

Please use January Host Code 2BUYMMWN when placing an order that is less thaln $150.   When shopping, you’ll earn 1 Free Sale-A-Bration item for every $50 you spend (before shipping and sales tax).  Want to learn more about Sale-A-Bration?  Click here.

Thanks for stopping by My Stampin Space.  I hope I inspired you to use Baby Bear when you have a little one to welcome into the world!  Share a pic to my Facebook page of any projects you made using Baby Bear.  While you’re there, please like my Facebook page too so we can stay in touch there.

I’m also on Pinterest and Instagram so follow me there as well!  See you soon.

Nancy


Save

Save

Save

Save

Save

Save

Taking Layering to a New Level

Today is the long-awaited for day!  And I’m not just talking about a day off of work!  But today is the day that the Stitched Shapes Framelits dies are back in stock!

145372 Stitched Shapes Framelits
Stitched Shapes Framelits dies – # 145372

The Stitched Shapes Framelit dies were introduced back in November as a teaser of what would be coming in the 2017/2018 Annual catalog to be released in June.  They were so hugely popular that they sold out faster than expected, put on backorder, and then put into a ‘non-orderable’ status  until today.

Why are they so popular, you ask?  What’s the big deal?  Well, I’ll tell you.  This set of 12 (4 each of square, oval and circles) basic geometric shapes have tiny stitching around the edges.  And they pair perfectly with our Layering Framelits in Squares, Ovals & Circles to create perfect layers with just the right amount of detail.    Let’s have a look:  IMG_8339[1]

IMG_8411[1]

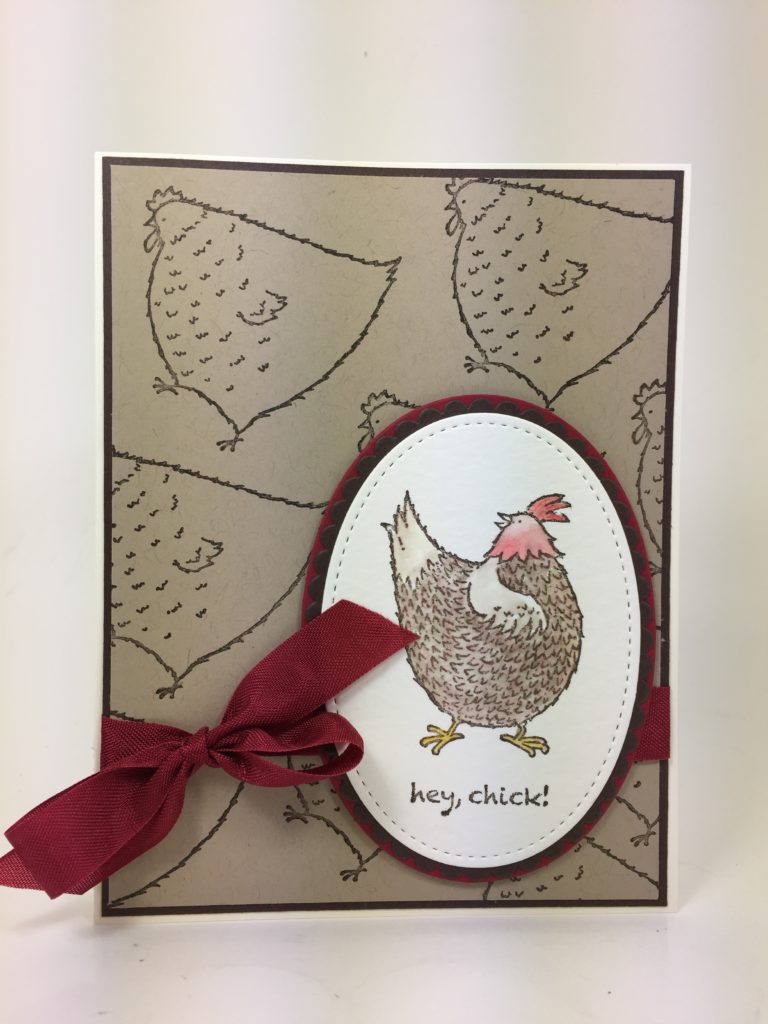
Hey Chick

See how the tiny stitches makes the shaped so much more ‘finished’ and adds just the perfect finishing touch to the basic shape?  And how the straight and scallop edges of the layering framelits dies coordinate so perfectly?  The Stitched Shapes Framelits and layering framelits are going to take your layers to a whole new dimension.  And the sizes of the shapes coordinate with so many stamp sets; both images & sentiments.

Now, what if you don’t own any of these basic shape framelit dies.  Can you still get the Stitched Shaped Framelit dies?  YES!!  Having both the layering framelit dies in all the shapes, AND the Stitched Shaped Framelits, will be an investment in tools for your paper crafing that you will have for years & years.  The best way to get all of these?  Ultimate Bundle SAB

When you purchase the Ultimate Starter Kit!  You can choose $125 worth of product for only $99 and not pay any extra for shipping!  But during Sale-A-Bration, you’ll get to choose 2 FREE stamps on top of that!  If you purchase this now, you’ll get a 20% discount on all of your purchases until the end of July 2017!  And you don’t ever have to host a workshop or sell anything if you don’t want to.  Get all the benefits of belonging to the Stampin’ UP! family by being a wholesale customer.  Purchase your Ultimate Starter Kit here.

If you choose not the order the Ultimate Starter Kit!  you can still earn FREE merchandise during Sale-A-Bration.  Just place your order here, and for every $50 you can choose one Sale-A-Bration item for FREE.  Please remember to use Host Code 2BUYMMWN when placing an order under $150.

Thanks for stopping by today.  See you soon!

Nancy


Save

Save

Save

Save

Save

Meet Your New BFF (aka the 2017 Occasions Catalog!)

It’s here!  Today is the day that the Stampin’ UP! 2017 Occasions catalog goes live!   And it’s also the start of Sale-A-Bration – the biggest sale event of the year!  So click on the catalog icons to the right, or click here to view the catalogs.

While almost every page of the new catalog is on my ‘want list’, a few items were on the top.  My favorite item from the 2017 Occasions catalog is the Cool Treats Product Suite.

Cool Treats 145181

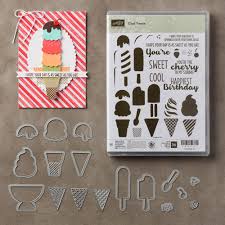
You know me, I”m a sucker for product coordination and this product suite has coordination with a Capital “C”!  For starters is a 36 piece photopolymer stamp set called Cool Treats, and the Coordinating Frozen Treats Framelits dies.  Pair some Designer Series Paper, Tasty Treats, in the yummy color palette featuring Pear Pizzaz, Pool Party & Peekaboo Peach.  Throw on some Sprinkles Embellishments, add some Tasty Treats Washi Tape, and an Ombre Effect Stampin’ Pad in Peekaboo Peach and you’ve got the perfect recipe to whip up some Tasty Treats!    The stamp set and framelit dies are also available as bundle to save you 10%!

The best part?When you purchase the entire Cool Treats Suite, you’ll Earn **2** TWO FREE SALE-A-BRATION ITEMS!!!!

Cool Treats Bundle # 145181                                  $48.50                                                 Tasty Treats Designer Series Paper # 142770     $13.00                                                Tasty Treats Designer Washi Tape #142773        $8.00                                          Sprinkles Embellishments # 142741                     $ 5.50                                        Peekaboo Peach Ombre Stamp Pad # 142805    $ 9.00                                         Tasty Treats Cardstock Pack # 142771                   $8.00                                       Peekaboo Peach Cardstock # 141417                     $ 8.00                                                                                   $100.00

So What two items will you choose? View the Sale-A-Bration catalog here.

Please remember to use HOST CODE 2BUYMMWN for every online you place with me during the month of January.  If your order is over $150 dollars (before shipping & tax), do NOT use the host code.

Thanks for stopping by My Stampin Space today.  Enjoy the new catalogs.  If your wish list is bigger than your budget, consider the Ultimate Bundle, made even better during Sale-A-Bration!  Purchase the Ultimate Bundle for $99, choose $125 worth of products, and ADD 2 FREE stamp sets of your choice too!  Oh, and did I mention, it ships free too?  ultimatebundlesab

Ready?  Click here to purchase the Ultimate Bundle.  Then, get ready to save 20% off your future purchases.   You’ll have all the perks of being part of the Stampin’ UP! family, you’ll be part of my online community of over 700 people across the country, you’ll save $ on your purchases, and get to preview the 2017/2018 Annual catalog before anyone else, and more!   There are so many perks and nothing to lose so join now.

See you soon.

Nancy

Save

Save

A new set of Framelits to ‘die’ for!

At first glance, you just might pass over the “Special Reason Bundle” as another floral stamp set and framelit die set.  But, once you look closer, you’ll see that this die set is like no other.  Stampin’ UP! has just taken their framelit dies to a whole new level.

occ17_p42d

The die is in 2 pieces; one to cut out the detail and the other to cut out the shape.  By using them separately, you can create really cool effects that you can’t do with other standard framelit and thinlit dies.  Watch this video below to see how this works:

See what I mean?  Don’t you just think these are to die for?  I know that you are anxiously awaiting the arrival of the new catalogs so you can get your hands on them!   As a demo, you can get them now!

I welcome “Wholesale Customers” into my group.  You can join Stampin’ UP! by purchasing the Starter Kit for $99 and choose $125 of products you’ll save $26 right off the bat!)  Then continue to save 20% off all future orders.  Click here for more information or click here to purchase the Starter Kit.     You’ll get all the perks, including early ordering, as a demo, with no pressure to sell anything.  Just keep the discount for yourself!

I can’t wait to share more exciting products and projects with you!

Nancy


Save

Save

Wedding Wishes

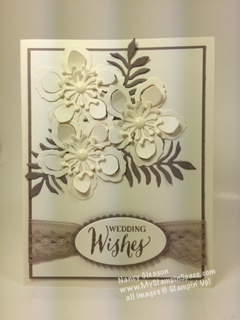
My husband and I were invited to a wedding this weekend, so of course you know that means I would be giving a handmade wedding card, right?

wedding-wishes

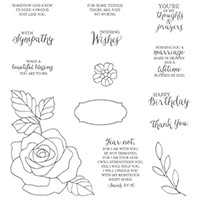
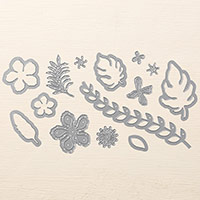
I chose Very Vanilla and Tip Top Taupe as my color combo.  I knew I wanted the “Wedding Wishes” sentiment from the Rose Wonder stamp set, but I wanted to use the flowers and leaves from the Botanical Builder Framelits dies

I used the soft, lace-y Tip Top Taupe 1″ Dotted Lace Trim.  This item is retired, but it is now available in the Clearance Rack! SCORE!!!  But only while supplies last so don’t wait if you want to get this gorgeous ribbon.  (it’s available in other colors, too!)  Layering Ovals framelits helped my crop out and layer the sentiment in a snap.

Rose Wonder Photopolymer Stamp Set


Botanical Builder Framelits Dies

Layering Ovals Framelits Dies

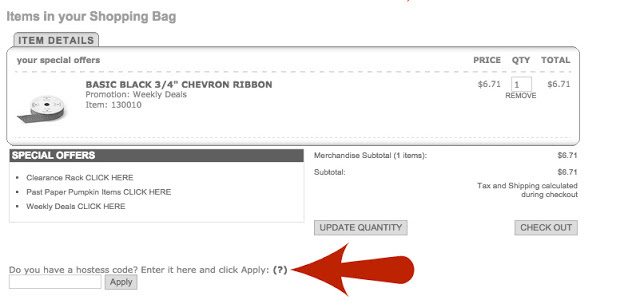
If you want to order any of these products, click here to start shopping!  If you place an order with me of $150 or less (before shipping & tax) please use HOST CODE:  CSC6VNTH  (If your order is over $150, please don’t use this host code as you will then be eligible for host rewards.)  See the graphic at the end of this post to see how to add a Host Code to your order.  If your order is $75 or more (before shipping & tax) and you use Host Code CSC6VNTH, I will send you  Halloween Night Enamel Dots.  This Host Code closes on 9.28.16

 Halloween Night Enamel Dots

Speaking of Weddings, did you know that my most re-pinned item on Pinterest is a wedding card?  You can view it here.  I was contacted by someone over the weekend too, to ask if I would make that card for her.  Of course!   I sell my cards for $6 with a coordinating envelope (plus shipping).  If you want any of the cards you see on my blog, or Pinterest, just ask.  I’d be happy to make any of my cards for you, or to custom design a card just for you.

how-to-apply-host-code

HOST CODE:  CSC6VNTH

Thanks for stopping by My Stampin Space to hang out with me today, and thanks for shopping with me.

Nancy


Save

Save

Save

Save

A Million Dollar Hooray

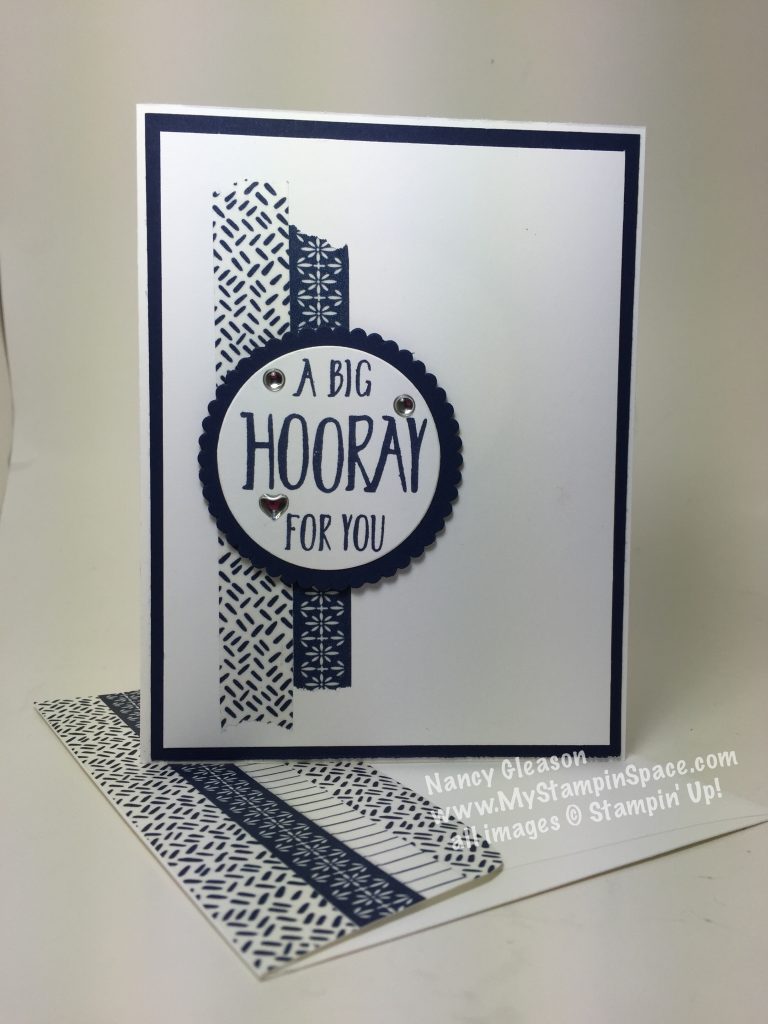
A  clean and simple card for a big celebration:A million dollar Horray

When I got started in my Stampin’ Up! hobby, I turned to Mary Fish of Stampin’ Pretty for a daily dose of inspiration.  And when I joined Stampin’ Up! as a demonstrator, I joined under Mary because A) I liked her papercrafting style, and B) she had a reputation for being a great support to her team, hence her nickname as “The Fearless Leader”.  Mary just achieved a major milestone in her career; she just became the 14th demonstrator to sell $1,000,000 in lifetime sales!   This card is on it’s way to Mary to congratulate her on this success.

A simple striking color combination of Night of Navy and Whisper White and lots of white space keeps this card Clean & Simple.  A few strips of Washi Tape, and a sentiment from the Perfectly Wrapped stamp set cropped with Layering Circles Framelits topped off with a few Metallic Enamel Shapes.  Simple, quick, clean and uncluttered.

I made my envelope to match by just layering strips of Washi Tape on the flap.   Speaking of Washi Tape, let me share with you my tip for keeping your Washi Tape organized.  I have little mesh bins on the wall in my stampin’ space that I keep my rolls of Washi Tape.  They fit perfectly but I don’t always know what roll goes with what, or what color it is.

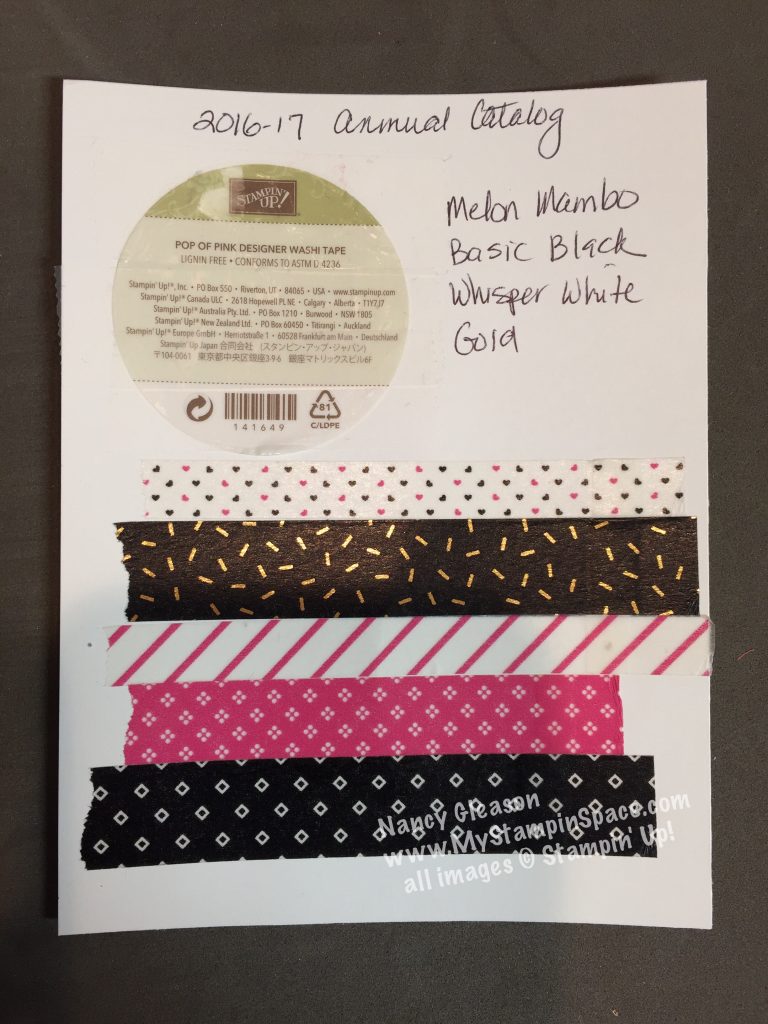
Solution?  I cut a piece of cardstock (4-1/4″ x 5-1/2″) and I gently peel off the sticker from the roll and adhere that to the cardstock.  I write the year and catalog name on top; list all the colors, and finally a strip of each pattern.  These cards go in the basket with my Washi Tape.  Organized!  🙂
axux42501

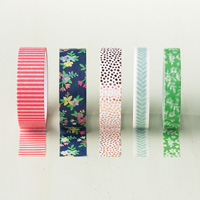
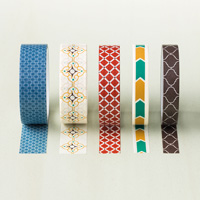
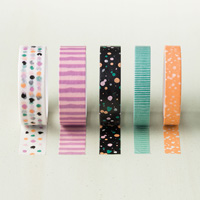
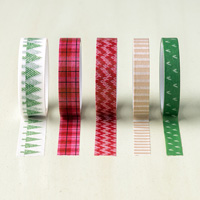
Stampin’ UP! offers so many Washi Tape assortments. So versatile and easy to use, Stampin’ UP! offers them in patterns and colors to coordinate with other products.  My card features a 3-roll assortment from the Floral Boutique Product Suite.  The card above is a 5-roll assortment from the Pop of Pink product suite.

Why don’t you add a package or two of Washi Tape in your next order and see how simple it is to use.   You can view the different collections below, and You can order Washi Tape right here. 

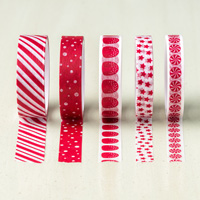
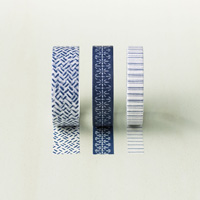
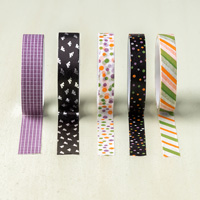
Affectionately Yours Designer Washi Tape Candy Cane Lane Designer Washi Tape

Floral Boutique Designer Washi Tape Halloween Night Designer Washi Tape

Moroccan Designer Washi Tape Playful Palette Designer Washi Tape

Warmth & Cheer Designer Washi Tape

I hope you enjoyed my card, and I hope Mary will like it too!  Please leave me a comment and let me know what you think.   If you would like to buy any Washi Tape, or any other Stampin’ Up! products, click here to shop my online store.

Thanks for stopping by My  Stampin’ Space today.  I hope that you find inspiration when you visit my blog.  Make sure to subscribe to my mailing list  – the 12 Weeks of Christmas is coming and I don’t want you to miss out!

Nancy


Farewell, My Friend(s)

Today’s post is a Good-bye of sorts, but in an exciting way!  Every year, approx. 1 month before Stampin’ Up! releases their annual catalog, they release a list of products that will be retiring.  Since these items won’t be carried over to the new catalog, this is the last chance to grab those items before they are gone for good.

So with the posting of the Retired List (farewell), it’s also a great chance to score some good bargains as some of these items are on sale too.  I think it’s nice that Stampin’ UP! gives us a heads up on what won’t be making it into the new catalog so we have the opportunity to grab those items before they are gone. CM100700B-500x153

STAMPIN’ UP! RETIRING PRODUCT SALE STARTS NOW!

2014-16 In Colors

The 2014-2016 In Colors will be retiring so now is the time to stock up on cardstock, ink pads, reinkers, markers, ribbon, etc.  before your favorite colors from this collection are gone.  Typically, the In Colors are the first to sell out.

LAST CHANCE TO GET THESE RETIRING PRODUCTS!  SAVE UP TO 50% on a huge inventory of select Stampin’ Up! retiring products including stamps, punches, dies, ribbon, designer series paper and much more. The sale starts TODAY (April 18). Stamps will be available at least through May 22.  Accessories (“everything else”) are only available while supplies last and can sell out quickly.  See ALL retiring Stampin’ Up! products on this printable PDF OR in my store here.

One of my favorite stamp sets retiring from the Occasions catalog is called Apple of My Eye.  Here are two cards I made with this set previously that just might cause you to scoop this stamp set up before it retires. Apple of My Eye

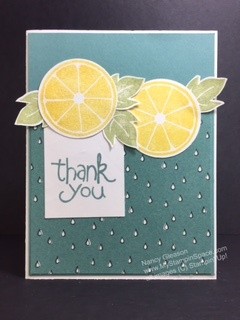
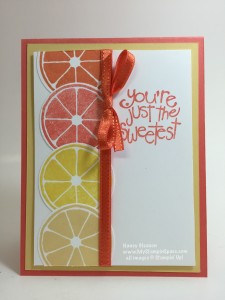
Lost Lagoon and the Flowering Fields DSP from Sale-A-Bration make the perfect backdrop for these luscious lemon slices.   Wink of Stella gives the lemon a citrus shine!

lemon slices

This is so summery and citrus-y and it is a total Pinterest CASE!  I cannot take credit for this design but the color combo and the sweet sentiment had me head over heels!

I hope you get the items you want before they are gone.  My advice:  I mark my catalog(s) with a red “R” next to every item that is retiring.  Then I can go thru the catalog and easily see what is retiring. The Retiring List lets us know which item is in the Occasions Catalog (OC) or Annual Catalog (AC) and the page #.  It’s worth the time to me to mark my catalogs.

Happy Shopping!  Nancy


The Beauty of the Butterfly

“As with the butterfly, adversity is necessary to build character in people.”  – Joseph B. Wirthlin
Butterflies are such complex creatures; they are so fragile and intricately detailed, yet the fight they endure to emerge from the cocoon is inspiring!
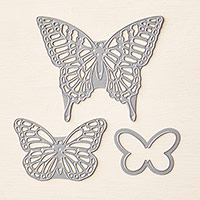
I love all the Butterfly stamps and thinlits and framelits dies that Stampin’ Up! offers; we have so many options when we want to add a butterfly to our cards.  Today I chose to use the Medium sized Thinlits die in the Butterflies thinlits as the focal point of my card.  I love the intricate detail of this thinlit.
IMG_6664[1]
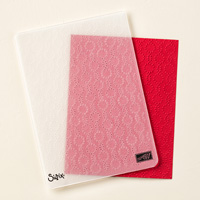
I also wanted to add some embossing as I was teaching a class on the Big Shot die cutting and embossing machine and wanted to show how it die cuts AND embosses.  The Elegant Dots TIEF was chosen for the way it coordinates with the Crushed Curry design of the Cherry On Top DSP stack.  A simple design of one color and white is all that is needed to make the focal point stand out.  (You could recreate this card in any color, but a bright, bold color will work better than a light, subtle color).
I cropped the butterfly out of the center of the Crushed Curry cardstock panel.  I then adhered the DSP panel and the embossed Whisper White panel on top of the Crushed Curry panel.  No one can tell that the butterfly was cropped out of it!  A piece of Crushed Curry ribbon (retired) covers the butt joint of the two pieces of paper.  The butterfly is embellished with a single Rhinestone jewel.  A wooden embellishment from the Expressions Natural Elements was adhered to the lower right section of the card.
Simple, yet elegant.  Just like a butterfly.  And my friends over at the Paper Players are featuring cards with Butterflies this week!  Click here to see all the butterfly inspiration from the Paper Players.  Come & Get It Challenge is featuring ‘things with wings’ so I get to enter this into both challenges; SWEET!
To purchase any of the items I used to make this card, click on the item hi-lighted above, or on the product list below.
BIG NEWS!!!  As you know, the current catalogs are set to expire on May 31st.   On April 18th, the RETIRING LIST will be posted!  Any items that will be retired by May 31st will be posted and from now on, will be available on a ‘while supplies last basis’.  So anything you’ve been wanting, scoop it up before it’s gone!  We know that all of the 2014-2016 InColors will be retired.  Any product with those colors in it, will also retire.  Usually all of the DSP patterns  retire too.  Click Here to go right to my online store to start shopping before those items you want are gone.

Let’s Go Blog Hopping!

Pals Blog Hop 2016 badgeWelcome to the Pals Blog Hop for April 2016.  We are thankful you stopped by to take a look at our new 2016 Blog Hop monthly themes.  This month we are featuring projects that are all about our families. This is a great time of year to think about what to make for Mother’s Day, Father’s Day, or upcoming graduations. And, family vacations are just around the corner… how would you want to remember those special family moments? We hope to provide you with lots of ideas and that you enjoy our creations.

You may just be starting the Blog Hop or may have come from the previous link from the Line-up on the Pals Blog Hop listing shown below.  The full lineup will help you move along from blog to blog so you may see all the projects.

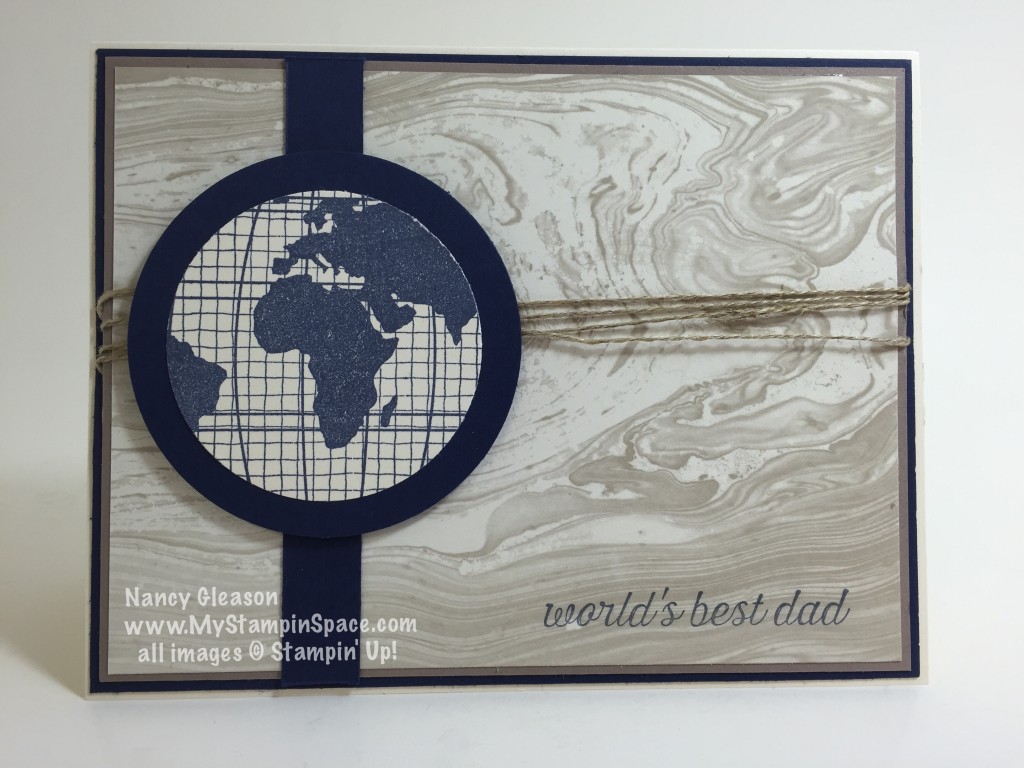
Well, I intended to make a card to welcome a new baby for today’s blog hop.  The idea I had in mind just didn’t pan out the way I envisioned it.  So, I fell back on my trusty old “Going Global” product suite.  I knew the ‘world’s best dad’ sentiment wouldn’t fail me!  After all, isn’t Dad always there to bail us out when we get into a jam?

Worlds Best Dad

When making a masculine card, I think it is important to keep things simple, without lots of embellishments or bling.  This beautiful patterned paper, from the Going Places DSP stack is all the design that’s needed to add lots of interest but not be too overbearing.  Layered on Sahara Sand and Night of Navy Cardstock, it has a nice pop of color, but in masculine tones.  The world image from the Going Global stamp set was stamped in Night of Navy and layered on a Night of Navy circle.  A thin strip of Night of Navy cardstock repeats this color 3x’s on the card (a good rule of thumb is to repeat a color or an element 3x’s for good balance!).  A few strands of Linen Thread repeat that neutral color while adding a rough, masculine touch.

If you would like to order any of the products I used here, just click on the item name in the description above, click here to go to my online store.

Thanks for visiting. To continue with the hop, please refer to the Blog Hop Line-up below. We hope to see you on next month’s Pals Blog Hop! 

  1. Mary Fish at Stampin’ Pretty
  2. Jackie Diediker at Stampin’ Jackie
  3. Michelle Gleeson at StampinMojo
  4. Katy McGloin at Just Fun Stamping
  5. Sherrie Gross at Stampin’ Sunshine
  6. Peggy Noe at Prettypapercards
  7. Brian King at Stamp with Brian
  8. Debra Simonis at Deb’s Stampin’ Grounds
  9. Wendy Klein at Doggone Delightful Stampin
  10. Jennifer Michalski at Stamping Serenity
  11. Kalyn Shubnell at The Stamping Chronicles
  12. Becky Volpp at InkBlossomwithBecky
  13. Patti MacLeith at Papercrafts by Patti
  14. Nancy Gleason at My Stampin Space  — YOU ARE HERE!!! —
  15. Pam Dotts at Clearly Southern Stampin’
  16. Beth Beard at My Little Craft Blog
  17. Lisa Ann Bernard at Queen B Creations
  18. Tricia Chuba at ButterDish Designs
  19. Beth McCullough at Stamping Mom
  20. Debbie Mageed at Secret Stamper
  21. Denise Hoepfner at The Mountain Magpie
  22. Maggie Mata at Maggie Made Cards
  23. Natalie Bradley at NatalieBradley.com
  24. Pamela Sadler at Stampin Pink Rose
  25. Karen Zaring Browning at Karen Zaring Browning
  26. Susan Itell at Simple Stampin’
  27. Debbie Crowley at Expressivley Deb


How Much Fun Can You Have in One Night?

Another Stampin’ Class, another night of fun!  I enjoy getting out of the house, and having a fun night with the ladies that come to my PaperCrafting classes!  Of course, I love papercrafting, but the camaraderie and friendship are so special to me.  The ladies always love the projects we make, and I wanted to share one of those projects with you now:

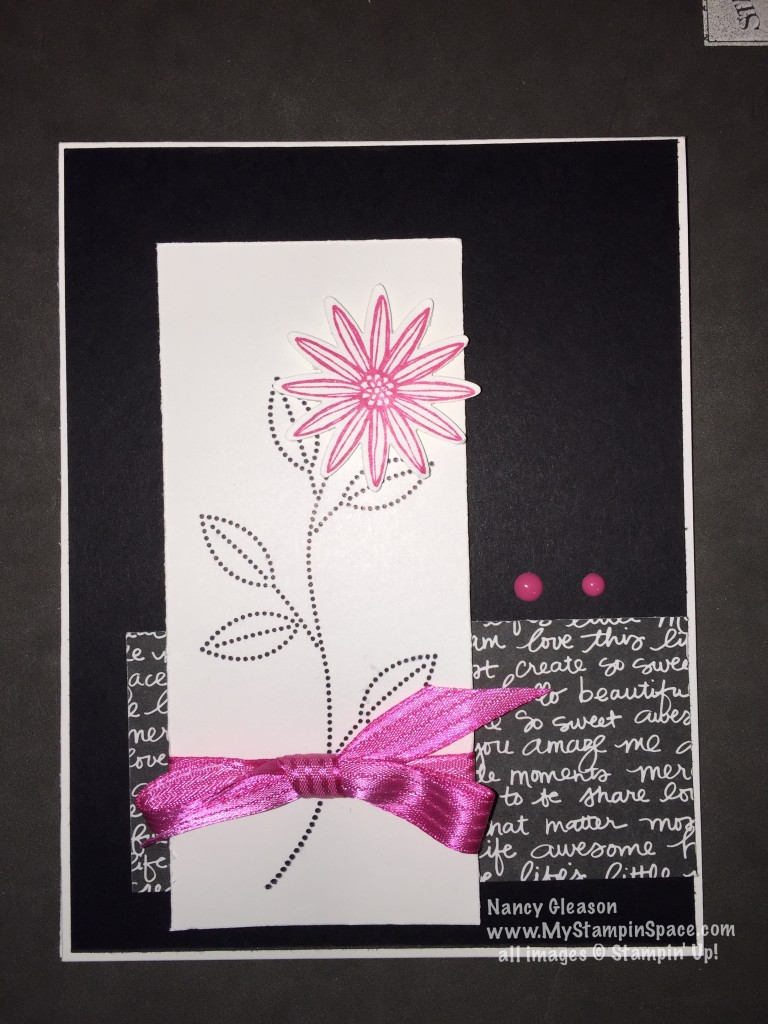
A Grateful BunchI love the look of a Black & White card with a pop of a bold, bright color.  Melon Mambo, this deliciously bright pink, does the job!  It really Pops against the B&W!  This card follows the rule of thirds:  a color should be repeated 3 times.  I used the Melon Mambo for the flower, the ribbon and the enamel dot accents.  This is a simple card to make but it really says “WOW!”
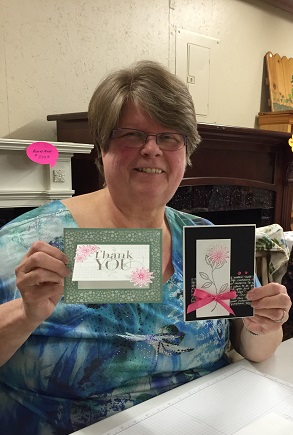
I started with a piece of Whisper White cardstock, cut to 4-1/4″ x 11, then scored to created a standard size card with the fold at top.  A piece of Basic Black cardstock cut to 4-1/8″ x 5-3/8″ was adhered to the face.  A small strip of Black DSP from the Neutrals DSP stack, cut to 2″ x 3-3/4″ was adhered along the right side about 3/4″ up from the bottom.  A strip of Whisper White was stamped with Black Archival ink and the stem from the Grateful Bunch stamp set.  The flower was stamped in Melon Mambo ink and cropped out using the Blossom Bunch Punch and popped up on a stampin’ dimensional.  A piece of Melon Mambo ribbon was tied around and this layer was also popped up on dimensionals.  A few enamel dots in Melon Mambo finish off the card!

Easy peasy, but oh, so striking!

The Ladies had so much fun.

Ruthie 40516

And they were so proud of the finished projects they made!  Nothing makes me happier than to see someone who has never stamped before  complete a project they can be proud of!   I love sharing my passion for papercrafting, and the tips & techniques I’ve learned along the way with others!  Classes are a great way for me to do that.

I wish everyone reading this could come to my classes!  If you are in the Scranton, PA area, you can!  If you don’t, well, it probably won’t be very convenient, but…..maybe you won’t have to!  I am going to start on-line classes in June!  Yes, you read that right.  So that means that no matter where you live, you can still stamp with me, via video!  Cool, right?

I’ll be sharing more info on that shortly, and you, my blog readers will be the first to hear about it!  But in the meantime, you can send me ideas of things you’d like to learn!  I’ll be happy to take your questions and suggestions and turn them into classes!

And I’ll be sharing the 2nd project we made in a few days so stop back.  And remember, if you want to order any of the supplies I used to make this project, please shop my online store here.  Thanks!  And feel free to pin this project or share it with your on facebook if you like it.

See you, soon!

Nancy


It’s hard to say goodbye to what you love

What I Love – it’s the name of a stamp set available for Free in the 2016 Sale-A-Bration promotion.  It was the stamp set that caught my eye and I knew I just had to have when I first got a glimpse of the Sale-A-Bration catalog back in November.  I used this at my last Stamp Club, and again to make a birthday card for my sister (her birthday is tomorrow, please feel free to wish her a happy birthday in the comments below!).  So let’s see what I made:

IMG_6507[1]

And here is the inside:  (I love that the sentiment from Grateful Bunch has an ‘inside/outside’ sentiment!)IMG_6509[1]

This is a great card that can be used for any occasion just by changing the sentiment.  Christy chose to leave a sentiment off her card so she would have a great card that she could just grab and stamp a sentiment on whenever she needed a card in a hurry!  Smart idea, Christy! 🙂IMG_6557[1]

I love how she used a 2nd flower in a complimentary color!

This would look great in just about any color combination too!  I made a card and coordinating gift bag using this layout but switched the colors to Tip Top Taupe and Watermelon Wonder.

IMG_6564[1]

Here it is with the coordinating gift bag:

IMG_6562[1]

I love how the patterns in the Decorative Paper stacks coordinate.  The Gift Bag Punch Board allows making custom sized gift bags a cinch!    You can watch my video tutorial here to learn how to use the Gift Bag Punch Board:

See, you NEED this stamp set!  Get yours today, after today it’s too late!  Shop here on line today and for every $50 you will get to choose a free Sale-A-Bration item!  Sweet!  Choose “What I Love” or any other stamp set or paper of your choice.

Thanks for stopping by; please feel free to PIN any picture you like for future reference, like me on Facebook and leave me a comment below.  And don’t forget to wish my sister a Happy Birthday!  Thanks,

Nancy

What’s a Girl to do when….

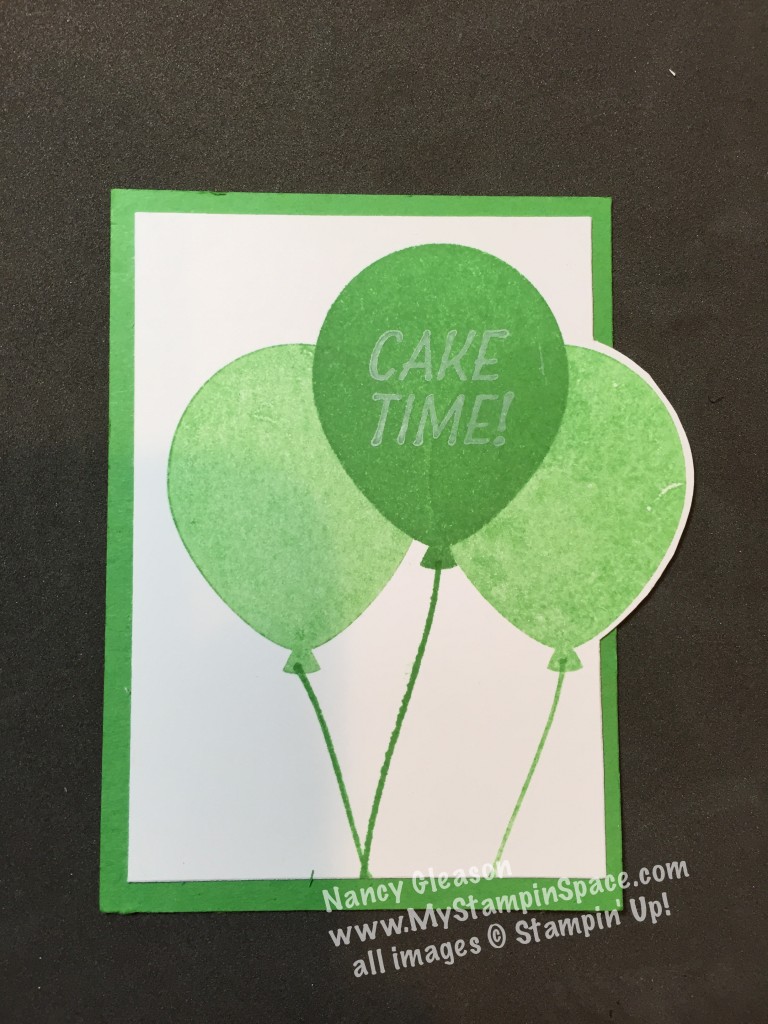
…her balloon punch is on backorder?   Well, in the words of Clint Eastwood, “Adapt, Improvise, and Overcome”. (Actually, I think Clint was quoting the Marines).  So I did just that!

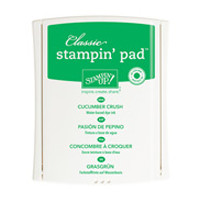
Cucumber Crush Balloons

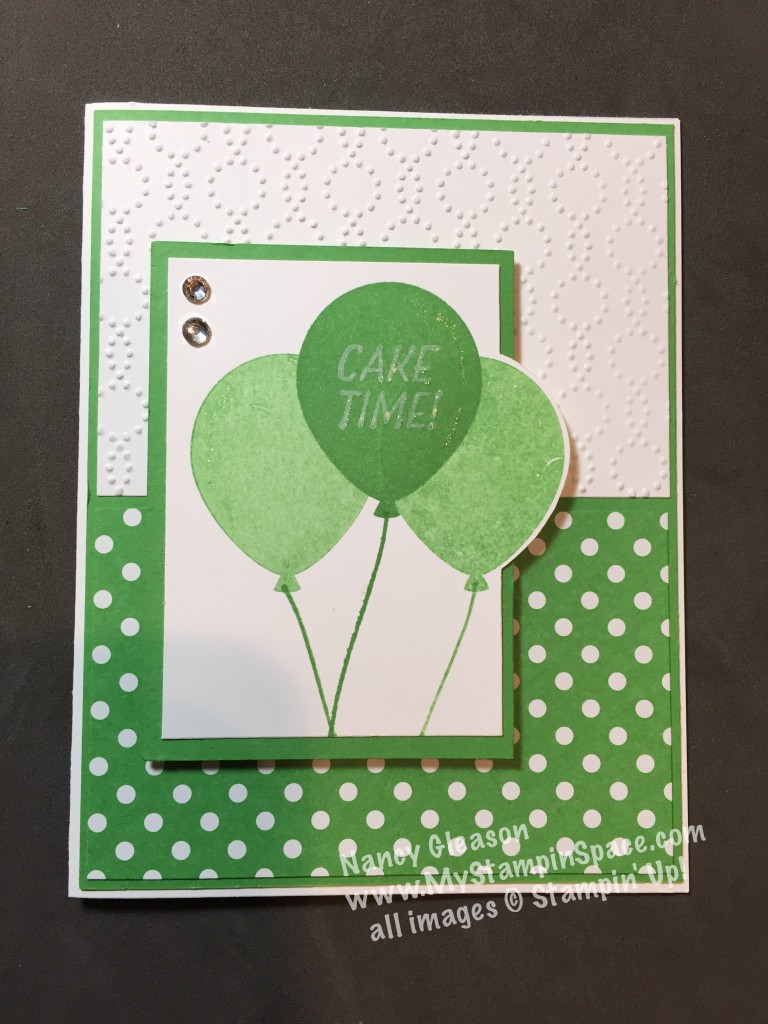
I finally had a chance to play with my new “Party Pants” stamp set but since my balloon punch is on backorder, I knew I’d only be stamping in one dimension.  But I think I created a pretty interesting element.  I’m almost glad my punch is on backorder because it forced me to get creative!

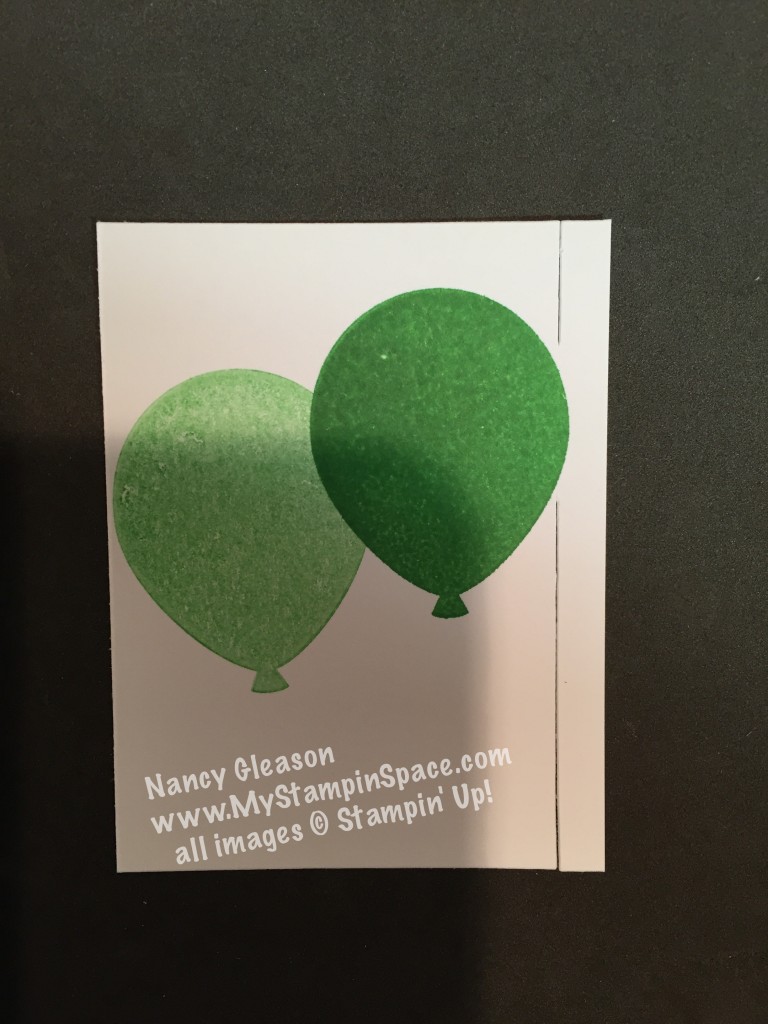
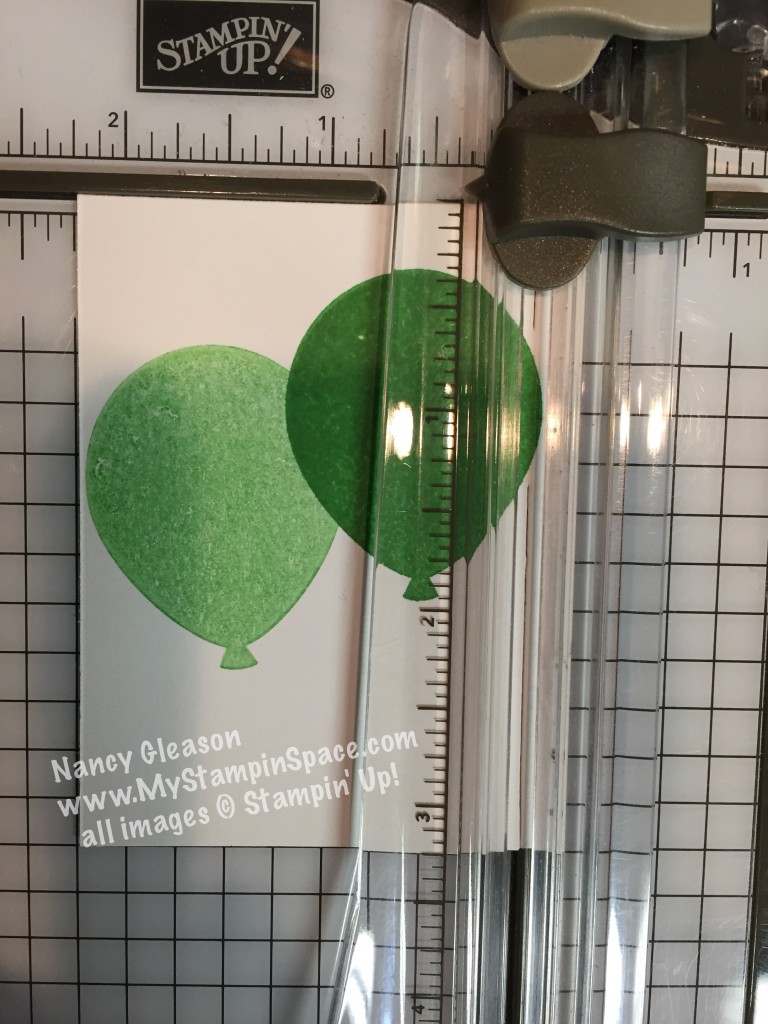
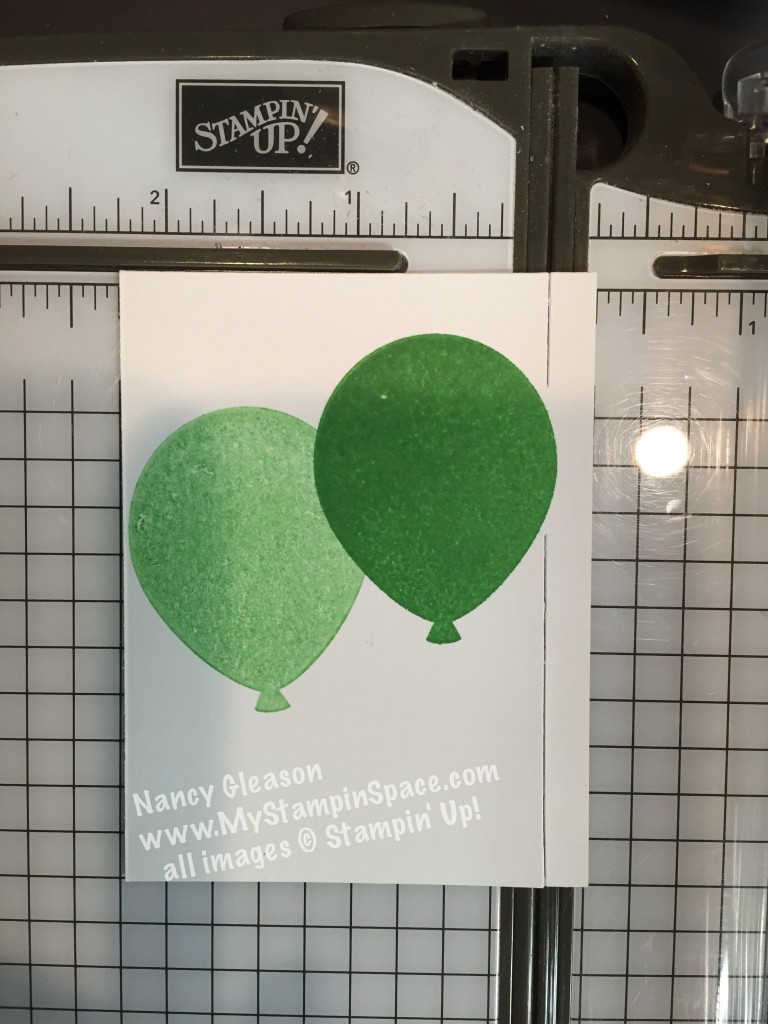
Take a close look at the balloons.  Do you see what I did there?  Here’s a close-up:balloons I trimmed the paper right up to the balloons, then used my paper snips to snip around the balloon.  I could not have achieved this effect with punch.  I’m really glad I discovered this technique.  Actually, I’ve never seen anyone else do this, so I may have even invented this technique!   That means I’ll have to name it.  Hmm, what to call it?  Well, I digress.  But,  I can’t wait to try it with another shape; perhaps flowers.
IMG_6513

Since I knew I wanted this panel to measure 2-1/4″ wide, I set it in my trimmer at that dimension.  I cut from the top down to the balloon,

IMG_6514

and then from the bottom up to the balloon.  Then I used my paper snips to finish it off!

IMG_6512

Easy peasy!  And here’s the final picture again.

Cucumber Crush Balloons

Thanks for stopping by My Stampin Space.  I hope you liked this and that you might try it yourself too.  If you do, send me a picture of your creation and I’ll feature it on my blog.  Leave me a comment and tell me what you think. – Nancy

If you want any of the  supplies I used to make this, shop my store safely & securely 24/7 from the comfort of your home.  Just click here or on any item listed below!  The Party Pants stamp set is FREE during Sale-A-Bration with a qualifying order, but only for a few short more days.  Sale-A-Bration ends March 31st so get yours now.  This is only available whiles supplies last and it is possible it will sell out before March 31st.

Come back on Wednesday, I”ll have a special treat in store for  you.  I’ll be participating in a blog hop featuring Easter & Passover projects and I think you’ll be amazed at the talent on this blog hop.

How do you say Happy Birthday to Someone Special?

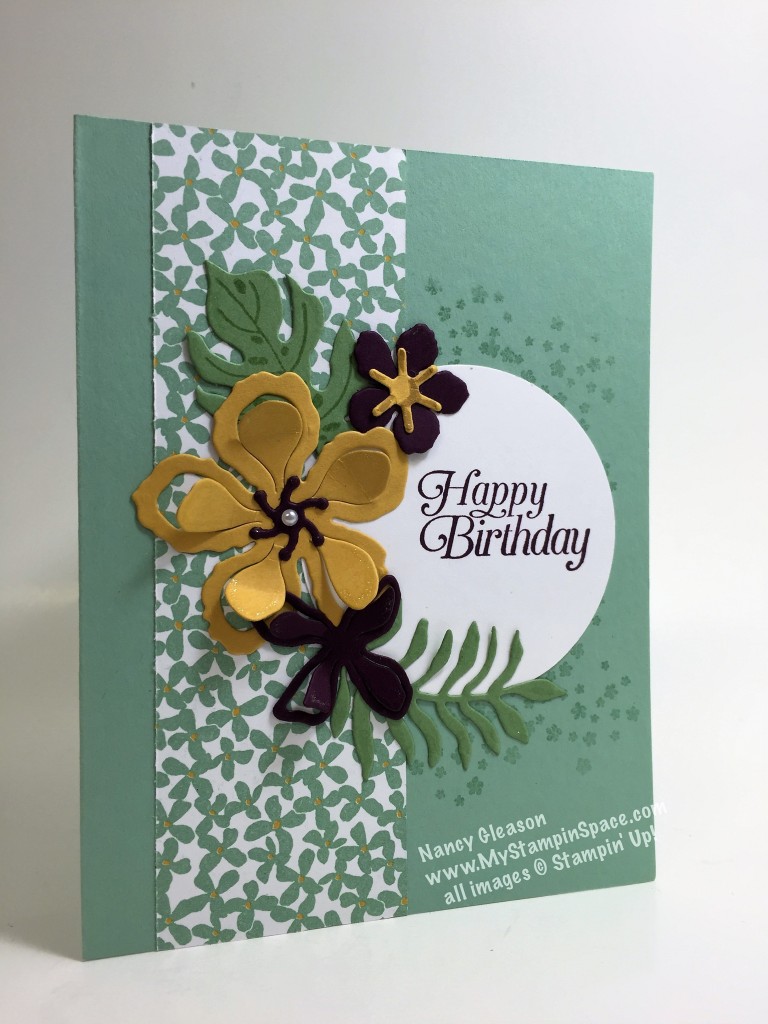
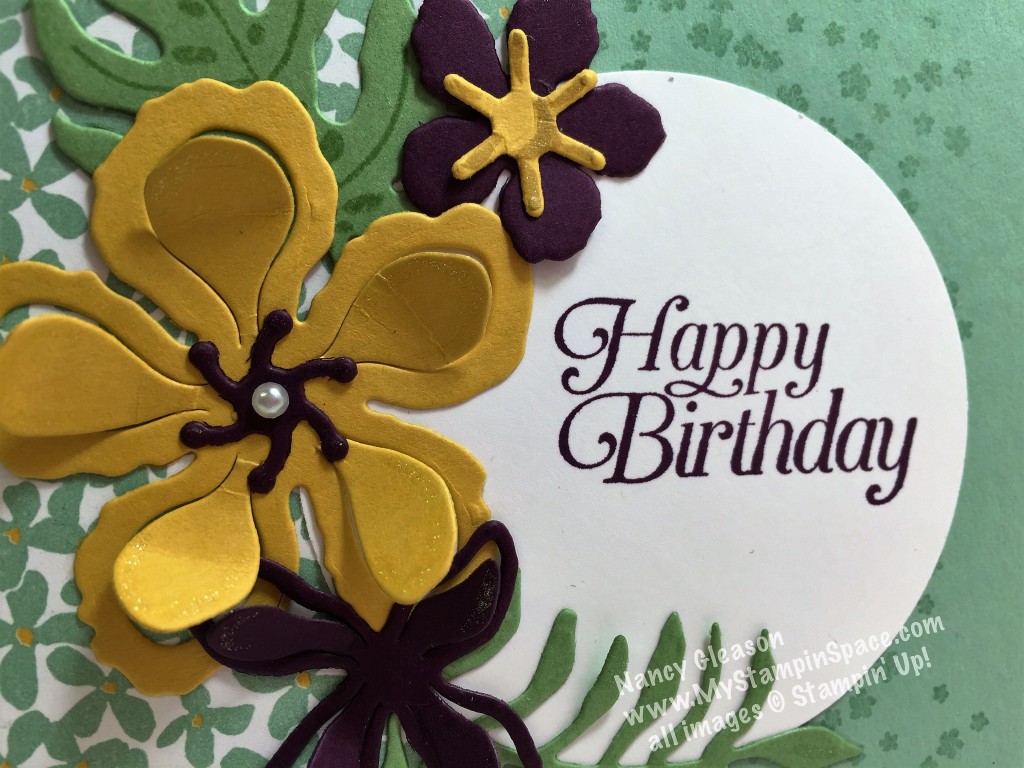
Well, I decided to wish my Mother-in-Law a Happy Birthday with the new Botanical Gardens suite!  Designer Series Papers, stamps, and framelits!

IMG_6282

My Mother-in-Law loves flowers so I knew that this product suite would be the perfect thing to create a card for her.  I started with the soft color of Mint Macaron for the card base.  I then used a strip of Botanical Gardens designer series paper.   I cropped a Whisper White circle and stamped it with the Happy Birthday greeting from the “Sky is the Limit” in Blackberry Bliss ink.

Hello, Honey and Blackberry Bliss cardstock was used to create the beautiful flowers from the Botanical Builder framelits dies.  Look at those flowers; aren’t they beautiful?  These dies create a 3-D type of flower!  It really is like no other die I’ve seen before; almost like a new generation of framelit dies.  It’s like a petal within a petal.

IMG_6283

Mom LOVED her card!   And you?   You’ll love the fact that the Botanical Gardens Suite is a bundle, and this bundle is a triple-play!  This Bundle contains the Botanical Blooms stamp set, the Botanical Builder Framelit dies AND the Botanical Gardens Designer Series Paper!  BONUS!  This bundle, priced at $51.75 earns you a FREE Sale-A-Bration item!   SWEET!!!  I used the Sky is the Limit stamp set, which will be retired on February 15th.  Now is a great time to score this bundle and stamp set, in a few days you will no longer be able to get this stamp set.  And trust me, this is stamp set you’ll want!  It makes great masculine cards, too!

To order any of the products shown here, just click on the product names above or on the pictures below.Built for Free Using: My Stampin Blog

Built for Free Using: My Stampin Blog

Thank you for stopping by My Stampin Space.  Please  leave me a comment and let me know what you think of this card; do you love it as much as Mom did?
I’ve been trying to fill my stash of Birthday Cards, to fill my New Year’s Resolution of sending birthday cards (on time) this year!  You’ll see more birthday cards on my blog in the coming days/weeks.  And you are welcome to join me for my next class, Thursday, Feb. 11th where we will focus on making Birthday Cards.  Email me to RSVP to my class!  If you just want to make your own cards, and want to shop with me, please know that I appreciate each & every order! Thank you 🙂
Come back soon as I’ll be sharing more birthday cards in the next few days.
Nancy

Playing with the Pals Papers Arts

I am blessed to be part of a wonderful on-line community of Stampin’ UP! demonstrators called the Stampin’ Pretty Pals, under Mary Fish.  The Pals have their very own place to play with paper,  called Pals Paper Arts.  Twice a month, they offer an opportunity to play with paper: a sketch challenge and a color challenge.

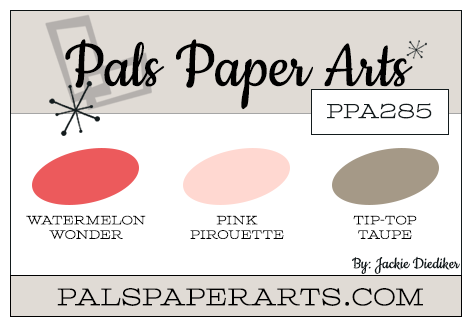
PPA-285-Jan28-1

This lovely color combination is the inspiration for this weeks challenge.  I have to admit ,I’m not sure why but at first I wasn’t too keen on these colors.  But I stretched myself to use them together, and this is what I came up with:

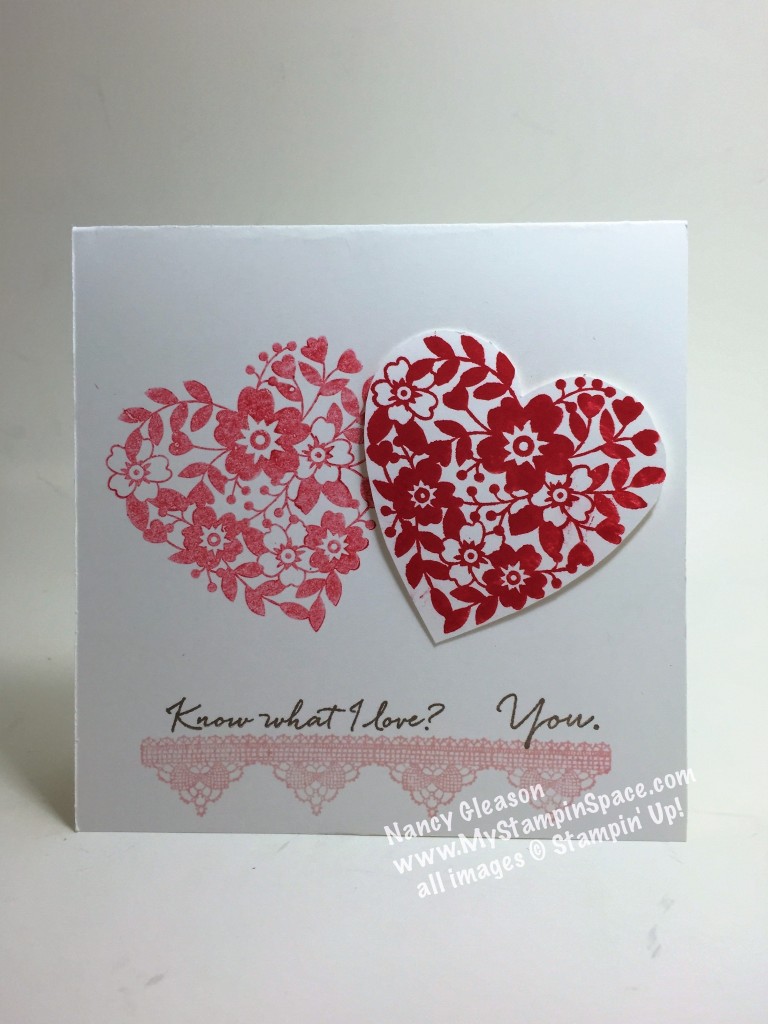
IMG_6285

I wanted a simple one-layer card and this really came together much better than I anticipated!  And once I sat back and admired my work 😉  I REALLY LIKED THIS COLOR COMBO!  All because I tried it.

Now, I can tell you there are some really talented folks who play at the Pals Paper Arts.  You can click here to head over there and take a look at all the fabulous creations made with these colors.  It will knock your socks off!

I used the Grateful Bunch stamp set for the lace border, Bloomin Love for the hearts and What I Love for the sentiment.  You can order any of these by clicking on the stamp set name, or clicking here.

The Grateful Bunch is part of bundle – add the coordinating Blossom Bunch Punch and SAVE!  The What I Love stamp is FREE with a $50 order during Sale-A-Bration.  (I love FREE!)

Sale-A-BrationWhat is Sale-A-Bration?  Click here to find out!

Thanks for stopping by My Stampin Space.  And if you choose to shop with me please know that I am grateful for each and every customer and will go out of my way to take good care of you.  If you have questions on any products or techniques, don’t be afraid to ask!  I love to share my knowledge of paper crafting!

Come back later, I have a special card to share.

Nancy


Hello, My Friend!

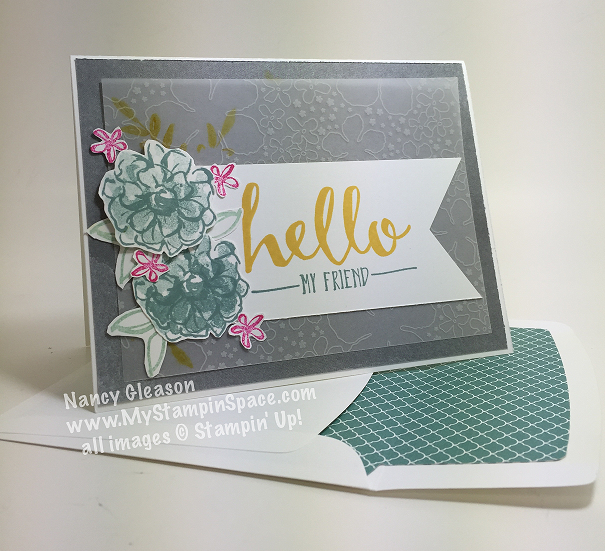
I spent a half an hour the other talking on the phone to a friend that I haven’t spoken to in a while (we text & facebook, but haven’t heard her voice in a while).  I’m not much of a ‘talk on the phone’ kind of person;  I call when I have something to say and usually keep it short & sweet.  But it was really nice to catch up with Laura, and she is going thru some really rough physical ailments, and recently had a set back in her journey.  Laura has one of the biggest hearts of anyone I know, and is always full of joy and maintains such a positive spirit!  I was so uplifted just talking on the phone with her, that I went down to My Stampin’ Space and whipped up this card to send to her.Hello Meets What I LoveOf course, I had to use all my new goodies to make this special card for a special friend!  I started with a Whisper White card base layered with a piece of Perfectly Artistic DSP in gray with the watercolor side up.  I layered a piece of Botanical Gardens Designer Vellum on top of that layer.  (Both of these items are FREE with a qualifying order during Sale-A-Bration! – Sweet!)  I cropped a banner of Whisper White card stock using the Banner Triple Punch and then stamped the Hello, My Friend sentiment in Crushed Curry ink and Lost Lagoon Ink using the “Hello” stamp set (also FREE during Sale-A-Bration).
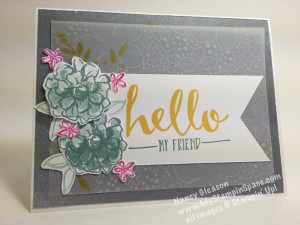
The flowers are from the “What I Love” stamp set (you guessed it, also FREE! – I love FREE, how about you?)  This was my top pick from the Sale-A-Bration catalog.  I used Lost Lagoon, Mint Macaron, Crushed Curry & Melon Mambo for the flowers & leaves.  My paper snips helped me fussy cut all the flowers & leaves in no time.

IMG_6234

The overall design/layout was CASE’D from the Sale-A-Bration catalog.  The samples shown were the reason that this is my favorite stamp set in the SAB catalog.  The designers at Stampin’ UP! offer us such great ideas and layouts and are a great springboard for our own creations.  While the catalog was my inspiration, my card is uniquely my own.  Is there a project in the catalog that has inspired you to make a project your own?

Well, by now, you’re probably wondering how you can get all of these stamps and papers for FREE, right?  Sale-A-Bration, that’s how!

Sale-A-Bration What is Sale-A-Bration? CLICK HERE to learn all about Sale-A-Bration and why you don’t want to miss out on this limited time promotion!

Weekly Deals headerWeekly Deals.  Stampin’ Up! releases new Weekly Deals every Tuesday – some of your favorite products at a discount for one week only (or while supplies last).  To check out this week’s deals, click here.

shop on lineClick here to start shopping!

Thanks for stopping by My Stampin Space today!  I hope that you enjoyed the project I shared with you, and hope that Laura liked receiving my card in the mail.   Please feel free to leave me comments; I love to hear from you.  And if you don’t have your own Stampin’ Up! demonstrator, and choose to order from me today, thank you!  I am always honored when someone chooses me as their demonstrator and I will do what I can to earn your trust and provide excellent customer service.

Nancy