So Grateful for Thanksgiving

I LOVE Thanksgiving!   I really do, and I feel bad that this holiday, one in which we pause from our hectic, busy lives, to give thanks to God for all the blessings he gives to us each & every day, gets crowded out in all the commercialism of Halloween & Christmas.

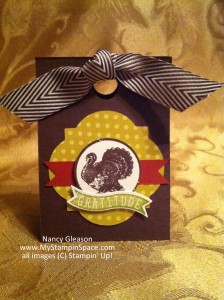
I am hosting Thanksgiving at my house again this year (I enjoy this!) and I made these adorable little treat holders for each of my 13 guests.  I actually made some more to bring to my co-workers too!
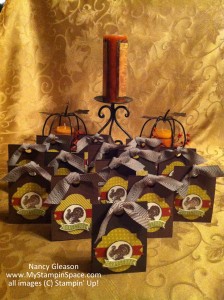
Thanksgiving Treat HoldersHere is a close-up of just one treat holder.
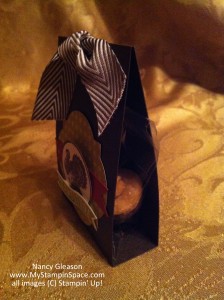
Thanksgiving Treat HolderAnd here’s a side view:

2013-11-27 16.45.39Want to see what’s inside?  Of course you do!  It would be rather mean to just leave you hanging in suspense, not really knowing what was inside, wouldn’t it?  I would not do that to you, so here’s a picture of what is inside:
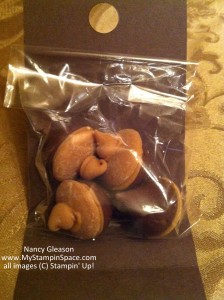
Acorn Candy TreatsAdorable little candy acorns.    Here’s a better shot of the acorns coming off the  assembly line:
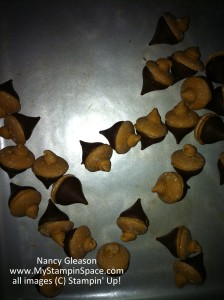
Acorn Candy treatsThese were so easy to make too!  Can you tell what they’re made from?  A Hershey Kiss.  The kiss is topped with a peanut butter wafer then a peanut butter chip.  I ‘glued’ all the candy pieces together with melted peanut butter chips.  So easy and so darn cute!  I suppose the taste combination is incredible too!  But, unbelievably, I haven’t eaten one.  I can just imagine popping one in my mouth, and the chocolate & peanut butter taste combination melting together, yum, yum, yum!

And my gift to you this Thanksgiving, since I can’t make and give a treat to each and every one of my dear blog readers, is the instructions on how to make this yourself. CLICK HERE for the PDF file with step-by-step directions and photos.

It could easily be adapted for Christmas, Valentine’s Day, a birthday or any occasion.

If you would like to make this, I would appreciate if you would shop on my on-line store if you need any supplies.  Don’t forget about our ongoing Holiday Sale and our Weekly Deals.  Be sure to check these out before placing an order.

Please leave me a comment and let me know how you like this and if you plan to make them yourself too.  I love to hear from you and treasure each and every comment you leave for me.

Have a Happy Thanksgiving, and Happy Stampin’!

Nancy


Holiday Sale!!!

The Day  you are waiting is here!!!!   Stampin’ Up!’s annual Holiday Sale (formerly known as the OnLine Extravaganza)  just in time for your Holiday Shopping for your crafty friends & family.  (If you want to snag some of these deals for yourself too, that’s Ok! – we won’t tell!)

Starting today, thru December 2, 2013 we’ve got a great selection of products on sale from 20%-50% off.   Today Only we have some great Door Buster sales to kick-off these 12 days of great savings!

Click Here to go directly to my on-line store.

Click Here to see the flyer listing all items on Sale!

The Fine Print

  • Hostesses who have earned a 50%-off item may not apply that discount to an already-discounted product.
  • There’s no minimum purchase required to participate in this promotion. Sale on!
  • For product bundles, you need to use the bundle item numbers provided. If you use individual item numbers, you won’t get the discountbummer.
  • You can buy additional products from any of our current catalogs  on the same order.

Start your holiday shopping (& saving!) right now, right here.

Festive Flurries…Just in time for Winter

Winter is officially here; we woke to our first snowfall this morning.  Not a lot, but just enough to add some white to our trees.

Just in time for Snow and your Christmas decorating, Stampin’ Up! has introduced the Festive Flurry Ornament Kit: this kit helps you make ten beautiful ornaments for just $14.95!

Festive Flurry Ornament Kit

Add a little festive flare to your holiday decorating with our new Festive Flurry Ornament Kit! Top presents, embellish cards, create a wintery garland, or trim the tree. How you use them is up to you!

The kit includes everything you need (minus adhesive) to create 10 snowflakes, including

  • 10 feet of Soft Sky Ribbon
  • Printed cardstock – die cut and scored, ready to be assembled (Soft Sky, Crumb Cake, Whisper White Cardstock and Silver Glimmer Paper)
  • Large Rhinestone Basic Jewels (40)

Festive Flurry Ornament Kit
Item #: 135813       Price: $14.95

Available starting 11/12/2013 – while supplies last.  Don’t wait, order yours today!

————————————————

Remember to get your Holiday Tag It bundles before it is too late! The bundles are only available through November 19.  Click on the photo to get more information and to place your order before they’re gone!

————————————————

And also be sure to check out our MDS Seasonal Sale (30 percent off select holiday downloads and print projects). Ends November 30.

————————————————

Holiday Sale: This year’s online holiday sale (formerly known as Online Extravaganza) will be November 20-December 2.   Get ready for your holiday shopping!  I’ll have all the info for you on November 19, so make sure to check back then.  This Holiday Sale will kick-off with a 24-hour doorbuster sale you won’t want to miss so make sure to stop back here on November 20.

————————————————

  • My Digital My Digital StudioStudio: Check out our newest downloads here! (PDF)
    • We’re introducing three new MDS online classes. Learn more here.
    • Enter our My Digital Studio Facebook Giveaway for a chance to win November’s bonus My Digital Class.
    • Don’t have MDS yet?  Click here to get a free 30-day trial of the software.  Try it before you buy it!

So Thankful for the Pals November Blog Hop

2013novhop_badge.jpg

Thank you for joining us for the November Pals Blog Hop. We are thankful you are visiting today and hope you enjoy our thank you inspired projects.  

You should have just left stop number 29 on the Pals Hop Sue Becker
at Sue’s R n R Stamping.   If so, you are in the right spot.  If you get off track, the full blog lineup below will help you move along from blog to blog so you see all of the amazing creations.

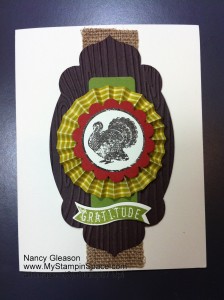
The very first Stampin’ Up! product I ever bought was a Thanksgiving set.  Maybe that’s why when the 2013 Holiday catalog came out & I saw the “Harvest of Thanks” stamp set I knew I just had to have it!  This set features a turkey and I knew instinctively what my Thanksgiving Table would look like!  The 1-1/4″ burlap ribbon was right there along with it!

A Turkey with Gratitude

I made this card to send to my out-of-town friends & relatives for Thanksgiving.  I used a Very Vanilla card base, placed a strip of the Burlap Ribbon, topped that with a piece cut from the Apothecary Accents framelits die in Early Espresso and textured with the Woodgrain Embossing folder.  A small Old Olive piece cut with a Chalk Talk framelit provided a little accent for my Rosette.  This piece was formed from a strip of Summer Starfruit DSP from the 2012-2014 Paper Stack.  My Simply Scored is invaluable in making the rosette.  A scallop circle cropped from the Scallop Circle Punch tops the rosette and makes the perfect backdrop for Mr. Turkey!  The turkey image was stamped in Early Espresso ink on Very Vanilla cardstock and cropped with a circle punch.

The final finishing touch is the sentiment:  I stamped the Gratitude sentiment in Old Olive ink on Very Vanilla cardstock and cropped it with the Itty Bitty Banners framelits die.  I popped that up on a Stampin Dimensional.

So, now that you’ve seen the card I am going to mail to out-of-towners, do you want to see the card that I made as an invitation to those folks who will be coming for Thanksgiving Dinner?  You do?  That’s great because I just happen to have it here for you.  Rather presumptuous of me of, huh?  Well, maybe it is, but I thought you’d really want to see it so I got it ready to show you.  Drumroll, please…..

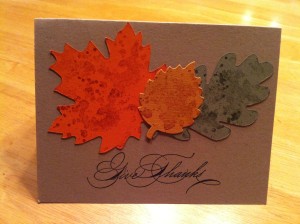
Give Thanks

This is made from the Wonderfall Bigz Die and the Gorgeous Grunge stamp set.  I simply stamped random spots onto the leaves after they were cut out.  The Sentiment is from a retired Stamp Set that I just love too much to part with.  Each invitation is different as I just cut out a bunch of leaves in various colors.  Then I just randomly picked 3 and made each card.

Want to see the inside?  Of course you do so here it is:

IMG_2919[1]

I used the “Make A Wish”  stamp set for the inside; perfect for any invitation regardless of the occasion.

So there you have it.  My card & invitation.  Stop back in the coming days & weeks, I’m working on my Thanksgiving table decor & another banner using the  Build A Banner Simply Created Kit.  And please “Like” me on Facebook – I’m only 2 people away from reaching 100 Likes.  Won’t you help me reach that milestone?  Thanks for your help, and thanks for stopping by My Stampin’ Space.

The next stop is Peggy Noe at prettypapercards,  stop number 31 on the Pals Blog Hop! Thanks for visiting – and I hope to see you next month!

  1. Nicole Watt at Pixel Maven’s Retreat
  2. Ann Schach at The Stampin’ Schach
  3. Katy McGloin at Just Fun Stamping
  4. Carmen Sublasky at The Creative
    Stamptuary
  5. Shirley Sumption at Look at
    my Cute Stuff
  6. Mary Fish at Stampin’ Pretty
  7. Connie Lindsey at Crafting a Joyful
    Life
  8. Michelle Gleeson at Stampinmojo
  9. Shannon Hokanson
    at Paper Works
  10. Colleen Mollema at Uncanny Crafting
  11. Lynn Kolcun at Stamping With Avery’s
    Owlery
  12. Kerry Willard Bray
    at Stampgoodness.com
  13. Debbie Mageed at Secret Stamper
  14. Amy L. Lazzell at Just A
    Thought…Cards by Amy
  15. Lisa Davis at Cherry
    St. Paper Treats
  16. Shannon Jaramillo at ezpeasycards
  17. Susan Itell at Simple Stampin’
  18. Martie Pollard at The Crafty Bandit
  19. Donna Kopenski
    at craftycardmaker
  20. Rae Harper at Wild West Paper Arts
  21. Sherrie Gross at Stampin’
    Sunshine
  22. Lisa Ann Bernard at Queen B
    Creations
  23. Linda Callahan at Stampin’
    Seasons
  24. Diane Roberts at Score
    at Four and a Quarter
  25. Brian King at Stamp with Brian
  26. Beth Beard at My little craft
    blog
  27. Debbie Crowley
    at expressivelydeb…
  28. Dawn Tidd at Tiddbits from
    Dawn
  29. Sue Becker
    at Sue’s R n R Stamping
  30. Nancy Gleason at My Stampin Space
  31. Peggy Noe at prettypapercards
  32. Marlene Heringer at So
    Many Toys in Schertz

2013novhop_back.jpg  2013novhop_next.jpg


My Spooky Banner

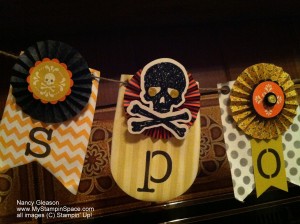
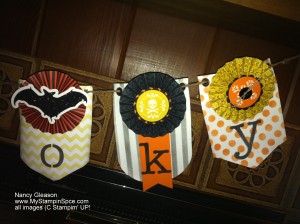
Spooky BannerHere is a picture of my fireplace mantel sporting the new Spooky Banner I created using the new Build A Banner Simply Created Kit (item # 133507) and the coordinating Halloween Banner Simply Created Accessory Kit (item # 132698).  The banner couldn’t have been easier to make; a short learning curve for me try both spritzing and sponging ( I ultimately opted for the sponging).

The banner kit contains 18 canvas pennants in 3 shapes, 3 background stencils (stripes, dots & chevron patterns), a stencil mask and alphabet stencils plus jute for hanging and a spritzer tool.  Because I opted for the sponging, the drying time was minimal meaning I could apply the colored background pattern and the text without waiting.  The accessory kit made decorating the banner a snap.  The kits are designed to include everything you need, just add ink and adhesives!  It could not be simplier.

I opted to use a few things on mine that weren’t in the kit, and likewise, didn’t use a few things that were, to make the banner ‘mine’ although I did try to stay as close to the banner shown on pages 4 & 5 of the Holiday Catalog to show how easy it is to create that.

IMG_2714


IMG_2719


The close-ups show you the rosette and pre-printed and glitter die-cut pieces that come with the accessory kit.  Are you digging the black Vintage Designer Faceted Buttons?  They are exclusive to this kit.

Since the kit contains 18 pennants, I will be able to make a banner for Thanksgiving and Christmas, in addition to this Halloween banner, from just one kit!

If you would like to order the Build-A-Banner Simply Created Kit (Item # 133507),   the Halloween Banner Simply Created Accessory Kit (item # 132698) or the Christmas Banner Simply Created Accessory Kit (item # 132697) – not shown, simply click the item name or Click Here to go to my on-line store where you can shop safely from the comfort of your own home.

Have you seen the new Envelope Punch Board?  No, well, I created a short video showing you this newest tool that is going to totally transform the way you make cards, and envelopes!  Don’t believe me?  Watch the video and see for yourself:

I know, now you want one;  you just can’t live without it, can you?  You are already thinking of all the cards you are going to make of odd sizes that you never dared make before, because you didn’t have an envelope.  The Envelope Punch Board is item # 133774 and it is available to order now.  You’re welcome 🙂

While you’re shopping, don’t forget to check out the Clearance RackWhere do all your favorite stamps, tools, accessories & embellishments go when they retire?  To the clearance rack!  And the Clearance Rack was just reloaded.  All items are deeply discounted and are only available while supplies last so don’t wait!  Click Here to shop the Clearance Rack.!

I’d love to see the Banner you create!   Just go to my on-line store and buy a banner kit, and an accessory kit if you so choose, and create your banner.  Then snap a pic and email it to me; I’ll post your banner pic on my blog!  It’s that simple 🙂

Thanks for stopping by My Stampin Space today.

Avoid the Frenzy – Start Planning for the Holidays Now

Every year, I think I am going to start my planning for the holiday season early to avoid the frenzied chaos I usually wind up in, but my good intentions don’t always pan out.  My problem is, I don’t have a PLAN for my planning; no way of organizing what I’m planning in my head. I write things down (sometimes) but then I can’t find my notes. I cut out a recipe, but don’t remember where I put it. Sound familiar?

But this year, Stampin’ Up! has my back. They’ve actually given me a plan for my planning, an organizer for my organizing.

If my story sounds like yours, then we both need The Season of Style This & THAT journal. Watch the video below to see how this will organize your holiday season so you can keep it all together this year.


Season Of Style This And That Journal
Season of Style This & That Journal
# 132277 $10.95
Naughty And Nice This And That Rotary Stamp
# 132278 $5.95


Season Of Style This And That Designer Stickers
#132276 $ 4.95
Season Of Style Designer Washi Tape
#132155 $4.95


I’ve even made it easy for you to order your This and That journal.  Just click on any picture and you’ll go straight to my on-line store.

This makes a great practical gift, too.  So don’t forget your sister, your BFF, or your co-workers.  Anyone who could use a little help getting their holiday planning under control.

Now, go enjoy your perfectly planned, stress-free holidays!  On behalf of Stampin’ UP!, you’re welcome!

Nancy

August Pals Blog Hop


Thank you for joining us for the August Pals Blog Hop. Even though it’s only August we want to provide some inspiration for your upcoming holiday projects. This month’s blog hop will showcase new products from the 2013 Stampin’ Up! Holiday Catalog. We hope you enjoy seeing how we use the new stamps, new punches and other accessories!

You should have just left stop number 14 on the Pals Hop – Nicole Watt at Pixel Maven’s Retreat. If so, you are in the right spot. If you get off track, the full blog lineup below will help you move along from blog to blog so you see all of the amazing creations.

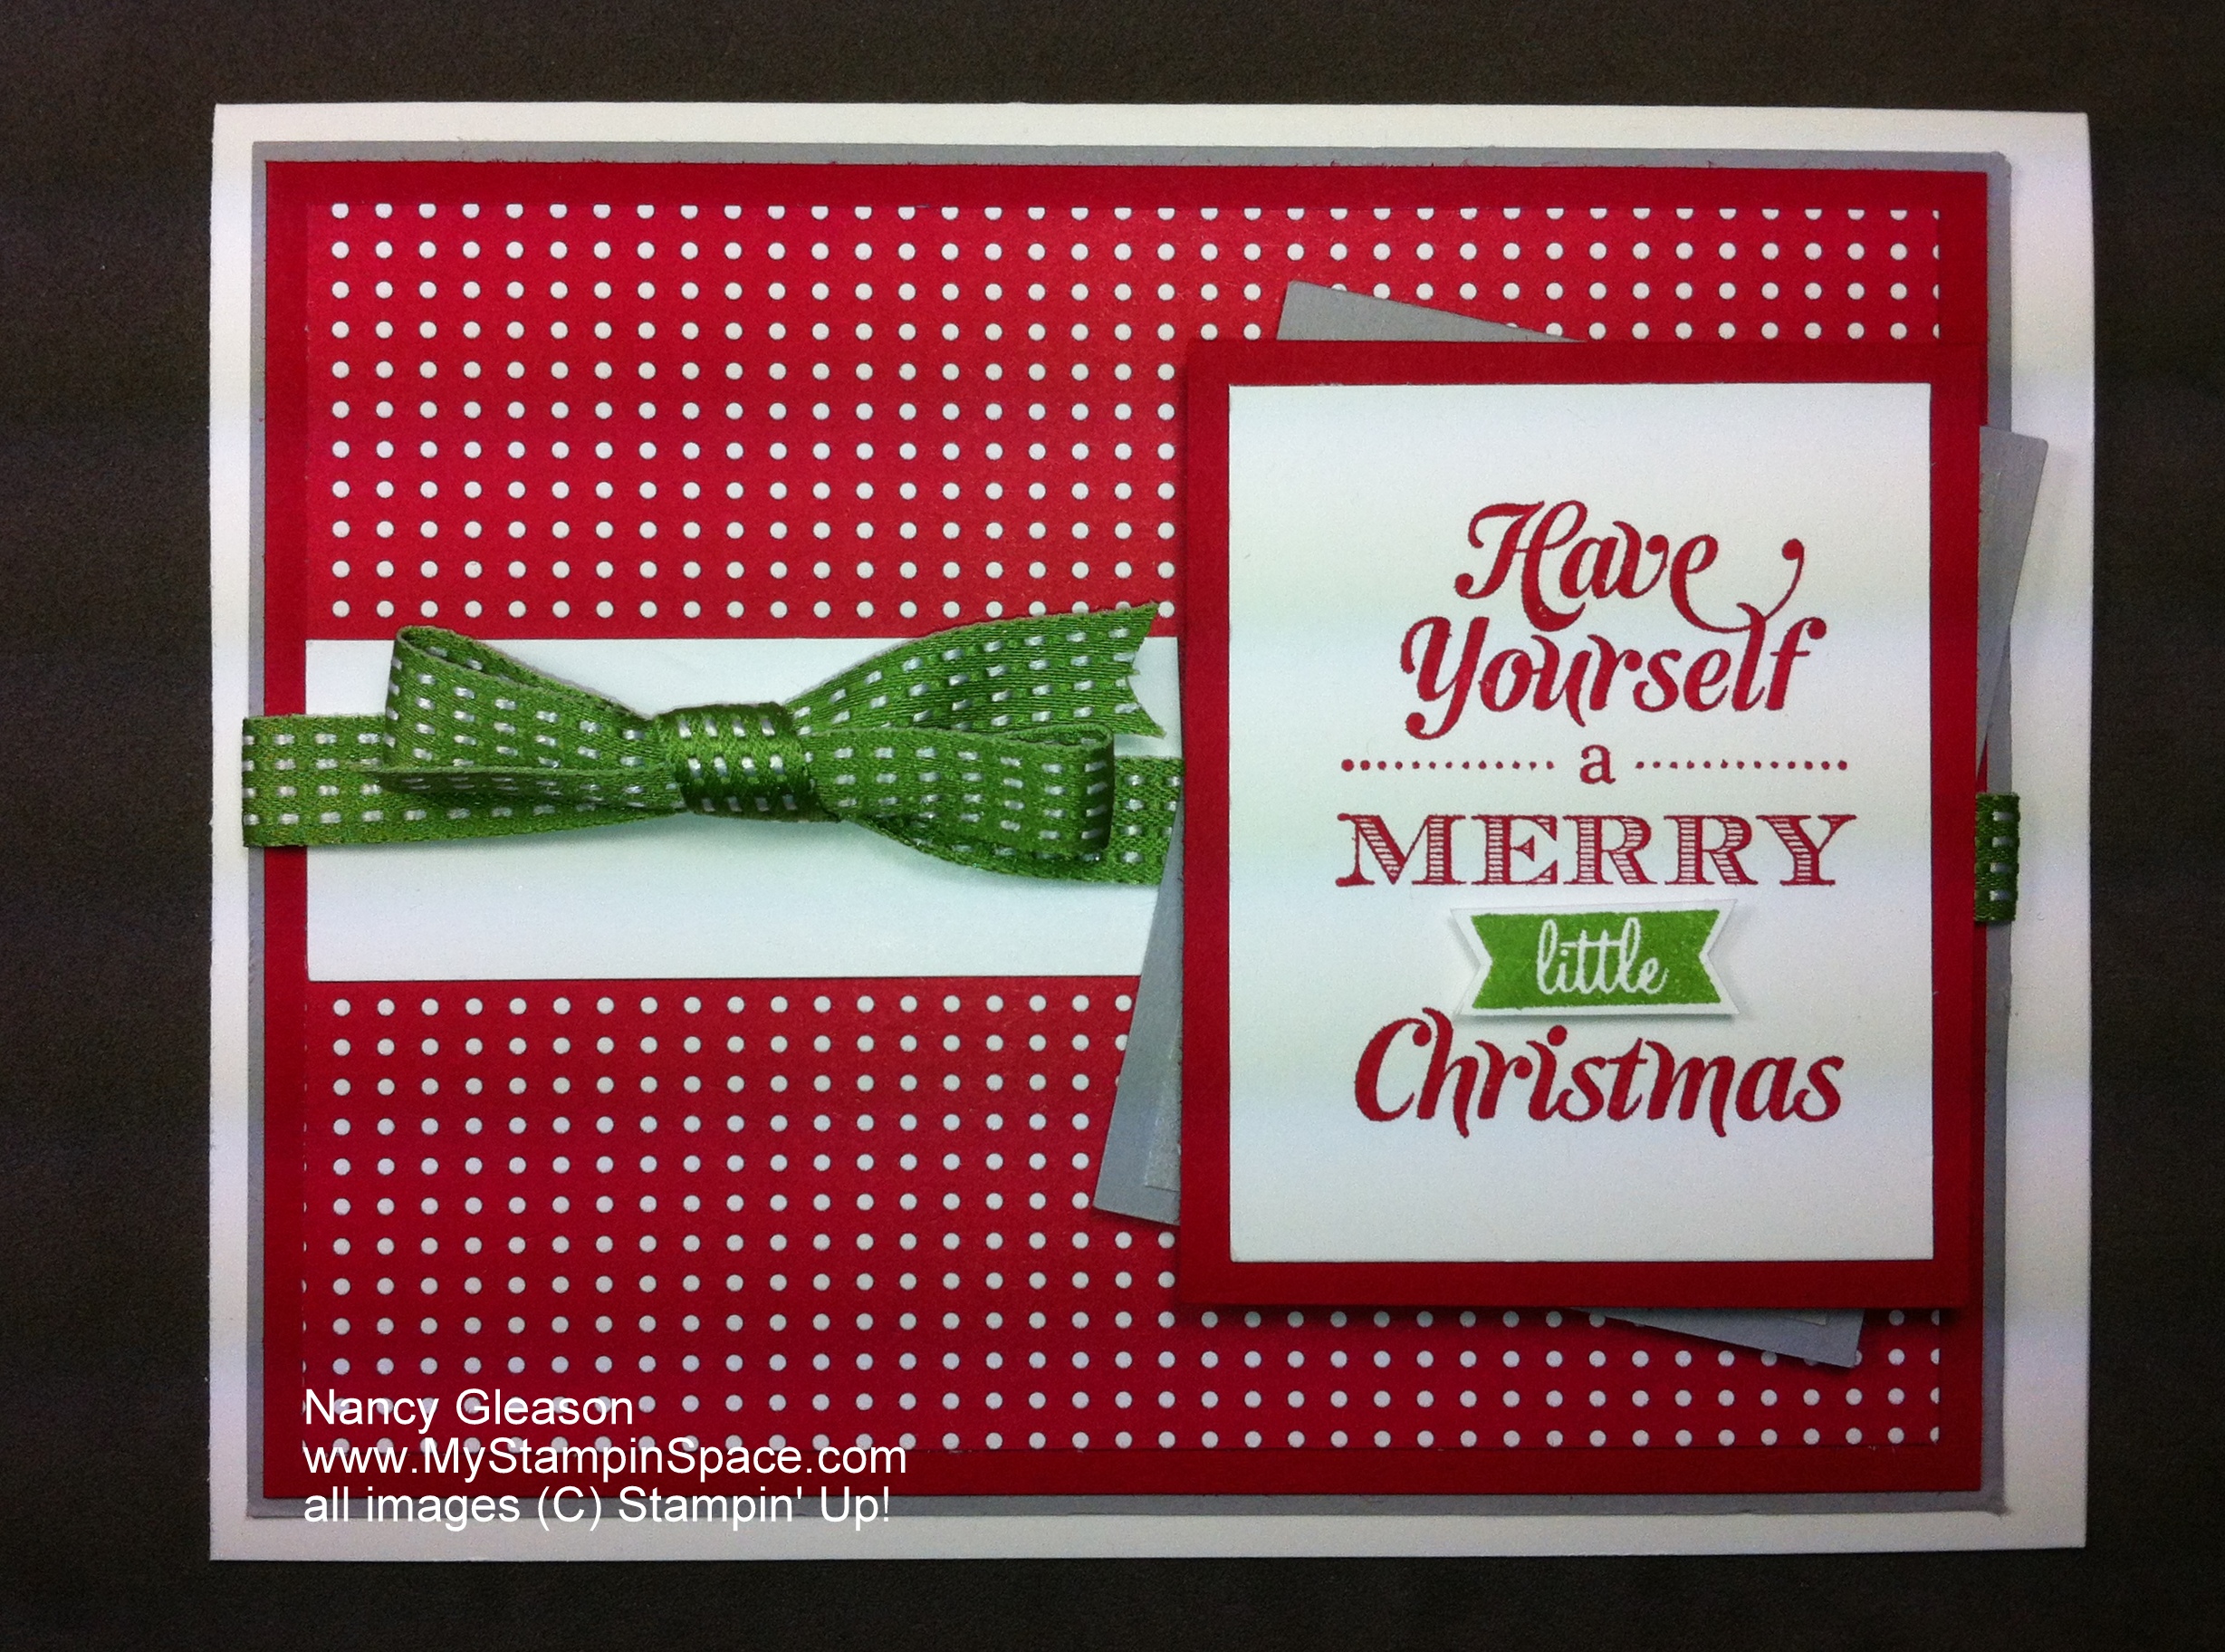
Have Yourself a Merry Little Christmas


“Merry Little Christmas” (#131826-wood, #131829-clear) was a stamp set that went straight to the top of my wish list my first trip thru the 2013 Holiday Catalog.  Why?  Because it’s part of a bundle!  Anytime I see a product bundle, I know that A)  the products will coordinate well together, and B) I’ll save money!

This catalog is full of kits, great for the busy crafter!  This stamp set comes bundled with a card kit for easy card-making without a lot of fuss and includes everything except ink & adhesives (basic supplies you probably have on hand).

For this card, I used a gray, red & green color combo.  There’s a layer of Smoky Slate card stock, then a layer of Real Red followed by a piece of DSP  (retired – I am bound & determined to use as much of my retired DSP as I can!)  .  The image is stamped in Real Red onto Whisper White cardstock.  I then stamped the image again on Whisper White using Gumball Green and snipped out the ‘little’ banner using my paper snips and popped it up on stampin dimensional.  The little bit of grey behind it offset gives it some flair.  The finishing touch is the Gumball Green ribbon.

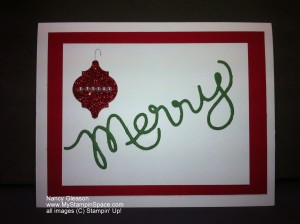
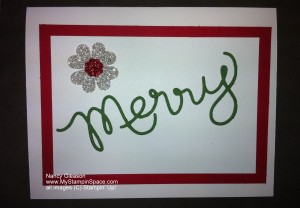
The next item I had to have were the Expressions Thinlits Dies #132171.  I loved the font and the size of each word.  IMG_2601Check out the spread on pages 10-11 in the catalog for some great ideas with this die.

These two cards were whipped out in minutes!  (Thanks to the Pals for the great tip about using wax paper to help get the cardstock out of the die! – No thanks to my family for leaving an empty roll in the wax paper box in my cabinet and not letting me know we were out!  – But that’s a different story!)

Red Glimmer Paper and Silver Glimmer Paper and punches created the designs.  (The Mosaic Madness punch and a line of mini pearls makes a great ornament, don’t you think?)  Need a quick card that you can mass produce but doesn’t cut corners on cuteness?  These thinlits will get the job done for you!  Another reason I like this set – it spans 3 holidays.  Plus I could see using the Love sentiment for more than just Valentine’s Day.

IMG_2602You can order any of these products from me.  Just click here to go directly to my store and start shopping!


The next stop is Beth Beard at My Little Craft Blog, stop number 16 on the Pals Blog Hop! Thanks for visiting – and I hope to see you next month!
2013aughop_back

2013aughop_next

  1. Colleen Mollema at My Crafty Habit
  2. Peggy Noe at Pretty Paper Cards
  3. Lisa Ann Bernard at Queen B Creations
  4. Angie Blake at Angie’s Musings
  5. Debbie Mageed at Secret Stamper
  6. Diane Roberts at Score at Four and a Quarter
  7. Barb Furlong at The Love of Stamping
  8. Mary Fish at Stampin’ Pretty
  9. Debra Simonis at Deb’s Stampin’ Grounds
  10. Laurie Chilton at Stampin’ Ink
  11. Penny Nichols at Sierra Stampin!
  12. Amy Williams at Stampin’ on the Range
  13. Shannon Jaramillo at Ezpeasycards
  14. Nicole Watt at Pixel Maven’s Retreat
  15. Nancy Gleason at MyStampinSpace
  16. Beth Beard at My Little Craft Blog
  17. Linda Callahan at Stampin’ Seasons
  18. Patti MacLeith at Papercrafts by Patti
  19. Sherrie Gross at Stampin’ Sunshine
  20. Kerry Willard Bray at Stampgoodness
  21. Brian King at Stamp With Brian
  22. Nicole Picadura at Scraps & Stamps
  23. Kim Czenszak at Live Love Stamp
  24. Rae Harper at Wild West Paper Arts
  25. Michelle Gleeson at Stampin Mojo
  26. Shannon Hokanson at Paper Works
  27. Dawn Tidd at Tiddbits from Dawn
  28. Lynn Kolcun at Stampin with Avery’s Owlery
  29. Susan Itell at Simple Stampin’
  30. Martie Pollard at The Crafty Bandit

Thanks to the talented Nicole Watt for creating our blog hop badge and buttons! This month’s badge and buttons feature the most excellent color combo featured in the Winter Frost product suite: Bermuda Bay, Coastal Cabana, Island Indigo, Pool Party and Smoky Slate.

And thanks to you for stopping by My Stampin’ Space today.  If you liked what you saw, please leave me a comment or sign up for my mailing list.  Please come back again!  See you soon!

Happy Stampin,

Nancy

Smart Owl

Wow!   Today my son is graduating.  I am so proud of him and all that he has accomplished.  Congratulations, Matt!

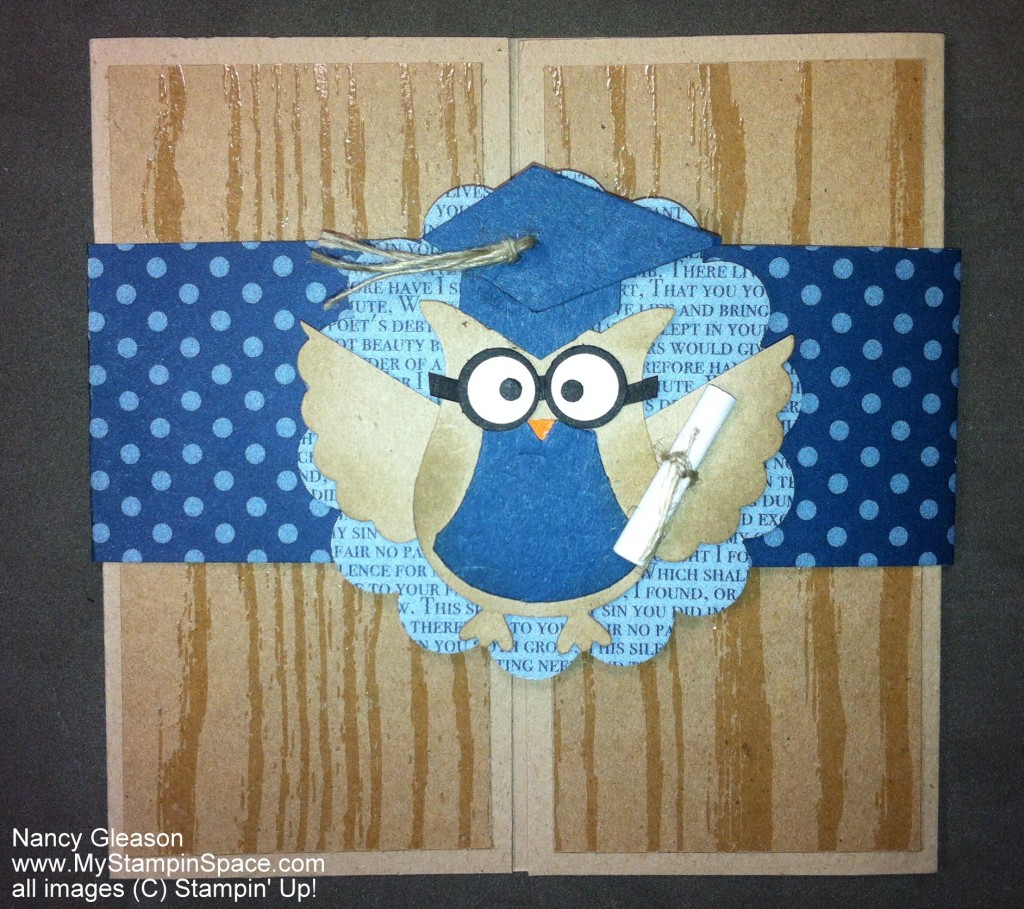
I made this card after seeing it by Mary Fish.  I love this little ‘smart owl’ – he looks so academic with his eye glasses, mortarboard, and diploma.

Smart Owl

I used Crumb Cake & Midnight Muse as my color combo.   (Matt will be wearing a navy cap & gown.)  Keeping with the academic them, I popped this little guy up on a 2-3/8″ scallop circle punched from our In-Color DSP with words on it so it looks like a page from a book.  This circle was then placed on a belly band to hold the double-door opening card together.  Two strips of Natural Composition DSP paper in the wood grain pattern were used for the card front, as everyone knows that owls live in trees.

The owl was a hoot to make!  I started with our Owl Builder Punch, the wings were made with the Scallop Oval Punch.  The top part of the mortarboard started out as a Petite Pennants Builder punch which I cropped by hand.  The hat part was snipped out using the Paper Snips freehand.  I also snipped little strips of paper to create the eyeglass frames.   Linen thread created the tassel and holds the diploma in place too.   A little bit of Crumb Cake ink was sponged around the edges of the owls body & wings to contrast.

Please leave me a comment and let me know how you like this card.  If you want to make this, and need any of the supplies, you can click on the hot links on any product listed, or click here to go to my online store and place your order securely and have it shipped right to your house!  You don’t need to be a graduate to know that’s the smart thing to do.

Thanks for stopping by.  If you’d like to leave Matt a ‘Congrats, Grad’ comment, please do.  I’ll pass along all of the well wishes to him and he’d be so happy to receive your wishes.

Thanks for looking, and happy stampin’,

Nancy

Spring is Here!

Stampin' Up! 2013 Spring CatalogWell, technically, Spring isn’t here.  Winter is in full forceBut the Spring Catalog is here!   And what could be more fun on a cold winter afternoon than curling up with the newly released Stampin’ Up!  2013 Spring Catalog!  Whether you prefer paper in hand, or the e-version, the new catalog is sure to get your creative juices flowing!  (Yes, I’ll admit, I was salivating when I saw it!)    From feminine and vintage to whimsical stamps & accessories, there’s so much there to set your Hearts a Flutter!

From several product bundles, new dies and punches, including a pop-up card base die, to coordinating paper and fabric, to embellishments, MDS digital content and tools such as another scoring plate for the Simply Scored! this catalog has so much to offer everyone.  I was just thinking that this catalog offers a little bit of spring, and all the essentials for our Spring holidays including Valentine’s Day, Easter & St. Patrick’s Day.

So take a peek at the 2013 Spring Catalog.  Then leave me a comment and tell me if you can find all of the references I’ve made in this post to new Stamp Sets.  Yes, I’ve hidden the names of 5 new stamp sets in my post.  Can you find them?

If you’d rather have a paper copy of the catalog, and do not currently have a demonstrator that you order from, please email me and I’ll mail a catalog out to you. US only and no demonstrators, please.  Thanks.

I’ll be posting and sharing projects made with several of these new products in the next few days so stay posted and come back soon to My Stampin’ Space.  In the meantime, enjoy the new catalog!  Caio, Baby!

Nancy


November Pals Blog Hop

We’re so glad you could join us for this month’s Pals Winter Wishes Blog Hop! We hope you have your holiday wish list ready because today the Stampin’ Pretty Pals are sharing some fabulous cards and projects showcasing our must have wish list items!

You’ve probably hopped over from Dawn Tidd at Tiddbits From Dawn, I’m stop number 14 on the Pals Hop and I’m glad you hopped in! I’ll help you “hop along” from blog to blog where you’ll find great ideas for Stampin’ Up! products from the Stampin’ Pretty Pals! Should you hop off course, simply click on any of the links in the Pals Hop Line-up below and you’ll be back on track.

I think the #1 staple in any crafter’s supply is a quality paper trimmer.  Stampin’ Up! hit a homerun with the introduction of their new paper cutter.  If you have any paper crafters on your holiday shopping list, make them happy, happy with a Stampin Trimmer

But, my favorite thing about Stampin’ Up! is their product coordination I LOVE, LOVE, LOVE when we have a stamp set and a coordinating punch or dies.  The Scentsation Season Bundle fills that bill.   Sets like this go straight to the top of my wish list because of their ease of making great looking cards without a lot of work.  Stamp, crank, ta-DA!  It just doesn’t get any easier than that.

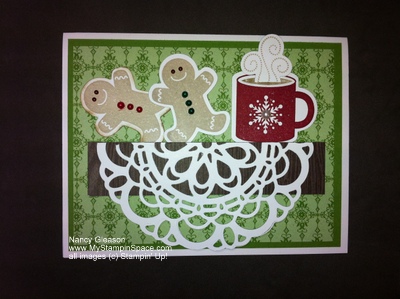
What’s more comforting & welcoming on a cold winter day than a cup of hot cocoa and cookies?  My card was designed to be a table (a piece of retired DSP in a woodgrain pattern created that wooden table edge) with a tablecloth (thanks to the Paper Doily Sizzlit) inviting you to come & warm up with hot cocoa & cookies. 


The Scentsational Season stamp set includes an adorable mug of cocoa, steam, gingerbread cookies, and a candy cane, Christmas tree & a star.  The Coordinating Framelits dies makes cutting those shapes a breeze.  Check back here later in the week, I’ll be posting some real simple cards made with this set to give you inspiration for other things to do with this set.  A shout-out to pal Ann Schach for her trick to cut a slit in the cocoa and slip the steam inside the cocoa!

I used a blender pen to remove the red ink from the cocoa mug and a Stampin’ Write marker in Chocolate Chip to color in the cocoa.  I also used colored sharpies to color the pearls to dress up our little gingerbread men!

I hope you were inspired to add a coordinating stamp set & dies to your wish list and/or the Stampin’ Trimmer to your wish list, or to your shopping list for a crafter in your life!  Thanks for stopping into My Stampin’ Space and hanging out with me.  Come back again.

Before you hop along, I’d like to give a big THANK YOU to our pal Nicole Watt for the fantastic job she did on creating our Blog Hop badge & buttons.  One of the must haves that should be on everyone’s wish list is MDS2!  Nicole used the Snow Festival Countdown Template (128136), which is part of the Remember December Collection Disc (129836). She used the recolor tool on the lights and stockings embellishments to customize the look. Want to learn more about MDS2?  Email me.

Now hop along for more inspiring ideas from Angela Curry at Kindred Stampers, stop number 15 on the Pals Winter Wishes Blog Hop! Thanks for “hopping” by!

  1. Lori Martin at The Rejoicing PaperCrafter
  2. Kerry Willard Bray at Stampgoodness
  3. Nicole Picadura at Scraps & Stamps
  4. Debbie Crowley at expressively deb…
  5. Janice Warhank at Janice’s Papercraft Playground
  6. Beth Beard at My Little Craft Blog
  7. Julie Trevett-Smith at The Stampin’ Affair!
  8. Rae Harper at Wild West Paper Arts
  9. Bobbi Mangas at My Therapy
  10. Nicole Watt at Impressions by Nicole
  11. Claire Crotteau-Hutt at Stamppaperscissors
  12. Susan Lankford at Stamp and Scrap With Susan
  13. Dawn Tidd at Tiddbits From Dawn
  14. Nancy Gleason at My Stampin’ Space
  15. Angela Curry at Kindred Stampers
  16. Diane Roberts at Score at Four and a Quarter
  17. Kim Czenszak at Live Love Stamp
  18. Mary Fish at Stampin’ Pretty
  19. Angie Blake at Angie’s Musings
  20. Sherrie Gross at Stampin Sunshine
  21. Barb Furlong at The Love of Stamping
  22. Peggy Noe at Prettypapercards.com
  23. Shannon Hokanson at My Stampin Blog
  24. Debbie Pierce at Stampin’ Sunshine

October Pals Blog Hop

Trick-or-Treat! It’s time for some fun and festive crafting with the Stampin’ Pretty Pals! You’ve probably hopped over from Sandra Conner at Pretty Provisions, I’m stop number 22 on the Pals Hop and I’m glad you hopped in! I’ll help you “hop along” from blog to blog where you’ll find great ideas for Stampin’ Up! Halloween projects along with some tricks and treats along the way! Should you hop off course, simply click on any of the links in the Pals Hop Line-up below and you’ll be back on track.

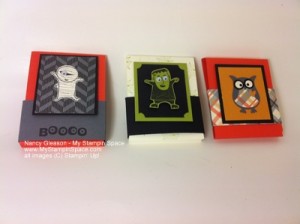
My Stampin Space treat holderCrafting & Chocolate are 2 of my favorite things – so when you combine them, how good is that? And today’s project incorporates both!

This matchbook style treat holder also uses my favorite color, Lucky Limeade, and my favorite stamp set of the day, Googly Ghouls.  It doesn’t get any better than this!

My Stampin Space treat holder projectThis photo shows the treat holder closed and the next photo shows it open, revealing the treat inside.

Perfect!

To purchase any of the supplies used to create this treat holder, feel free to click here to visit my secure on-line store.

Paper:  Lucky Limeade Cardstock, Basic Grey cardstock, Basic Black cardstock, Very Vanilla cardstock and Howlstooth & Scaringbone DSP.

Stamp Set:  Googly Ghouls

Ink:  Staz-On Black ink, Lucky Limeade Classic Ink Pad

Cool Tools:  Word Window Punch, Blender Pen, Score-Pal

Embellishments:  Googlies Adhesive Eyes

Adhesives:  Snail & Sticky Strip

I’m giving away a TREAT! Lucky you!

One lucky winner will receive this project AND  3 other treat holders for a total of four (4) Matchbook style treat holders AND instructions on how to make them!Pals October Blog Hop Blog Candy   This project is so versatile, you can make treats or party favors for just about any occasion.

If you’d like a chance to win, simply leave a comment below by Friday. One random winner will be announced here next Tuesday, so be sure to come back!
Note: I only ship within the U.S.   Winner has 24 hours to email me their name and mailing address so stay tuned for the announcement of the winner!

Now hop along for more tricks and treats and some spooky ideas from Barb Furlong at The Love of Stamping, stop number 1 on the Pals Trick-or-Treat Blog Hop! Thanks for “hopping” by!

  1. Barb Furlong at The Love of Stamping
  2. Kim Czenszak at Live Love Stamp
  3. Nicole Picadura at Scraps & Stamps
  4. Mary Fish at Stampin’ Pretty
  5. Beth Beard at My Little Craft Blog
  6. Peggy Noe at Prettypapercards.com
  7. Kerry Willard Bray at Stampgoodness
  8. Debbie Crowley at expressively deb…
  9. Naki Rager at …notes from Naki
  10. Sherrie Gross at Stampin Sunshine
  11. Claire Crotteau-Hutt at Stamppaperscissors
  12. Diane Roberts at Score at Four and a Quarter
  13. Laurie Chilton at Stampin’ Ink
  14. Katy McGloin at Just Fun Stamping
  15. Rae Harper at Wild West Paper Arts
  16. Brian King at Stamp with Brian
  17. Ann Schach at The Stampin’ Schach
  18. Nicole Watt at Impressions by Nicole
  19. Shannon Hokanson at My Stampin Blog
  20. Maggie Mata at Maggie Made Cards
  21. Sandra Conner at Pretty Provisions
  22. Nancy Gleason at My Stampin’ Space

Mojo Monday 262

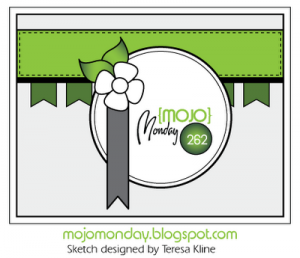
Today is Monday, so it’s time to get my mojo on and  play the Mojo Monday sketch challenge.

Here is the sketch that the design team over at Mojo Monday created.  I had so many ideas run thru my head the second I saw this sketch.  Since I had my Halloween stamps and paper out (for the Pals Blog Hop) I used those.

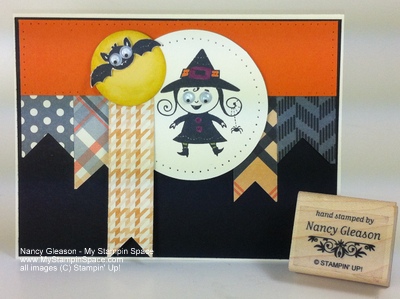
Here is my project – I hope you like it!  Googly Ghouls & Howlstooth & Scaringbone DSP

This sketch is a great way to use those little scraps of DSP that I always seem to accumulate but don’t want to get rid of (and I’m sure you have them too!).

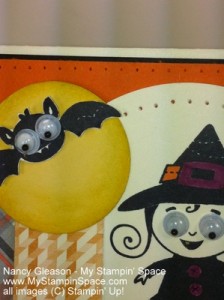
My card base is Very Vanilla cardstock with Basic Black layered on top of that.  A strip of Tangerine Tango crosses the top and acts as anchor for all the flags to hang from.  A circle of Very Vanilla acts as the canvas for my witch from the Googly Ghouls stamp set.  Both of those pieces have been pierced for added interest and texture.  You can see that better in this close-up.

Mojo Monday 262 close upI punched a circle in So Saffron and sponged Daffodil Delight around the outer edges to create shading.  The little bat flying over the moon adds to the ominous feeling!

I also used Rich Razzleberry, Pumpkin Pie, and Lucky Limeade markers to color in parts of my little witch.  The Googlie eyes just make the images in this stamp set so adorable!  Nothing frightening here!

If you like what you see, please leave me a comment.  You can even sign up to for my newsletter or to follow my blog so you don’t miss a post.

Thanks for stopping into My Stampin’ Space!  I hope you were inspired to get your mojo on and try your hand at making a project using your scraps of DSP and this sketch.

Happy Stampin’!  – Nancy


Christmas Ornament Medallion

I’ve promised my facebook fans that I would post pics of my interpretation of the Christmas ornament on the cover of Stampin’ Up!’s holiday catalog.  So, without any further adieu, here we go!

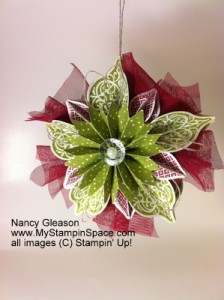
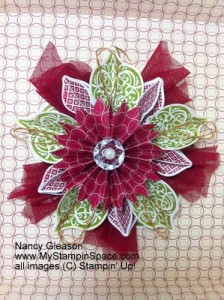
Holiday catalog cover ornament
Candlelight Christmas Ornament
Holiday Cover Christmas Ornament

This is my first attempt.  It was very easy, just time consuming!  I did not have the exact paper that was used for the rosette so I just used what I had!  I think it looks nice.

This is my 2nd creation.  As you can tell right away, I used a totally different paper for the rosette.  What you may not notice immediately is that I used a gold metallic cord rather than linen thread to dress it up a little.  Then, I lined a shadowbox frame with more of my DSP and I framed the Ornament Medallion!  What a great way to preserve this beautiful handmade creation!

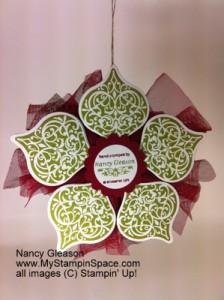
Back of the Christmas Ornament Medallion
The Back

I dressed up the back (of the ornament being hung, not framed!)   You can use this space to sign your artwork or use to convey a message to the recipient of your gift!


If you want to recreate this on your own, a supply list is below.

 Ornament Keepsakes stamp set (clear or wood mount) and coordinating Framelits Dies.  Buy the bundle & save!  Clear # 128051 or Wood # 128048
Scalloped Tulle RibbonCherry Cobbler # 127841
Ink:  Old Olive Ink Pad, Cherry Cobbler Ink. 
Paper:  Whisper White or Very Vanilla Cardstock
Candlelight Christmas Specialty DSP # 126901 (or substitute with a DSP that you have on hand)
Embellishments:  Vintage Faceted Designer Buttons, Large Pearl Basic Jewels, Linen  Thread.
Cool Tools:  Big Shot machine & the Designer Rosette Bigz  XL die # 125594, or a Simply Scored tool to score the DSP to make your own Rosette.
Adhesives:  I recommend using the Multipurpose Liquid Glue # 110755 and a hot melt glue gun.
 
 Thanks for stopping by My Stampin Space.  I hope you like what I created and that you are inspired to create this for yourself!  If you do, just click here or on any of the underlined products listed above to go right to my online secure ordering site. 
Happy Stampin!
Nancy

Spooktackular Offer

Stampin’ Up! Halloween Spooktacular Starter Kit Special!

Join my group in August, and in addition to all the perks you receive, you’ll get this awesome Halloween project FOR FREE!!!  How Spook-tacular is that?

B1LP_Spooktacular_ProjectKit_Aug0112_NA

NO TRICKS, JUST TREATS when you join Stampin’ Up! in August. Purchase the Stampin’ Up! $99 Starter Kit and receive everything you need to complete the Howl-O-Ween Printer’s Tray Project Kit featured above as a FREE product bonus!   Offer ends August 31.

The Howl-O-Ween Printer’s Tray Project Kit includes:

  • Products (shown on the right in photo above) needed to create the adorable project (on the left).  Ink and clear blocks not included.
  • You will receive the Stampin’ Up! Toxic Treats stamp set (Holiday Catalog) in your choice of wood or clear-mount.  
  • Also included is a full pack of Rhinestone Basic Jewels, full Baker’s Twine and partial products (enough to create the project) of the ribbon and buttons shown.
  • The Howl-O-Ween project kit isn’t offered anywhere else.  Be sure to take advantage of this special offer in August!