Today’s the Day!

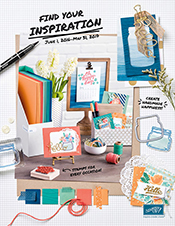
June 1st – the release of the new 2016-17 Annual Stampin’ UP! catalog!  Click the catalog cover image below to start flipping thru the pages and dive into the creative goodness of all the new products and on-trend stamp sets, and try on the new 2016-18 In Colors!

2016 Stampin' UP! Annual Catalog
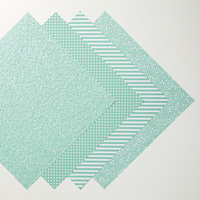
Meet the New 2016-18 In-Colors here:  Back Row:  Emerald Envy & Dapper Denim.  Front Row:  Peekaboo Peach, Flirty Flamingo & Sweet Sugarplum2016-18 In Colors

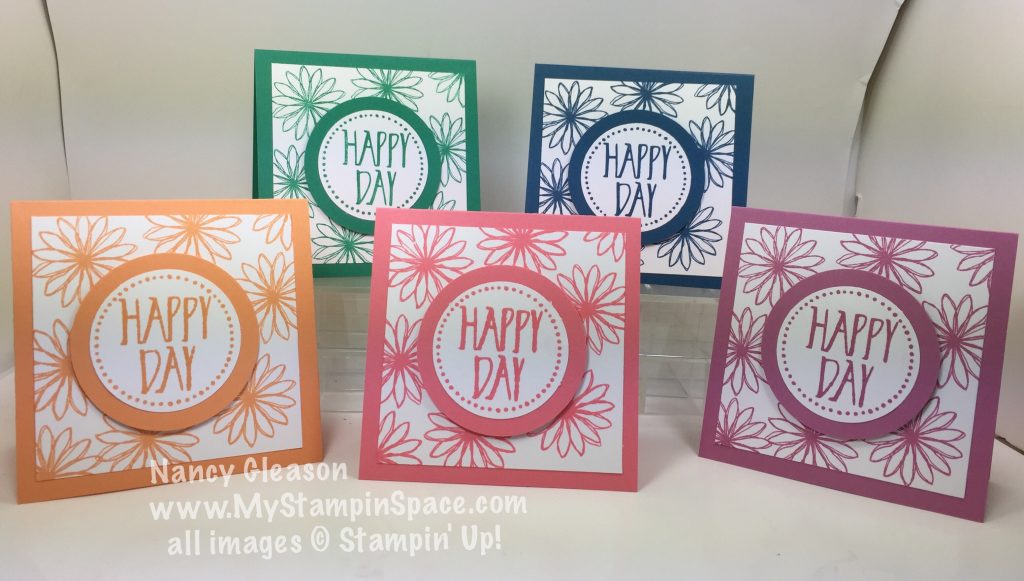
To place an order online, just click here and start shopping!  If your order is less than $150 (before shipping & tax) please use Host Code X2VCG9GC.  If your order is greater than $150 you will earn host rewards, so please don’t use my host code.

host-promo-header-na

GET $35 MORE HOST REWARDS!   June 1 – 30.  Host a home party or place an on-line product order of $350 or more (before shipping and tax) during June and you’ll receive a $35 bonus in host rewards.  That’s in addition to our standard host rewards here!  Fill your wish list or team up with a few friends to place your order together!  Email me if you want to schedule an in-home party.

Screen Shot 2016-05-26 at 11.45.03 AM

SAVVY SHOPPERS REJOICE!  GET TWO STAMP SETS FREE!  June 1 – 30!  Purchase the $99 starter kit (your choice of up to $125 in products and the kit ships FREE) and add ANY TWO stamp sets, ANY price FREE.  Think of all the possible stamps sets to choose from in the new catalog!   Learn more about the $99 starter kit and the discounts and perks of joining Stampin’ Up! .   Purchasing the $99 starter kit and joining Stampin’ Up! is a great way to fill your paper crafting wish list for the new catalog at a discount (with fun, friendship and exclusive resources as a HUGE bonus)  Purchase the Starter kit now!   

Happy New Catalog Day!

Nancy

Farewell, My Friend(s)

Today’s post is a Good-bye of sorts, but in an exciting way!  Every year, approx. 1 month before Stampin’ Up! releases their annual catalog, they release a list of products that will be retiring.  Since these items won’t be carried over to the new catalog, this is the last chance to grab those items before they are gone for good.

So with the posting of the Retired List (farewell), it’s also a great chance to score some good bargains as some of these items are on sale too.  I think it’s nice that Stampin’ UP! gives us a heads up on what won’t be making it into the new catalog so we have the opportunity to grab those items before they are gone. CM100700B-500x153

STAMPIN’ UP! RETIRING PRODUCT SALE STARTS NOW!

2014-16 In Colors

The 2014-2016 In Colors will be retiring so now is the time to stock up on cardstock, ink pads, reinkers, markers, ribbon, etc.  before your favorite colors from this collection are gone.  Typically, the In Colors are the first to sell out.

LAST CHANCE TO GET THESE RETIRING PRODUCTS!  SAVE UP TO 50% on a huge inventory of select Stampin’ Up! retiring products including stamps, punches, dies, ribbon, designer series paper and much more. The sale starts TODAY (April 18). Stamps will be available at least through May 22.  Accessories (“everything else”) are only available while supplies last and can sell out quickly.  See ALL retiring Stampin’ Up! products on this printable PDF OR in my store here.

One of my favorite stamp sets retiring from the Occasions catalog is called Apple of My Eye.  Here are two cards I made with this set previously that just might cause you to scoop this stamp set up before it retires. Apple of My Eye

Lost Lagoon and the Flowering Fields DSP from Sale-A-Bration make the perfect backdrop for these luscious lemon slices.   Wink of Stella gives the lemon a citrus shine!

lemon slices

This is so summery and citrus-y and it is a total Pinterest CASE!  I cannot take credit for this design but the color combo and the sweet sentiment had me head over heels!

I hope you get the items you want before they are gone.  My advice:  I mark my catalog(s) with a red “R” next to every item that is retiring.  Then I can go thru the catalog and easily see what is retiring. The Retiring List lets us know which item is in the Occasions Catalog (OC) or Annual Catalog (AC) and the page #.  It’s worth the time to me to mark my catalogs.

Happy Shopping!  Nancy


The Beauty of the Butterfly

“As with the butterfly, adversity is necessary to build character in people.”  – Joseph B. Wirthlin
Butterflies are such complex creatures; they are so fragile and intricately detailed, yet the fight they endure to emerge from the cocoon is inspiring!
I love all the Butterfly stamps and thinlits and framelits dies that Stampin’ Up! offers; we have so many options when we want to add a butterfly to our cards.  Today I chose to use the Medium sized Thinlits die in the Butterflies thinlits as the focal point of my card.  I love the intricate detail of this thinlit.
IMG_6664[1]
I also wanted to add some embossing as I was teaching a class on the Big Shot die cutting and embossing machine and wanted to show how it die cuts AND embosses.  The Elegant Dots TIEF was chosen for the way it coordinates with the Crushed Curry design of the Cherry On Top DSP stack.  A simple design of one color and white is all that is needed to make the focal point stand out.  (You could recreate this card in any color, but a bright, bold color will work better than a light, subtle color).
I cropped the butterfly out of the center of the Crushed Curry cardstock panel.  I then adhered the DSP panel and the embossed Whisper White panel on top of the Crushed Curry panel.  No one can tell that the butterfly was cropped out of it!  A piece of Crushed Curry ribbon (retired) covers the butt joint of the two pieces of paper.  The butterfly is embellished with a single Rhinestone jewel.  A wooden embellishment from the Expressions Natural Elements was adhered to the lower right section of the card.
Simple, yet elegant.  Just like a butterfly.  And my friends over at the Paper Players are featuring cards with Butterflies this week!  Click here to see all the butterfly inspiration from the Paper Players.  Come & Get It Challenge is featuring ‘things with wings’ so I get to enter this into both challenges; SWEET!
To purchase any of the items I used to make this card, click on the item hi-lighted above, or on the product list below.
BIG NEWS!!!  As you know, the current catalogs are set to expire on May 31st.   On April 18th, the RETIRING LIST will be posted!  Any items that will be retired by May 31st will be posted and from now on, will be available on a ‘while supplies last basis’.  So anything you’ve been wanting, scoop it up before it’s gone!  We know that all of the 2014-2016 InColors will be retired.  Any product with those colors in it, will also retire.  Usually all of the DSP patterns  retire too.  Click Here to go right to my online store to start shopping before those items you want are gone.

Let’s Go Blog Hopping!

Pals Blog Hop 2016 badgeWelcome to the Pals Blog Hop for April 2016.  We are thankful you stopped by to take a look at our new 2016 Blog Hop monthly themes.  This month we are featuring projects that are all about our families. This is a great time of year to think about what to make for Mother’s Day, Father’s Day, or upcoming graduations. And, family vacations are just around the corner… how would you want to remember those special family moments? We hope to provide you with lots of ideas and that you enjoy our creations.

You may just be starting the Blog Hop or may have come from the previous link from the Line-up on the Pals Blog Hop listing shown below.  The full lineup will help you move along from blog to blog so you may see all the projects.

Well, I intended to make a card to welcome a new baby for today’s blog hop.  The idea I had in mind just didn’t pan out the way I envisioned it.  So, I fell back on my trusty old “Going Global” product suite.  I knew the ‘world’s best dad’ sentiment wouldn’t fail me!  After all, isn’t Dad always there to bail us out when we get into a jam?

Worlds Best Dad

When making a masculine card, I think it is important to keep things simple, without lots of embellishments or bling.  This beautiful patterned paper, from the Going Places DSP stack is all the design that’s needed to add lots of interest but not be too overbearing.  Layered on Sahara Sand and Night of Navy Cardstock, it has a nice pop of color, but in masculine tones.  The world image from the Going Global stamp set was stamped in Night of Navy and layered on a Night of Navy circle.  A thin strip of Night of Navy cardstock repeats this color 3x’s on the card (a good rule of thumb is to repeat a color or an element 3x’s for good balance!).  A few strands of Linen Thread repeat that neutral color while adding a rough, masculine touch.

If you would like to order any of the products I used here, just click on the item name in the description above, click here to go to my online store.

Thanks for visiting. To continue with the hop, please refer to the Blog Hop Line-up below. We hope to see you on next month’s Pals Blog Hop! 

  1. Mary Fish at Stampin’ Pretty
  2. Jackie Diediker at Stampin’ Jackie
  3. Michelle Gleeson at StampinMojo
  4. Katy McGloin at Just Fun Stamping
  5. Sherrie Gross at Stampin’ Sunshine
  6. Peggy Noe at Prettypapercards
  7. Brian King at Stamp with Brian
  8. Debra Simonis at Deb’s Stampin’ Grounds
  9. Wendy Klein at Doggone Delightful Stampin
  10. Jennifer Michalski at Stamping Serenity
  11. Kalyn Shubnell at The Stamping Chronicles
  12. Becky Volpp at InkBlossomwithBecky
  13. Patti MacLeith at Papercrafts by Patti
  14. Nancy Gleason at My Stampin Space  — YOU ARE HERE!!! —
  15. Pam Dotts at Clearly Southern Stampin’
  16. Beth Beard at My Little Craft Blog
  17. Lisa Ann Bernard at Queen B Creations
  18. Tricia Chuba at ButterDish Designs
  19. Beth McCullough at Stamping Mom
  20. Debbie Mageed at Secret Stamper
  21. Denise Hoepfner at The Mountain Magpie
  22. Maggie Mata at Maggie Made Cards
  23. Natalie Bradley at NatalieBradley.com
  24. Pamela Sadler at Stampin Pink Rose
  25. Karen Zaring Browning at Karen Zaring Browning
  26. Susan Itell at Simple Stampin’
  27. Debbie Crowley at Expressivley Deb


How Much Fun Can You Have in One Night?

Another Stampin’ Class, another night of fun!  I enjoy getting out of the house, and having a fun night with the ladies that come to my PaperCrafting classes!  Of course, I love papercrafting, but the camaraderie and friendship are so special to me.  The ladies always love the projects we make, and I wanted to share one of those projects with you now:

A Grateful Bunch
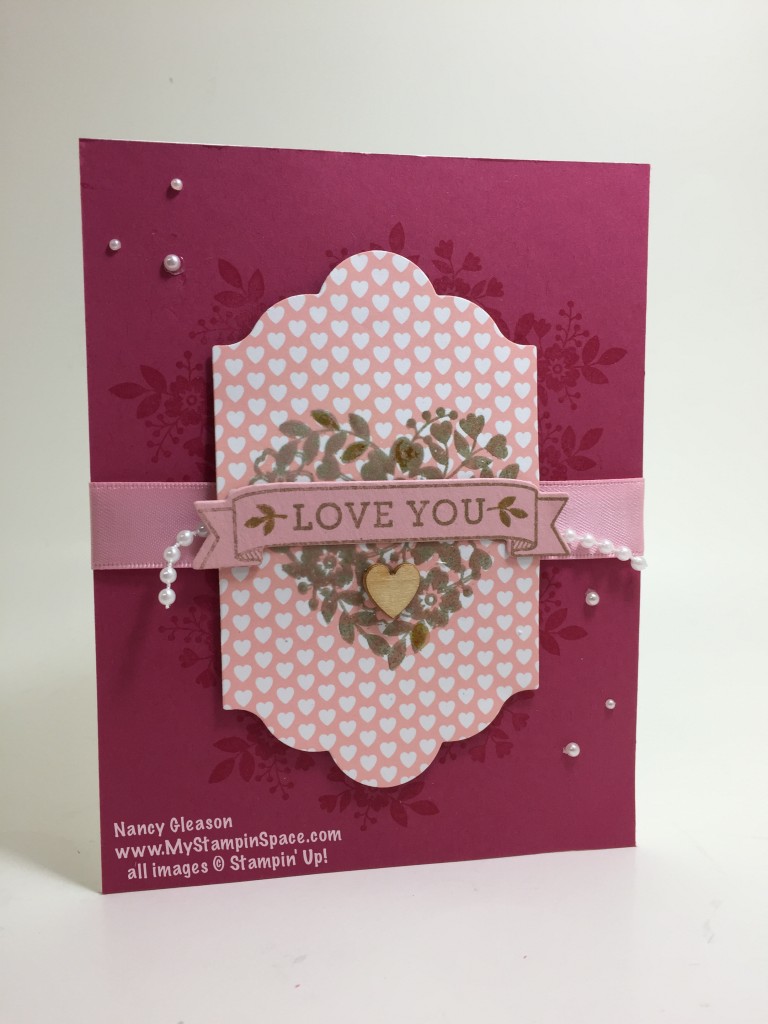
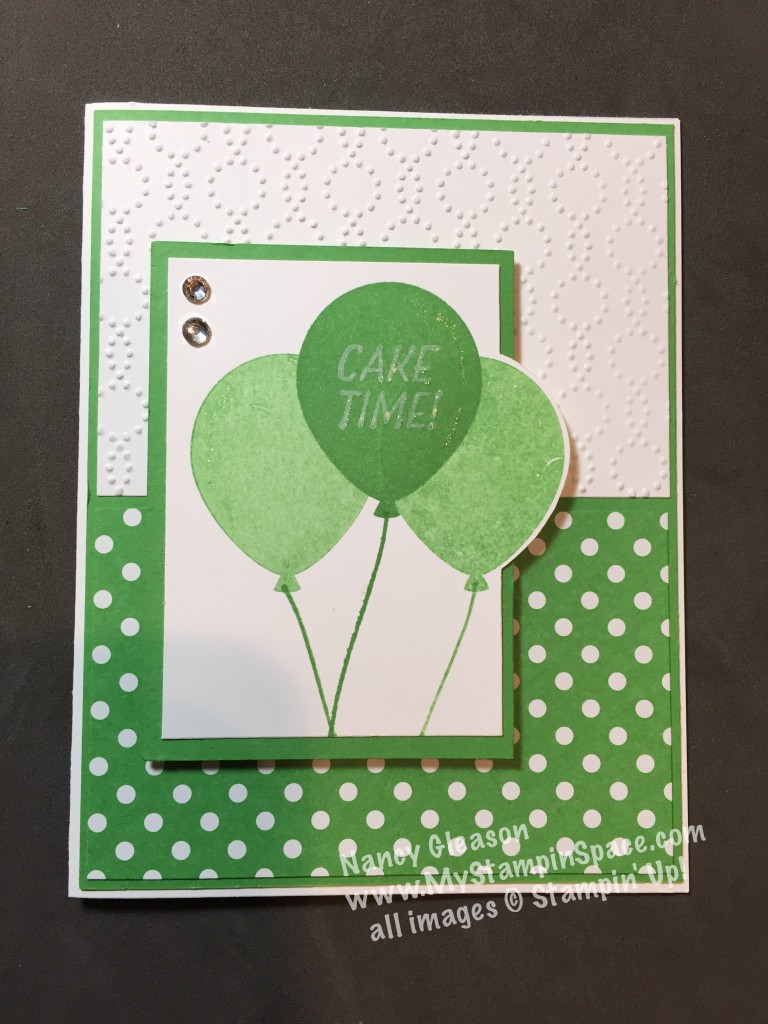
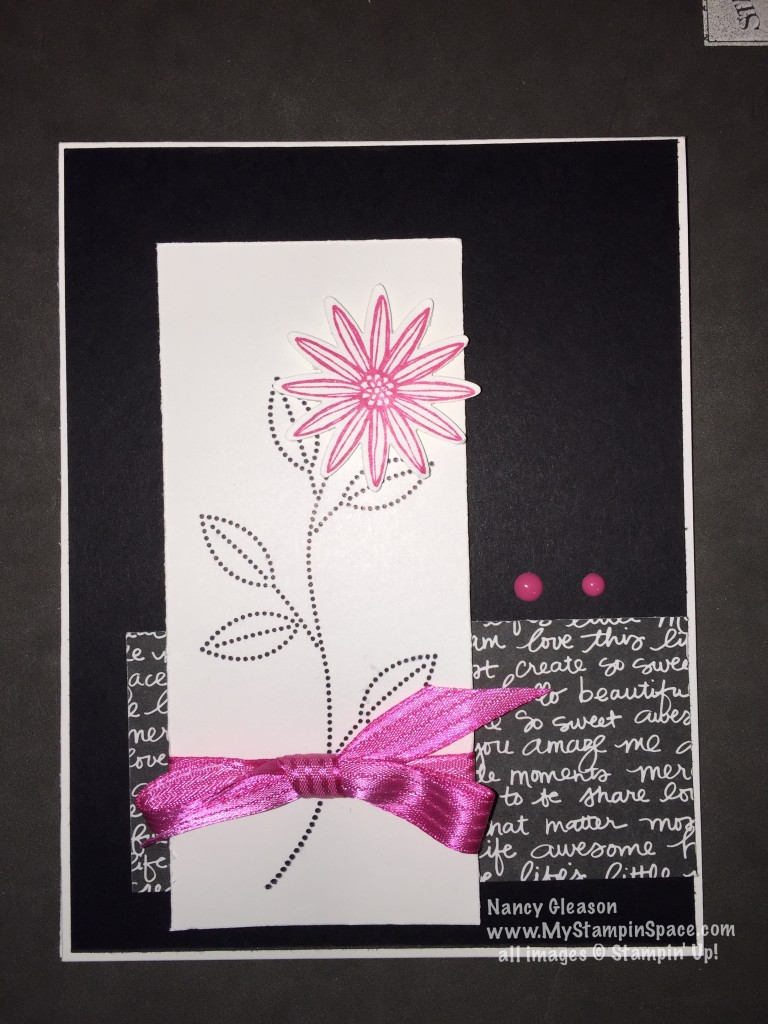
I love the look of a Black & White card with a pop of a bold, bright color.  Melon Mambo, this deliciously bright pink, does the job!  It really Pops against the B&W!  This card follows the rule of thirds:  a color should be repeated 3 times.  I used the Melon Mambo for the flower, the ribbon and the enamel dot accents.  This is a simple card to make but it really says “WOW!”

I started with a piece of Whisper White cardstock, cut to 4-1/4″ x 11, then scored to created a standard size card with the fold at top.  A piece of Basic Black cardstock cut to 4-1/8″ x 5-3/8″ was adhered to the face.  A small strip of Black DSP from the Neutrals DSP stack, cut to 2″ x 3-3/4″ was adhered along the right side about 3/4″ up from the bottom.  A strip of Whisper White was stamped with Black Archival ink and the stem from the Grateful Bunch stamp set.  The flower was stamped in Melon Mambo ink and cropped out using the Blossom Bunch Punch and popped up on a stampin’ dimensional.  A piece of Melon Mambo ribbon was tied around and this layer was also popped up on dimensionals.  A few enamel dots in Melon Mambo finish off the card!

Easy peasy, but oh, so striking!

The Ladies had so much fun.

Ruthie 40516

And they were so proud of the finished projects they made!  Nothing makes me happier than to see someone who has never stamped before  complete a project they can be proud of!   I love sharing my passion for papercrafting, and the tips & techniques I’ve learned along the way with others!  Classes are a great way for me to do that.

I wish everyone reading this could come to my classes!  If you are in the Scranton, PA area, you can!  If you don’t, well, it probably won’t be very convenient, but…..maybe you won’t have to!  I am going to start on-line classes in June!  Yes, you read that right.  So that means that no matter where you live, you can still stamp with me, via video!  Cool, right?

I’ll be sharing more info on that shortly, and you, my blog readers will be the first to hear about it!  But in the meantime, you can send me ideas of things you’d like to learn!  I’ll be happy to take your questions and suggestions and turn them into classes!

And I’ll be sharing the 2nd project we made in a few days so stop back.  And remember, if you want to order any of the supplies I used to make this project, please shop my online store here.  Thanks!  And feel free to pin this project or share it with your on facebook if you like it.

See you, soon!

Nancy


It’s hard to say goodbye to what you love

What I Love – it’s the name of a stamp set available for Free in the 2016 Sale-A-Bration promotion.  It was the stamp set that caught my eye and I knew I just had to have when I first got a glimpse of the Sale-A-Bration catalog back in November.  I used this at my last Stamp Club, and again to make a birthday card for my sister (her birthday is tomorrow, please feel free to wish her a happy birthday in the comments below!).  So let’s see what I made:

IMG_6507[1]

And here is the inside:  (I love that the sentiment from Grateful Bunch has an ‘inside/outside’ sentiment!)IMG_6509[1]

This is a great card that can be used for any occasion just by changing the sentiment.  Christy chose to leave a sentiment off her card so she would have a great card that she could just grab and stamp a sentiment on whenever she needed a card in a hurry!  Smart idea, Christy! 🙂IMG_6557[1]

I love how she used a 2nd flower in a complimentary color!

This would look great in just about any color combination too!  I made a card and coordinating gift bag using this layout but switched the colors to Tip Top Taupe and Watermelon Wonder.

IMG_6564[1]

Here it is with the coordinating gift bag:

IMG_6562[1]

I love how the patterns in the Decorative Paper stacks coordinate.  The Gift Bag Punch Board allows making custom sized gift bags a cinch!    You can watch my video tutorial here to learn how to use the Gift Bag Punch Board:

See, you NEED this stamp set!  Get yours today, after today it’s too late!  Shop here on line today and for every $50 you will get to choose a free Sale-A-Bration item!  Sweet!  Choose “What I Love” or any other stamp set or paper of your choice.

Thanks for stopping by; please feel free to PIN any picture you like for future reference, like me on Facebook and leave me a comment below.  And don’t forget to wish my sister a Happy Birthday!  Thanks,

Nancy

Who Wants FREE Stamps?

If you answered, YES, then keep reading!  If you answered NO, then you can just close this. But, if I know you, I think you’ll want FREE Stamps!   And there are several ways you can get FREE STAMPS.

#1 – Sale-A-Bration 

Sale-A-Bration 
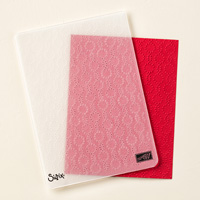
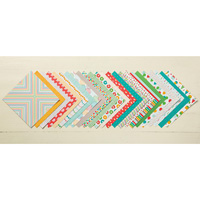
It’s winding down, March 31st will be the last day to get any of the FREE items from the Sale-A-Bration promotion.  9 different stamp sets to choose from, as well as 3 different paper packs and 1 embellishment!  13 different FREE items – which one will you choose?  Or why stop at one when you can get them all!   Learn all about Sale-A-Bration here.

#2 – Paper Pumpkin Free Stamps in April

To celebrate Paper Pumpkin’s milestone of shipping 1 million kits, the April kit will contain a FREE, exclusive stamp set called “All About Everything” in every kit valued at $17!  So whether you are a long time subscriber, or if you sign up today, you’ll get a FREE stamp set in April.  Sweet, right?  Well, if you purchase a 3-month prepaid subscription before March 31st , and redeem it before April 10th,  you will SAVE $ AND qualify for 1 Free Sale-A-Bration item!  Double Sweet with a cherry on top!

#3 – MYSTERY GIFT GIVE-AWAY!!! 

mysterygift

I love a good surprise, don’t you?  Well, I’m giving away, not one, not two, but three, yes 3, surprise packages of Stampin’ Up! goodies to the first 3 people who place an online order of $50 more (before tax & shipping) with me.  Each package will contain at least $25 worth of Stampin’ UP!  products, including 1 stamp set.  All you have to do is click here and place an order, use host code 3RMYGF9V ,choose your FREE Sale-A-Bration item and then email me and tell me you placed an order.  The first 3 people to do this, will win!  It’s that simple.

Your order can contain a 3-month Prepaid Paper Paper Subscription, Weekly Deals, or any other item.

So remember, if you shop thru me, qualify for a Sale-A-Bration item, and use Host Code 3RMYGF9V, and you’re one of the 1st 3 people, you’ll win a mystery gift.  East Peasy, right?  So start shopping now, before someone else beats to you to the first 3 spots. 

Well, I’m going to start packaging up those mystery gifts & get them ready to ship out while you start shopping.  Is one of the packages going to be mailed to you?

Nancy

Easter & Passover: A Lifestyle Blog Hop

Living-With-Style-Blog-Hop-for-Blog
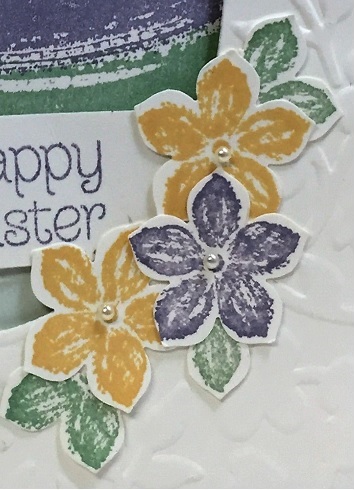
Welcome to our Blog Hop! Easter and Passover are quickly approaching, and today we have some great ideas, inspiration, tips, resources and how-to for you this Easter or Passover holiday as you move along through the blog hop.

You may just be starting the blog hop or may have come from Pam Baker of The Birch Cottage on our Living with Style Blog Hop. If you get off track at any time, the full lineup below will help you move along from blog to blog so you make sure to see and learn from all of the articles featured here today.

IMG_6413[1]

“Work of Art” is one of the most versatile stamp sets I have ever owned!  Due to the creative genius of many people who envisioned various objects from the swishes and swooshes and shapes in this stamp set, I have made flowers, sailboats, snowmen, and now an Easter Egg with this set!

I used the large swish in various ink colors to create the rainbow of color, from Pink Pirouette, to So Saffron, to Wisteria Wonder, to Mint Macaron to Soft Sky.  This layer was adhered to a Wisteria Wonder card base.

TIP:  I used my Stamp-a-ma-Jig to get my swishes placed just perfectly!  A must when using wood mount or clear mount stamps and precise placement is critical.

Another sheet of Whisper White card stock was embossed with the Spring Flowers TIEF then cut with the Oval Framelits.  Propped up on stampin’ dimensionals, this is placed on top of the rainbow stamped layer.  (NOTE:  The Spring Flowers TIEF is retired, but you can buy it on the CLEARANCE RACK while supplies last!  Sweet deal!)

The finishing touches come from the addition of a little banner stamped with the “Happy Easter” sentiment in Wisteria Wonder from “Circle of Spring” stamp set.    A few flowers stamped from Petite Petals and cropped with the Petite Petals Punch in coordinating colors finish off the card!

close up

TIP:  I stamped and punched a flower in Mint Macaron ink and cut the flower into 2 petals, 2 petals and 1 petal to create the leaves!

I hope you enjoyed my project today.  If you don’t already own the Work of Art stamp set, I encourage you to add this to your collection.  You won’t regret it!

The next stop is  Lisa Milligan at Life on Merlin on Living with Style Blog Hop! Thanks for visiting and I hope to see you again next time around!

Nancy

Work of Art Wood-Mount Stamp Set by Stampin' Up!      Stamp-a-ma-Jig by Stampin' Up!
Ovals Collection Framelits Dies by Stampin' Up!    Spring Flowers Textured Impressions Embossing Folder by Stampin' Up!        Petite Petals Wood-Mount Bundle by Stampin' Up!       Circle of Spring Photopolymer Stamp Set by Stampin' Up!

What’s a Girl to do when….

…her balloon punch is on backorder?   Well, in the words of Clint Eastwood, “Adapt, Improvise, and Overcome”. (Actually, I think Clint was quoting the Marines).  So I did just that!

Cucumber Crush Balloons

I finally had a chance to play with my new “Party Pants” stamp set but since my balloon punch is on backorder, I knew I’d only be stamping in one dimension.  But I think I created a pretty interesting element.  I’m almost glad my punch is on backorder because it forced me to get creative!

Take a close look at the balloons.  Do you see what I did there?  Here’s a close-up:balloons 
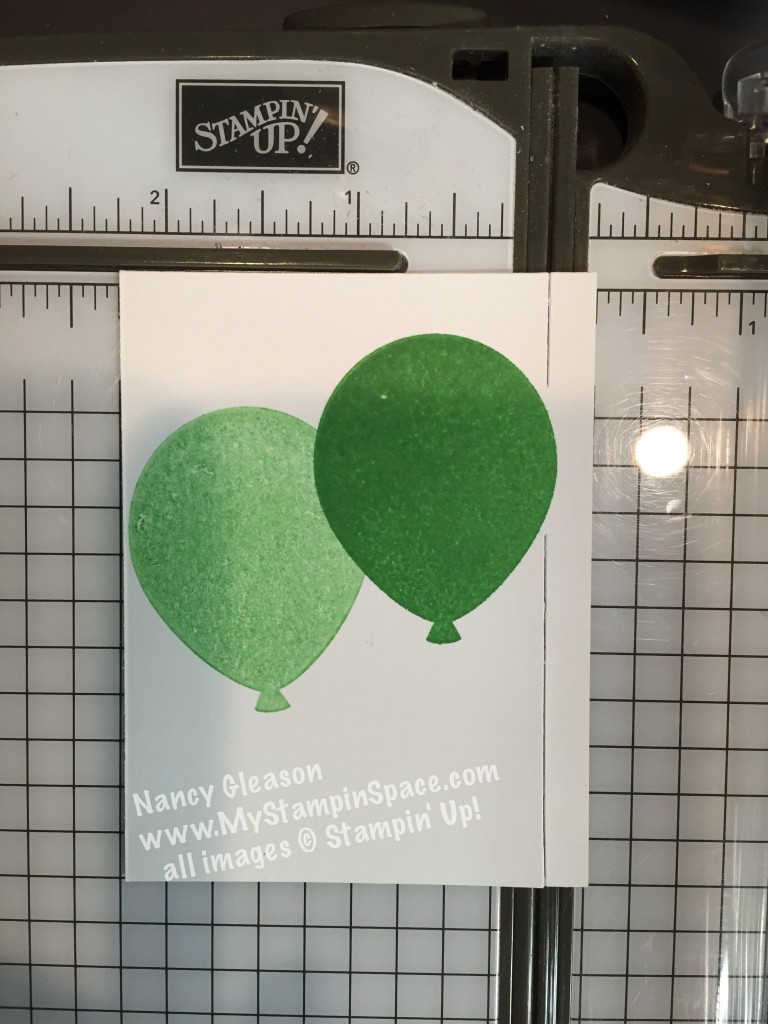
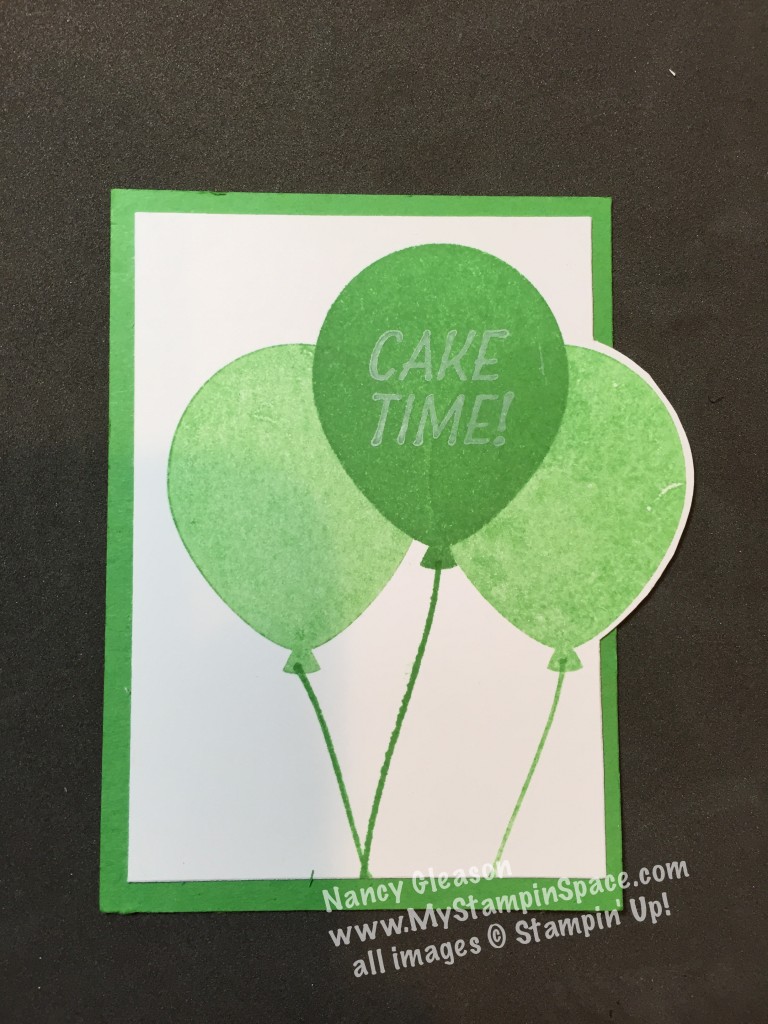
I trimmed the paper right up to the balloons, then used my paper snips to snip around the balloon.  I could not have achieved this effect with punch.  I’m really glad I discovered this technique.  Actually, I’ve never seen anyone else do this, so I may have even invented this technique!   That means I’ll have to name it.  Hmm, what to call it?  Well, I digress.  But,  I can’t wait to try it with another shape; perhaps flowers.

IMG_6513

Since I knew I wanted this panel to measure 2-1/4″ wide, I set it in my trimmer at that dimension.  I cut from the top down to the balloon,

IMG_6514

and then from the bottom up to the balloon.  Then I used my paper snips to finish it off!

IMG_6512

Easy peasy!  And here’s the final picture again.

Cucumber Crush Balloons

Thanks for stopping by My Stampin Space.  I hope you liked this and that you might try it yourself too.  If you do, send me a picture of your creation and I’ll feature it on my blog.  Leave me a comment and tell me what you think. – Nancy

If you want any of the  supplies I used to make this, shop my store safely & securely 24/7 from the comfort of your home.  Just click here or on any item listed below!  The Party Pants stamp set is FREE during Sale-A-Bration with a qualifying order, but only for a few short more days.  Sale-A-Bration ends March 31st so get yours now.  This is only available whiles supplies last and it is possible it will sell out before March 31st.

Come back on Wednesday, I”ll have a special treat in store for  you.  I’ll be participating in a blog hop featuring Easter & Passover projects and I think you’ll be amazed at the talent on this blog hop.

Some Things Just Get Better with Age!

Look Who’s Turning 3!   Paper Pumpkin!

BirthdaySlide

Well at the risk of sounding like a Virginia Slim ad, “You’ve come a long way, baby!”  Yes, I remember the very first Paper Pumpkin kit.  It was, well, ok.  It was cute, but nothing too spectacular.  And to be honest for the first year I didn’t subscribe.   But Stampin’ UP! has really stepped up the quality of the kits and the projects in each one.  I love my Paper Pumpkin kits and look forward to them and can’t wait to see what project each month’s kit contains.

This month, March 2016, Paper Pumpkin turns 3.  To celebrate, the kits will arrive in a special edition blue box, and it should be something extraordinary!

I urge you, if you don’t already subscribe, CLICK THIS LINK NOW!  For only $19.95 plus tax, it is really one of the best deals out there, no coupon needed.  When you subscribe by the 10th, you’ll receive the special edition March kit.

Then, each month you will get a truly creative craft kit; filled with all the supplies you need, color photos and instructions, and an exclusive stamp set and ink spot, to make one of a kind projects, shipped right to your house.

Subscribe to Paper Pumpkin here. 

You’ll be glad you did!

Nancy

What did my Stamp Club want to make?

Pot of Gold at the end of the Rainbow
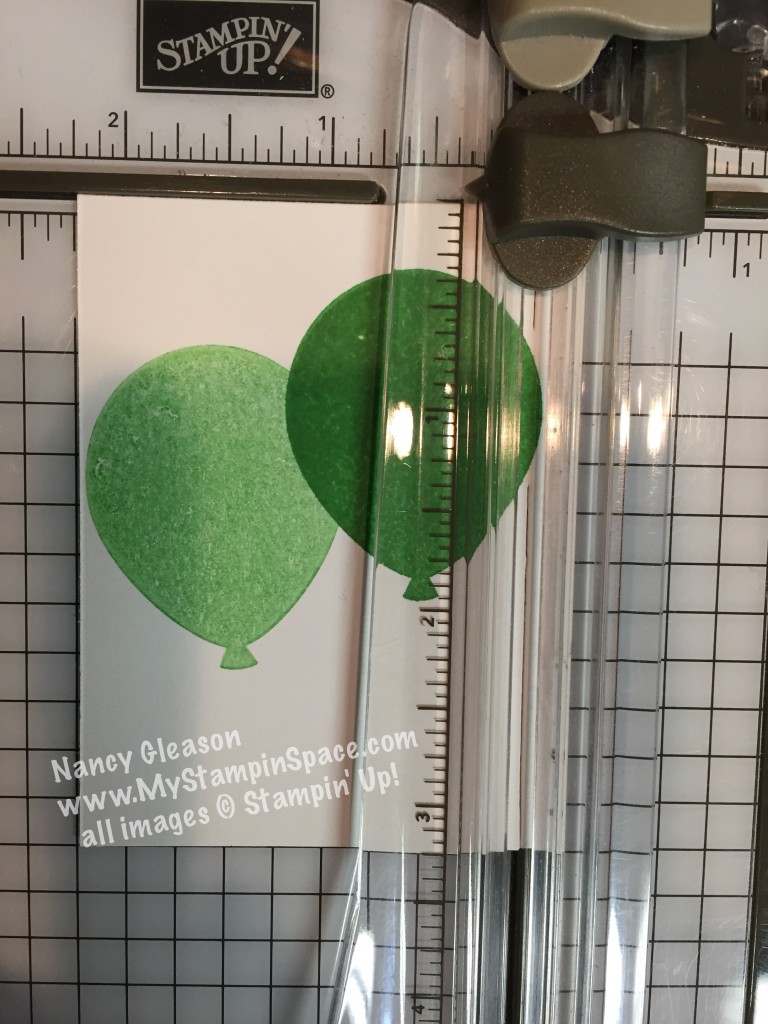
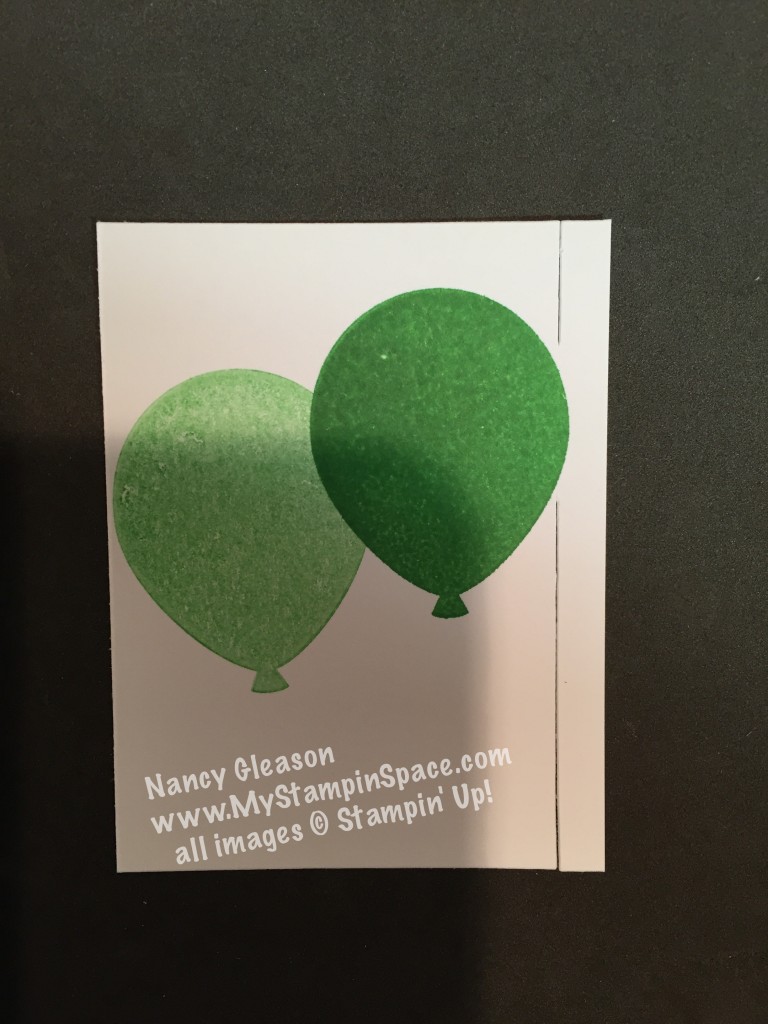
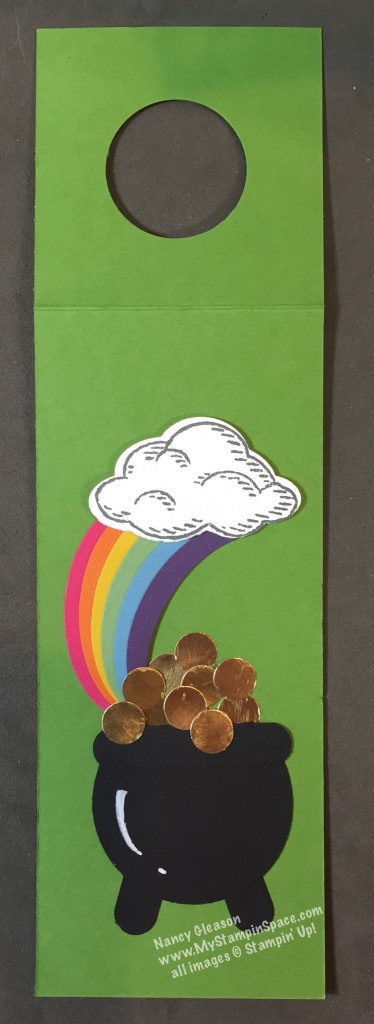
When I asked the ladies in my Stamp Club if there was anything special they wanted to make, they answered that they wanted to make something for St. Patricks’ Day.

Well, I didn’t want to just make a run of the mill, ordinary 3 or 4 leaf clover.  So I thought of a pot of gold (I’d seen a cute punch art pot on Pinterest) but I knew we would need a rainbow.  After all, the pot of gold is found at the end of the rainbow, so I needed to make a rainbow.  Well, since I didn’t own a rainbow stamp, I really had to put my thinking cap on and get my creative juices flowing at the same time!  Not any easy feat if you know me!  Ha Ha.

Since I had my punches out to make the pot of gold, I thought maybe I could just punch art my way to a rainbow.  The extra large oval punch and thin strips of cardstock combine to give me thin arched shapes of paper which I glued together to form the end of the rainbow.  A cloud stamped from the “Sprinkles of Life” stamp set and punched with the coordinating Tree Builder punch gives the rainbow a starting point.

For the rainbow, I used Melon Mambo, Pumpkin Pie, Daffodil Delight, Wild Wasabi, Marina Mist, and Elegant Eggplant cardstock.  The pot was made by slicing the top off a 2″ circle punched out of Basic Black Cardstock.  A Word Window punch was used for the rim of the pot, and another was cut in half and used for the legs.  A white Uni-ball gel pen let me create the hi-light on the side of the pot.  The 1/2″ circle punch was used to cut out the coins from gold foil.

This was a fun little project to put together.  The ladies really enjoyed it, and we had a special guest stamper with us that night!IMG_6391

IMG_6393

Even Sadie, 5, enjoyed making her project and did a great job!  She was grinning from ear to ear and couldn’t wait to show her Dad when he came to pick her up!  (We believe in starting ’em young!)

If love to know if you are going to try making this yourself too.  We put ours on water bottle tags, what will you put yours on?  A bookmark, a card, a gift tag?  Please leave me a comment and tell me what you will do.  And save this to your Pinterest board for future reference too.  You can follow me on Pinterest too.

Well, thanks for stopping by My Stampin’ Space today, and Happy St. Patrick’s Day to you !

Don’t forget to shop my store if you need to order any supplies to make this or anything else.  With every $50 you purchase, you get to choose a free Sale-A-Bration item as well.

Nancy

You’re Never to Old to….

….Learn something new!  And class is session now.  Practice your papercrafting skills, learn new techniques and have fun with friends, old & new.  Sign up for a class below, or if you’d rather, schedule a private, in-home workshop and I’ll bring the party to you!

Fri., Mar 11th – 7-9:30 PM   Sip & Stamp! BYOB of wine or beverage of your choice to enjoy while we stamp and make cards! $12.00 includes all supplies & complimentary cheese & crackers.

Tues., Mar 15th –  6:30-8:45 PM Paper Crafting Class – $12.00 includes all supplies

Fri., Mar 25th     Stamp Club (closed)

Tue., Mar 29th –  6:30-8:45 PM Paper Crafting Class $12.00 includes all supplies

Thurs, Mar 31st – 7-8:00 PM    Paper Pumpkin Party–bring  your Paper Pumpkin kit and we’ll assemble them together! Or come just to see what all the buzz is about; there’s always plenty to share!      *(My house)

Tues., Apr 5th–  6:30-8:45 PM Paper Crafting Class $12.00 includes all supplies

Fri., Apr 15th –  7-9:30 PM    Sip & Stamp! BYOB of wine or beverage of your choice  to enjoy while we stamp and make cards! $12.00 includes all supplies & complimentary cheese & crackers..

Tue., Apr 19th –  6:30-8:45 PM Paper Crafting Class     $12.00 includes all supplies

Thur., Apr 28th  – 7-8:00 PM    Paper Pumpkin Party–bring  your Paper Pumpkin kit and we’ll assemble them together! Or come just to see what all the buzz is about; there’s always plenty to share!      *(My house)

Teacher saysDon’t wait – seating is limited and ADVANCE REGISTRATION IS REQUIRED!!!   Email or Call/Text  570-357-4580 to sign-up.  Registration closes 2 days prior to class.   All classes will be at Walden Pond Wellness Center 540 Gleason Dr., Moosic, PA unless noted otherwise.

BTW,  I’ll also be taking part in a CRAFT SHOW!    Sunday, March 6th  from 10:00AM-3:00PM at the Riverside High School Storrs Street in Taylor, PA. Stop by and see me.  I’ll have finished cards for sale as well as retired stamp sets and papercrafting kits, and a few gift items as well.  Mark you calendars and come out and see me there.

What is your favorite day of the month?

One of my favorite days of the month is the day my little red box of fun is in my mailbox.  You know what I mean, my Paper Pumpkin kit.  It’s a little creative escape that I treat myself to each month.  For less than $20 a month, my fun just keeps coming.  Except for this month.  Due to a little snafu on my part, I mistakenly set my subscription to skip a month!  Oh my, what was I thinking?  Clearly I wasn’t.  Well, I put a call into Stampin’ Up! and all is well.  Or at least it will be in a few days.  The folks over at Stampin’ Up! are sending my February Paper Pumpkin to me.  Oh, and I fixed my account to be sure that doesn’t happen again!  So in the meantime, all I can do is:

So, now you can see why I just couldn’t miss a month of my Paper Pumpkin.  And you shouldn’t either.  After all, you deserve a creative escape too!

And now, you can get it on sale, too!  What could be sweeter than that?  A free Sale-A-Bration too!  Yup, that’s right!

blogpost_pp_sab_header_12-29-2015_na
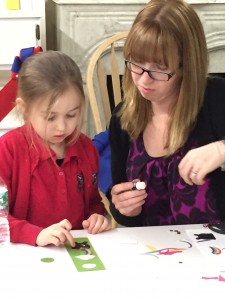
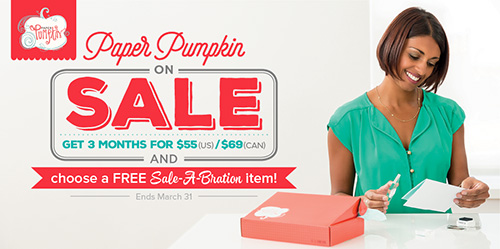
Order a 3-month prepaid subscription for just $55 (regularly $59.85) and you’ll get 3 months of creative goodness delivered right to your door, AND your choice of one Sale-A-Bration item.  What will you choose?  Click here and here to see what your choices are.

So three months of creative bliss AND a free gift; what are you waiting for?  CLICK HERE, order your 3-month Paper Pumpkin subscription and your free gift.  (Or order a 6 month subscription and get 2 Free Sale-A-Bration items, or a 12 month subscription and get 4 FREE Sale-A-Bration items!  Super Sweet! )

I bet your favorite day will be the day your little red box is in your mailbox, too!

Nancy

Sale-A-Bration TAKE 2!

What will you choose for free?

When Stampin’ UP! launched their annual Sale-A-Bration campaign this year (Jan 5 – March 31), a few of the items were Limited Time only (thru Feb. 15).  Several new items were just added on Feb. 16 which will be available thru March 31st.

To see a list of the new items, click here.  To see the new items in action; watch the videos below.

What is Sale-A-Bration?  Only the best promotion ever!  Click here to learn more about Sale-A-Bration

With a qualifying $50 order of products, you can choose either of these products for FREE.  So which will you choose?  Leave me a comment and let me know which new Sale-A-Bration item is your favorite, and why.

Thanks,

See you soon.  If you like what you see here, please use the sign-up box on the right to subscribe to my mailing list.  And BE FRIENDLY – and be sure to forward this any of your friends that you think will like my blog too! Thanks!

Nancy

What would you CASE from the catalog?

CASE = Copy And Share Everything

Pals Blog Hop 2016 badgeWelcome to the Pals Blog Hop for February 2016. We are thankful you stopped by to take a look at our new 2016 Blog Hop monthly themes.  This month we are CASE-ing a project shown in a current Stampin’ Up! catalog. After all, with the Annual, Occasions and Sale-a-Bration catalogs available right now, there is much inspiration to choose from. We hope you enjoy our creations.

You may just be starting the Blog Hop or may have come from the previous link from the Line-up on the Pals Blog Hop listing shown below.  The full lineup will help you move along from blog to blog so you may see all the projects.

Here is my project:

Case the Catty

You may recognize this from the 2016 Occasions catalog, page 16.  It is part of the “Love Blossoms” product suite.  If you know me, or if you’ve been reading my blog, you know how much I love the product coordination with Stampin’ Up! products.   This product suite really delivers when it comes to product coordination!

While the Bloomin’ Hearts thinlits die may be the star of this product suite, the Bloomin’ Love stamp set is the supporting actress!  This card features the floral heart heat embossed in gold on a piece of Designer Series paper from the coordinating Love Blossoms Designer Series Paper stack which was shaped using the Lots of Labels framelits.  This shaped piece is the focal point of the card, but the details make it special!  The small flowers were stamped in Rose Red ink on the Rose Red card stock to frame our shaped paper.  A piece of Satin Ribbon and a string of pearls, and the little wooden heart all hail from the Love Blossoms Embellishment kit.   A few pearl basic jewels randomly placed tie everything into place.

TIP:  While it may look like I used Rose Red for my card base, I actually used Whisper White card stock cut and folded to a standard 4-1/4″ x 5-1/2″ size.  Then I cut a piece of Rose Red cardstock to the same size.  This allows me to:     1) -Wrap and adhere the ribbon to the back side of the cardstock layer before I glue it to the card base.  2) Have the inside of my card be white so it is easy to write on.  I like to keep things neat & tidy including the insides of my cards.

Thanks for visiting My Stampin’ Space.  Please leave me a comment at the end of this post and tell me what you think of my project.   To continue with the hop, please refer to the Blog Hop Line-up below.   We hope to see you on next month’s Pals Blog Hop!  – Nancy

  1. Mary Fish at Stampin’ Pretty
  2. Katy McGloin at Just Fun Stamping
  3. Debbie Mageed at Secret Stamper
  4. Jennifer Michalski at Stamping Serenity
  5. Kelly DeTommaso at Kelly’s Creative Corner
  6. Denise Hoepfner at The Mountain Magpie
  7. Debbie Crowley at expressively deb…
  8. Patti MacLeith at Papercrafts by Patti
  9. Beth McCullough at Stamping Mom
  10. Michelle Gleeson at StampinMojo.com
  11. Lisa Ann Bernard at Queen B Creations
  12. Susan Itell at Simple Stampin’
  13. Kalyn Shubnell at The Stamping Chronicles
  14. Jane Knudsen at see jane stamp
  15. Peggy Noe at prettypapercards
  16. Julie DiMatteo at The Paper Pixie
  17. Nancy Gleason at My Stampin Space — YOU ARE HERE —
  18. Tricia Chuba at ButterDish Designs
  19. Wendy Klein at Doggone Delightful Stampin’
  20. Kim Jolley at Stampin’ Artfully
  21. Rae Harper at Wild West Paper Arts
  22. Jackie Diediker at Stampin’ Jackie
  23. Karen Hallam at Karen’s Stampin’ Habit!

If you’d like to order any of the products I’ve used here, click here to go to my online store where you can shop securely 24/7 and have your purchases shipped right to your house. For every $50 in products you order, you can choose one item from the Sale-A-Bration catalog. Click on any of the items below to see each item I used in this project.

Built for Free Using: My Stampin Blog