First Pals Blog Hop of 2015

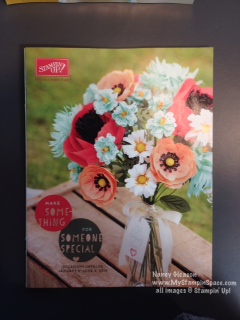
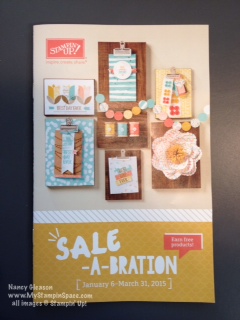
Welcome to the first Pals Blog Hop of 2015!  We hope your new year is off to a great creative start. To celebrate the start of a new Stampin’ Up! year, we are showcasing products from our newest catalog this month – the Occasions catalog. You may also see new Sale-a-bration products too. If you don’t know how to earn free Sale-a-bration products – contact your Stampin’ Up! demonstrator to learn more.

You may just be starting the blog hop or may have come from Becky Volpp at InkBlossomwithBecky. Use the full lineup below to move along from blog to blog so you see all of the new projects.

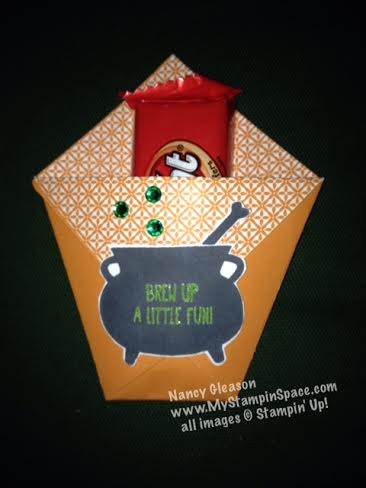
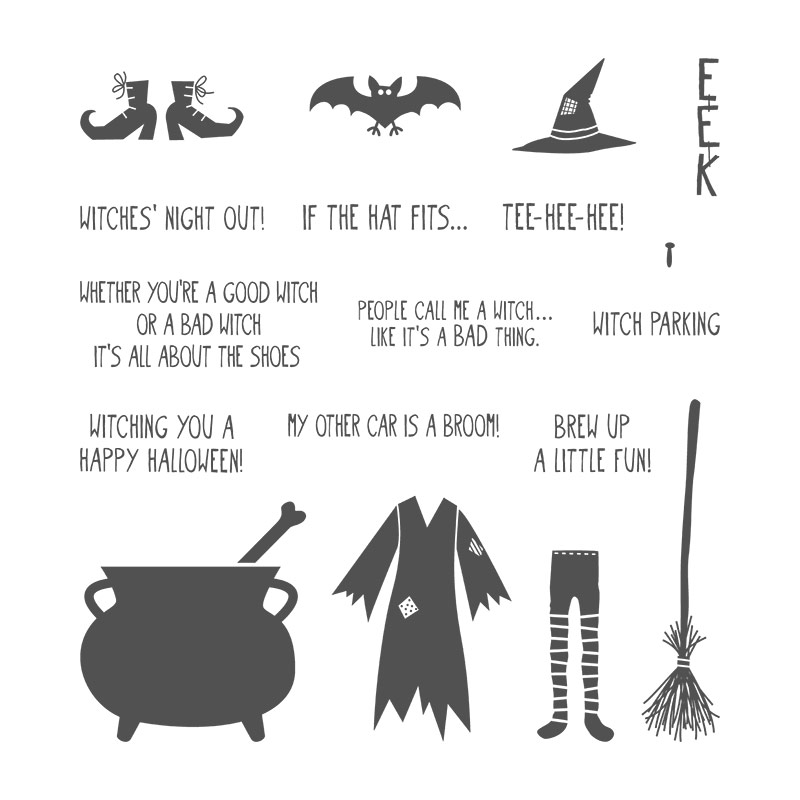
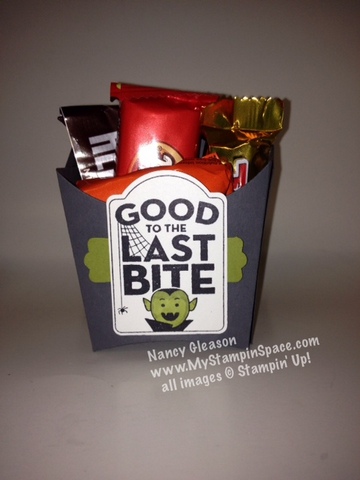
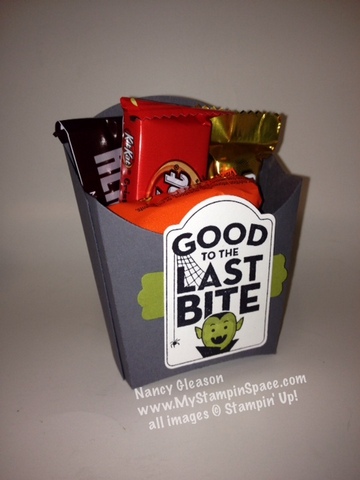
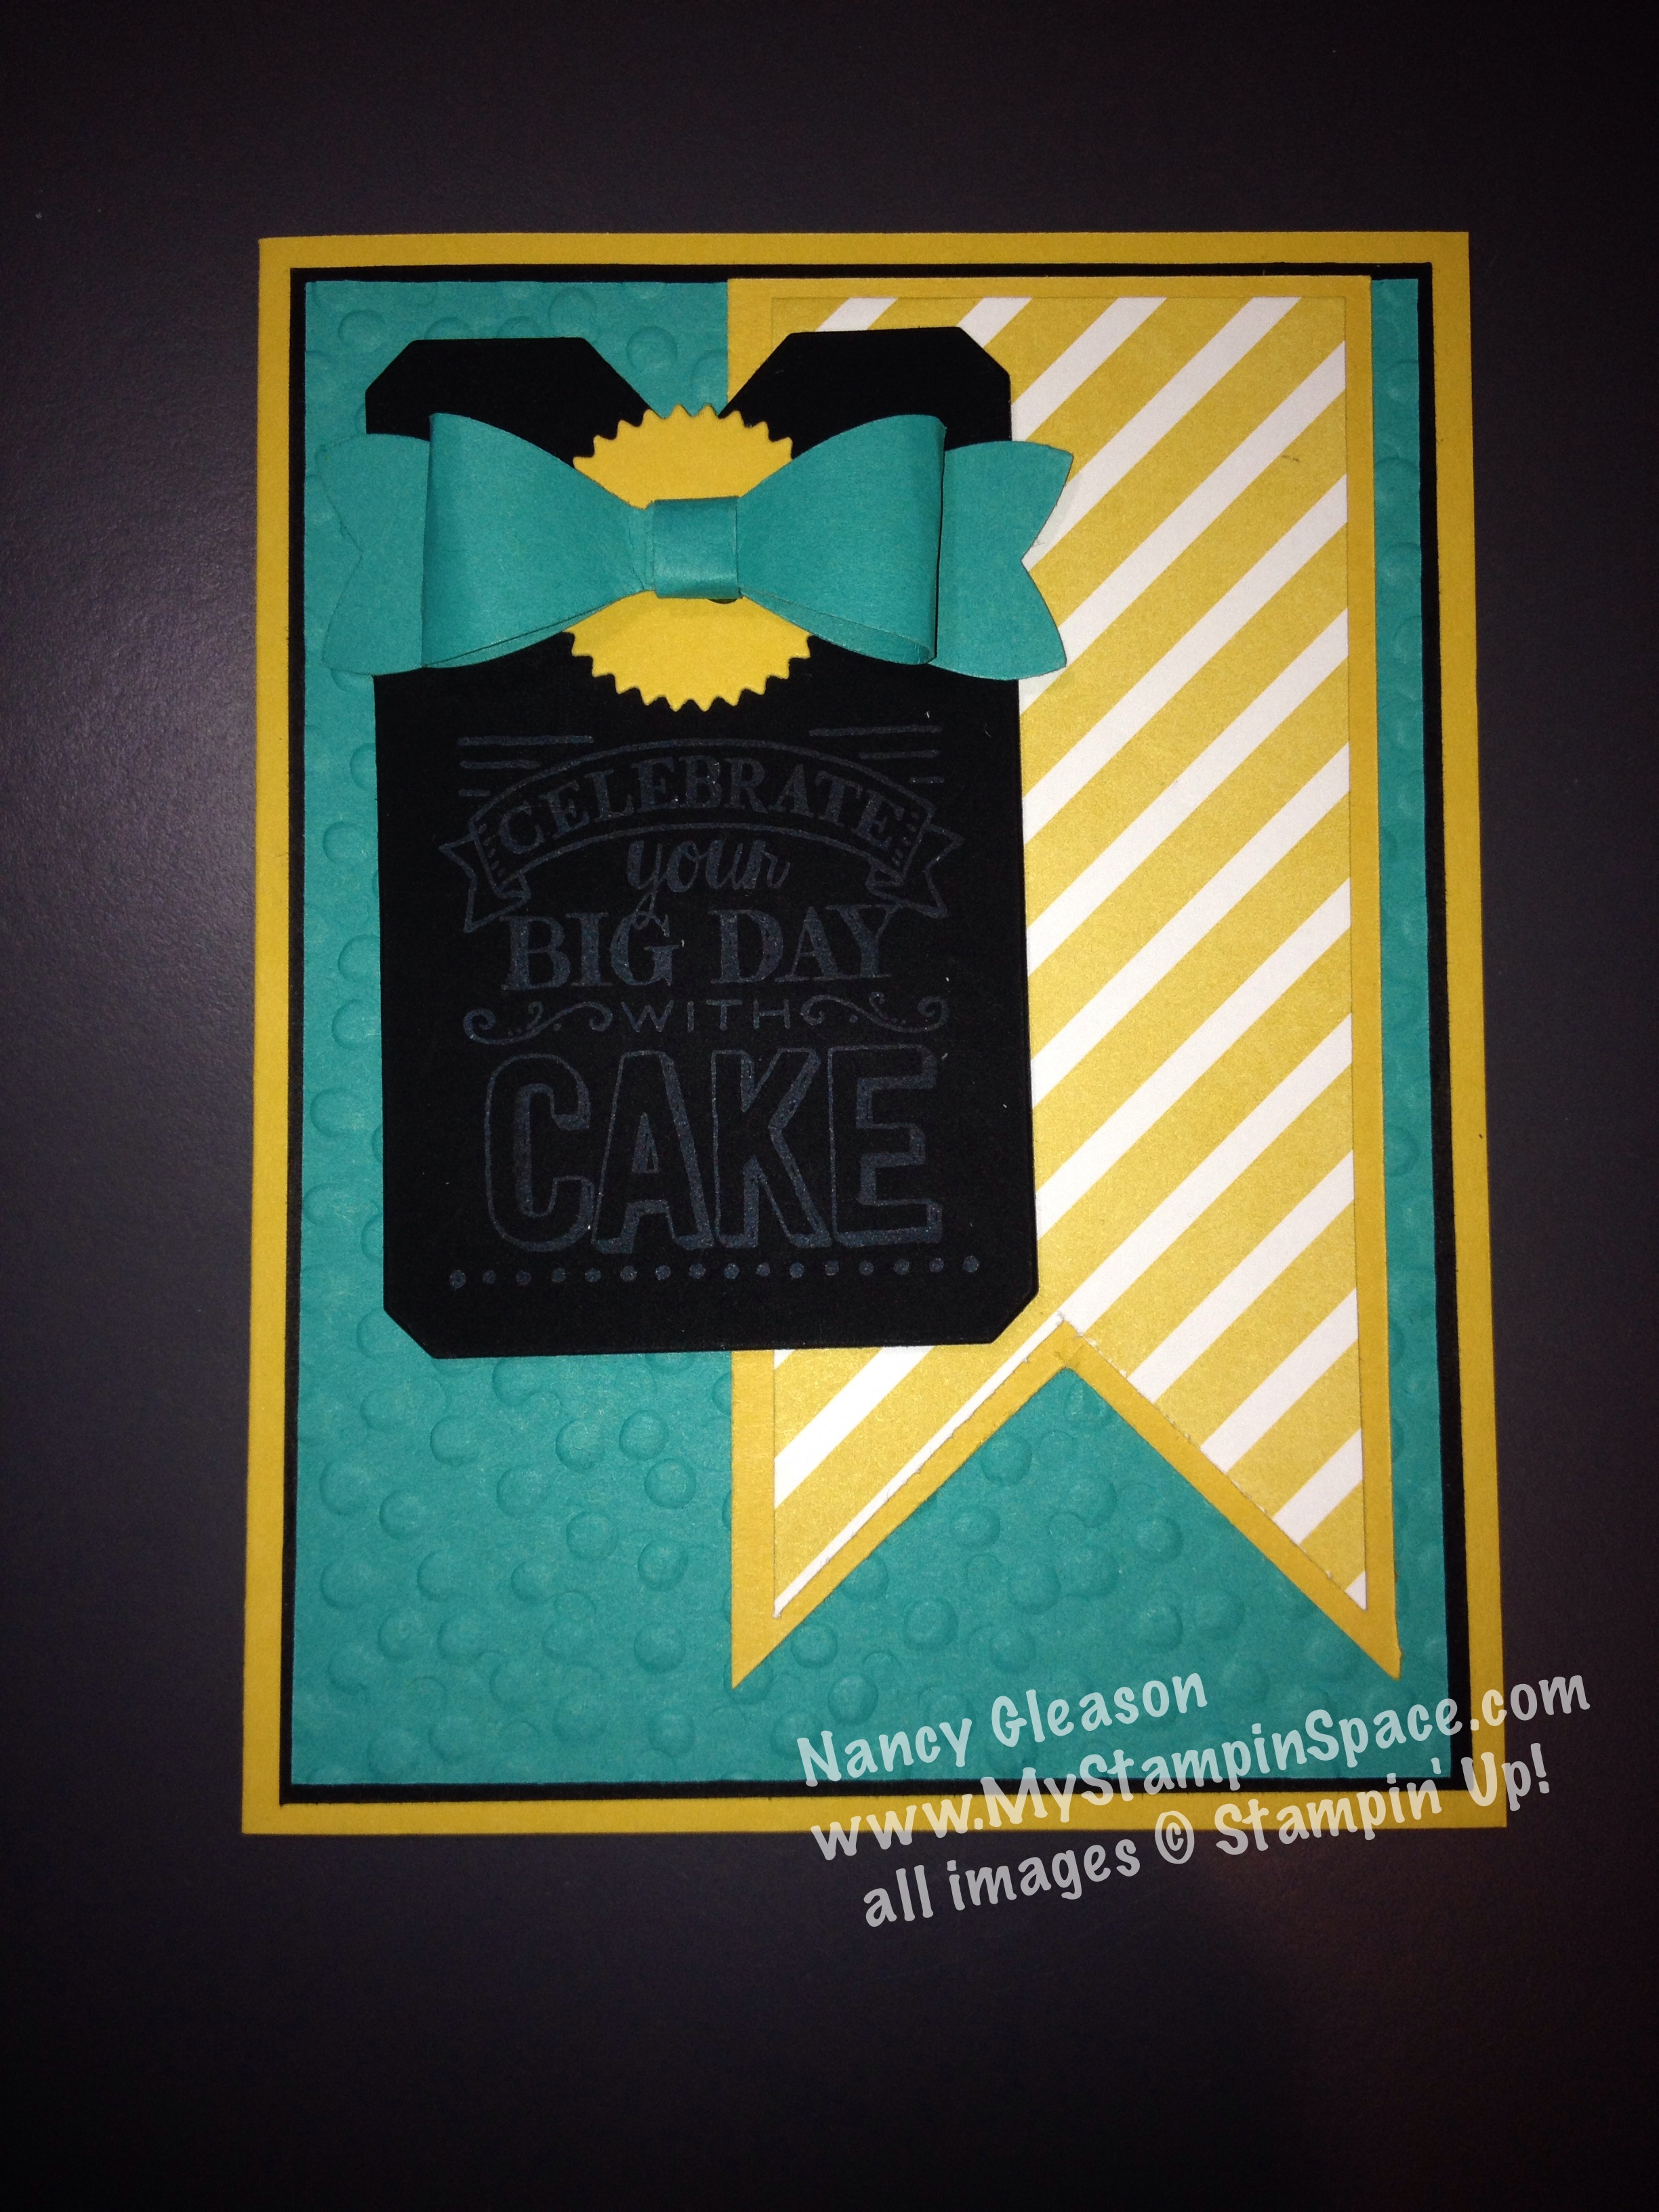
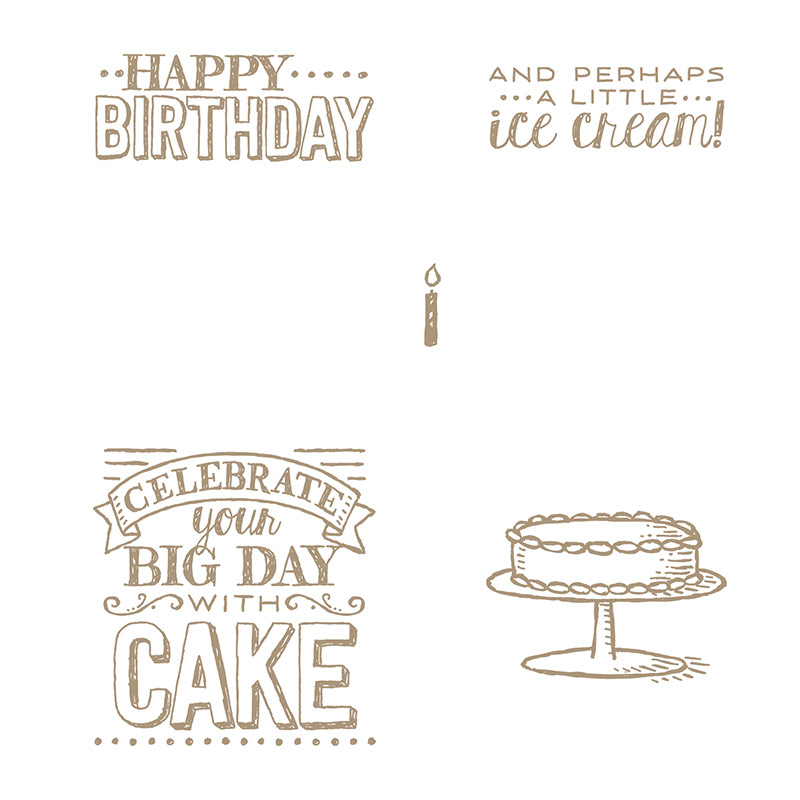
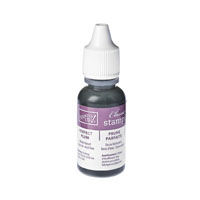
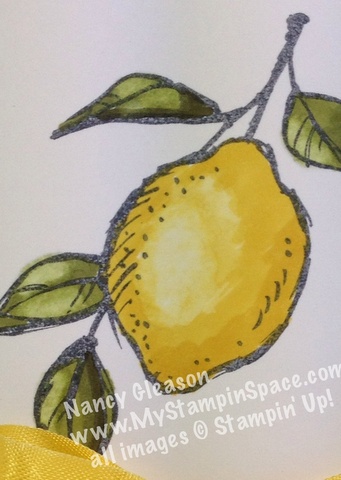
When I first saw the 2015 Occasions catalog, and Sale-A-Bration catalog, several items went straight to the top of my Must-Have List!  One product suite that really caught my eye was the Chalkboard Paper and Colored Chalk Ink pads on page 25.  The chalkboard technique and fonts are really hot & trendy right now and this just fit that trend.  (If you don’t believe me, just spend 3 minutes n Pinterest!)  The FREE stamp set, Big Day, was the perfect font style & images for the chalkboard technique so it’s kind of like a marriage made in heaven!

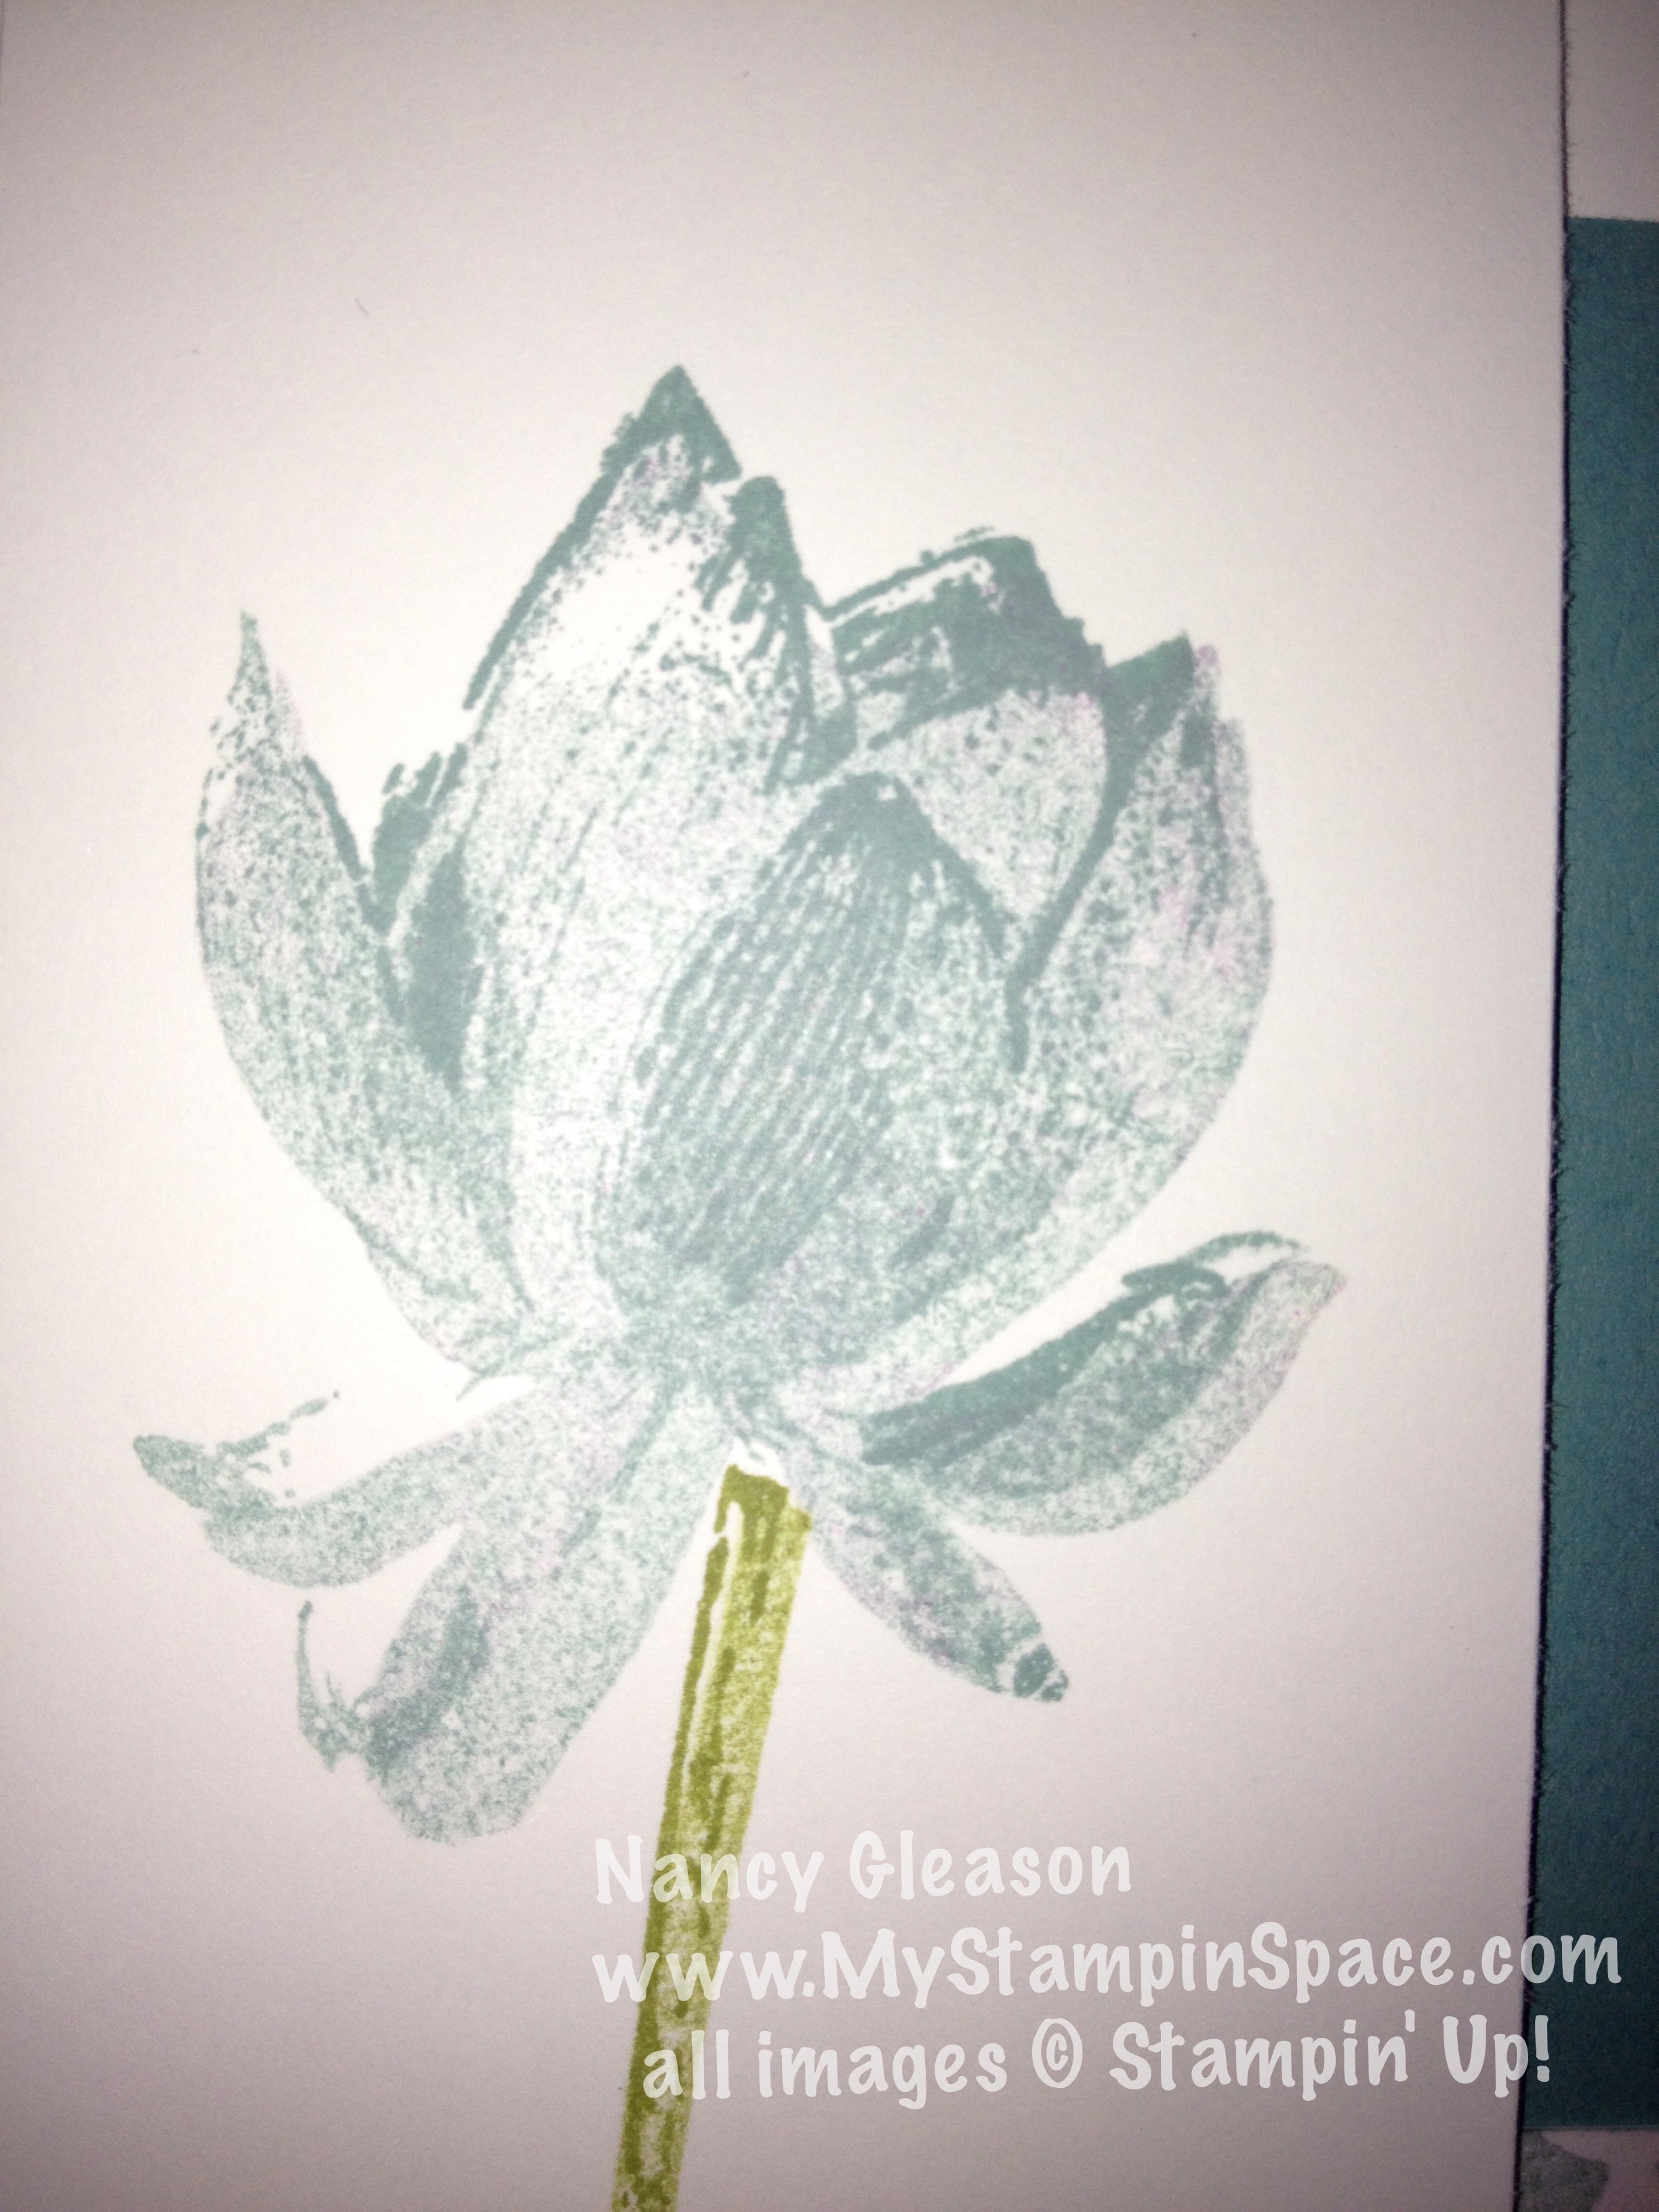
I must say that the color isn’t as deep as I hoped it would be, but using a trusty stamp-a-ma-jig, it is possible to double ink to achieve a darker color.  It also doesn’t photograph too well!  It does look much better in person.

Big Day and Chalkboard paper
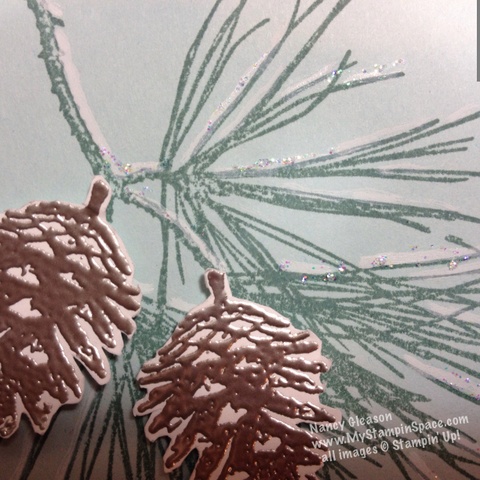
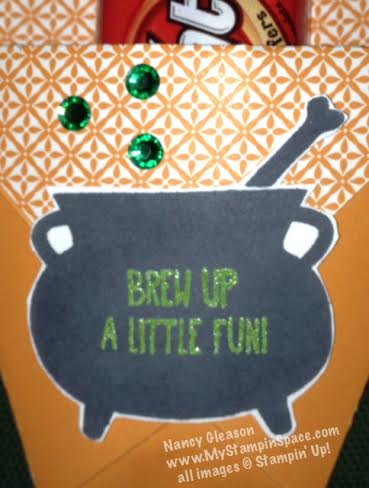
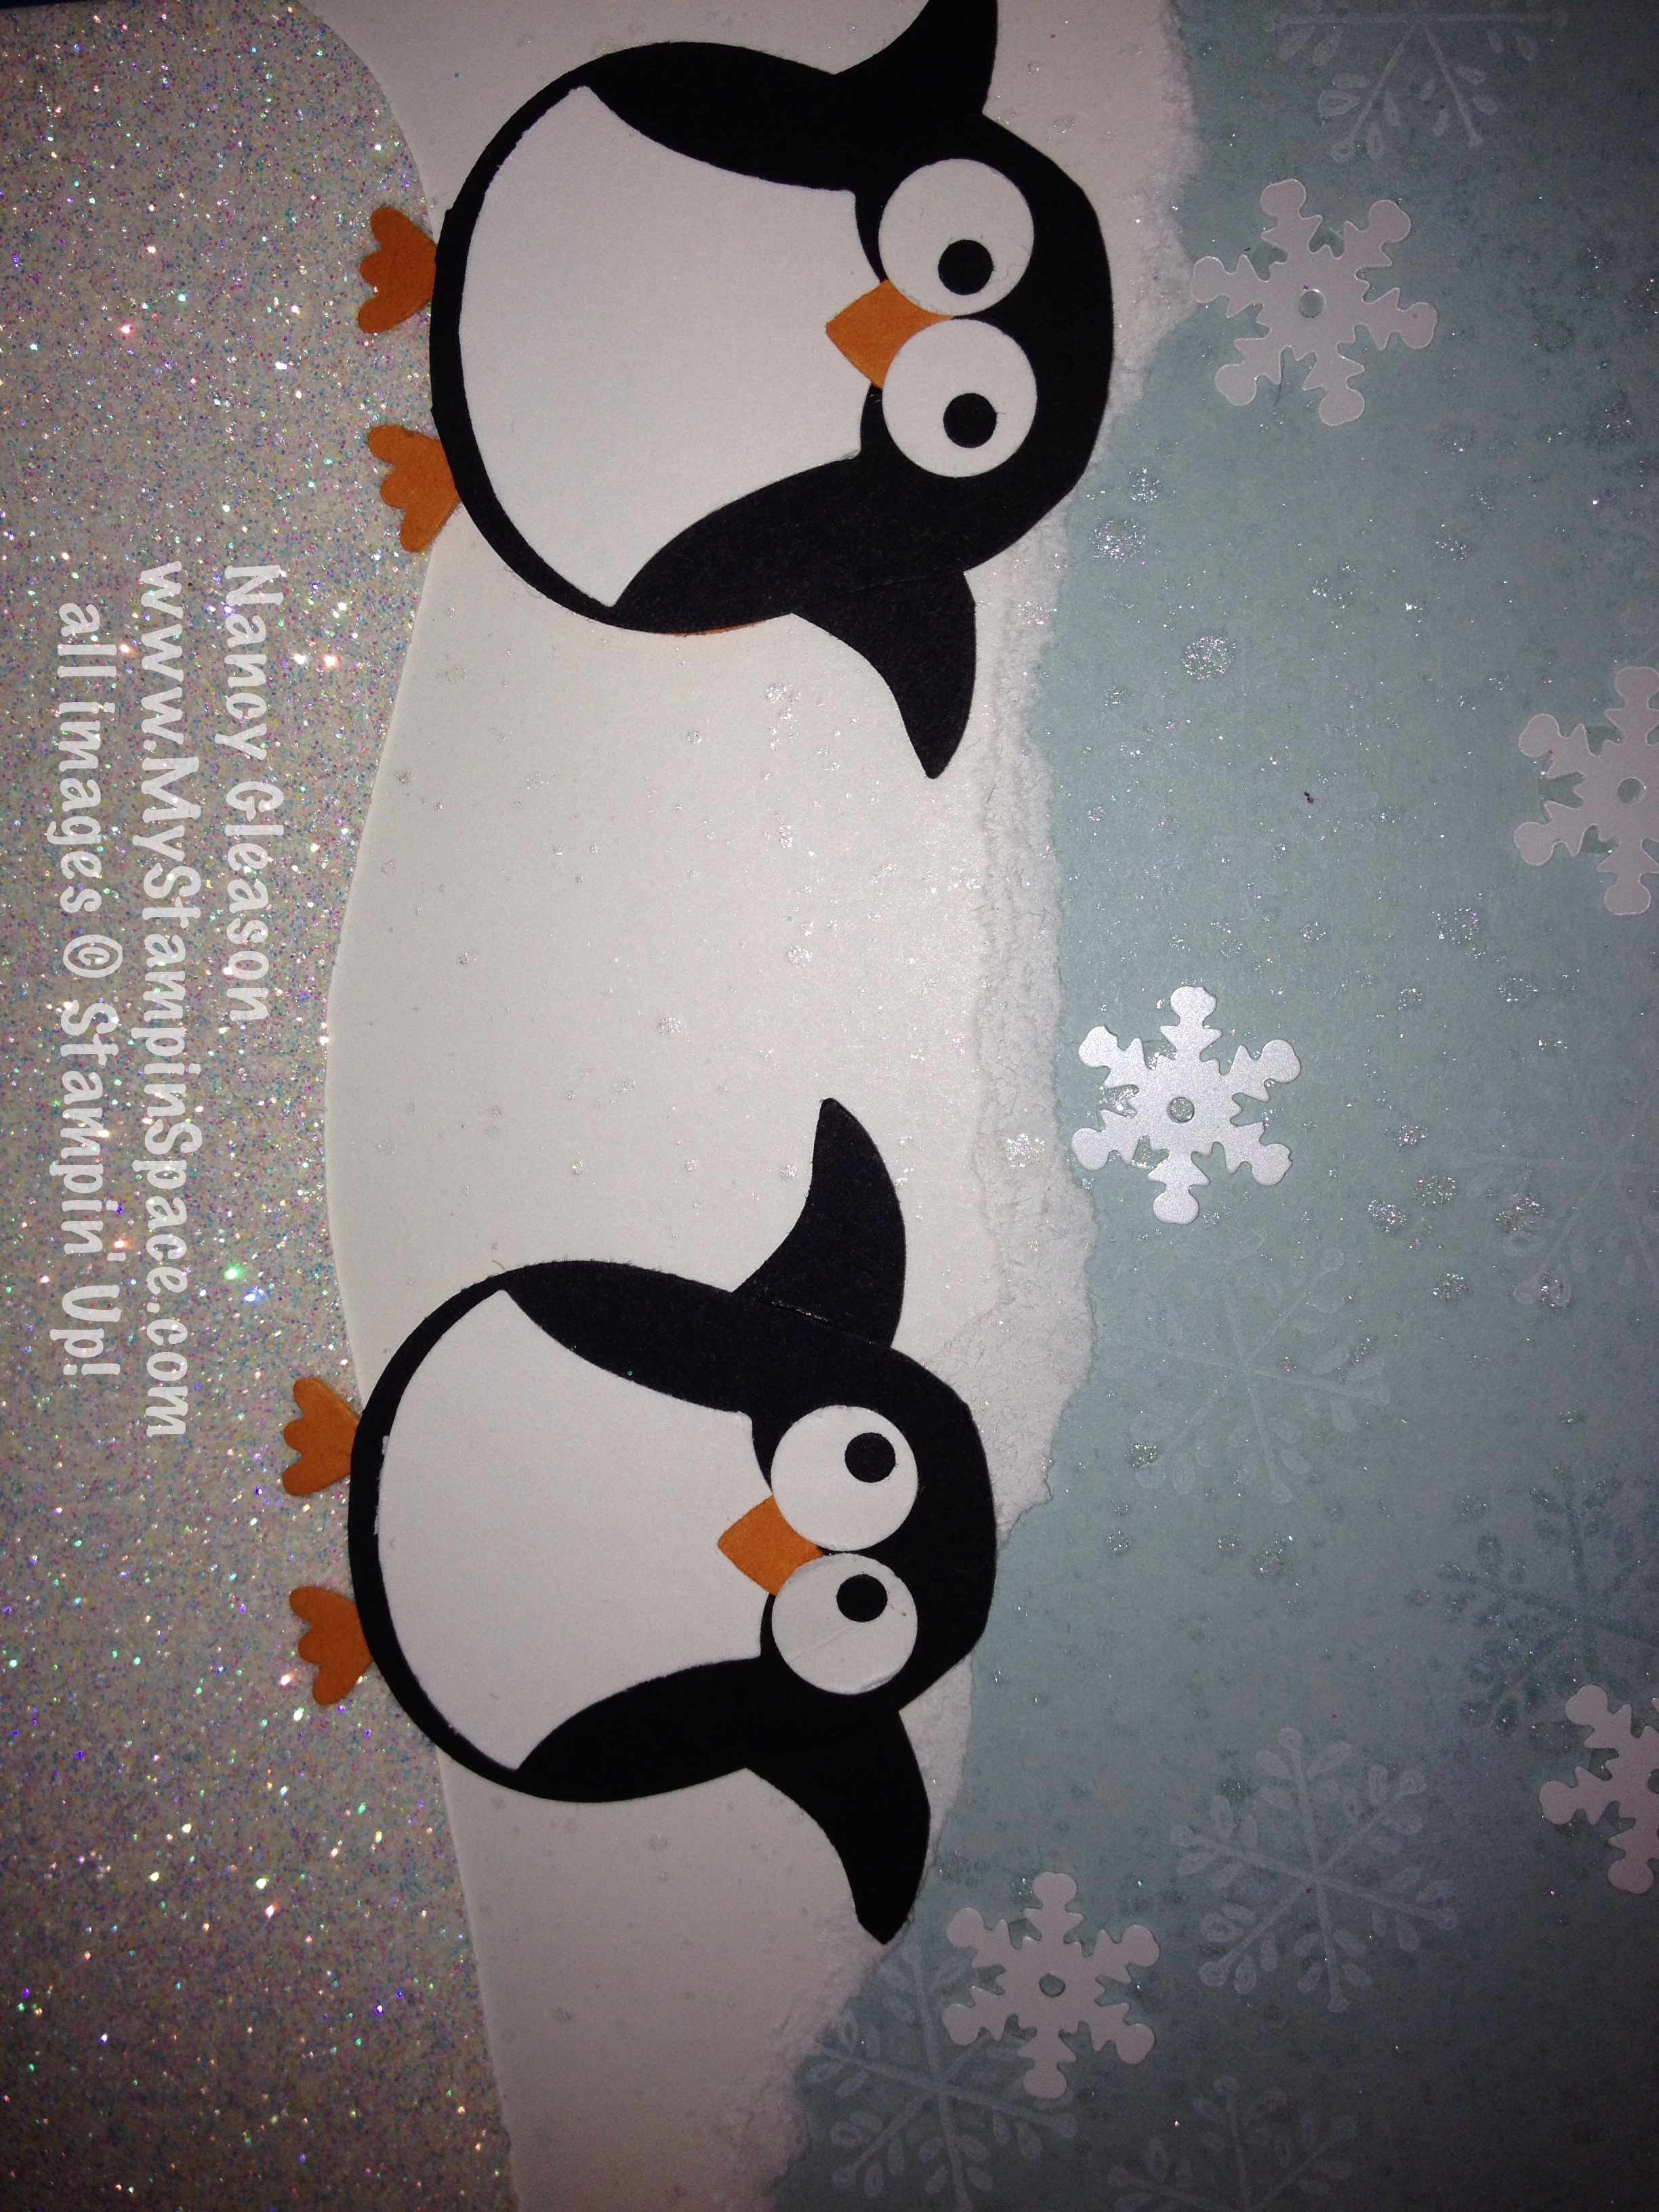
Here’s a closer up view of just the chalkboard portion:

IMG_4539 
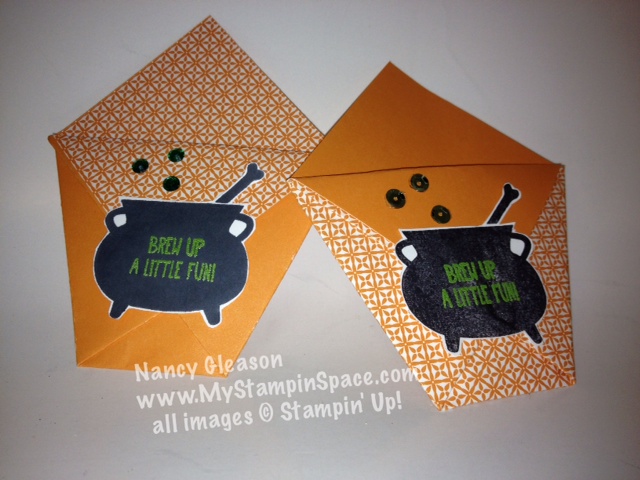
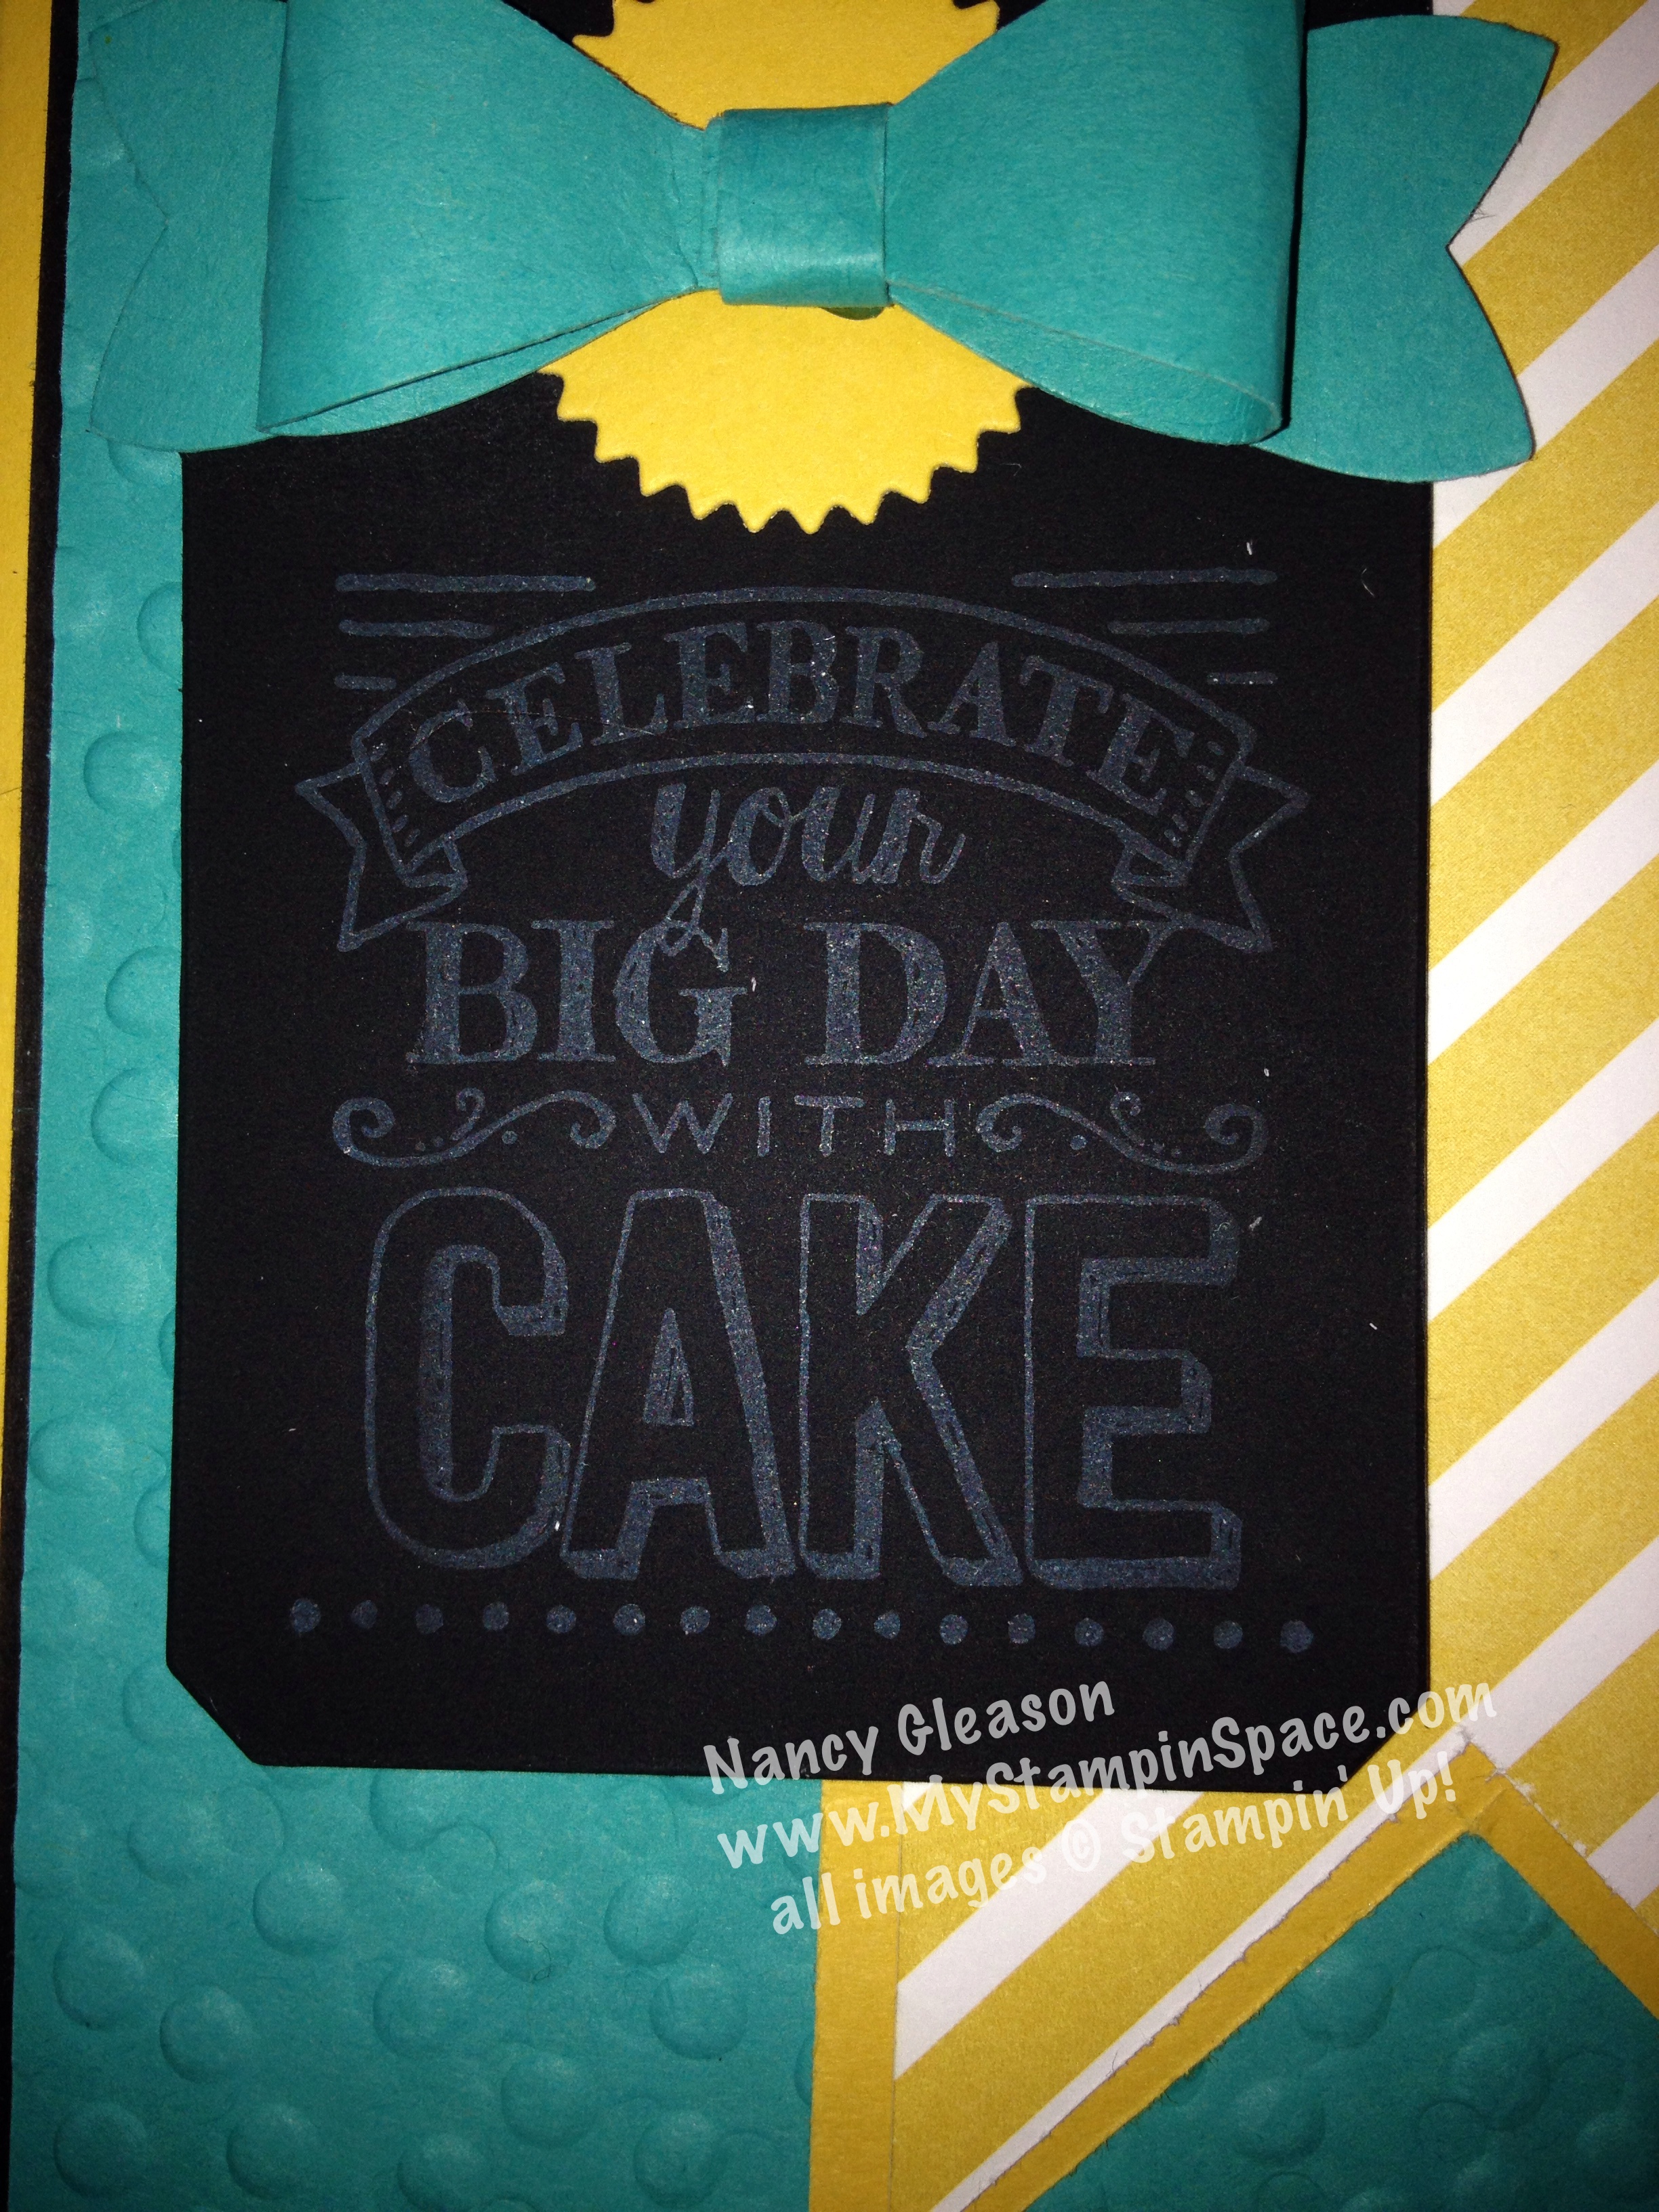
See what I mean about the images/font being just perfect for the Chalkboard technique?

139109G Big Day
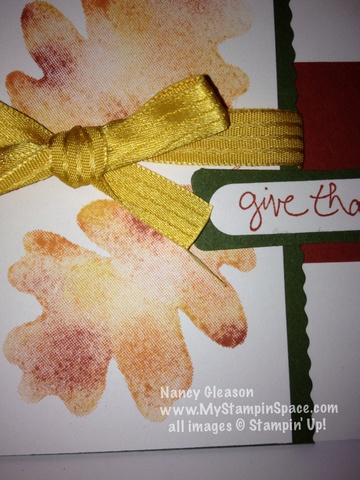
Another item that I knew I just had to have was the Bow Builder Punch.  This is like a mini version of the  Gift Bow Bigz Die.

IMG_4540
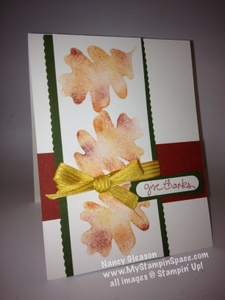
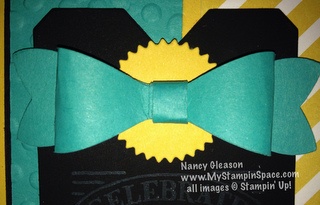
How adorable is this bow?  It adds just the right finishing touch.  I’ve been making lots of bows lately – you’ll be seeing them on several of the Valentines’ Day cards I have in the works as well as birthday cards.

IMG_4538
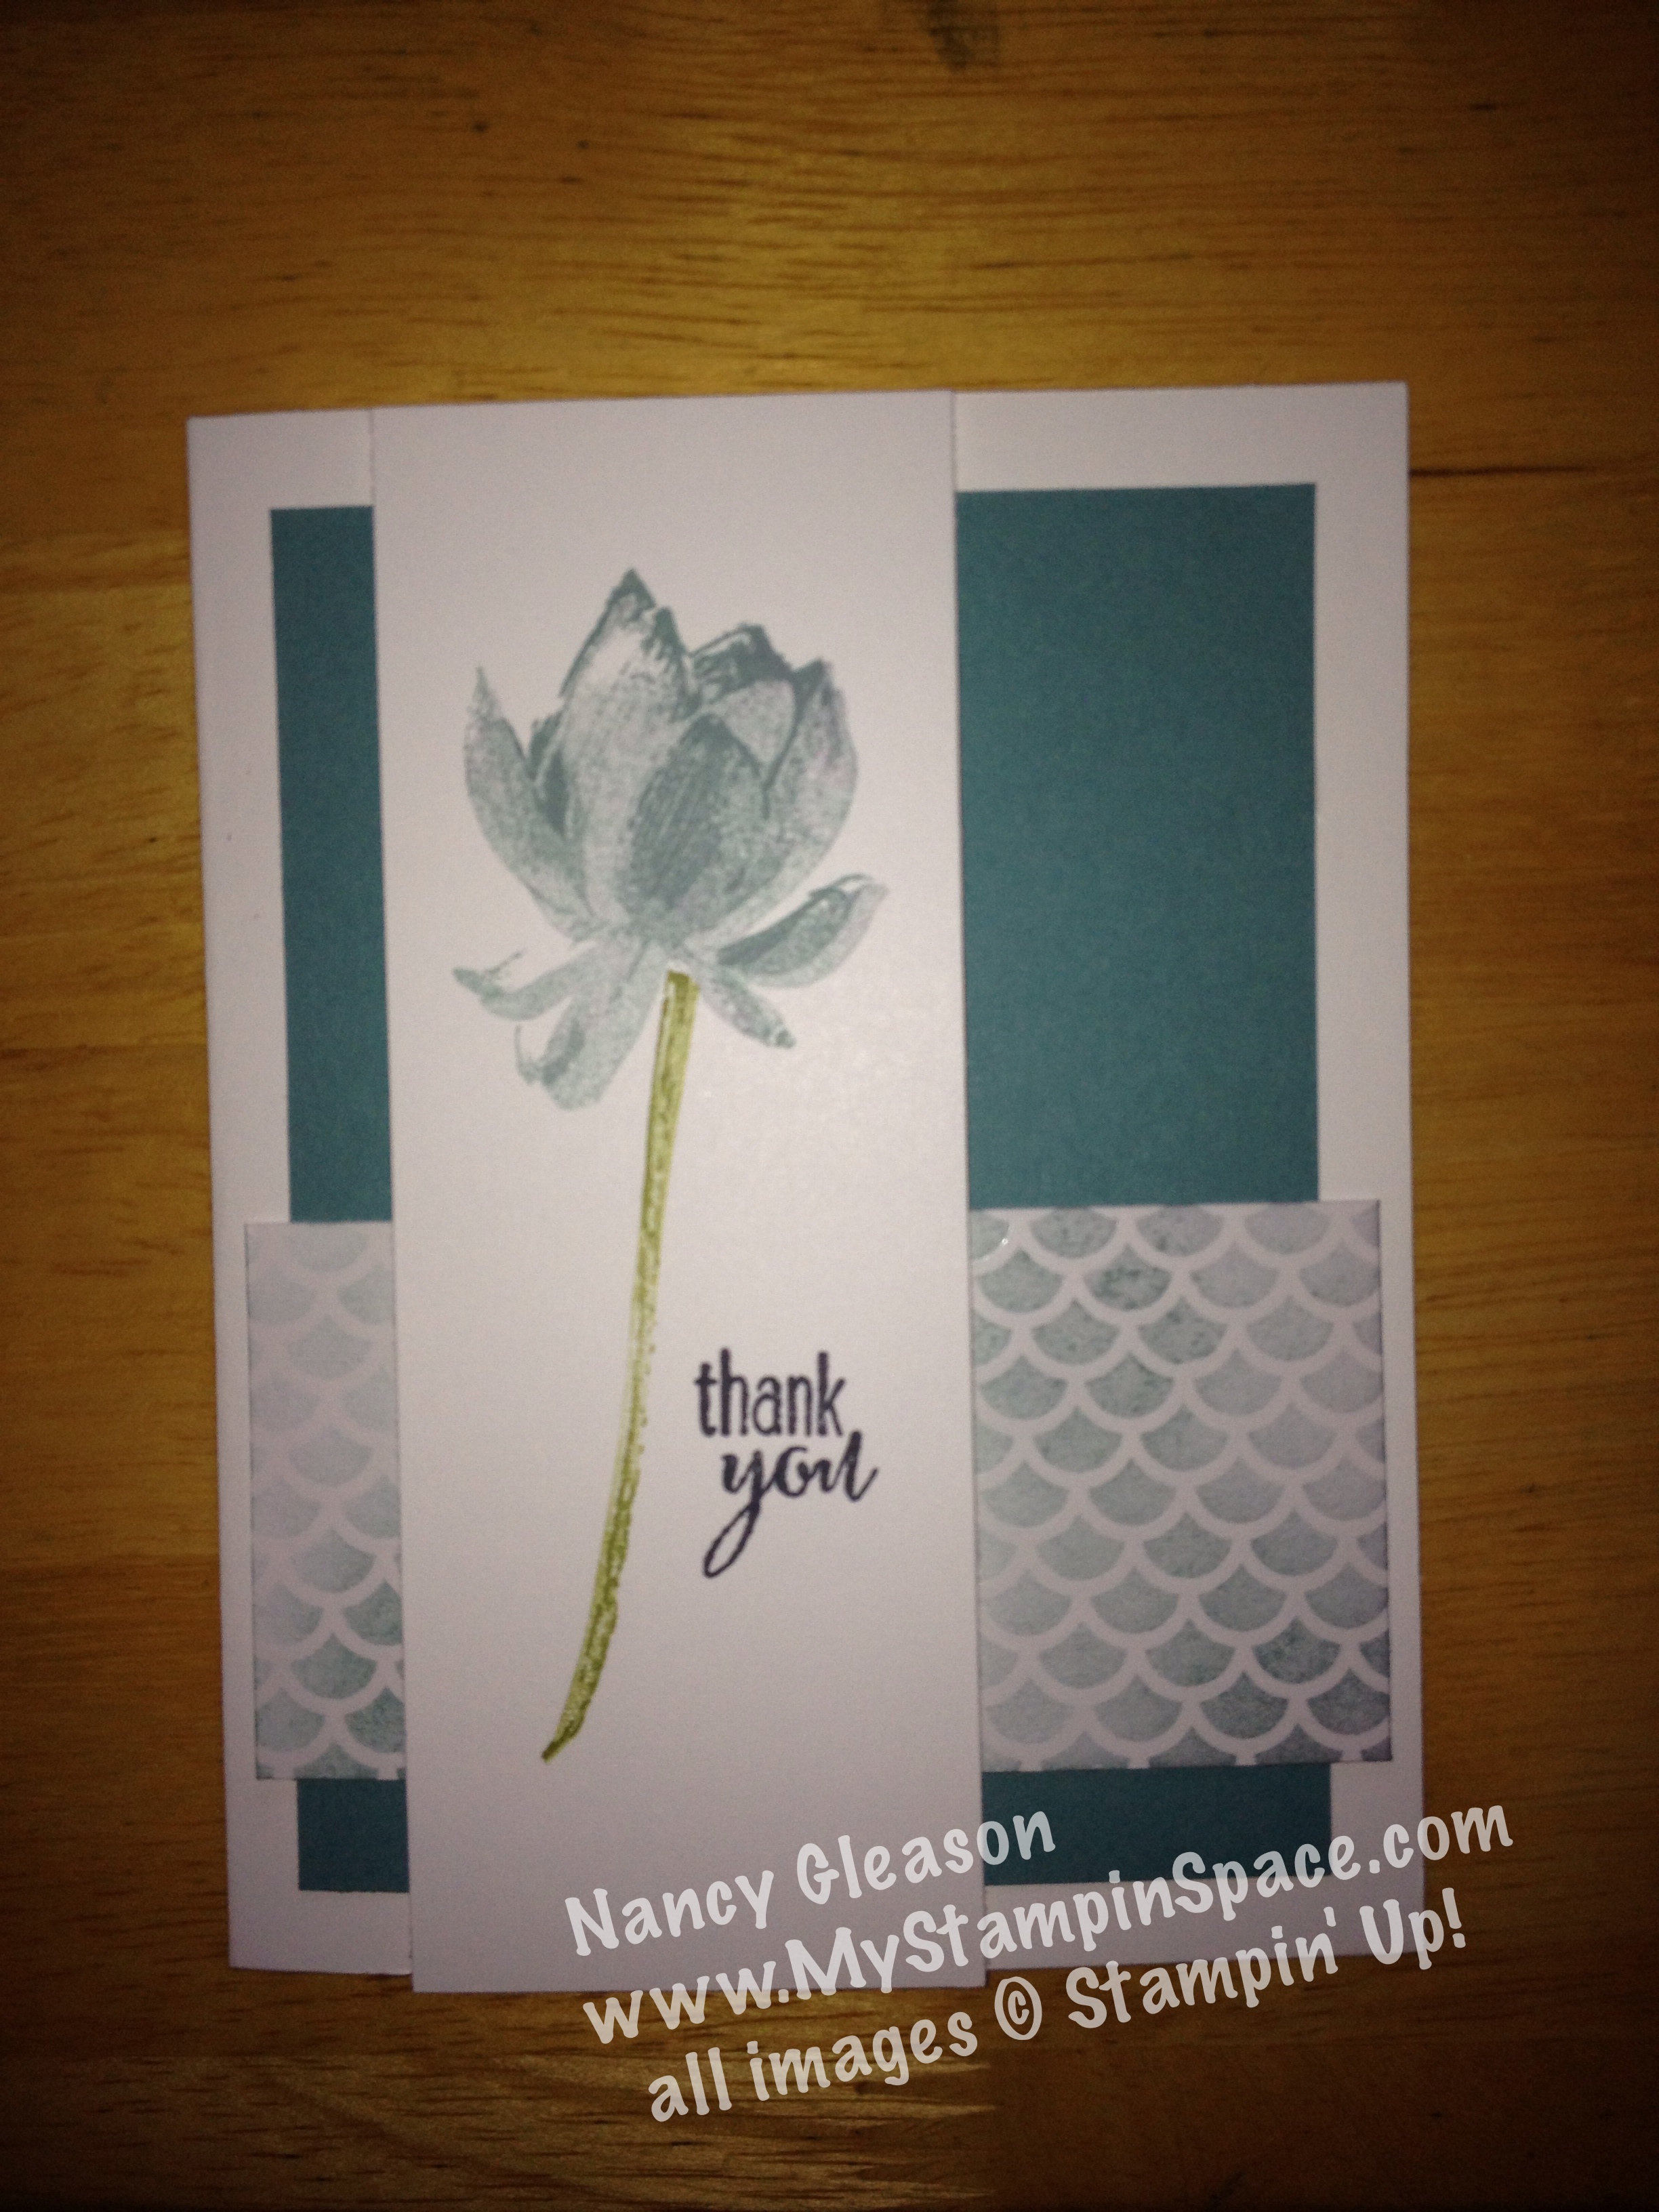
If you need any of the items I used to create this card, just click on the item name to see it in my online store.  Remember, for every $50 of products that you order, you can choose one Sale-A-Bration item for FREE!  Maybe you’ll choose the Big Day stamp set.

The next stop is Jane Knudsen at www.seejanestamp.com on the Pals Blog Hop! Thanks for visiting and I’ll see you next month.

2015janhop_next2015janhop_back


  1. Amy Whelan at Amy’s Inklings
  2. Maggie Mata at Maggie Made Cards
  3. Becky Gifford at The Social Stamper
  4. Kerry Willard Bray at Peonies and Paper Chains
  5. Debbie Crowley at expressivelydeb…
  6. Amy Williams at Stamps and Spice
  7. Rae Harper at WildWestPaperArts.com
  8. Sherrie Gross at Stampin’ Sunshine
  9. Wendy Klein at Doggone Delightful Stampin’
  10. Becky Volpp at InkBlossomwithBecky
  11. Nancy Gleason at My Stampin Space — YOU ARE HERE—
  12. Jane Knudsen at www.seejanestamp.com
  13. Debbie Mageed at Secret Stamper
  14. Michelle Quinno at Shell’s Life
  15. Susan Lankford at Stamp and Create With Susan
  16. Karen Hallam at Karen’s Blog
  17. Kelly DeTommaso at Kelly’s Creative Corner
  18. Mary Fish at Stampin’ Pretty
  19. Laurie Chilton at Stampin’ Ink
  20. Brian King at Stamp with Brian
  21. Peggy Noe at prettypapercards.com
  22. Martie Pollard at The Crafty Bandit
  23. Kim Jolley at Stampin’ Artfully
  24. Beth Beard at My little craft blog
  25. Michelle Gleeson at StampinMojo
  26. Sue Becker at RnR Stamping
  27. Jackie Diediker at Stampin’ Jackie
  28. Natalie Bradley at Natalie Bradley Events
  29. Lisa Ann Bernard at Queen B Creations
  30. Candy Ford at Stamp Candy
  31. Dawn Tidd at Tiddbits From Dawn
  32. Angie Valle-Peters at Paperluxuries
  33. Amy Hoptay at Inking of You!
  34. Lynn Kolcun at Stamping with Avery’s Owlery
  35. Shannon K Jaramillo at Shannon Kay Paperie
  36. Liz Gautreaux at Kind Deeds Stampin
  37. Beth McCullough at Stamping Mom
  38. Nicole Watt at Pixel Maven’s Retreat
  39. Pamela Sadller at Stampin Pink Rose
  40. Jennifer Michalski at Stamping Serenity
  41. Shannon Hokanson at Paper Works by Shannon

Lotus Bloom Meets Irresistibly Yours

A Match made in Heaven!   Yesterday I shared with you my favorite paper from the Sale-A-Bration Catalog; a specialty paper called Irresistibly Yours.  You can see that blog post here.

Today, I am sharing with you my favorite stamp set from Sale-A-Bration:  Lotus Bloom.  When Lotus Bloom and Irresistibly Yours went out on a blind date, it was love at first sight and they have been inseparable ever since!

Lotus Bloom is a 3-step stamp.  Yes, 3-step.  That’s not a typo, it is a 3-step; not a 2-step stamp set.   The Lotus flower image is irresistible (probably why it is in love with the paper of the same name!)  on its own, but the font in the sentiments is to die for.  lotus bloomNow let me show you the magic that happens when you stamp all three flower images, one of top of the other.

IMG_4531See the gorgeous depth & detail?   This is actually created from just one color ink; Lost Lagoon.  But by layering the 3 stamps, and stamping off between layers, you can create various shades of the same color.

Now, for the font:  IMG_4528I love when a print and a script are combined.   Excuse me if this is a little blurry; it got distorted trying to zoom in & crop such a small area.

Now when Lotus Bloom and Irresistibly Yours are going steady; this is the result:

IMG_4528Don’t you just love these two together?  They make such a cute couple.  I think I hear wedding bells….   The Irresistibly Yours paper and sponge daubers allow you to create light & dark areas on the paper; it mimics the light and dark areas on the flower.

I bet you didn’t even mind waiting until last to see the final project.  I usually show you the final project first, then zoom in on the details but today I flipped it around.

Want to see more on how to use this 3-step stamp?  Watch the video:

Remember with Sale-A-Bration, every item in that catalog is FREE with a qualifying purchase.   $50 (before tax & shipping) earns you one FREE Sale-A-Bration item, $100 earns you two and so on.  Don’t forget, when you reach $150 in one order; you’ll start to earn host reward dollars too.  So $150 product order gets you 3 FREE Sale-A-Bration AND $25 host reward dollars.  SAB Host RewardsWhether you host a party, or place an order for yourself, or gather orders from yourself & some friends, the Host Reward Dollars are the same.  See the chart for all the details.  You can see how your FREE merchandise really adds up.  No wonder Sale-A-Bration is the most popular promotion of the year.

Click here to shop online now.  Email me if you’d like to host a workshop; whether in person if you are in the Scranton, PA area, or online.

Share this post and video with your friends.  Then leave me your comments on Lotus Blossom.  Do you plan to add this to your stamp collection?

Nancy


Irresistibly Yours

One of my favorite items in the Sale-A-Bration promotion is a specialty paper called Irresistibly Yours.   At first glance it looks like plain white paper, but when you look at it close; you see a tone-on-tone pattern.  But the real beauty comes when you add color.  The pattern is designed to resist ink, so when you add ink, either by spritzing, daubing or sponging, the color reveals the pattern!  It was love at first sight for me.


Irresistibly Yours

Imagine being able to create a patterned paper in any color to match any project!  That is exactly what I did to create this card below.

IMG_4518[1]The color challenge for this weeks Colour Me Color Challenge is Perfect Plum and a neutral.  I needed to make a sympathy card for a special girl and thought Perfect Plum would be cheerful.  I didn’t have any patterned paper in Perfect Plum but with my Irresistibly Yours specialty paper; that didn’t matter.  I had an ink pad and a re-inker in Perfect Plum so I was set.

I simply filled a Stampin’ Spritzer bottle with rubbing alcohol and 12 drops of ink and sprayed the paper.  Using a tissue I rubbed the ink off to reveal the pattern.  Easy peasy!  You get 12 sheets (2 each of 6 patterns) in the package of paper, and the paper is FREE with a qualifying order during Sale-A-Bration!

I also stamped an image on the inside of the card; both the flower, and the inside & outside sentiments are from Bloom With Hope stamp set.

Bloom With Hope Clear Stamp Set by Stampin' Up!   IMG_4517[1]


The sentiment on the front was heat embossed with White embossing powder on Perfect Plum cardstock.  The embellishment is actually an old retired Builder Brad that I pulled from my stash.  There is an Artisan Embellishment kit in the New Occasions catalog that is reminiscent of an old Artisan Embelllishment kit that I pulled this from.

IMG_4516[1]Tip:  When using a dark colored cardstock for my card base, I like to glue a piece of Whisper White paper on the inside for writing.  It gives the inside of the card a polished look too!.  Of course, envelopes need some jazzing up too!  A simple bloom from the same stamp set adorns the outside.

Want to know more about the Irresistibly Yours paper?  Watch this video:

Remember:  During Sale-A-Bration, you get FREE items for every $50 in product you order.  So place your orders in $50 increments for maximum savings.

IE:  I have a customer who orders $35 every month on-line.  A $35 order won’t yield you any free items.  If during each month of Sale-A-Bration (January, February & March) she placed a $35 order; she would spend $105.  If she spent that same money in two orders of $52.50 each she would get 2 FREE Sale-A-Bration items.  So spend smart!

Want to order any of the products I used to create this card? Just click on the item below in this chart to go right to that item in my online store.

Click Here to view the Sale-A-Bration flyer to see all the products you can get for FREE with a qualifying order of $50 (Before tax & shipping)
Click Here to go directly to my online store.
I hope you see the beauty of this awesome paper.  I have already ordered 2 packages of this paper so I’ll have some to hoard keep and some to share!
Please leave me a comment and let me know your favorite item in the Sale-A-Bration catalog.  Did Irresistibly Yours top your list?  Come back tomorrow and I’ll share the other item that tied for my #1 Fav from the Sale-A-Bration catalog!
In the meantime, Happy Stampin’,
Nancy

Ring in the New Catalogs!

Sale-A-Bration & the 2015 Occasions Catalog Start Today!

Occasions Catalog (click cover to view)

Occasions Catalog PDF
Spanish Flyer

On Sale NOW!  There are so many fresh, new spring products to tempt you in the Stampin’ Up! Occasions Catalog. It runs from Jan. 6 – June 2, 2015.

Sale-A-Bration is the biggest sale event for Stampin’ Up! – most die-hard Stampin’ UP!pers (myself included) can’t wait to get their hands on the Sale-A-Bration catalog and all the FREE products (including many exclusive products) that Sale-A-Bration has to offer!

For every $50 in products (before tax & shipping) that you order; you can choose 1 items from the Sale-A-Bration catalog.  And there is NO LIMIT!  Order $100, choose 2 items.  Order $150, choose 3 items AND get host rewards of $25 too!

Playful Penguins Punch Art

I saw these adorable little punch art penguins a few weeks back and thought they were so stinkin’ cute I just had to make some!

Itching to make them ever since, I knew I had my opportunity with the Friday Mashup Challenge #191.   This week’s Mashup Challenge is:

  • Create a project with a “Winter theme”.
  • Create a project with “Snowflakes”.
  • or Mash it Up! and create a “Winter project with Snowflakes”

Hello: Winter, Snowflakes, Penquins! It was a natural fit!


So here is my Friday Mashup – Penguins playing in the snow.

Penguins Playing in the Snow Aren’t they adorable?  I just love them.  Here’s a close-up of the stars of the show:  IMG_4505[1]

I thought I bookmarked the page where I saw them, so I could give credit to the designer, but for the life of me, I can’t find it!  My apologies!    They are created from the Stampin’ Up! Owl Builder Punch

I’ve created a PDF tutorial showing step-by-step instructions on how I made the penguins.

You can click here to download the PDF if you’d like to try your hand at making the penguins yourself.

I created the card by starting with a 5-1/2″ x 4-1/4″ Island Indigo card base.  A layer of Soft Sky cardstock cut to 5-1/4″ x 4″ was placed on top of that.  I cut a strip of Whisper White cardstock to 5-1/4″ wide and tore the top edge to create the snowy hills in the background.  I then stamped a snowflake using the smallest image from  Endless Wishes in White Craft Ink and in Illuminate ink.  I then sprayed this layer with Vanilla Shimmer Smooch spray to create the illusion of falling snow.

I used a strip of Dazzling Diamonds paper to create the snowy hill in the foreground.  Since the snowflakes were so soft & muted (and therefore, didn’t photograph well)  I added a few Frosted Snowflake Sequins just so the judges at the Mashup would know for sure that I added snowflakes 😉

The penguins were popped up using stampin’ dimensionals.  (Do I ever make a project without stampin’ dimensionals?  Hardly.)

Playful Penguins

And I know you noticed that the two penguins are looking at each other.  Simply placing the black dots on the edges of the white circle, rather than the middle, allows you to make the penguins look as they are ‘looking’ in a particular direction.

Thanks for stopping by My Stampin’ Space.  I hope you like my penguins as much as I do.  Leave me a comment – I love to hear from you.  Please do print out my Penguin Punch Art PDF and try to make them yourself.   And if you do, please send me a photo of what you make; I’d love to know that I helped  you create something cute!

If you need any of the supplies to make this card, or any Stampin’ Up! supplies, click on the item name and go right to that product, or click here to go to my online store where you can shop safely & securely 24/7.   Don’t forget, the Year End CloseOuts end on Jan. 5th.  (The Frosted Sequins are on sale for only $2.99! so get them now before they are gone).   On Jan. 6th, our 2015 Occasions catalog and Sale-A-Bration catalog go live!

Happy Stampin’,

Nancy

My {Freshly Organized} Stampin’ Space

The New Year is always a great time to clean, organize and declutter, don’t you agree?  I can’t be alone on this; the sale ads are chock full of storage containers and other organizing things to make our lives more organized and our homes less cluttered.

Well, My Stampin’ Space seemed to take a beating this past month.  Lots of last minute cards & tags to make, lots of new products ordered, and NO TIME to put things away!  The better part of the day last  Sunday was devoted to cleaning & organizing My Stampin’ Space, and boy, do I feel better! A messy space = mental chaos.   A clean space = mental clarity to me.    I need that clean space to help me feel more creative (and to find things!).

So here is a little tour of my newly organized space.  No, I didn’t take any ‘before’ pictures.  I have very little room due largely in part to a 6′ wide window in front of my desk.  So I make room where I can.

This is where I sit.You can see part of that big window in front of me.  I take advantage of the deep windowsill;  it is perfect for my stampin’ scrub, embellishment holder, and my marker storage.

window sill close upMy old stampin’ scrub got broken at the hinge; so I keep both parts open and easily accessible.  The rotating organizer holds all those little containers of buttons & brads and other embellishments.  I used a divided pencil cup on its side to hold my Blendabilities.  I covered toilet paper rolls with DSP, & glued them together to create my own pyramid of marker holders.

IMG_4457 IMG_4459

To my left, is a bookshelf that faces the desk.  I found 3-drawer storage units at Wal-Mart that fit on those shelves perfectly.  They also perfectly hold my inks and other supplies.

photo 3I labeled each drawer so I know where everything is at a glance.  Hanging from the side of that bookshelf is a hanging cosmetic bag that holds my punches (old style).  Another 3-drawer unit (much larger) sits on the floor at my side.  The top drawer has my adhesives, and lower drawers have my clear blocks and my Christmas stamps.  I have my clock/radio right there along with a pen/pencil basket and and extension cord for my Iphone, heat tool, and glue guns.

I really needed more stamp set storage so I mounted this DVD storage rack on the narrow strip of wall above that.  (I can’t believe its almost full already! – No wonder I didn’t have room to stamp anymore, these were just the stamps that didn’t fit on my stamp set shelf and were just piled up on my desk!)

photo 1photo 2

It was a cheap unit and kind of flimsy.   It is designed to just have one rack to hold the DVDs but it wouldn’t hold anything.  Since I had 2 double racks, I just mounted them next to each other so my stamp cases were in two racks for added stability.  You can see some are still a little wonky as the holders are not that sturdy, but it did the trick.  (Thanks to my wonderful hubby for measuring and mounting so the 2 pieces are perfectly level to one another!).

There is a door right there, which is why the wall is so narrow.  The door is a metal door (and I don’t use it too much) so I thought I would make that useful too!  Metal baskets and a few magnets are all that were need to hold my growing collection of Washi Tape in sight but corralled nicely.

IMG_4412[1]Behind me is a narrow shelf unit my hubby custom built for me to hold my stamp sets, punches and ribbon.  The top shelves are used to house my stash of finished cards.  This is built onto the side of our furnace so I have to leave the grill on the bottom open so air can get into the furnace.  But another 3-drawer unit and a rack to hold my tools fit perfectly without obstructing airflow!.  IMG_4441The rack, again a Wal-Mart find, is designed to hold pot lids.  But my bigger tools, like my punch boards, and rotary arm for the Stampin’ Trimmer are neatly stored and easily accessible.  IMG_4448The drawer unit has become my new home for My Paper Pumpkin kits.  I love the red boxes, but since being a subscriber since the spring, the red boxes were really piling up.  So this is how I contained them:  IMG_4447IMG_4462 IMG_4461

I have each kit contents in a gallon sized ziploc labeled with the date & kit name. The ziplocs are standing up in the drawers.  I have all the ink spots in a wood mount case.  Suddenly a tower of red boxes in under control!  Nice 🙂

Well, that’s all for today!  My stampin’ area is actually a 12′ long counter.  One side of the counter is where I stamp, and the other end is my actual office desk/computer area.  That side did NOT get cleaned  & organized so no photos of that just yet.  But I promise I’ll have that ready for you soon, and show you the neat way I keep my embossing folders, dies & framelits organized!  You’ll love what I found to keep them in.  AND Wonderful Hubby is going to solve my 12×12 paper woes (but not for another week or two).

Please let me know how you liked the tour of My Stampin’ Space.  Did you find any helpful tips or organizing ideas that you’d like to try out in our your space?   I’d love to hear from you if you found anything helpful.  Stamping is my passion, and probably yours too!  But organizing is an essential part of a crafters’ life too.  I hope that you were able to find a tip or two.   Until next time, Happy Stampin’ and Happy Organizing  🙂

Nancy

Free is always “a happy thing”

Happy New Year & Welcome to 2015!   I’m excited about the New Year and the many things I have planned for you, my customers!  (Like MyStampinSpace on Facebook to stay abreast of all the news!)   I’m also really excited about the soon to be released 2015 Occasions Catalog, and it’s counterpart – the Sale-A-Bration catalog!

2015 Occasions Catalog Cover2015 Sale-A-Bration Catalog Cover


When the 2014 Holiday Catalog was introduced, I really thought Stampin’ Up! hit it out of the ball park, but I can honestly say that these new catalogs trump the Holiday Catalog!   It’s amazing how Stampin’ UP! is constantly outdoing themselves! Being a Stampin’ Up! demo, I get to see the new catalogs about one month before they are released to the public, AND order new products at that time too! (I love this perk that comes with being a Stampin’ Up! demonstrator!)

I’ve had the new catalogs for a few weeks now, and if you are one of my regular customers, then you should too!  I’ve mailed the Occasion Catalog  to you which you should have received around mid-December.  And I’ll have the catalogs posted on my blog when they go live on Jan. 6th.

But with all the busyness of the holidays, I haven’t had a chance to actually USE any of my new products!  YIKES!!!  Well that had to change.  Earlier this week I carved out some time to clean, and organize My Stampin’ Space.  (It had gotten quite messy, I’m ashamed to admit!)  I bought a couple of storage pieces to help conquer the clutter so I could banish the chaos and create in a clean space.  (My creative side doesn’t function well in a mess).  Stop back tomorrow to take a virtual tour of My Stampin’ Space and glean some organizing tips from me.

My clean space was just calling for me to create something, so I did!

One of the ladies in my stamp club has a birthday coming up so I wanted to make her a birthday card, but, I found out that she is in the hospital!  So I had to make a Get Well Card too!.  I discovered I don’t have any current stamp sets that say “Get Well”.  (That will have to change!)  But in the meantime, I combined some old and new to create this Get Well Card.

IMG_4403[1]This stamp set, “A Happy Thing” is free as part of the Sale-A-Bration promotion.  The stamp set features this lemon, and a bird, and two sentiments.  I couldn’t wait to use the lemon stamp and my Blendabilities and I thought that luscious lemon yellow was so cheerful it would brighten anyone’s day.

Luscious Lemon

Here’s a close-up of the lemon.  I used the Momento Ink in Tuxedo Black, but I stamped it onto a piece of scrap paper, and then stamped my image.  This gave me a much more muted grey shade, rather than the dark, crisp black the Momento Ink produces.  The Blendabilities markers let me create depth by layering highlights and shadows.   This is what makes the lemon look so realistic and not just flat.

Daffodil Delight Seam Binding Ribbon makes the perfect drapey double bow.  Are you loving the paper behind the lemon?  Doesn’t it pair perfectly with the leaves on the lemon stamp?  It’s new too!   It’s called Painted Blooms DSP and let’s just say, you’re going to LOVE it!

Notice my layers?  Because the Daffodil Delight is such a strong bold color, I wanted the layer of Daffodil Delight Cardstock behind the image panel to be very thin so it wouldn’t be overwhelming.  That color is repeated 3 times; on the major element (the lemon), in the ribbon, and on that cardstock layer.  By contrast, the solid Wild Wasabi cardstock layer behind the DSP is alot larger to anchor it to the background.

I know you’ve been checking out how I lined the envelope with the same DSP.  Doesn’t that add such a nice touch?   The Envelope Liner Framelit dies make that a snap to do.

Are you loving this set, yet?  I thought so!  The best part of this stamp set is that it is FREE with a qualifying order.  Every item in the Sale-A-Bration catalog is free with a $50 purchase.  And there is no limit; purchase $100 get 2 items for FREE.  Purchase $150 and get 3 items FREE AND $25 in host dollars to spend anyway you want!  Purchase $200 and get 4 FREE sale-a-bration items AND $30 host dollars to spend.

You can really maximize your purchasing power by letting the Sale-A-Bration and Host Reward Dollars work for you.  If you really want to put your purchasing power on steroids, consider joining Stampin’ Up!  Many demos join Stampin’ Up! to get the 20% discount AND the added perks of seeing & ordering from the new catalogs one month prior to the release date.  If this sounds like something you’d like to explore,  email me.  I’d be happy to set a time where we could chat and see if this would be right for you.

So,  I hope that this new year brings you joy and happiness, and good health!  I hope too that you’ll find lots of time to play with paper & create lots of pretty projects.  If your New Years Resolutions include improving your paper crafting skills, then you’re in luck!  Sign up for my newsletter and stay tuned for some information that will make you a better and more educated stamper in 2015!

See you tomorrow for some organizing tips when I take you on a tour of My {freshly organized} Stampin’ Space!  Happy 2015!

Nancy


Winter Wishes Pals Blog Hop

Welcome to the last Pals Blog Hop of 2014. This month we want to help you start your holiday wish list by sharing projects featuring our favorite Stampin’ Up! papers, stamps, tools and accessories. Get your wish list ready as you move along through the blog hop.

You may just be starting the blog hop or may have come from Patti MacLeith www.papercraftsbypatti.com on the Pals Hop. If you get off track at any time, the full lineup below will help you move along from blog to blog so you see all of the project.

When I first saw the 2014 Holiday Catalog, I pretty much wanted the whole catalog!  I found myself marking my catalog, not by products that I wanted, but by pages!  Seriously, I wanted everything on page 5 and page 43, and so on!  (And I did actually buy almost everything in that catalog too, by the way!)  But I knew that Ornamental Pine was the set that I would use to make most of the Christmas cards that I would mail out.

Here is my most favorite card I’ve made yet using the Ornamental Pine Stamp Set

IMG_4264[1]

I started with a card base of Soft Sky and stamped the pine needle image in Lost Lagoon.  I added a Lost Lagoon banner that was cropped using the Project Life framelits to balance out the Lost Lagoon color on the card.

Then I thought I wanted to step up the card a notch; so I recreated the card but this time added a  Lost Lagoon panel.  Here is my stepped up card:

IMG_4265[1]

What do you think?  The little panel really adds a lot, doesn’t it?   A simple one-layer card is always nice but I really think adding a layer of a contrasting color just adds a whole dimension and really makes it classy.

Here they are side by side so you can really see the difference:

IMG_4266[1]

Nothing wrong with the 1-layer card, but the added layer just makes the card look more finished and polished, at least that’s what I think, and I’m sure you’ll agree because I know that great minds think alike 🙂

But the jewels on this card are the pinecones.   I heat embossed the pinecones in Pewter embossing powder onto Whisper White card stock.  My heat embossing tool is one of my favorite tools.   I used my paper snips (another tool I couldn’t live without!  – proof that all scissors are NOT created equal) to fussy cut the pinecones.  The pewter pinecones and the ‘snow’ resting gently on some of the pine needles add just enough sparkle without going into glitter overload.  I know you really want to see the sparkle up close so here it is:

IMG_4260-001Yes, the snow capped pinecones look so real you don’t believe that I stamped them.  You think I went outside, picked some pinecones from my pine trees, don’t you?  Nope, they are stamped, heat embossed, fussy cut & popped up on a stampin’ dimensional.

See the snow glistening on the pine needles?  I used my white chalk marker to draw snow on some of the pine needles and then added a little bit of Dazzling Details to select snow.

How did I get such a crisp white sentiment on the Lost Lagoon cardstock?  Heat embossing.  Great for putting light colors on darker colored cardstock.

Because I chose to make a square card, and a fairly large square at 5″ x 5″, my Envelope Punch Board is another favorite tool of mine.  It makes simple work of making custom sized envelopes so my cards are no longer limited to a standard size envelope, leaving me free to create whatever works best for me and the stamp set I’m working with.  How liberating is that?

To recap: Ornamental Pine is my favorite stamp set from the Holiday Catalog and the heat embossing tool, the paper snips and Envelope Punch Board are my favorite, must-have, can’t live without tools.  If you don’t already have them, be sure to put them on your wish list.  Then let your friends & family know that you have a wish list, and let them know that your wish list can be fulfilled right here!

BTW, I’ve seen the 2015 Occasions Catalog AND the Sale-A-Bration catalog and all I can say is you better have lots of paper;  you’re wish list is going to be very long!  The good news is that the more you buy from the Occasions catalog, the more you’ll get in FREE items from the Sale-A-Bration catalog.   If you are a regular customer of mine, than your catalog is on its way to you.  If you are not, but you’d like to be, just contact me. I’d be happy to be your demonstrator if you don’t already have a relationship with another demonstrator.

So now, please tell me which card you like best, and if you enjoy heat embossing as much as I do, or if you’ve never heat embossed at all.  Then hop along to see the rest of the projects from our amazing talented Pals.    The next stop is Maggie Mata at www.MaggieMadeCards.com on the Pals Blog Hop!

Thanks for visiting and I hope to see you in 2015.

2014dechop_back

2014dechop_next

  1. Michelle Gleeson at StampinMojo
  2. Shannon Hokanson at Paper Works by Shannon
  3. Dawn Tidd at Tiddbits from Dawn
  4. Sherrie Gross at Stampin Sunshine
  5. Beth McCullough at Stamping Mom
  6. Kalyn Shubnell at The Stamping Chronicles
  7. September Gray at www.septembergray.com
  8. Debbie Mageed at Secret Stamper
  9. Patti MacLeith at Papercrafts by Patti
  10. Nancy Gleason at MyStampinSpace – – – YOU ARE HERE – – –
  11. Maggie Mata at Maggie Made Cards
  12. Debbie Crowley at expressivelydeb…
  13. Wendy Klein at Doggone Delightful Stampin’
  14. Amy Whelan at Amy’s Inklings
  15. Brian King at Stamp with Brian
  16. Amy Williams at Stamps and Spice
  17. Mary Fish at Stampin’ Pretty
  18. Pamela Sadler at Stampin Pink Rose
  19. Jackie Diediker at Stampin’ Jackie
  20. Candy Ford at Stamp Candy
  21. Susan Lankford at Stamp and Create With Susan
  22. Peggy Noe at Pretty Paper Cards
  23. Nicole Watt at Pixel Maven’s Retreat
  24. Amy Hoptay at Inking of You!
  25. Lynn Kolcun at Stamping with Avery’s Owlery
  26. Beth Beard at My little craft blog
  27. Sue Becker at RnR Stamping
  28. Lisa Ann Bernard at Queen B Creations
  29. Kerry Willard Bray at Peonies and Paper Chains
  30. Rae Harper-Burnet at WildWestPaperArts.com
  31. Deb Cozzone at Deb Cozzone’s Stamping Zone
  32. Debra Simonis at Deb’s Stampin’ Grounds
  33. Susan Itell at Simple Stampin
  34. Jane Knudsen at see jane stamp
  35. Katy McGloin at Just Fun Stamping
  36. Martie Pollard at The Crafty Bandit
  37. Natalie Bradley at Natalie Bradley Events
  38. Becky Volpp at InkBlossomWithBecky

Are You Ready?

You are?   Ready, set, shop! 

Online Extravaganza - Stampin' Up! sale

Click here to go to my online store.

Download the PDF file of the list of sale items here:  2014_Online_Extravaganza_Products_US

This Online Extravaganza sale begins Monday, Nov. 24th and runs thru Monday, Dec. 2nd. 

ONE-DAY ONLY SPECIALS:   While most of the items on this list are available all week (while supplies last), the first day and last day are special.  These ONE DAY ONLY DOOR BUSTERS sales are incredible.  Monday, Nov. 24th the Door Buster Sales include:

  • Textured Impressions Embossing Folders at $5 each.  This offer includes almost all embossing folders on pages 226 and 227 of the Annual Catalog (except Stylish Stripes, Chevron, Beautifully Baroque and Woodgrain)
  • Gift Box Punch Board at 30% off.  #135963, $13.96
  • Card Kit Bundle (includes Everyday Occasions & Hip Hip Hooray Kits) at 30% off.  #140350, $34.93

The other deals (20% off – 50% off) run the whole week and can be ordered anytime during the week!  Print off the list above and start making your list and checking it twice.

Want to save even more?  Want to save 20% off every order you place, without having to wait for a sale?  Consider joining my team.

keep calm & joinAlong side the Online Extravaganza, Stampin’ Up! has also marked down the Starter Kit  to $74.25.  You choose $125 worth of your favorite Stampin’ Up! items (except personalized stamps) for only $74.25 AND IT SHIPS FREE!

Then you get to enjoy all the perks of being part of the Stampin’ Up! family.  Take your passion for paper, stamps and SAVINGS to a new level!

  • For a limited time!  Sale runs one week only!  Nov. 24 – Dec. 2.
  • 25% off!  $99 Starter Kit will be discounted 25% to $74.25.  You can order it through me HERE!
  • You decide!  Choose up to $125 in product for your kit.  That’s over $50 in FREE product!!!
  • Free Shipping!  The kit ships FREE for another 10% savings.
  • Stock up!  Once you join, you receive a one-time 30% off discount on a product order of $150 or more placed within 45 days.
  • 20% discount!  Enjoy a minimum of a 20% demonstrator discount every day.
  • 5% Bonus EXCLUSIVELY this special!  Receive 5% cash back on all purchases and outside sales placed in December.  Cash back is in addition to your discounts and will be paid in January.
  • Be first!  December 3rd marks your chance (with your demonstrator status) to see and pre-order products from the NEW Occasions Catalog and earn Sale-A-Bration gifts (also new)!
  • No risk!  You’ll have through April 30, 2015 to “test drive” demonstrator discounts and benefits.
  • No penalty!  If you reach $300 in sales by the end of the first FULL quarter, (March 31, 2015),  you will renew your demonstrator benefits for another quarter. If you don’t reach $300 in sales you “drop” with no penalty.
  • No catch!  There’s no catch–no need to host workshops, purchase anything further or get outside sales.

THE BEST NEWS OF ALL!  You don’t have to be all about the business; many people join Stampin’ Up! just for the discount for their personal purchases.

There are so many resources available thru Stampin’ Up! to help you take your paper crafting to the next level.   Our group, the Stampin’ Pretty Pals, are several hundred members strong, and are all connected virtually.   You’ll be part of this fun-loving group where you’ll have access to the our groups’ exclusive resources, fun and friendships—all virtual and on YOUR schedule and level of interest!

READY?   Purchase the Starter Kit and JOIN ME and the Stampin’ Pretty Pals here!   You can’t imagine how much fun you’ll have!

So get your list ready,  you get to choose whatever products you want;  $150 worth of products for only $74.25.  Then save, save, save on future purchases.  Sounds like a win, win!

Happy Stampin,

Nancy

SAVE BIG ALL WEEK LONG!!!

Just announced:   Stampin’ Up!’s Online Extravaganza!  Savings start on Monday, Nov. 24 and run through Dec. 2nd.   Stampin’ Up! likes to do things big so they don’t limit their Black Friday sales to just one day!  You’ve got a whole week to save.

The PDF file lists 3 pages worth of savings- Check it out here:

2014_Online_Extravaganza_Products_US

Be sure to watch the headers:  some deals are one day only deals!  You’ll save big on embossing folders, ribbon, tools (like the gift box punch board & magnetic platform for the Big Shot), Paper Pumpkin refill kits, Project Life by Stampin’ Up! and more.

I’ll have links direct to the savings posted 6:00 AM on Monday so go make your list, remember to shop for yourself too with savings this big, and come back on Monday.

Increase your savings!   Join the Stampin’ Up! Family of demonstrators Nov. 24th – Dec. 2nd.   The starter kit is reduced to $74.25 and contains $125 worth of your choice of products and ships free!  Then save 30% on your first order and 20% on all your  Stampin’ Up! orders after that.   Click here to join the fun!

Click here to go directly to my online store.

Email me if you have any questions!

Happy Stampin’ & Happy Shopping,

Nancy


Treat Yourself to some Crafty-Goodness!

Four years ago this week, I made a decision that has impacted my life in so many positive ways!  I have learned SO MUCH, challenged myself, stretched myself in ways I never could have imagined, succeeded (& failed) in taking certain steps and reaching certain goals I have set for myself along the way.  I’ve made so many friends with people all over the country, and even had the pleasure of meeting some of them!

So what did I do, you ask?  I joined the Stampin’ Up! family and crossed over from being a loyal Stampin’ Up! customer to becoming a Stampin’ Up! demonstrator.

I didn’t know if I could really make a business at Stampin’ Up!, but something inside me really wanted to share my love of paper crafting with other people.  I wanted to ‘teach’ others who may have never before taken a rubber stamp to an ink pad and then to paper.  I love seeing others create something that they can be proud of, especially when they thought they couldn’t!

Honestly, I also liked the thought of buying my stampin’ supplies at a discount, and possibly even earning a few bucks to help fund my stampin’ hobby.

keep calm & joinDoes this sound like you?  Consider crossing the line and joining Stampin’ Up! for yourself.    Now is a great time; The Stampin’ Up! Starter Kit is ON SALE!

Take your passion for paper, stamps and SAVINGS to a new level!

  • For a limited time!  Sale runs one week only!  Nov. 24 – Dec. 2.
  • 25% off!  $99 Starter Kit will be discounted 25% to $74.25.  You can order it through me HERE!
  • You decide!  Choose up to $125 in product for your kit.  That’s over $50 in FREE product!!!
  • Free Shipping!  The kit ships FREE for another 10% savings.
  • Stock up!  Once you join, you receive a one-time 30% off discount on a product order of $150 or more placed within 45 days.
  • 20% discount!  Enjoy a minimum of a 20% demonstrator discount every day.
  • 5% Bonus EXCLUSIVELY this special!  Receive 5% cash back on all purchases and outside sales placed in December.  Cash back is in addition to your discounts and will be paid in January.
  • Be first!  December marks your chance (with your demonstrator status) to see and pre-order products from the NEW Occasions Catalog and earn Sale-A-Bration gifts (also new)!
  • No risk!  You’ll have through April 30, 2015 to “test drive” demonstrator discounts and benefits.
  • No penalty!  If you reach $300 in sales by the end of the first FULL quarter, (March 31, 2015),  you will renew your demonstrator benefits for another quarter. If you don’t reach $300 in sales you “drop” with no penalty.
  • No catch!  There’s no catch–no need to host workshops, purchase anything further or get outside sales.

THE BEST NEWS OF ALL!  You don’t have to be all about the business; many people join Stampin’ Up! just for the discount for their personal purchases.    There are so many resources available thru Stampin’ Up! to help you take your paper crafting to the next level.   Our group, the Stampin’ Pretty Pals, are several hundred members strong, and are all connected virtually.   You’ll be part of this fun-loving group where you’ll have access to the our groups’ exclusive resources, fun and friendships—all virtual and on YOUR schedule and level of interest!

READY?   Purchase the Stater Kit and JOIN ME and the Stampin’ Pretty Pals here!   You can’t imagine how much fun you’ll have!

I’d love to have you as part of my team.  If you are considering taking advantage of this special, but have questions, please call me!   I’d love to talk to you.

So get your list ready,  you get to choose whatever products you want;  $150 worth of products for only $74.25.  Be ready to go Nov. 24th!

Nancy

November Pals Blog Hop

Welcome to the November Pals Blog Hop, we are thankful you stopped by!  This month we are showcasing projects that show our thanks, including both thank you and Thanksgiving themed projects.

2014novhop_backYou may just be starting the blog hop or may have come from Sherrie Gross at Stampin’ Sunshine on the Pals Hop. If you get off track at any time, the full lineup below will help you move along from blog to blog so you see all of the amazing projects.

Question?  What do baby wipes, styrofoam plates & ink refills have in common?  And what do they have to do with Thanksgiving, or being thankful?  Don’t ready any further or scroll down until you’ve had time to ponder that question.  Are you ready?  Are you sure?

Well, just to be sure, I won’t give that answer just yet.  I’ll show you my projects first.  Yes, I did say projects, plural.  I have not one, but two projects to show off today.

fall leaves 2

Fall LeavesTwo projects, but one technique.  The leaves in both projects are made the same way.  In the top card, I stamped the leaves onto Whisper White card stock and used my paper snips to fussy cut the leaves out.  In the second project, I stamped directly onto Very Vanilla card stock.

I used the “For All Things” stamp set for the leaf image.  “Good Greetings” was used for the sentiment in both cards – I sure hope you earned that set when it was available as a Host Promotion last month!   The Color Me Autumn DSP makes the colorful background.  These items can be ordered by clicking on their respective links, or click here to go to my on-line store where you can shop safely.

For All Things Clear-mount Stamp SetColor Me Autumn Designer Series Paper

So now for my answer:  Baby wipes, a styrofoam plate  & ink refills are used to create the beautiful, mottled effect I used for my leaves in my projects known as the baby wipe technique.  And my mailing list subscribers will learn exactly how to do this when I send a video lesson directly to them later this week!  Wait, you’re not a subscriber?  Well, go to the Mailing List Sign-Up box on the top right and sign up!  I’ll wait.  You’re finished already?  That was quick.  Now you’ll get this video lesson and learn how to do this too!

See the variegated, mottled effect this technique creates?  I taught the ladies in my Monday night class how to do this, and they LOVED IT!   I’m sure you will too so make sure you don’t miss my video class!

close up of leafThanks for stopping by My Stampin Space.  I hope to see you here again real soon.  In the meantime, continue the hop by following the line-up below.

Happy Stampin’

Nancy

2014novhop_nextThe next stop is Candy Ford at Stamp Candy on the Pals Blog Hop! Thanks for visiting and I hope to see you next month.

  1. Candy Ford at Stamp Candy
  2. Angie Valle-Peters at Paperluxuries
  3. Brian King at Stamp with Brian
  4. Beth McCullough at Stamping Mom
  5. Susan Itell at Simple Stampin
  6. Rae Harper-Burnet at WildWestPaperArts.com
  7. Amy L. Lazzell at Just A Thought…Cards by Amy
  8. Natalie Bradley at Natalie Bradley Events
  9. September Gray at septembergray.com
  10. Jane Knudsen at see jane stamp
  11. Nicole Watt at Pixel Maven’s Retreat
  12. Amy Whelan at Amy’s Inklings
  13. Amy Hoptay at Inking of You!
  14. Peggy Noe at Pretty Paper Cards
  15. Martie Pollard at The Crafty Bandit
  16. Kerry Willard Bray at Peonies and Paper Chains
  17. Katy McGloin at Just Fun Stamping
  18. Mary Fish at Stampin’ Pretty
  19. Susan Lankford at Stamp and Create With Susan
  20. Debbie Mageed at Secret Stamper
  21. Beth Beard at My little craft blog
  22. Lisa Ann Bernard at Queen B Creations
  23. Patti MacLeith at Papercrafts By Patti
  24. Wendy Klein at Doggone Delightful Stampin’
  25. Jackie Diediker at Stampin’ Jackie
  26. Dawn Tidd at Tiddbits from Dawn
  27. Debbie Crowley at expressivelydeb…
  28. Kim Jolley at Stampin’ Artfully
  29. Sue Becker at RnR Stamping
  30. Becky Volpp at Inkblossomwithbecky
  31. Kalyn Shubnell at The Stamping Chronicles
  32. Sherrie Gross at Stampin’ Sunshine
  33. Nancy Gleason at My Stampin Space – – – YOU ARE HERE! – – –

Happy Halloween!

I promised a treat on Halloween and I plan to deliver!  One lucky blog reader will take home the Tee-Hee-Hee stamp set, tonight!  But first, my most favorite card that I’ve made this Halloween season.

Stamp  Class Sept 2014Don’t you just love this?  It is made using the same brayered background technique we used for my Snowy Night card featured in the October Virtual Stamp Club.  (Which by the way, you can still join my Virtual Stamp Club if you’d like – just click on the link and sign up!)

I started with So Saffron cardstock, and punched a circle from a sticky note to cover up the ‘moon’.  I used Daffodil Delight, Crushed Curry & Rich Razzleberry inks on my brayer to color the background and create the dark, spooky sky!  I removed the sticky note and it looks the moon is glowing against the dark sky.  This piece was then adhered to a Basic Black card base.  The homes were made using the Holiday Home stamp set and coordinating framelits die.  (Yes, another bundle and save!)  I used white embossing powder on Basic Black cardstock to get a crisp look.  I used Momento Tuxedo Black ink to stamp on the bats, trees, & lamp posts onto my main layer.  The ghost was stamped on Whisper White cardstock and my paper snips made cutting out the ghost an easy task so I could tuck him behind the chimney.

Now, what you’ve been waiting for…..the winner!   Drumroll please!

#5 – Kim Jones!  Congratulations, Kim!  Please email me your address so I can get your stamp set out in the mail to you.

If you’d like to order any of the items used to make this card, I’m listing the items below.  Just click on the image to go right to my online store where you can order securely 24/7.  Your order will be shipped right to your home.

Again, congrats to our winner, Kim Jones!  Happy Halloween to all 🙂

Happy Stampin,

Nancy


A treat for you

Want a cute and quick way to give someone a candy bar this Halloween?  This little treat holder is the answer.

treat holderIt’s adorable, right?  And it’s made with only a 6″ x 6″ piece of double sided paper.  That means you can get 4 of these out of one 12″ x 12″ piece of DSP!  Just fold the paper in half, point to point, then fold the left point over to the right.  Fold the right point over, and finally end by bringing the top fold down.    It’s that simple.  You don’t even need to glue it if you don’t want to.  But I do recommend using your bone folder to get sharp creases at every fold.   Come back tomorrow and I’ll post a quick video showing you step by step exactly how to make these.

treat holder emptyI used the witches cauldron from the Tee-Hee-Hee stamp set to decorate this, but you could use almost any stamp, sentiment & paper combination for whatever occasion you wish.  A candy bar is always in season!  You could also put movie tickets inside.    treat holder close upFirst I stamped the witches cauldron in Momento Tuxedo Black ink.  Then I used my stampin’ buddy and Versamark ink to stamp the sentiment onto the image I just stamped.  Wild Wasabi embossing powder makes the sentiment pop on the black ink.  A few Rhinestone jewels, colored with a sharpie marker, look like bubbles rising from the creepy potion being brewed!  My paper snips make it so easy to fussy-cut the cauldron.

135125GI’m giving away this stamp set;  all you have to do is leave me a comment and one lucky winner, randomly chosen, will be the winner!  Of course, the winner will have to get back in touch with me to give me their address so I can mail the stamp set to them.  I can only ship to the United States, so my apologies to my blog readers from Canada and beyond.

So, leave me a comment at the end of this post.   I’ll give my readers until 10 PM Friday night to leave me a comment to enter to win the stamp set giveaway.  A winner will be chosen and will have until Tues to claim their prize.  Good luck to all who enter!  I’ll post the video late Friday night or Saturday afternoon showing how to make these.

Thanks for stopping by,  see you soon.

Nancy


Treats for your Trick-or-Treaters

I like to give special treats to those special trick or treaters in my life; whether they are in costume or not!  (Yes, I mean “my boys”, my co-workers and other family).  Of course, you could make a whole bunch of these to hand out to every trick or treater at your door if you really wanted to!

photo 2I used the Fry Box die and Basic Gray cardstock to make the box.  The image is from the “Merry Everything” stamp set.  I love the little dracula, and the little spider behind him.  This set has a coordinating punch, Note Tag Punch, which made cropping out the shape a snap.   Now, you know how I love the coordinating products.  But I love saving money just as much too!  And when these two products are bundled together, you save 15%!  Bonus!

Momento Tuxedo Black ink is my new favorite black ink.  It is crisp and dark, and doesn’t run when you color in it.  I stamped the image with that, then  I used my Old Olive Stampin’ Write Marker to color in his little face.   Old Olive cardstock and the Modern Label punch made a little splash of color behind the image.

photo 3

I love how this fry box can be stuffed with candy.  And it holds a pretty decent amount of candy.  I’m also planning on making these for Thanksgiving to set at each place setting.  I may fill a clear bag with either candy corn , or cookies to put in the box.   This little box is so versatile;  I could see it filled with nail polish & lip stick for a little girl’s birthday party.  Or Legos or Matchbox cars for a little boy.  What will you put in yours?

Don’t forget, I’m giving away the Tee-Hee-Hee stamp set on Halloween!  All you have to do is leave me a comment.   All comments received this week will be entered in to win.  I’ll pick a winner on Friday!

135125GAnd if you’d like to order any of the items I used to make the treat box above, you can click here to go to my store, or click on the picture below.