Bye, Bye Butterfly!

Bye, Bye Butterfly!  This is something I would say to my kids when they were younger.  Now I’m saying it to some retiring products I love.   I am so sad to see the Watercolor Wings stamp set retire, but I’m even sadder to see the Bold Butterfly Framelits and the Butterflies Thinlits retire!  Together this trio of products just made all your butterfly creating dreams come true!

Watercolor Wings # 139424

You can click here to purchase the Watercolor Wings stamp set.

Bold Butterflies Framelits # 138135

You can click here to purchase the Bold Butterflies Framelits.

Butterfly Thinlits # 137360

The Butterflies Thinlits dies are indeed already sold out!  Retiring items are only available thru May 31st or while supplies last.  DO NOT WAIT if you want something that is on the retiring list!

A Butterfly Project Tutorial for you

I made this project in my class a week or so ago that I want to share with you:  Bold Butterfly and I made this video to show you how to make this project.

I hope you enjoyed my Bye, Bye Butterfly tribute.  And I hope that you grab the Watercolor Wings stamp set and Bold Butterflies Thinlits while they are still available.  Click here to shop my online store, and don’t forget to grab any item from the Retiring Lists and the recently updated Clearance Rack.

Retiring Products graphic

Annual Catalog Retiring List

Occasions Catalog Retiring List

Clearance Rack

Retiring 2016-2018 InColors

Snag these now before they’re gone, and you won’t have to say Bye, Bye Butterfly!

Thanks, Friends, See you soon! – Nancy


This is the most exciting time of year

This is the best time of year to be a Stampin’ Up! Demonstrator; it’s the most exciting time of year, even more so than Christmas!  This is when the demonstrators get to see the new Annual Stampin’ UP! catalog and even get to order some sneak peak items!

Last weekend I attended the Stampin’ UP! OnStage event in Hartford, CT.  There the new catalog was unveiled, I got to meet up with some old friends, make new friends, partied a little bit, hear some exciting announcements from the home office, and take home some new, not yet released stamp sets and accessories.  And yes, I took home a new catalog too, along with some swag!  And of course, the swaps!  More on that in my next post.

Of course the new catalog brings new products which is very exciting.  In order to make way for new, some products will be retiring.  You can see the list of Retiring products here and here.

The announcement that created the most excitement was the Color Revamp for 2018! 2018 Stampin' UP! Color Revamp

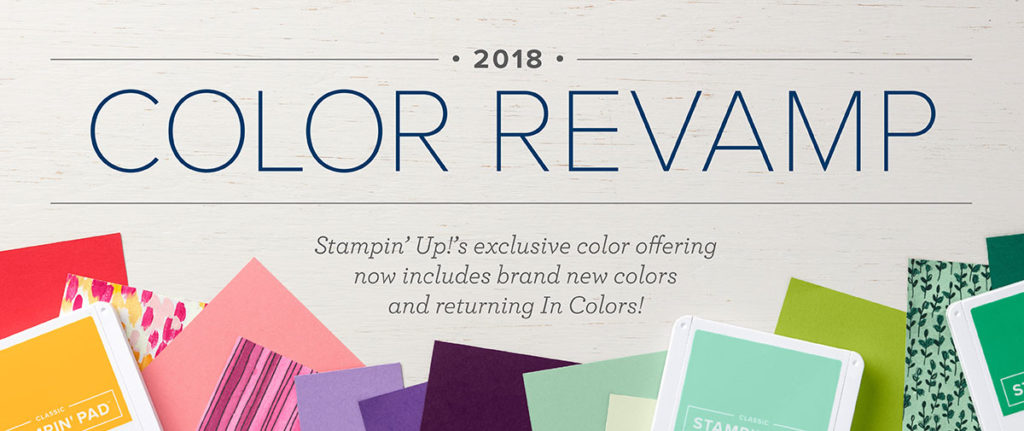
In addition to the InColor program (where 5 new colors are added each year for a 2-year duration) several colors are being retired, and some new colors are being added, and some previously retired InColors are coming back for a permanent placement in the current color line-up.  So without any further adu, let’s take a look.

First, here are the In Color Collections. Each collection is available for a 2-year period.  Each color a set of 5 colors is cycled in, and a set of 5 colors is rotated out. This shows both In Color collection side by side.  Stampin' Up! InColors
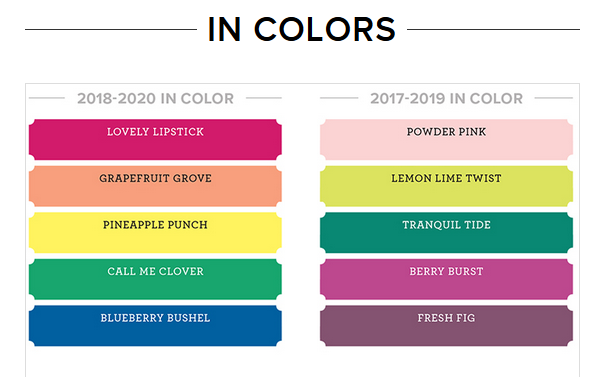
Next we have some returning colors that will now have a permanent place in our color line-up.  Stampin' Up! Returning Colors
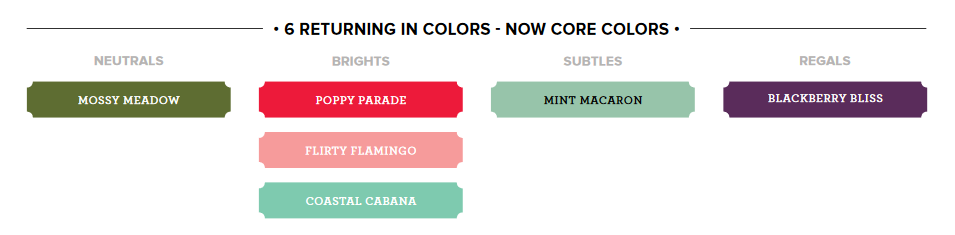
I’ve been pining the loss of Mint Macaron and Blackberry Bliss and have been hoping for their return.  So glad to welcome all of these colors back!

In order to keep up with current color trends and to keep our color palette fresh, several brand new colors are being introduced.  Here they are: Newly added colors to the Stampin' UP! Color Collection
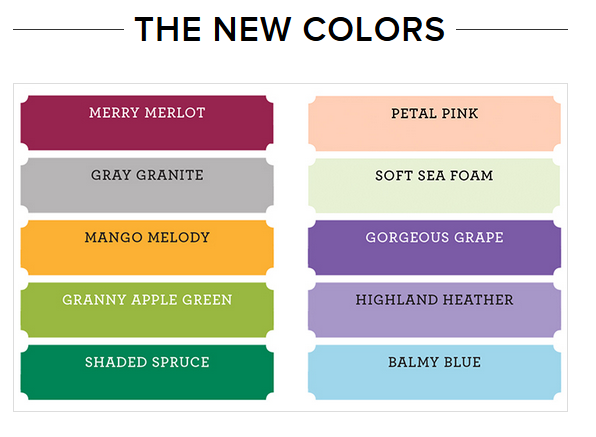
When you put it all together, this is what the new color palette for 2018 will look like:  Stampin' Up! New Color Collections
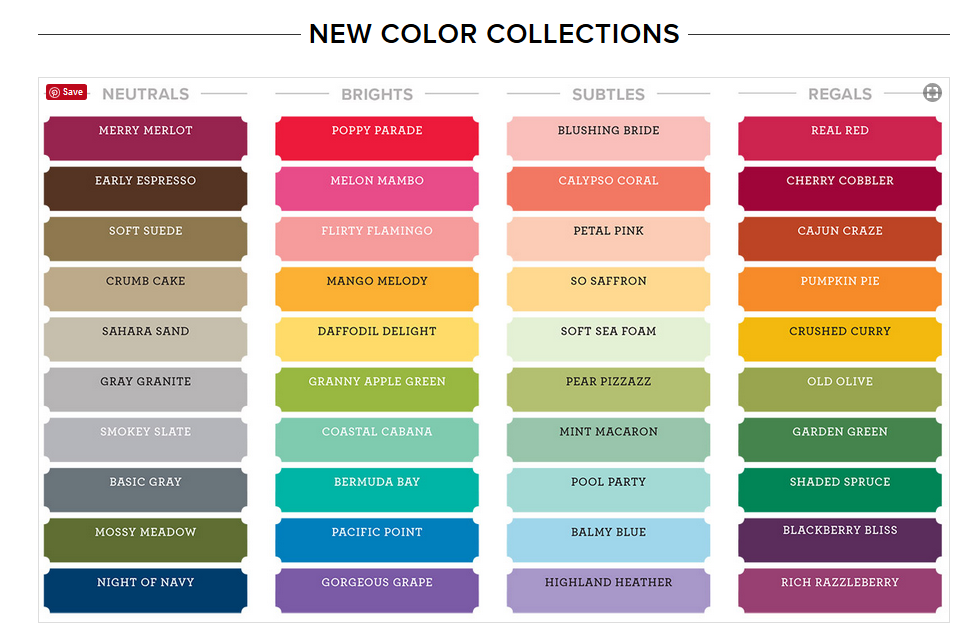
Basic Black, Very Vanilla, and Whisper White have been moved out of the Neutrals Collection, into a Basics Collection, in order to keep all of the colors in each collection an exclusive Stampin’ Up! color.  This actually creates a total of 53 colors, versus the 50 that were available previously.

I told you this is the most exciting time of year!   As a demonstrator I can pre-order these colors and they are on their way to me.  I’ll be posting color swatches of the new colors along side current colors so you can see how they compare.

Of course to make room for new colors and returning colors, other colors had to be retired.  Colors that are no longer as fresh and trendy are retired.  The list of retiring colors is as follows:

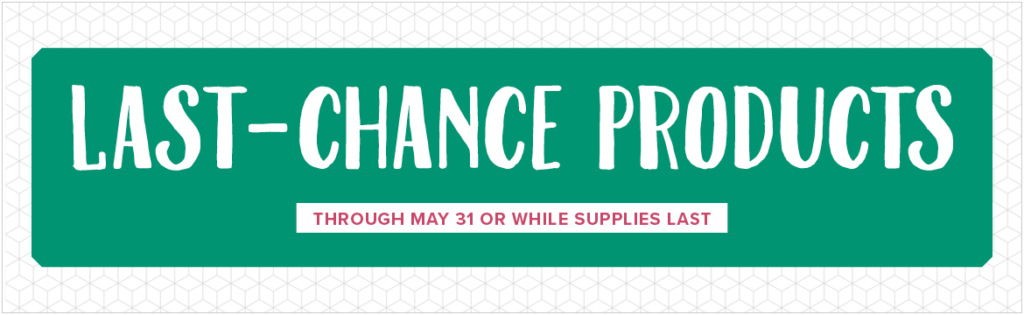
Always Artichoke, Chocolate Chip, Elegant Eggplant, Island Indigo, Marina Mist, Perfect Plum, Pink Pirouette, Rose Red, Soft Sky, Tangerine Tango, Tempting Turquoise, Wild Wasabi, and Wisteria Wonder.  All items in these colors will be retired (cardstock, ink, ribbon, etc.) and will be available until May 30th or while supplies last.  My advice would be stock up on these retiring colors now before they are sold out.  You can shop your favorite color by color collection here.  Just click on the color you want and you’ll see every item in that color!  Pretty cool, right?

Now I know I just gave you a lot of information to digest.  You can get

Retiring Products graphic

Feel free to print out the Retiring Lists from both Catalogs here:

Annual Catalog Retiring Products     Occasions Catalog Retiring Products

Shop for your favorite Stampin’ UP! products here:

Questions?  Ask me!  I love to hear from you and am always happy to answer your questions.

Are you excited about all the new colors and new products too?  Want to get your hands on the new products now?  Why wait until June 1st, order your $99 Starter Kit now and get all the perks of being a Stampin’ Up! demonstrator.  I’d love to share with you why it may be the best decision you’ll ever make, and how you can make this the most exciting time of year for you too!

I’ll share all the swaps I made at OnStage in my next blog post, so come back. See you soon.

Nancy

Have you considered this?

Sale-A-Bration is quickly coming to an end 🙁  I have loved so many of the items in Sale-A-Bration this year.  From Heartfelt Blooms and Blossoming Basket Bundle to the Party Pandas and the Epic Celebration, there was just something for everyone.  While there are so many options of merchandise to get for free with a qualifying purchase, have you considered this? Free with a qualifying purchase is NOT the only way to save during Sale-A-Bration.

Have you considered joining Stampin’ Up? If you have considered it, then you should act on it now.  You’ll get 2 free stamp sets of your choice, any value, when you purchase the $99 Starter Kit during Sale-A-Bration.

If you’ve never considered joining Stampin’ Up! before, let me give you some things to consider.  First ,when you join Stampin’ Up!  you get an incredible value in the $99 Starter Kit – $125 worth of products, and Free Shipping for $99.  During Sale-A-Bration, add 2 stamp sets of your choice, any value.Join Stampin' Up1Second, you get all the perks of being a demonstrator, but it’s up to you if you want to join as a hobby demonstrator, or a business builder.  Join just to get the discount off your favorite products, and be your own (even only) customer. Or build a business and earn a profit every time you make a sale.   Imagine being able to contribute to your monthly budget by having an income doing what you love.  It all begins with the $99 Starter Kit.

My favorite perk of being a distributor is the early catalog reveal and pre-order.  Join Stampin’ Up! now and be able to see the new 2018-19 Annual Catalog on April 9th rather than waiting for the June 1 release!

Community:

A close tie for the #1 perk of being part of the Stampin’ Up! family is the community.  Our closed, online groups have allowed me to make friends across the country, as well as the friendships I’ve developed stamping with others locally.

Events:

Corporate events, like the OnStage event I’ll be attending in 2 weeks are just plain fun!  Filled with excitement, swaps, prize patrol, early catalog release, learning and sneak peaks, it’s a time to be relished.  And since it’s for demonstrators only, it’s an exclusive event.

These are just some of the reasons you should consider joining Stampin’ Up!  So  whether you’ve been contemplating this, or you never thought of it, if you join before the end of Sale-A-Bration on March 31st, you’ll get the added bonus of 2 Free Stamp sets.  That makes the incredible $99 Starter Kit deal, an even better deal!

Click here to purchase the $99 Starter Kit and join the Stampin’ Up! family.  Have questions?  Contact me and I’ll answer your questions and help you decide if now is the best time for you to join Stampin’ UP!

Nancy Gleason. Stampin' UP! demonstrator, teacher, and blogger


Heartfelt Thanks deserve Heartfelt Blooms

This week, someone went out of their way to help me in such a tremendous way and I really wanted to express my heartfelt thanks and appreciation to this gentlemen.  What better way to say ‘thanks‘ than with a handmade card.  And what better way to deliver heartfelt thanks than by using the “Heartfelt Blooms” stamp set.

Heartfelt Thanks to FMS, too!

This sketch by Freshly Made Sketches was the perfect starting point for my card.Freshly Made Sketches #329That large circle shape just begged to be filled with the awesome Heartfelt Blooms stamp.   This is what I came up with:

Heartfelt Thanks using Heartfelt Blooms

I am pleased with the way this card turned out.  You can visit the FMS blog to be inspired with how others interpreted this sketch.

I started with a rectangle of whisper white and stamped the floral image in Bermuda Bay ink in the lower left corner.  I used Dapper Denim ink to stamp the sentiment (also from the Heartfelt Bloom stamp set).Heartfelt BloomsNext I layered this panel with a rectangle of Bermuda Bay card stock and wrapped it with Bermuda Bay ribbon.  I had some of my favorite 1/4″ white cotton ribbon (retired) that I layered over the ribbon to tone it down a bit.  A few of the  Tutti-Frutti adhesive backed sequins in Pool Party were added for a bit of embellishment.  Then that whole layer was adhered using Stampin’ Dimensionals onto a Dapper Denim card base.   Quick and Easy!  But the end result makes it look like I spent a lot of time on this card, thanks to the awesome Heartfelt Bloom stamp set.

Sale-A-Bration

You can get the Heartfelt Blooms stamp set for Free with a qualifying purchase during Sale-A-Bration but you have to hurry.  Sale-A-Bration ends next week on March 31st and this stamp will not be returning.

2016-2018 InColors

By the way, do you know that Dapper Denim is one of the 2016-2018 InColors which means that this color will be retiring May 31st.  If you want any of the 2016-2018 In Colors, you should start stocking up now as from this point forward, retiring In Colors are available on a while supplies last basis.  So you can stock up on these colors while you can still get them AND earn FREE Sale-A-Bration items!  Win-Win!

Click here to shop my online store and with a $50 purchase (before tax and shipping) you can select the Heartfelt Blooms stamp set for FREE.  There is no limit to how many items you can get for FREE during Sale-A-Bration so the more you shop, the more you can get!

Shop Online

When you shop, if your order (before tax and shipping) is less than $150, please use Host Code Z7KWJFBP.  If your order is $150 or more (before tax and shipping) DO NOT use the host code but rather, claim the host rewards for yourself.  Shop Online Now with Nancy Gleason at MyStampinSpaceAnd, when you place an order with me, I’ll be sending heartfelt thoughts of appreciation to you!  – Nancy

Did you ever do anything COMPLETELY Different than planned?

Did you ever do anything COMPLETELY Different than you planned?  I did! GDP130
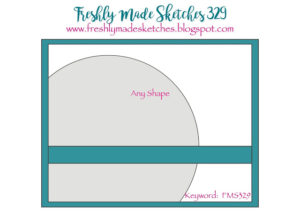
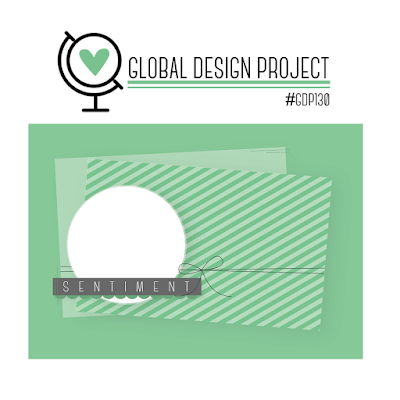
When I saw this sketch challenge from Global Design Project, I immediately envisioned using the Beautiful Peacock stamp in the focal point, and using the beautiful bright blues & greens & golds of a real peacock.  What I ended up with isn’t even remotely close!  No peacock in sight!  Nancy Gleason GDP#130 entryDoes that ever happen to you?  I just didn’t like the way the peacock had to be cropped to fit in the circle, so I just scrapped that idea entirely and went in a different direction, and boy I’m sure glad I did!  I really like the way this card turned out. (Confession:  I ultimately wound up using a larger punch than I was planning and the peacock may have fit much better in the larger 2-1/2″ circle.  But don’t tell the Peacock!).

Anyway, this card gave me opportunity to break out my sponge brayers that have been sitting idle and feeling lonely lately.  I just love to color, whether with colored pencils, crayons, Stampin’ Blends, and coloring the background with a brayer is just joyful to me.  A sponge brayer, an ink pad and the Springtime Foils Specialty DSP created the layer immediately behind the focal point. The metallic dots resist the ink so when you color the paper, the metallic print isn’t affected!  I like the way the Rose Gold metallic looks against Rich Razzleberry.  A piece of Crumb Cake cardstock behind this gives balance and contrast to this busy layer, and the Rich Razzleberry card base ties it all together.

Take a closer look at the sponged Springtime Foils Specialty DSP:Sponge Brayered Springtime Foils DSP
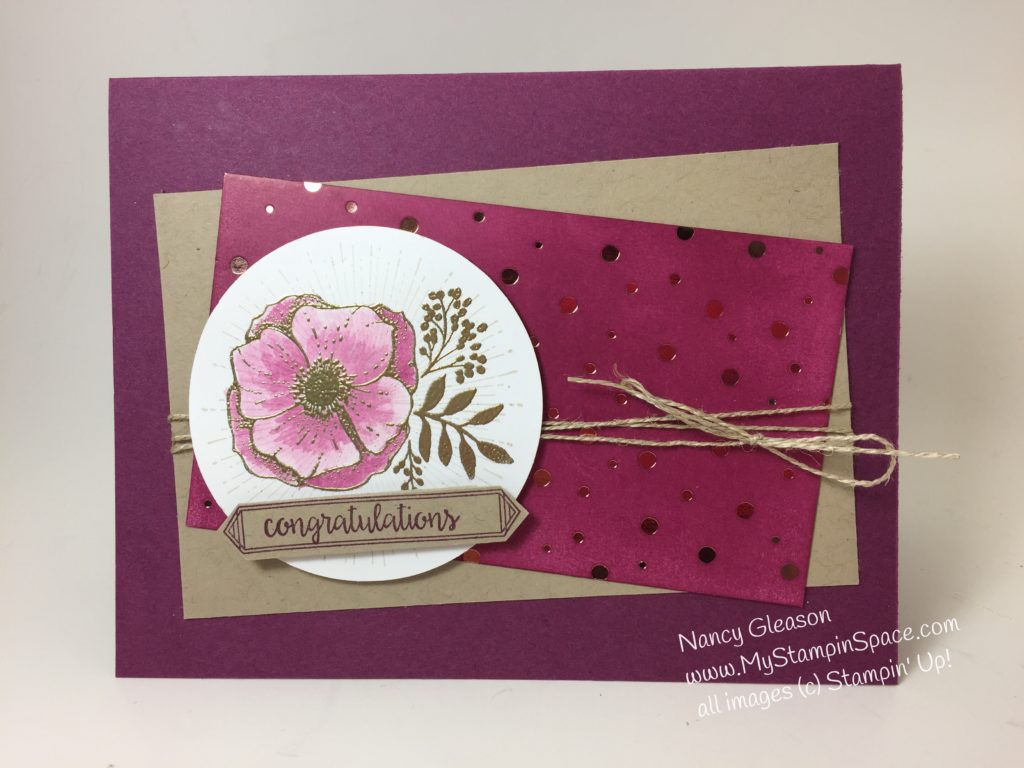
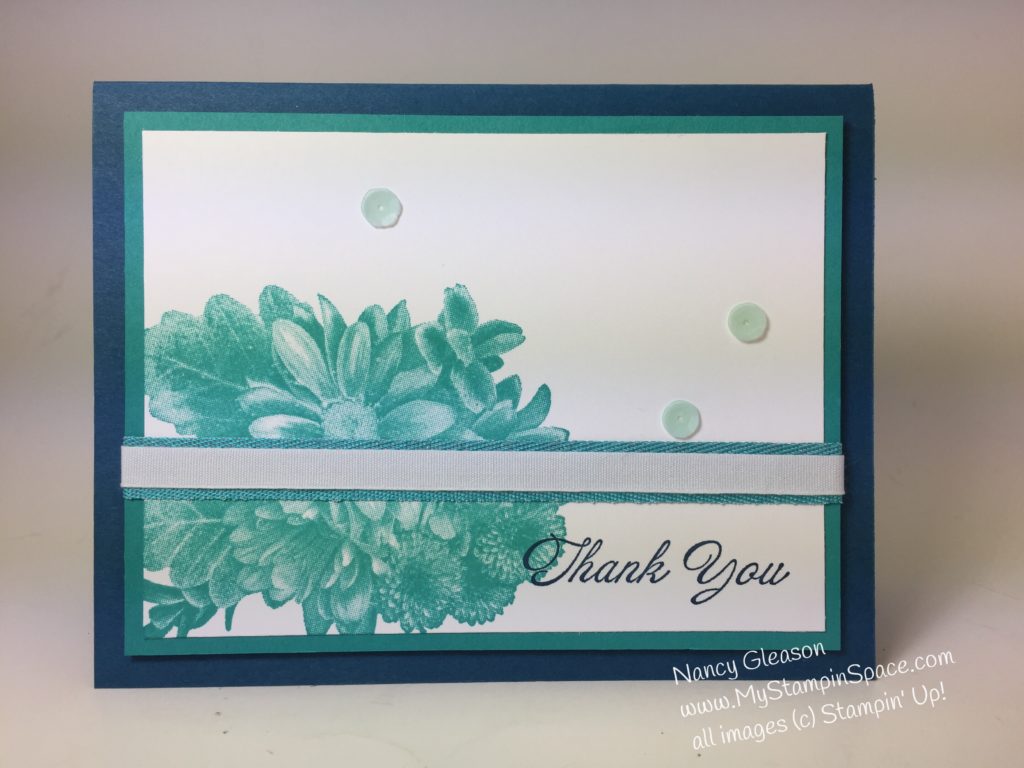
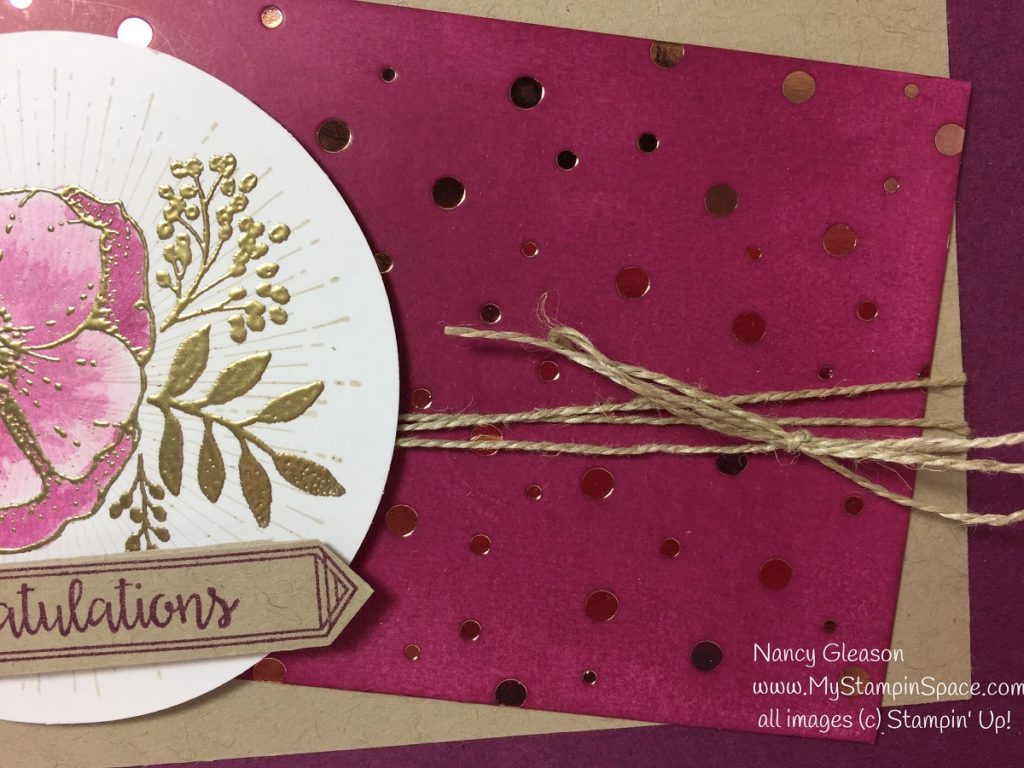
The focal point circle was stamped on top of the sunburst image in Sahara Sand ink twice to create a circle.  Then I stamped the floral image in Versamark ink and heat embossed using gold embossing powder.  Look closely:Gold Embossed floral from Amazing You stamp set

Next up I colored the flower using Rich Razzleberry ink and my aqua painter.  I layered the ink on very lightly and built it up a layer at a time.    Another scrap of Crumb Cake cardstock provided me with just the right thing for my sentiment layer.  I stamped the border & Congratulations from “Happy Birthday Gorgeous” in Rich Razzleberry ink and enlisted the help of my snips to crop out that shape.

Although there are a lot of elements and layers, this card came together fairly quickly.  I’m hoping the folks over at the GDP like it, and I hope you like it too! Why don’t you head over the Global Design Project and see what others have come up with using this sketch.  But before you leave, please take a moment and leave me a comment to tell me what you think of my card, and if you ever completely changed directions when you sat down to create a card, or any other craft project.  If you need any of the products listed here, please click here to shop now.  Remember the Sale-A-Bration items are Free with a qualifying purchase ($50 or $100 before tax and shipping).   There is NO LIMIT on how many FREE Sale-A-Bration items you can earn.  Sweet, right?  But there is a TIME LIMIT – it all goes away on March 31st!  So place your qualifying order and get your favorite Sale-A-Bration items before they’re gone! Shop Online Now with Nancy Gleason at MyStampinSpaceHappy Stampin’
Nancy Gleason. Stampin' UP! demonstrator, teacher, and blogger

Bubble Over with Happiness During the last few days of Sale-A-Bration!

Today I want to share with you a delightful pattern of Designer Series Paper that will just make you just bubble over with happiness! It is the Bubbles & Fizz Designer Series Paper (147244). Bubbles & Fizz DSPThis paper coordinates perfectly with the Bubble Over Stamp Set and Bottles & Bubbles Framelits dies (Bundle & Save! – 146082). The Glitter & Clear Epoxy Shapes are the perfect embellishment to add a bubbly finishing touch to this product suite!

 Watch & See:

And it’s FREE! What’s better than cute AND free?   Cute, free and perfect coordination! Look at the Bubble Over Stamp set:  And the Bottles & Bubbles Framelits Dies:Bottles & Bubbles Framelits DiesAnd with the Bubble Over Bundle and Bubbles & Fizz DSP, you get it all.  So get it all right now!Shop Online Now with Nancy Gleason at MyStampinSpaceSale-A-Bration ends March 31st and the Bubble Fizz DSP will be gone.  You’ll still be able to get the Bubble Over Bundle until May 31st, but you won’t be able to get the coordinating paper after March 31st.

Want to see my other Sale-A-Bration picks?  Click Here, Here and Here.  Which Sale-A-Bration items is YOUR favorite?  Click to leave a comment.  So order the Bubble Over Bundle  and get the FREE Bubbles & Fizz Designer Series Paper now and I know you will bubble over with happiness with all the cute cards, gift tags and scrapbook pages you’ll make!

A set called “Heartfelt Blooms”

Sale-A-Bration offers exclusive products for FREE with a qualifying purchase.  One of the exclusive stamp set you can get is a set called “Heartfelt Blooms”.  This is a red rubber set available in clear mount (147202) and wood mount (147197).  In keeping with Stampin’ Up! high standard of innovative products, this stamp is a Distinktive stamp, a patent pending technology that gives a photographic finish.  Take a look:  Heartfelt Blooms Clear-Mount Stamp Set

The stamp set features this beautiful, life-like flower bouquet along with some great sentiments with fabulous fonts.  To see how awesome this stamp set is, watch this video:

HOw I used it

Now take a look at a card I made using a set called “Heartfelt Blooms:”

a sympathy card using a set called "Heartfelt Blooms"

This card uses a color combination Fresh Fig and Sweet Sugarplum.  The stamped image is so beautiful it does all of the work for you.  A simple sentiment and a ribbon pulls the focal together and the Basket Weave TIEF creates the perfect backdrop!  (More on that Basket Weave embossing folder in my next blog post!)

a set called "Heartfelt Blooms" meets Basket Weave TIEF by Nancy Gleason of My Stampin Space

For this next card I pulled Mint Macaroon out of retirement  as it pairs so well with Tranquil Tide, don’t you agree?

Which color combination do you like best?  Leave me a comment here.

I know you want Heartfelt Blooms.  And it’s yours FREE with a qualifying $50 purchase.  So stock up on some cardstock, adhesives, envelopes, etc.,  NOW while you still can get this stamp set.  Click HERE or on the shopping cart:

OnLine Shopping Cart Nancy Gleason Stampin' Up!

Thanks for stopping by my blog today, and for shopping my online store.  Now you too can have a set called “Heartfelt Blooms” of your very own! Sweet 🙂


Time is Running Out! – Only 24 Days Left!

Time is running out – there are only 24 days left for Sale-A-Bration and all it’s FREE stuff goodness.

Today I want to showcase a stamp set that is just perfect for the teens, pre-teens and young adults (including young at heart) in our lives!

Epic Celebration

This red rubber stamp set (available in both wood mount and clear mount) have a couple of great images and sentiments that are just trendy and on point for the younger generation.  Watch this video to see this stamp set in action:

WOW!!!  It’s SO EASY to make awesome cards with this stamp set!

I recently held a class where we made this card: Epic Celebration
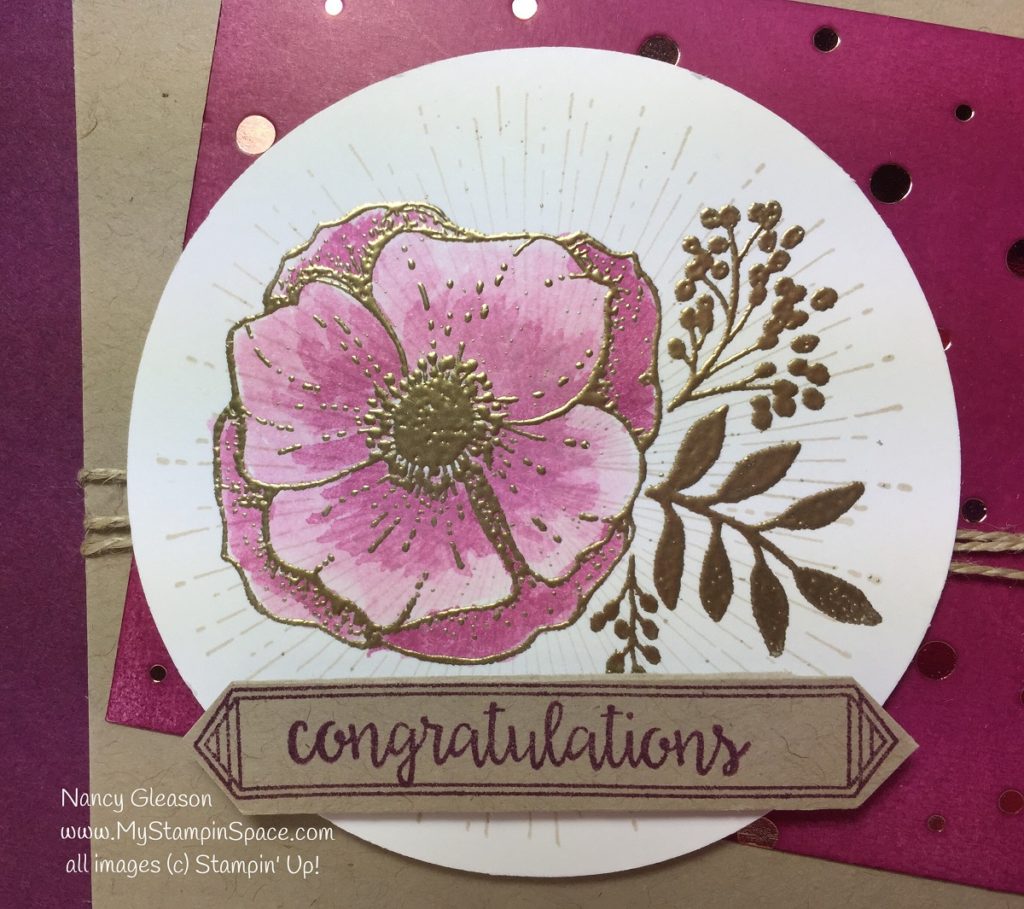
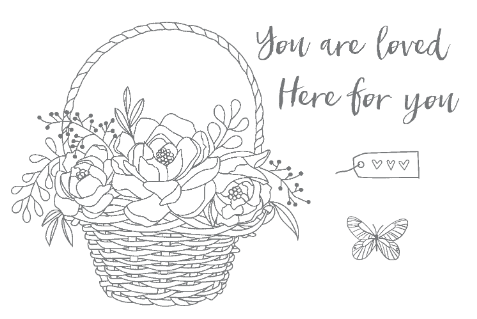
If this looks familiar, it’s because I CASE’D it from the catalog!    I copied the front layer of the gift bag on page 12 of the Sale-A-Bration catalog and turned it into a card.  Sometimes you see something that is so perfect you just want to make it!   The Stampin’ Up! catalogs are chock full of wonderful examples just waiting for us to make!  Love it!   You can view the catalogs here.

Another class, another card using the Epic Celebrations stamp set.  This one features an inked embossing folder background and the sneakers are colored with the watercolor pencils and a blender pen.

Epic Celebration

Who wouldn’t be awesome in pink and orange sneakers?  So cheerful!

Epic Celebration is a level 1 reward so it is free with a $50 purchase.  Shop for your favorite Stampin’ Up! items here, and score a FREE Sale-A-Bration for every $50 you purchase!  Sweet!  But time is running out- there are only 24 days left before Sale-A-Bration ends!

Time is Running Out!

Sale-A-Bration is in full swing, but I must warn you:  Time is Running Out!  Sale-A-Bration ends on March 31.    So, I am going to spot light some of my favorite Sale-A-Bration  items for you.  Then all you have to do is choose which are your favorites, and decide how many FREE Sale-A-Bration items you want before it’s over.  Need a refresher on what Sale-A-Bration is?  Just click here.

Amazing You and Celebrate You

This is a stamp set and and thinlits dies that coordinate together.   The stamp set is a level 1 reward (free with a $50 purchase) and the thinlits are a level 2 reward (free with a $100 purchase).  The cool thing is that the Celebrate You Thinlits dies are going to carry over into the 2018-19 annual catalog which means you’ll be able to purchase them in June 2018 if you don’t get them now.  So no fear of losing out!

Don’t you just love this coordinating product suite?  If you subscribe to mailing list, then you got my newsletter that showcased the Celebrate You thinlits dies on a scrap book page!  Amazing You scrapbook page

If you subscribe to my newsletter, you received the project tutorial to make this scrapbook page in my March 6, 2018 newsletter.  If you didn’t, then subscribe to my newsletter now so you won’t miss out on any future project tutorials.

If you want to get the Amazing You stamp set and the Celebrate You Thinlits dies, place a qualifying order when you shop my online store.   It’s a great time to stock up on essentials like envelopes, adhesives, cardstock, ink refills, etc.  or to splurge on a tool or bundle you’ve been wanting.  Remember, Time is Running out on Sale-A-Bration so get your order in before it’s too late!

Subscribe to my Mailing List

subscribe to my mailing listHave you subscribed to my mailing list yet?  

Thank you if you have.  When you subscribe to my mailing list, you will  receive my newsletter and project tutorials, as well as hear all about any promotions or updates concerning your favorite paper crafting supplies from Stampin’ Up!

If you haven’t yet subscribed to my mailing list, WHAT ARE YOU WAITING FOR?  It doesn’t cost anything for starters.  You’ll get my FREE REPORT
The 7 Essential Tools Every Paper Crafter MUST have to be Successful””  when you subscribe, AND you’ll get awesome project tutorials that are delivered exclusively to my mailing list subscribers.

SPOILER ALERT!!!   Subscribe to my mailing list before 1:00 EST Tuesday, March 6th and get a 12 x 12 scrapbook page layout project tutorial for FREE!

It’s easy!  Just click on the mailing list subscription box on the top right, on the box that pops up, or click here.  Then prepare to get lots of project tutorials and inspiration from the newsletters that will appear in your inbox.    See how easy that is?

SHARING IS CARING!

Know anyone else that would like to get this type of newsletter in their inbox?  Just copy the text below and send it to your friends!

“Like Paper Crafting?  You should subscribe to this mailing list.  I did and now I receive FREE project tutorials and more in my inbox. You’re welcome!”

Easy, right?  Your friends will love you for sharing this and they will probably buy you ice cream the next time you’re out together to show their appreciation.  Yay!  Ice Cream!

Seriously, thank you.  I honestly appreciate the opportunity to share my love  of paper crafting with you and your friends.  Do you have a suggestion for a topic you would like to see me address?  Just leave me a comment.

See you soon!  But before you go, subscribe to my mailing list!

I’m addicted to coloring!

My name is Nancy Gleason, and I’m addicted to coloring!  Adult coloring is such a popular hobby but when you are coloring with the Stampin’ Blends markers and the new stamp sets from Stampin’ Up!, it’s like adult coloring on steroids!  And I’m not ashamed it’s created an addiction!

The new round of Sale-A-Bration was just released on Feb. 16th and this new Blossoming Basket bundle with the Blossoming Basket stamp set and coordinating Basket Weave TIEF is enabling my addiction!  Let me show you what I’ve been working on:Blossoming Basket stamp set colored with Stampin' Blends

The coordinating Basket Weave Textured Impression Embossing Folder has a deep texture that is just the perfect compliment to this basket.  I added some ink to the TIEF to create even more depth!  A 2″ strip adds just enough texture to this card.

The more I use the Stampin’ Blends markers the more I love them!   Look at the shading you can achieve:  I used Crumb Cake for the basket, Daffodil Delight on the large rose, Calysp Coral for the smaller roses, Cherry Cobbler for the berries, and Old Olive for the leaves.  A small swipe of Ivory under the basket helps to ground it.

Blossoming Baskets in Yellows & Oranges

Have you tried the Stampin’ Blends yet?  I can’t get enough of them!  You can see some other projects I made with Stampin’ Blends here and here.  Come back again as I’ll have another card that I made with this stamp set but in a totally different color combination.

Sale-A-Bration

Blossoming Basket

This is the stamp set Blossoming Basket that is available for free during Sale-A-Bration with a qualifying order.  You can always order Stampin’ Blends to qualify for this stamp set which comes bundled with the Basket Weave TIEF. You can watch a video from Stampin’ UP! here on the Blossoming Basket bundle.

Click here to place an online order now.

So much to color and not enough time to do it!  Too bad I have to go to work every day!  I’d rather stay home and stamp and color all day! That would be much more fun, don’t you think?  After looking at what you can do with Stampin’ Blends markers, it’s not really a bad thing that I’m addicted to coloring!


Rose Wonder meets Stampin’ Blends

Did you ever wonder what happens when the stamp set Rose Wonder meets Stampin’ Blends?  Well, I’m going to show you!

Without any further adu, here is the teaser I showed last week.  (Yes, I did tell you to check back in a few days for the finished project.  A case of the flu set me back about a week!  I am feeling so much better now, thank you. )Rose Wonder Meets Stampin' blends
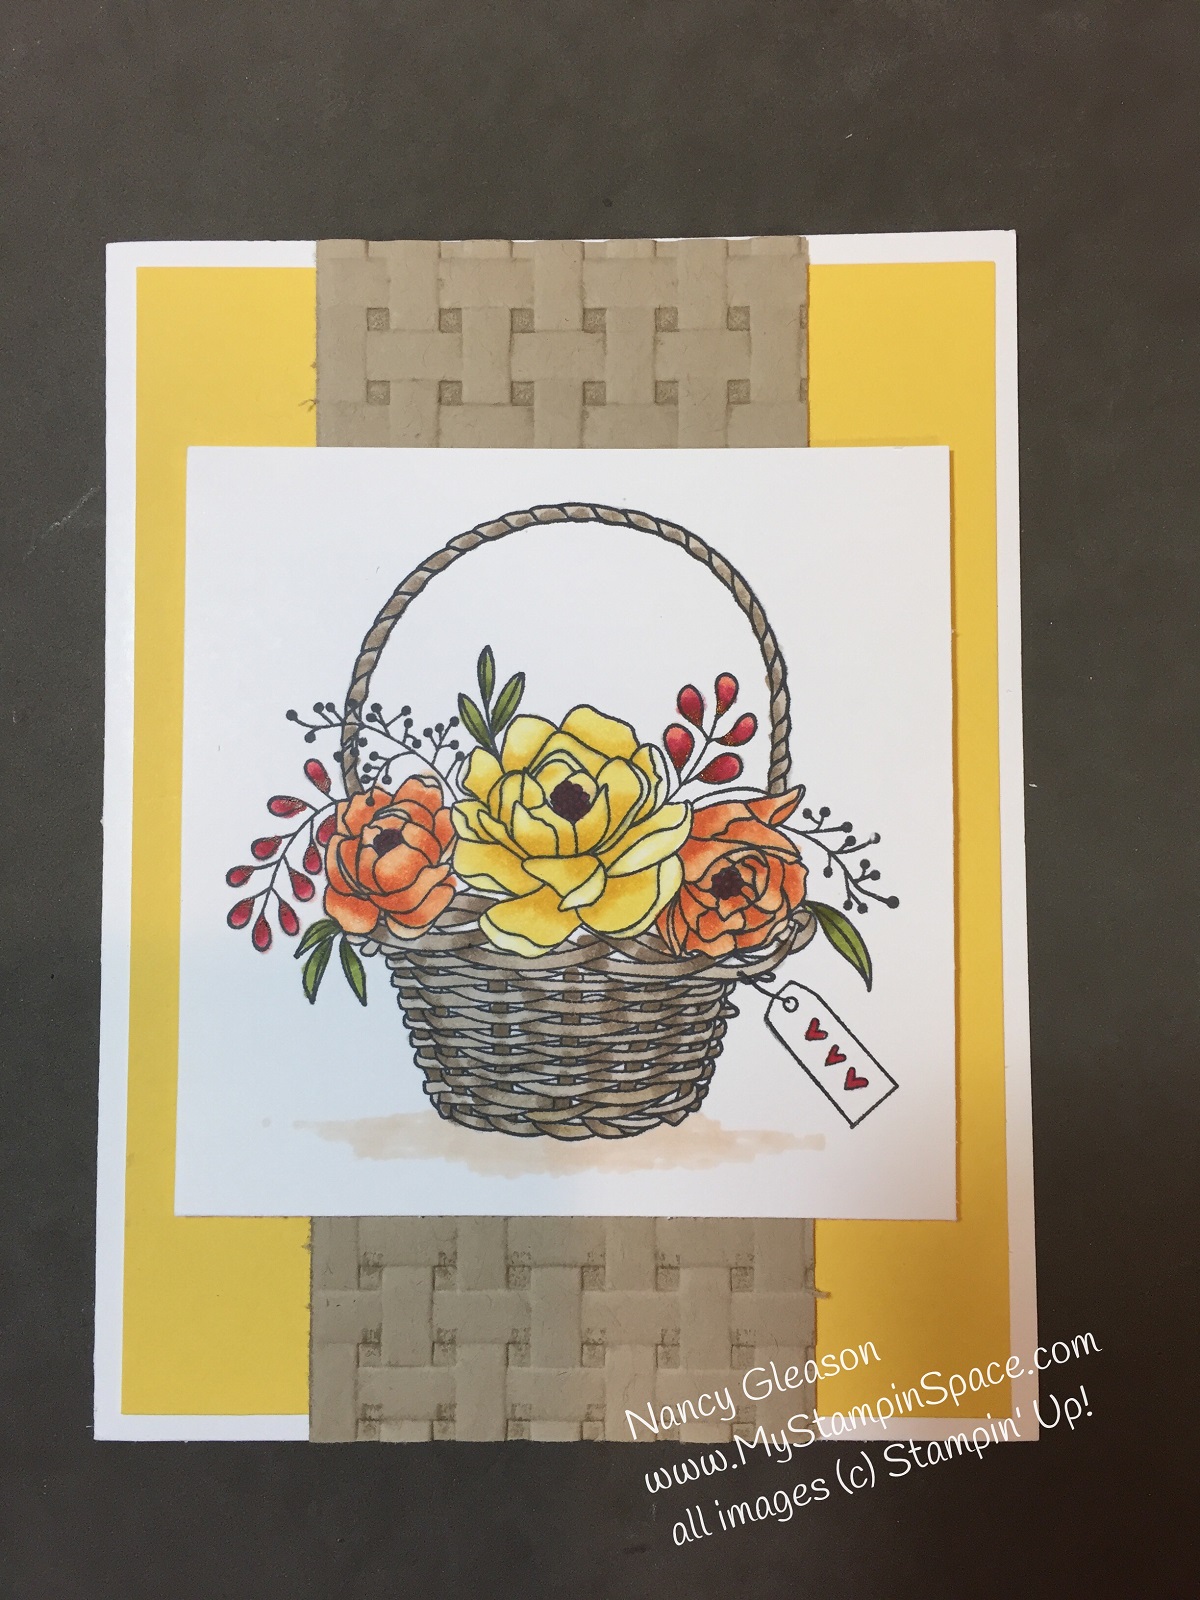
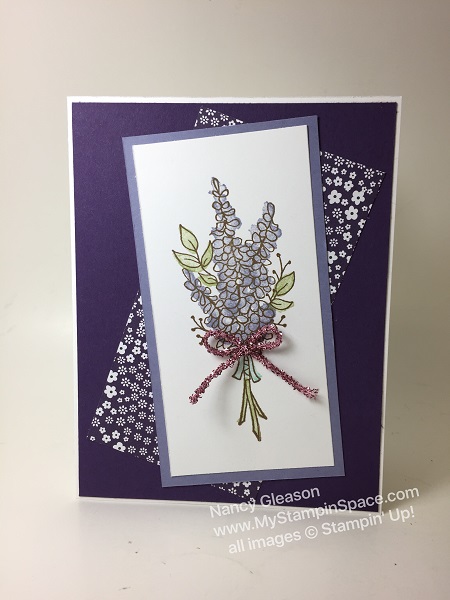
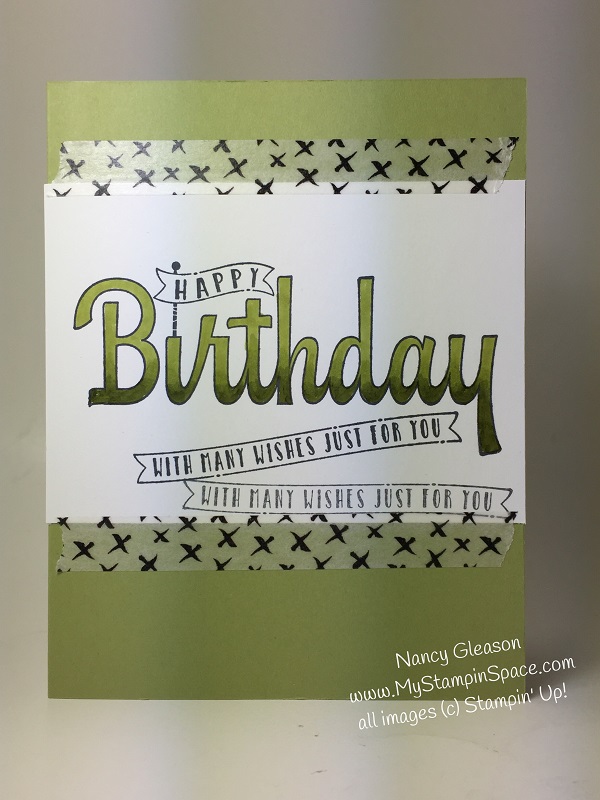
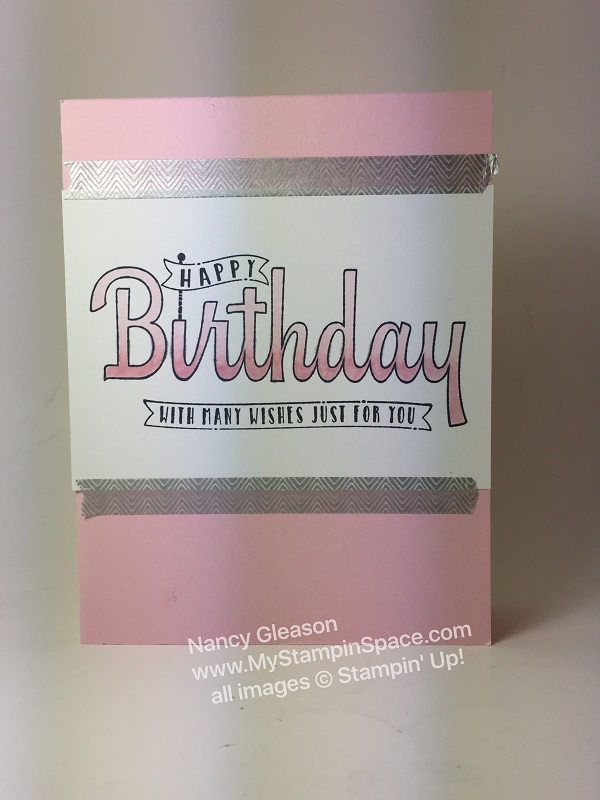
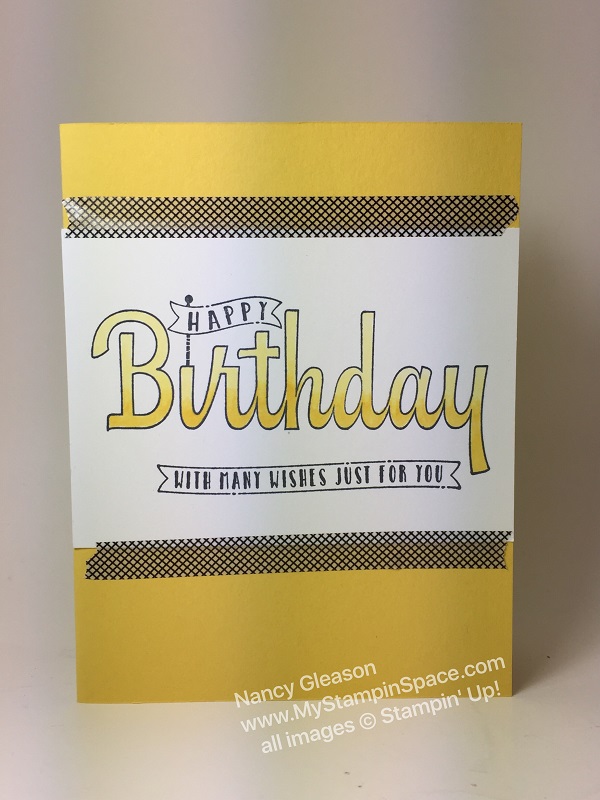
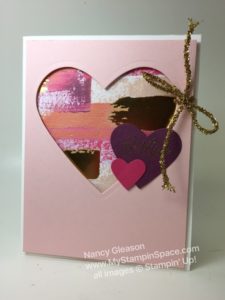
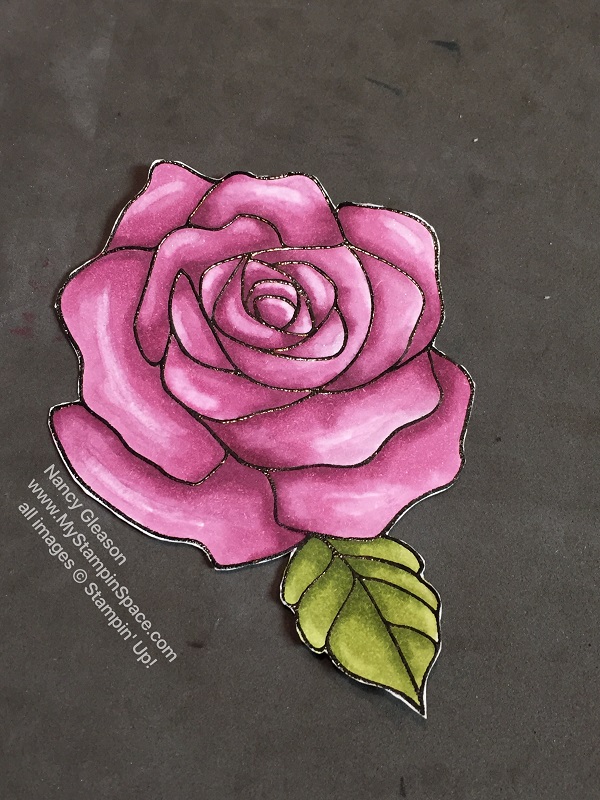
I am just loving coloring with the Stampin’ Blends markers and the remarkable shading and hi-lighting that is possible with these markers.  With a light and a dark shade of each color, the stampin’ blends alcohol markers allow you to blend colors seamlessly.  The addition of a color lifter allows you to ‘lift’ or remove color to create hi-lights.  After coloring this flower, I fussy cut it out.

For this flower, I used Rich Razzleberry and Old Olive  Stampin’ Blends.

Here is the card I made with that flower: Rpse Wonder meets Stampin' UP! 
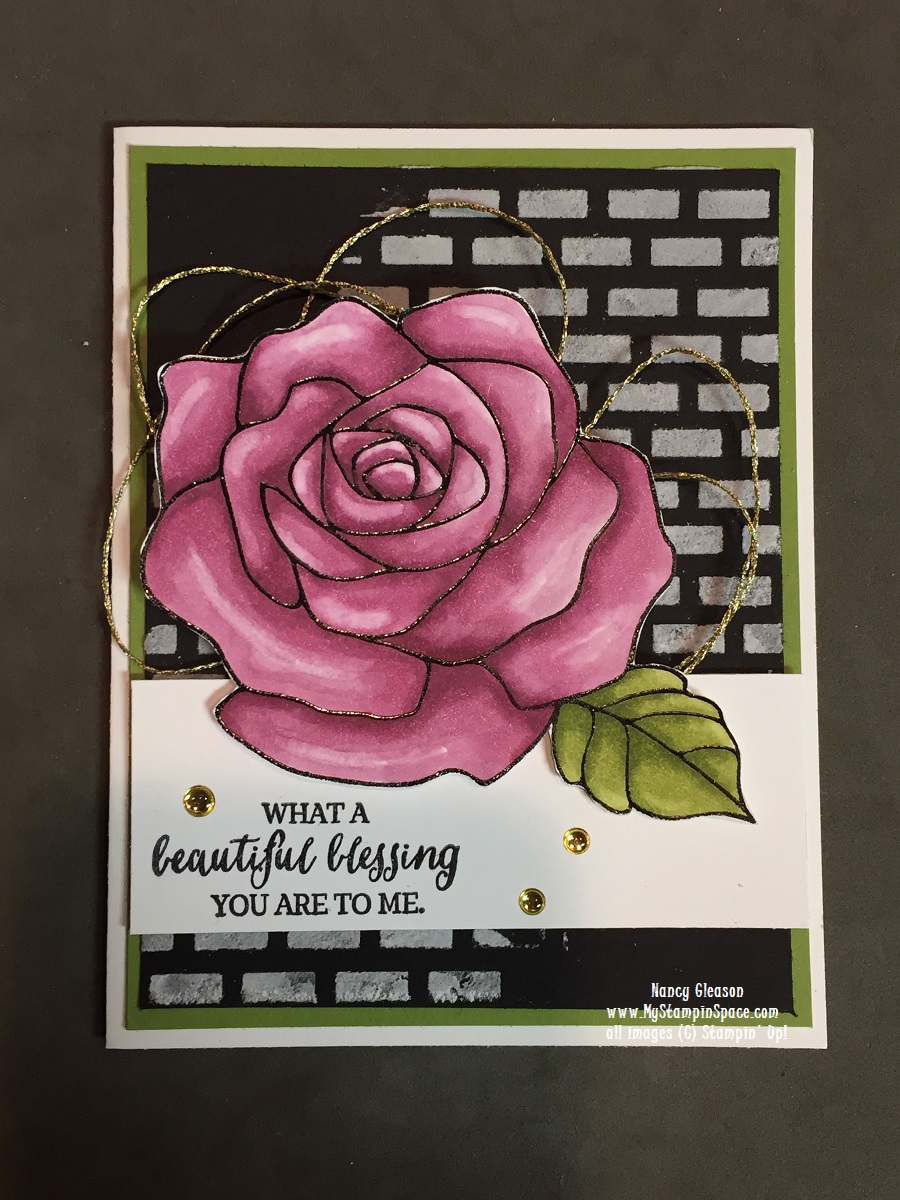
I used embossing paste to create the subway tile look on the background.  I like how the black and white make the perfect backdrop to this stunning flower.  A little bit of gold thread and gold embellishments add just the right amount of bling without stealing the show from the star of the show.

Have you tried the Stampin’ Blends yet?  I encourage you to give them a try.  You can get the entire collection of Stampin’ Blends or just pick up a color or two.  I would recommend a set of Old Olive and a pink or blue or yellow to be able to make a flower, and of course the color lifter.  Watch this video to see how to work with the Stampin’ Blends markers.

Sale-A-Bration

During Sale-A-Bration you will earn a Level 1 reward for every $50 you spend, or a Level 2 reward for every $100 you spend before tax and shipping.  Did you see the new Sale-A-Bration items just released? Click Here for the 2nd release.   The new Blooming Basket just begs to be colored with Stampin’ Blends!

Blossoming Basket

When you purchase the $99 Ultimate Starter Kit during Sale-A-Bration, you can choose $125 worth of products for only $99 plus free shipping, AND you can choose any 2 stamp sets for FREE as well.  What will you choose?  Decide what you want, then CLICK HERE to purchase the $99  Ultimate Starter Kit.

So, what do you think about Rose Wonder meets Stampin’ Blends?  Leave me a comment here.  I love to hear from you.

How to Use the Stampin’ Blends and How to Get them on Sale!

Today’ I am going to show you how to use the Stampin’ Blends markers to achieve a soft, gradated or ombre look. I recently taught a class on how to use the Stampin’ Blends and I want to share that project with you.  This example uses Pool Party Stampin’ Blend markers.

How to Use Stampin' Blends with the Birthday Wishes for You Stamp Set
See how the color is darker at the bottom of each letter and lighter towards the top? That’s the beauty of the Stampin’ Blends markers!

I used the Birthday Wishes For You, #145742 stamp for the Happy Birthday, and used the light and dark of each shade of color to get my results.

There are a couple of tips you should know about to get good results with the Stampin’ Blends.  First, use the Memento Tuxedo Black Ink,  #132708 to stamp the outline stamp.  There are several stamp sets in our Annual Catalog, as well as the Occasions catalog that will work wonderfully with the Stampin’ Blends.  Secondly, you need the light and dark version of each color.  You will always want to color with a scrap piece of paper under the piece you are working on.  The markers do bleed thru the cardstock and you don’t want to ruin your work surface.  

Here are other versions of the same card – This one uses Old Olive Stampin’ Blends and Old Olive cardstock:

How to Use Stampin' Blends with the Birthday Wishes for You Stamp Set

Here we go with Pink Pirouette Stampin’ Blends and Pink Pirouette cardstock:How to Use Stampin' Blends with the Birthday Wishes for You Stamp Set

And lastly, below is Daffodil Delight Stampin’ Blends and Daffodil Delight cardstock:How to Use Stampin' Blends with the Birthday Wishes for You Stamp Set

Do you have a favorite?  I have to say that whatever color I was coloring at the time was my favorite; I love them all!

This is a great stamp set to practice with the Stampin’ Blends as it very forgiving.  I started with the dark shade at the bottom of each letter, working 2-3 letters at a time, then I went in with the lighter shade working from the top down.  I overlapped the light shade over the ‘line’ where the light and dark met.  This coloring back and forth across that line allowed the colors to blend so that the colors blended together, rather than having a hard line.

I recently taught the ladies at my Wine Down Wednesday stamp class how to make this card.  Everyone walked away with a card they were proud to show off, and loved the Stampin’ Blends!

I’ll be showing a more detailed image colored with the Stampin’ Blends later this week so make sure you come back to see that. In the meantime I wanted to share with you how you can get Stampin’ Blends for yourself.

what’s the best way to get stampin’ blends?

You can buy the markers individually for $4.50 each or $9.00 for the set of Light and Dark shades of each color.  There are 12 Colors plus a Bronze, and Ivory, and a Color Lifter pen for a total of 27 markers.  You can purchase the Stampin’ Blends Marker Collection for $121.50 plus 10% shipping. Or you can purchase the Stampin’ Blends Collection for $99 and get free shipping.  Which option will you choose?  If you want to order the Stampin Blends Marker Collection for $121.50, or buy individual markers, CLICK HERE.

If you want to get the entire set of 27 Stampin’ Blends markers for only $99, you can purchase the $99 Starter Kit.  You get to choose $125 worth of products, and get free shipping.  With this option you can elect to become a ‘wholesale customer’ or ‘hobby demo’.  You can also choose to become a ‘business builder’.  Either way you get the same perks and benefits and you get to enjoy the discount, the early catalog reveal and more.  You’ll become part of my team, My Stampin’ Circle, too!

I hope that you’ll take advantage of the $99 Starter Kit deal to get the complete set of Stampin’Blends as this is the best bang for your buck!  Oh, and did I mention that you will also get to choose 2 FREE Stamp Sets (any value) when you purchase the $99 Starter Kit during Sale-A-Bration (thru March 31st)?  Which 2 stamp sets will YOU choose for Free with YOUR starter kit?

If you enjoyed the projects in today’s post please COMMENT HERE  I love hearing from you. If you have any questions, feel free to EMAIL ME.  And don’t forget to SUBSCRIBE to my FREE monthly newsletter & exclusive offers.

I hope you enjoyed learning How to Use the Stampin’ Blends Markers and how you can get them discounted by purchasing the $99 Starter Kit.

Happy Stampin’

Nancy Gleason. Stampin' UP! demonstrator, teacher, and blogger


A Valentine Project Tutorial Special just for you!

Valentine’s Day is just a week away, but don’t panic! I’ve got a Valentine Project Tutorial Special just for you!  The project is a Valentine’s Day card that is just perfect for you to show your love (and your artistic skill as well!)

My project features the Painted With Love Specialty Designer Series Paper and the gold mini tinsel trim, to give your project just the right amount of bling.Be Mine Valentine card featuring Painted With Love Specialty DSP

The tutorial features step by step instructions with over the shoulder pictures of multiple steps along the way so even a novice card maker can follow along and be successful.

Normally my project tutorials sell for $9.95, but I’m offering this tutorial at a 50% discount because 1) it’s almost Valentines Day, and 2) I wanted to share the love with you so you can share the love with your loved ones!  That’s a lot of love going around!

Order the valentine’s project tutorial now!


Just click on this button and you can safely and securely pay with PayPal and you’ll immediately get your Be Mine Valentine project tutorial PDF so you can begin making your cards right away.

Do you need any supplies?

You can get them right hereSale-A-Bration 2018
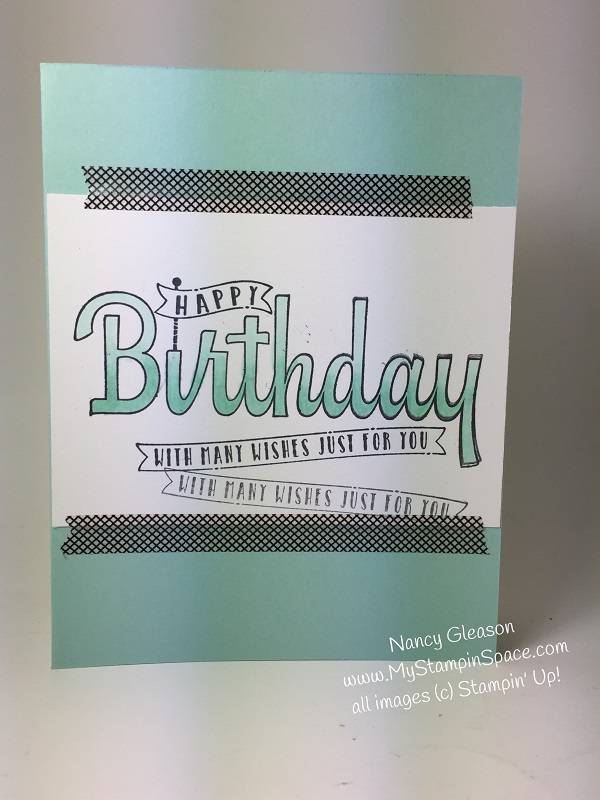
Remember as you are shopping that you will earn a free Sale-A-Bration item with every $50 of product you order thru March 31, 2018.


JUST ANNOUNCED: 

Fast Fuse 129026 From February 8 -12, 2018 you can take advantage of the Fast Fuse Buy 1 Get 2 Refills Free promotion!  Sweet right?  Even better, when you order a Fast Fuse, you’ll get 2 refills free, AND your purchase will go towards your Sale-A-Bration earnings!  Even sweeter!

Learn more about Fast Fuse Adhesive when you watch this video:
https://youtu.be/gdZ6-hB_VbU

Don’t miss out; click the Buy Now button now and get your half-priced Valentine Project tutorial now.


Thanks,

Nancy Gleason

The Lots of Lavender Tutorial

If you visited my blog yesterday, you saw the project I created as my entry for the TicTacToeChallenge using the Lots of Lavender stamp set.  If you didn’t, you can read that post here.  I promised that I would post the Lots of Lavender Tutorial to that project today, and true to my word, here it is.

First the project photo again:  Lots of Lavender, TTTC030, purple, floral, Nancy Gleason, My Stampin Space, Sale-A-Bration 2018

ABOUT THE STAMP SET

The stamp set is the Lots of Lavender stamp set #147194 from the 2018 Sale-A-Bration catalog and it is FREE with a qualifying order of $50 (before tax and shipping).  This is an 11 piece photopolymer stamp set and it is a 2-Step Stamp meaning there are 2 stamps to create the layers of the image.  The background images fill space in the outline with a watercolor-y wash layer of ink.

Let’s look at the stamps in this stamp set:2018 Sale-A-Bration, Lots of Lavender, 2step stamping, floral bouquet

Here are card samples that you’ll find in the catalog:

2018 Sale-A-Bration, Stampin' UP!, Lots of Lavender, floral cards

THE LOTS OF LAVENDER TUTORIAL:

Lots of Lavender, TTTC030, purple, floral, Nancy Gleason, My Stampin Space, Sale-A-Bration 2018I started with a standard card base 5-1/2″ x 4-1/4″ of Whisper White cardstock.  I layered a piece of Elegant Eggplant cardstock which measures 5-3/8″ x 4-1/8″ on top of that.  A piece of Elegant Eggplant DSP (retired) which measures 2-1/2″ x 4-3/4″  was placed on a diagonal.

For my focal piece panel, I started with a piece of Whisper White cardstock 2-1/4″ x 4-1/2″.  I stamped the bouquet outline in Soft Suede ink.  I used Wisteria Wonder ink to stamp the floral background, Pear Pizzazz ink for the leaves & stem and Pool Party ink for the bow.   This piece was then layered a piece of Wisteria Wonder cardstock 2-1/2″ x 4-3/4″.  This panel was then adhered on a diagonal on top of the card base.  A piece of Tinsel Trim in pink was tied in a bow and held on with a mini glue dot.

Although I designed this card for the TicTacToeChallenge and it called for a project with No Sentiment, you could easily add a sentiment if you really want one.  Here I swapped out the bow for a sentiment panel:

Lots of Lavendar with Sentiment

“Happy Birthday” was heat embossed in white emboss powder onto a piece of Pool Party cardstock and cropped out the banner shape with the Duet Banner punch.

Which do you like better?  With or Without the Sentiment?  Leave me a comment and let me know which you prefer.  If you want to purchase any of the items I used to make this card, shop here.  Please use Host Code EV9JYCGC when your online order is less than $150You can earn the Lots of Lavender stamp set for FREE during Sale-A-Bration with a qualifying $50 order.

What is Sale-A-Bration? 

Click here for everything you need to know about Sale-A-Bration.

I hope you enjoyed my project tutorial.  You can get more project tutorials for free when you sign up for my mailing list.  My mailing list subscribers get FREE, EXCLUSIVE project tutorials delivered to their inbox every month.  You can start receiving these project tutorials too!  Sign up here.

Happy Stampin’

Nancy Gleason