I’m loving Lots of Lavender

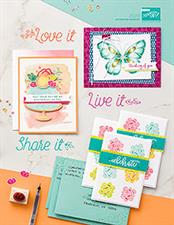
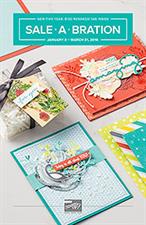
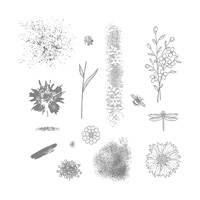
Ever since I got my order with the new products from the  2018 Occasions catalog and Sale-A-Bration catalogs, I’ve had a hard time putting down the Lots of Lavender stamp set.  So much so, that I haven’t even opened up most of the other stamp sets I ordered.  YIKES, right?  I’m just loving Lots of Lavender so much – it’s so versatile.

To see some of the other projects I’ve created with this set, click here and here, or just go to my Pinterest Board Sale-A-Bration 2018.

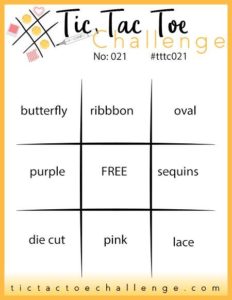
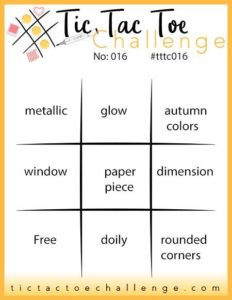
So when the TicTacToe Challenge posted a new challenge and one of the squares was floral, guess what I chose?  Yup, that’s right – Lots of Lavender.  No surprise there, right?  So here is the challenge:

TicTacToeChallenge #030

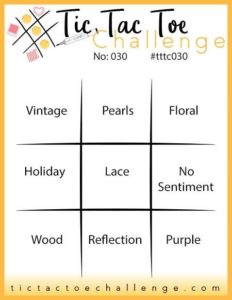
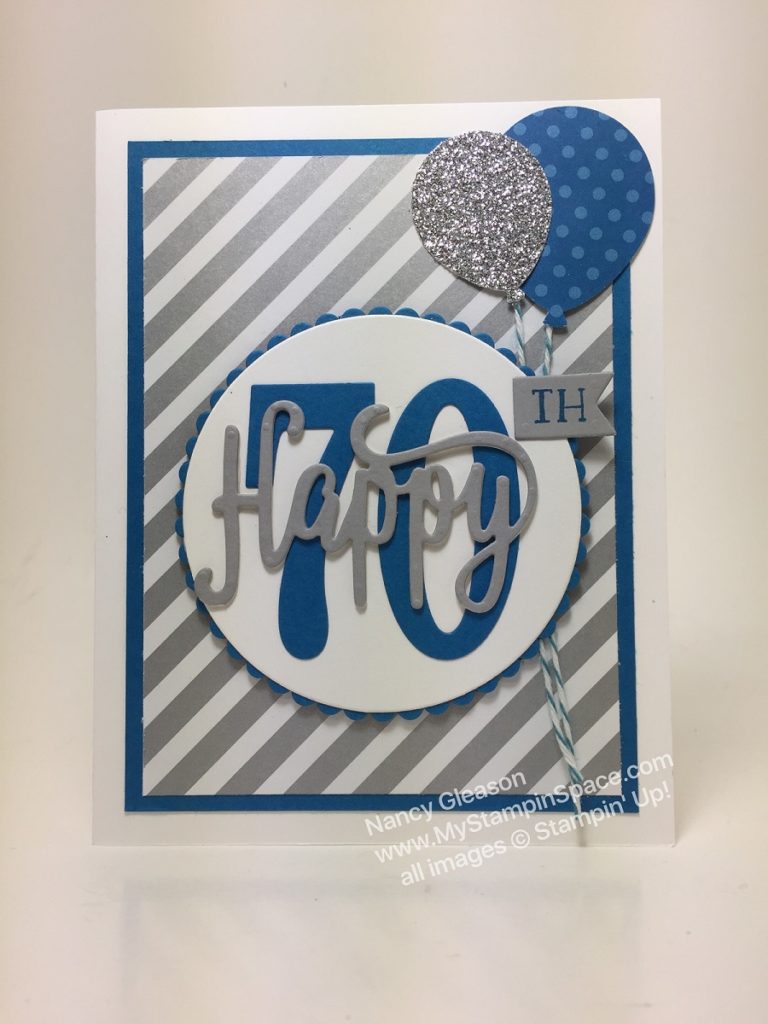
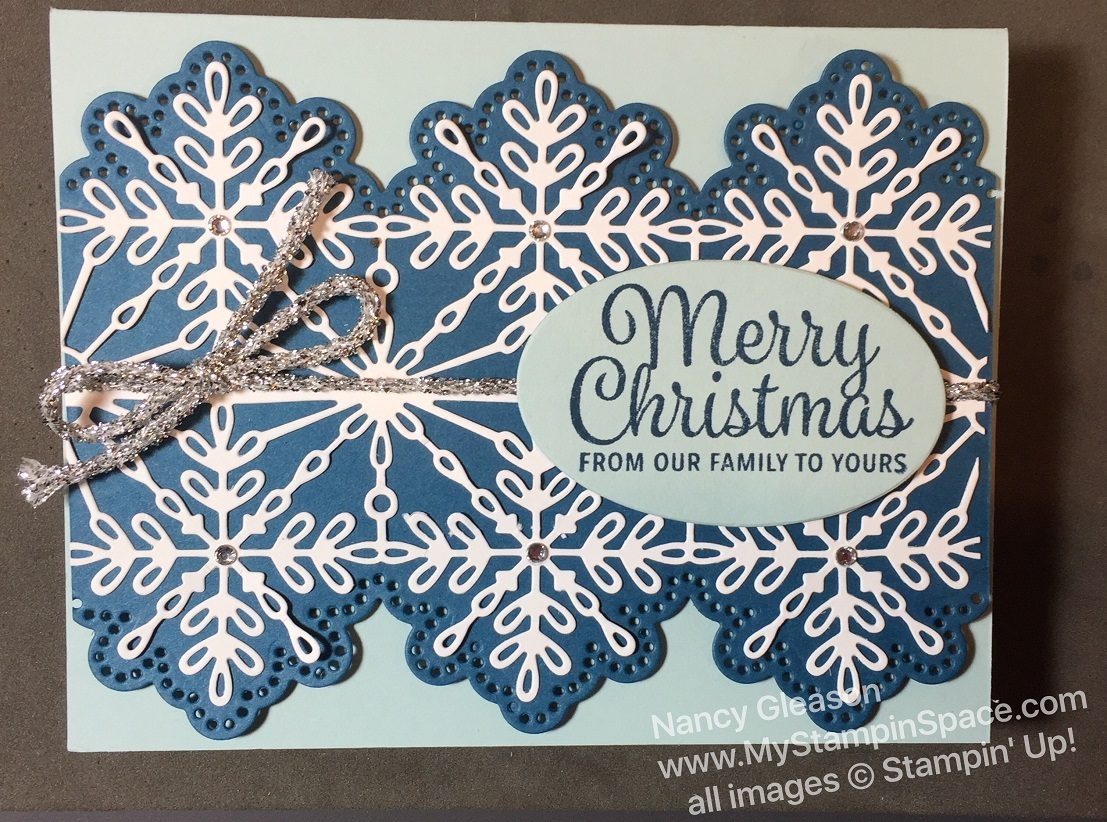
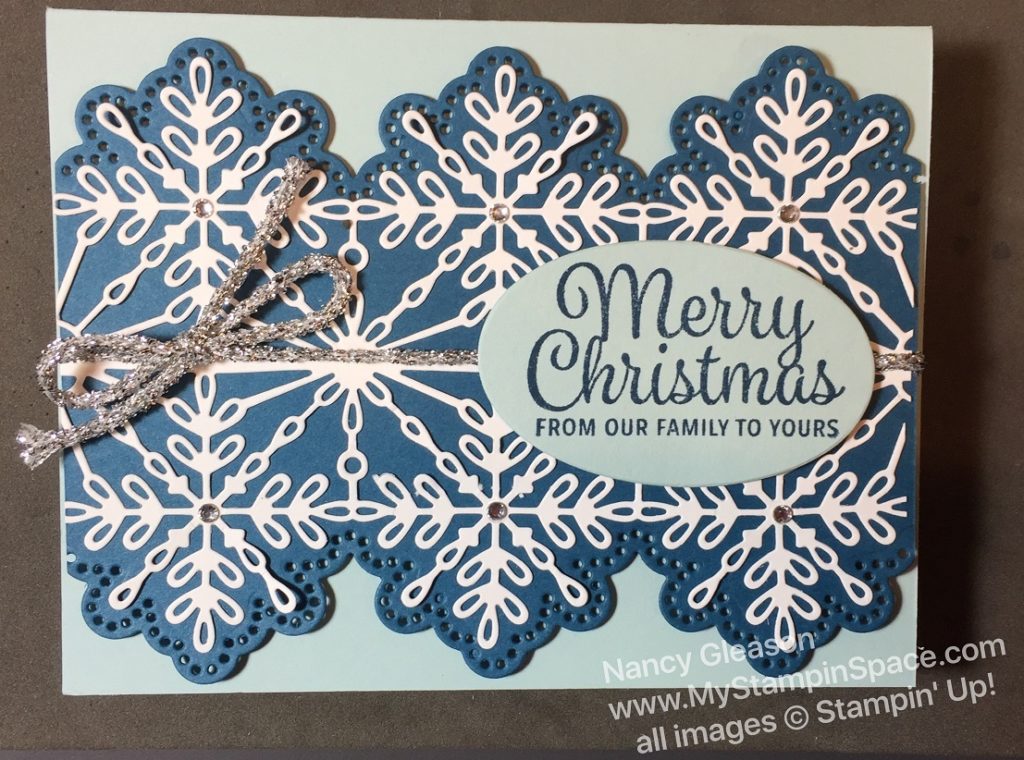
And here is my submission, Right Column Down (Floral, No Sentiment, Purple).

Lots of Lavender, TTTC030, purple, floral, Nancy Gleason, My Stampin Space, Sale-A-Bration 2018

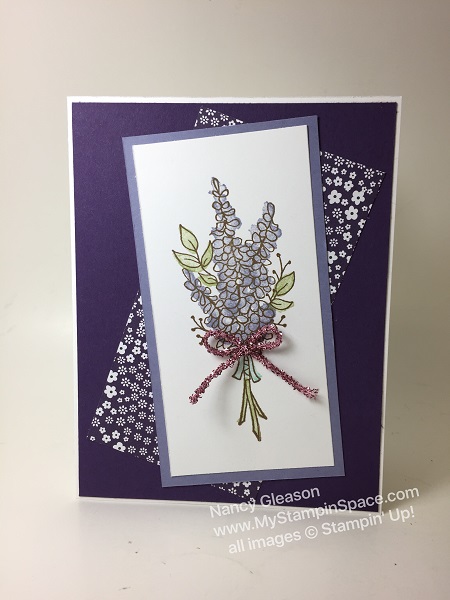
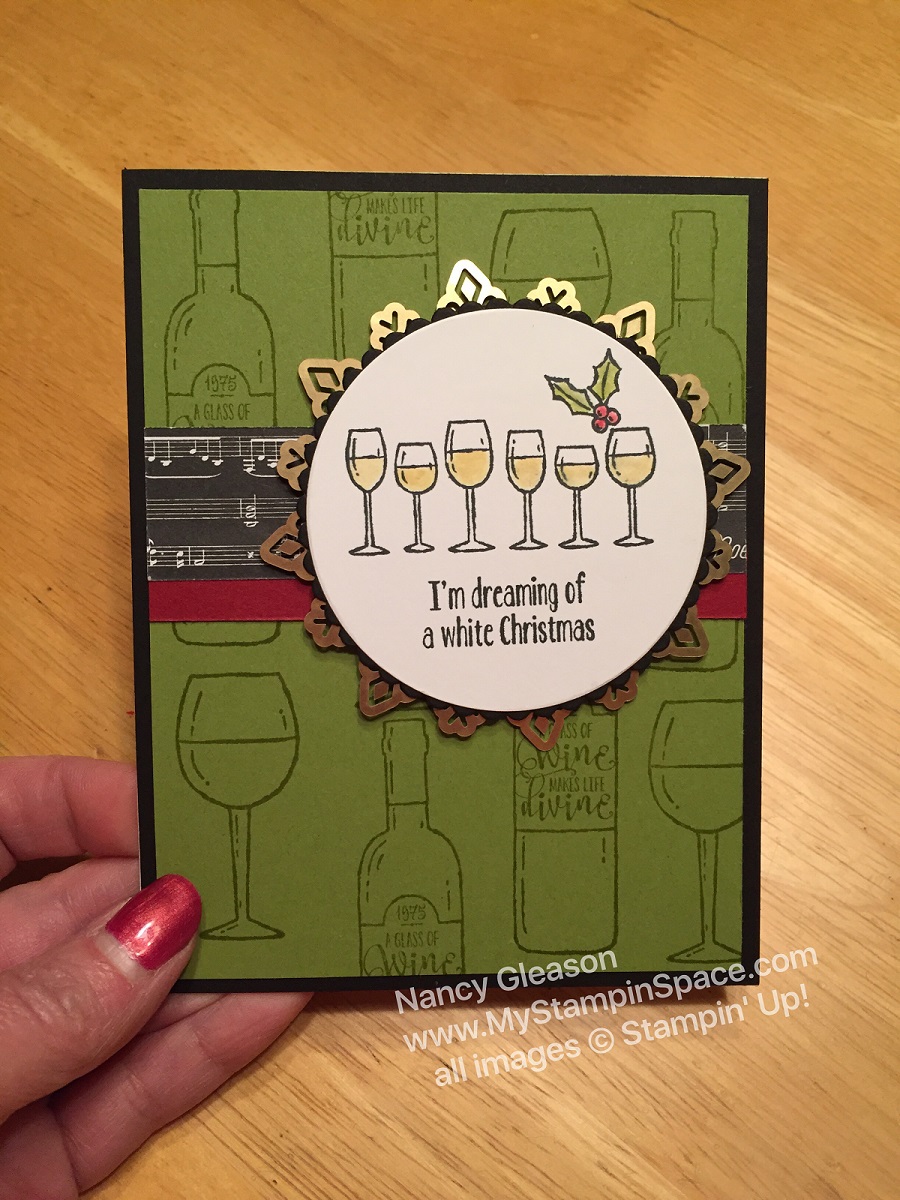
The beauty of this stamped image, accented by a bow of Tinsel Trim, speaks for itself – it doesn’t need a sentiment.  Shades of purple are used with just a touch of blue, green & pink.

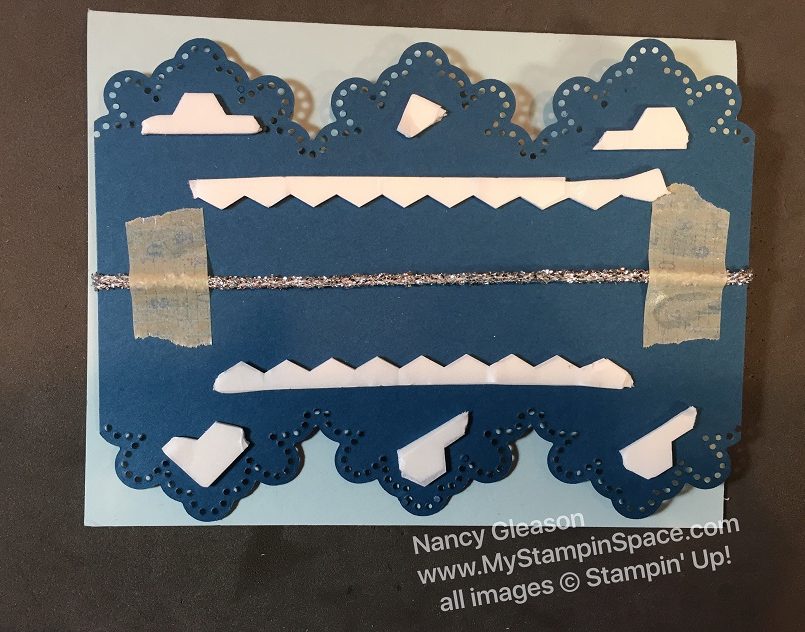
Come back tomorrow to find out how to make this project yourself – I’ll be posting a project tutorial.

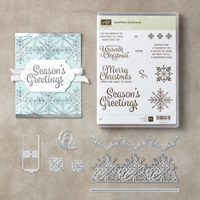
Aren’t you loving this stamp set?  You can get this set for FREE with a qualifying purchase during Sale-A-Bration.  As a level 1 reward, you can choose this item (#147194) an 11 piece photopolymer stamp set with a $50 purchase (before shipping & tax).  Click here to place an order, and please use Host Code  EV9JYCGC when placing an online order of $150 or less. If your order totals $150 or more do NOT use this host code, but rather claim the host rewards for yourself.

BE THE FIRST TO KNOW OF SPECIALS, NEW PRODUCTS, ETC

“I share all sorts of sneak peeks and give-aways on my Facebook Page that you don’t want to miss!

You’ll want to do the following right now to make sure you get access:

1. Visit my My Stampin Space Facebook Page (https://www.facebook.com/mystampinspace/)

2. “Like” my Page, If You Haven’t Already

3. On the same “Liked” Button, Select See First and “Turn On” Notifications”

With the new algorithms that Facebook is putting into place, you’ll need to make sure you Turn On Notifications so that you will be sure to see my posts. 

SIGN UP FOR MY MAILING LIST  “My mailing list subscribers get access to project tutorials that I don’t share anywhere else.  You can sign up for my mailing list here.  You’ll also get my free report “The 7 Essential Tools Every Paper Crafter MUST have to be Successful” when you subscribe!

Come back tomorrow for the project tutorial!

Nancy Gleason


Lots of Lavender

Lots of Lavender is a new stamp set that you can earn for FREE as a Level 1 Reward during Sale-A-Bration. What is Sale-A-Bration?  And How can YOU get this stamp set for free?  I’m glad you asked!  Click here to know everything you ever wanted to know about Sale-A-Bration.

Now that you know what Sale-A-Bration is, you’ll want to add Lots of Lavender to the top of your must have list.

I needed to make some Thank You cards and Birthday cards and thought this would be a good image to use for either.  I wanted to experiment using this 2-step stamp set so I started out by stamping on a scrap of Whisper White cardstock using the lavender image with Versamark ink and then heat embossing with Gold Embossing Powder.  I used my Blender Pen to fill in color from my ink pads using Pear Pizzaz, Perfect Plum and Pool Party.  I was so pleased with this, that I knew I had to make this focal point of a card!  I quickly layered this piece onto coordinating Perfect Plum cardstock.  Lightbulb moment!  I just knew the sketch from the Freshly Made Sketch challenge was JUST PERFECT for this image.  I quickly whipped out some Washi Tape in Perfect Plum (retired)  and I had a perfect sketch challenge entry.

Since I need to make some birthday cards and thank you cards so I decided to add a sentiment, and here is my final result:

Lots of Lavendar, Happy Birthday, Nancy Gleason, My Stampin Space, Rose Wonder, Sale-A-Bration 2018, floral, gold embossing, blender pen, washi tape

Here is the 2nd card I made.  There’s just a subtle difference with the sentiments, but which do you like better?

Lots of Lavendar, Happy Birthday, Nancy Gleason, My Stampin Space, Beautiful Bouquet, Sale-A-Bration 2018, floral, gold embossing, blender pen, washi tape

Take a look at the sketch that was my inspiration for this card:

Freshly Made Sketch Challenge

You can view the Freshly Made Sketches line up here.

Here’s an up-close of the water-coloring technique I did with the floral design.

So simple with the Blender Pens yet it has such a “WOW” factor!  I strongly encourage you to get Blender Pens if you haven’t tried them yet.  They are also a good stepping stone to using the Stampin’ Blends markers too.  If you love coloring, the Blender Pens and Stampin’ Blends will transport you to coloring heaven!  Both are so easy and fun to use but give different results.

You can earn the Lots of Lavender as a Level 1 Sale-A-Bration FREE item (with a qualifying $50 purchase before tax & shipping).  Be sure that you place your orders in $50 increments so can earn a FREE item.  You can shop on line here.

Follow me on Social Media: Like me on Facebook, Instagram and Pinterest.  I’m showcasing another card I made using the Lots of Lavender stamp set and the new Painted with Love Specialty Designer Series Paper (new in the Occasions catalog) on Instagram that you can see HERE.

Nancy Gleason

You’ve been waiting and now it’s time!

The New Year brings more than just a new calendar!  It brings TWO NEW Stampin’ Up! catalogs!  The Occasions catalog is filled with everything you need to celebrate all the upcoming Spring Holidays from Valentines’ to Mothers & Father’s Day, Easter, and SO.MUCH.MORE.

The sales period for these new catalogs begins today, January 3rd.  Just click on the catalog cover image below to open the catalog.

2018 Occasions Catalog                                         2018 Sale-A-Bration


The Sale-A-Bration promotion is bigger and better than ever.  There are 3 ways to earn FREE stuff with Sale-A-Bration.  Let’s take a look:

SHOP Every item in the Sale-A-Bration catalog is FREE with a qualifying order of $50 (before tax & shipping).  NEW THIS YEAR – a $100 level.  Look for the $50 or $100 reward symbols with every item in the catalog.  February 18th will bring additional Sale-A-Bration items to choose from.

HOST:  Host a qualifying workshop of $250 and earn an additional $25 in Stampin’ Rewards.  (This additional reward is also valid for online orders too!)

JOIN:  Purchase the standard Starter Kit for $99, choose $125 worth of products AND choose 2 additional stamp sets (up to $101 in value!).  Wow – you really can have it all!

If you are my customer (meaning that you have shopped with me in the past calendar year) or do not have a current relationship with another Stampin’ UP! demonstrator and want to order from me, and you want a paper copy of the catalogs, please email me.

Happy New Catalog Browsing!  Thanks for choosing to shop with me; I appreciate your business.    When you shop, remember to order in $50 increments and choose a Free S-A-B item(s).  If your order is less than $150 (before tax & shipping)  please use Host Code EV9JYCGC.  If your order is greater than $150, do NOT use the host code, and redeem the Stampin’ Rewards earned on a $150 or greater order.

CLICK HERE TO SHOP! 

Cheers,

Nancy Gleason

Time is Running Out!!!

By now you’ve seen the last 2 months of Paper Pumpkin kits and if you are a Paper Pumpkin subscriber, I can only image how excited you were when your plaid box arrived and you opened it up and saw the awesome project kits inside!  The cool shaker card kit in October: 
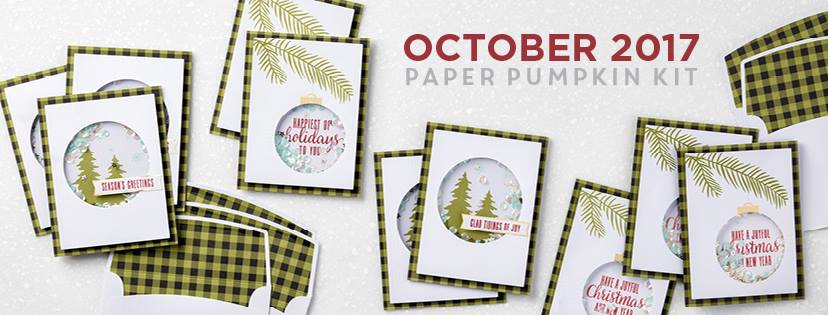
and the uber cool, coordingating stockings in the November kit: If you aren’t a subscriber, and missed out, well, you can fix that right now!  But time is running out!!  You have until the 10th of the month to subscribe to Paper Pumpkin to get that month’s kit..  So, you only have until Dec. 10th to get the December Paper Pumpkin kit.

We’ve also been treated to a little ‘sneak peek’ of what to expect for december.  Ready to see?

Paper Pumpkin Sneak Peek December 2017

Not only do I see gorgeous peonies but I also see Lemon Lime Twist and Berry Burst, 2 of the new In-Colors.  I don’t know about you, but I’m excited!!!  I can’t wait to get my kit.    Make sure you don’t miss out on this, subscribe to Paper Pumpkin by Dec. 1oth.

Don’t forget:  Santa makes Creativity Deliveries

Who do you know that would love a little something special in their mailbox each month?  A prepaid Paper Pumpkin subscription makes the perfect gift, and with 1, 3, 6 or 12 month subscriptions, it comes in just the right size too!    Every day is FREE SHIPPING when you purchase a prepaid Paper Pumpkin subscription.

So go on and subscribe to Paper Pumpkin right now!

And just a reminder, if you are already a subscriber, you can manage your account when you sign in to your account.  You can increase the number of kits you get each month.   Make sure your address is current and your credit card info is up-to-date so there won’t be any delays in receiving your kit.

Want to order Prepaid Paper Pumpkin Subscriptions for gifts?  Click here and then choose the number of months.  You’ll even get a cool E-Gift Card to send to your recipient.

I bet there are several people on your Christmas gift-giving list that you can take care of with just a couple of keystrokes!  Easy-peasy, right?

Now for you.  Did you reserve your Stamparatus yet?

Stamparatus

Get all the details here on the newest tool from Stampin’ UP! that will rock your world!  Because the expected demand for this is thru the roof, Stampin’ Up! is opening up a reservation system – first in will be first to get them.  The first lot of 27,000 were reserved in just 15 minutes!!! That’s correct! Reserve yours today, a credit card is required but it won’t be charged until it is ready to ship.

Year End Sales Event
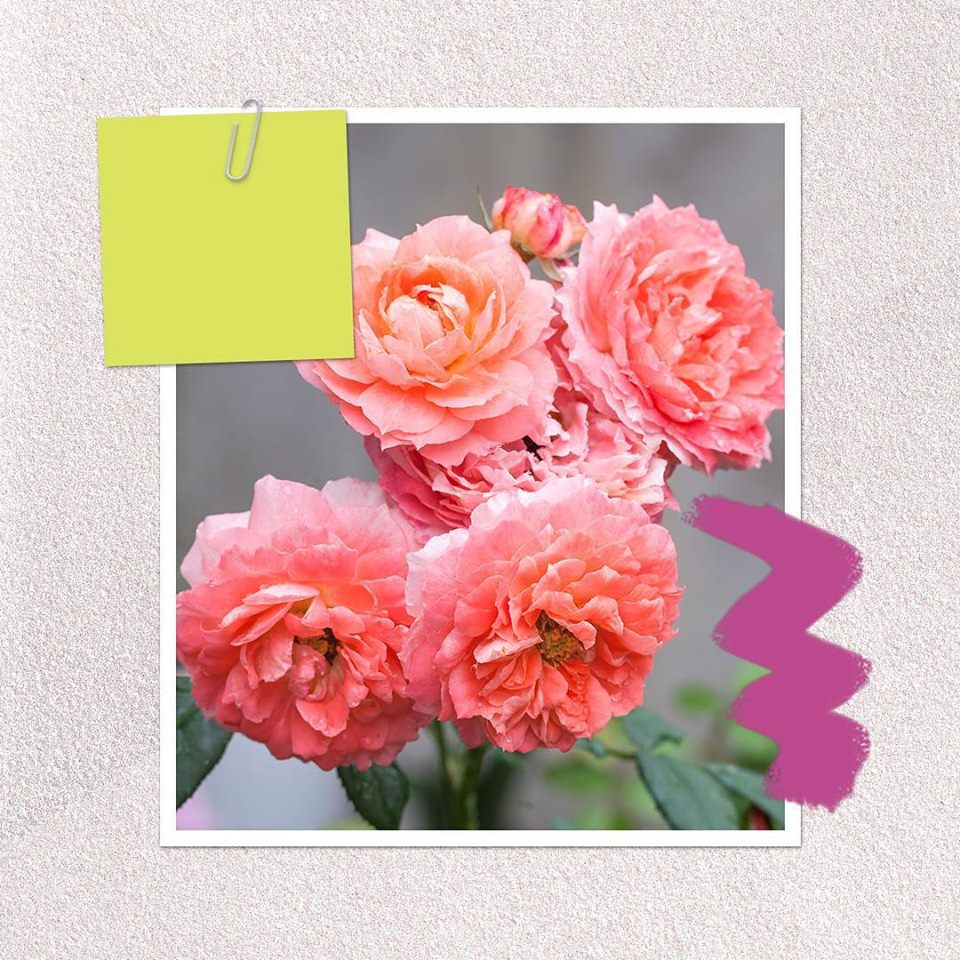
While you’re shopping, don’t forget about our Year End Sales Event going on now too.  Grab your favorite items from the Holiday  catalog before they’re gone and score some deals on select items too.

BE THE FIRST TO KNOW OF SPECIALS, NEW PRODUCTS, ETC.
“I share all sorts of sneak peeks and give-aways on my Facebook Page that you don’t want to miss!

You’ll want to do the following right now to make sure you get access:
1. Visit my My Stampin Space Facebook Page (https://www.facebook.com/mystampinspace/)
2. “Like” my Page, If You Haven’t Already
3. On the same “Liked” Button, Select See First and “Turn On” Notifications”

Nancy Gleason


Decisions, Decisions!

My friend Steve recently asked me to make a card for him to give to someone who would celebrating their 70th birthday.  Of course, I was delighted and took this request very seriously.  Decisions, Decisions… which stamp set to use?  Well, it is for a 70th birthday so of course the “Number of Years” stamp set was a given.

Making masculine cards is very easy, in theory.  Certain color combinations lend themselves to being masculine, especially if you add a neutral such as grey, black or brown, and avoid pinks and purples.  Simple geometric patterns (stripes, squares, circles, etc.) and avoid florals, lace and ribbons.  Easy so far, right?

This is the card I created:  Happy 70th birthday

Ok, so this follows all my masculine rules, but… I felt like it just needed something more since it is such a milestone birthday.  Decisions, Decisions.  I decided on balloons, simple, gender neutral and very festive.  My color combination is gray, blue and white.  I wanted to use these colors but also add something with a little more pop.  I thought about adding green, or orange, or red, but….decisions, decisions!

I ultimately added some silver glimmer paper.  It added some pop, but without adding another color to my simple, masculine color combination.

Happy 70th Birthday with Balloons

What do you think?  Do you like the addition of the balloons?  I like the plain card, but I like the stepped up version even more.  Now leave me a comment and tell me which one you like best.

I’m really pleased with the way  ‘happy’ layered over the 70 turned out.  Do you like that too?

Let me share how I created this card:

A card base of Whisper White, then a layer of Pacific Point cardstock.  A piece of Neutrals DSP in silver & white diagonal stripes.  2 layers of circles in Pacific Point and Whisper White again, and the numbers die cut in Pacific Point using the Large Numbers Framelits dies.  The little flag banner is part of the Large Numbers Framelits dies and the ‘th’ is part of the “Number of Years” stamp set .

The Happy is from the Happy Birthday Thinlits.  I used my Paper Snips to cut the Happy apart from Birthday.  I cut another “Happy” from Thick Whisper White cardstock  and then glued both of those together.  This raised up the word so when I layered it over the numbers it appears to be floating over it.

The balloons were punched out using the Balloon Bouquet punch using Pacific Point DSP and Silver Glimmer Paper.  A simple piece of Bakers Twine was used for the balloon strings.

Here is the card with the coordinating envelope.Happy 70th Birthday card with envelope

Let me tell what my friend Steve said when he got home and saw the card that I left for him.  “Nancy thank you for the card.  It is perfect 🙂  No doubt in my mind he will love it.  You have a gift Nancy, thank you for sharing it”

I am very flattered by his compliment!  I hope that you like this card as well.  Please leave me a comment; I’d love to hear what you have to say!

If you would like to make a card like this and need to order any of the supplies I used, please use my link to shop my online store.  Please use Host Code FBGK6C6F if your order is less than $150 (before shipping and tax).  If your order is $150 or more, do NOT use the host, but redeem the Stampin’ Rewards yourself.

Year End Sales Event
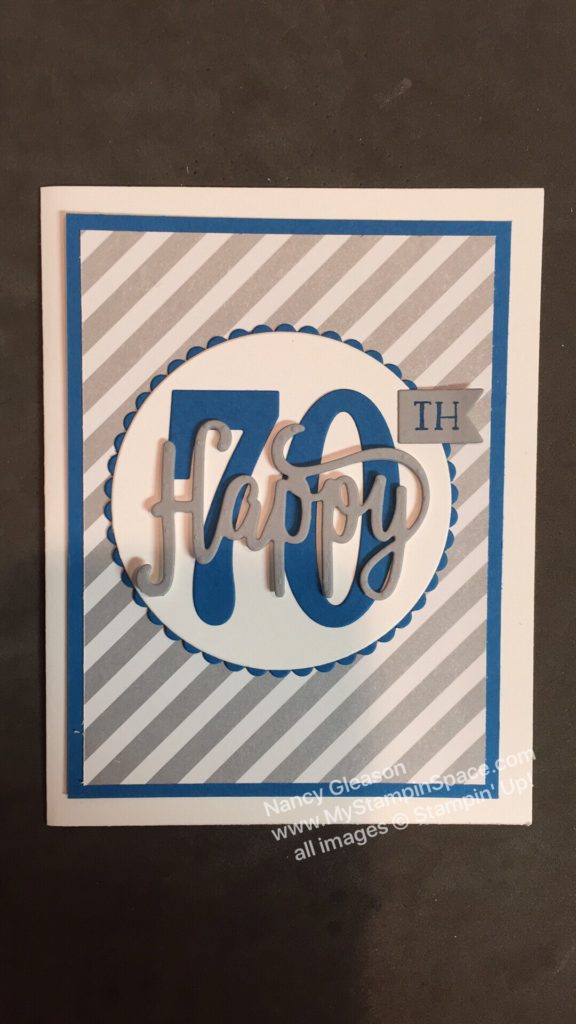
While you’re shopping, don’t forget about the Year End Sales Event going on now.

This is your last chance to grab those Holiday Catalogs items you’ve been wanting before the retire on Jan. 2, 2018.  Some of those items are on sale, but all of them are only available while supplies last so don’t wait.  To see a list of what’s on sale, download the PDF file here, or just go to my online store. 

Stamparatus!

Stamparatus

Before you go, have you seen the latest & greatest?  Stampin’ UP! is introducing a new stamp positioning tool that is set to take the stamping world by storm!  Because demand for this item is huge, Stampin’ Up! is offering a reservation system based on first in, first out.  (the first reservation window  of 27,000 units sold out in just 15 minutes!)  To find out more about the Stamparatus and  how you can get yours, click here.

Thanks for stopping by My Stampin Space and hanging out with me.  Don’t forget to leave me a comment.  And sign up for my mailing list if you haven’t already.  You’ll receive updates and announcements on all new products and promotions (like the new catalogs and Sale-A-Bration promotion coming on January 3, 2018!), in addition to exclusive projects and inspiration.

Nancy Gleason

Get Excited! Stampin’ UP! Online Extravaganza Sale is here!

Here’s some news that will help you Get Excited!  Online Extravaganza 2017Stampin’ UP!’s annual Online Extravaganza Sale.

Forget a 1 day Black Friday sale, or a 1 day Cyber Monday Sale.  Get excited – I’ve got a WEEK LONG SALE for you!  It will be kicked off by a 24-Hour Flash Sale beginning at 12:01 AM Monday, Nov. 20th until Midnight with 16 stamp sets on sale!     You can download the flyer here to see the Sale Prices.

Pictured below are the stamps that will be on sale until midnight Nov. 20th (just click on the image to purchase it – easy!)Please be sure to use the November HOST CODE, ZC6WCKXD, when you shop online with me and your order is less than $150.  If your order is $150 or  more (before tax & shipping), do not use the host code, and claim your Stampin’ Rewards with your order.

The Online Extravaganza continues all week from Nov. 20-Nov. 26th and includes Thinlits, Framelits, Punches, Embossing Folders, WaterColor Pencils, embellishments and select Paper Pumpkin kits and refills.
 You can download the flyerhere to see the complete listing of sale items.
Don’t forget to check the Stampin’ Up! Clearance Rack and 10% OFF Bundles for extra savings.

24-hour flash sales ‘bookend’ the online extravaganza!

The Online Extravaganza will wrap up with an Additional 24-Hour Flash Sale on Monday, Nov. 27th! Mark your calendar.
It’s a great time to shop for your friends and family, or to stock up on the items that have been on your wish list.
Want someone else to fill your wish list?  Download my Wish List Form; jot down the items you want, and the folks who will be shopping for you and email it back to me.  I’ll contact those folks and let them know EXACTLY what you want!  Then just sit back and act surprised on Christmas Day.  You can do that, right?
Ready to save?  Shop here and use Host Code ZC6WCKXD
Happy Shopping!
Nancy Gleason

White Christmas

I’m dreaming of a White Christmas… famous song lyrics.  Go ahead, you can sing if you want to.  My project today puts a spunky twist on the song lyrics.  The stamp set “Half Full”, one of my favorite stamp sets in the 2017 Holiday Catalog, has a whimsical inside/outside sentiment that I used for this project.  Let’s take a look:

White Christmas Front using Half Full

And for the inside….. (drum roll please!)

White Christmas inside

I know you just chuckled!  I know I did when I first saw this stamp set!  And I just knew I had to have it.  I made this card with the ladies in my “Wine Down Wednesday” Stampin’ Class (of course we made wine-themed cards on Wine Down Wednesday!) and they just loved it. Half FullAnd you’ll notice that I used a strip of the Merry Music Designer Series Paper as a nod to the song lyrics… I’m dreaming of a white Christmas….  I know;  I’ve been humming this tune for several days now!

A little bit of coloring with the blender pen adds the perfect amount of color to this project.  Momento Ink is my ink of choice when filling in color with the Blender Pen.

I’ve used this stamp set in other classes; you can see those projects here and here.  This is such a versatile and fun stamp set; and if you are considering getting this stamp set, I hope you will.  It’s a lot of fun.  You can click here to go to my online store or click on any of the items below.

Don’t forget our Buy 3 Get 1 Free Designer Series Paper sale runs thru 10/31.  Click here to see all the details.

Nancy Gleason

Save

Save

Save

Save

Save

Save

Save

Save

Save

Swirly Snowflakes

The stamp set called “Snowflake Sentiments” and the coordinating Swirly Snowflakes Thinlits dies caught my eye the first trip thru the 2017 Stampin’ Up! Holiday Catalog and went straight to my ‘must have’ list.  The intricate snowflake cut out and the lacy border, along with the font style and basic greetings, were too much for me to pass up.  Add to that the fact that you can bundle & save, and I was hooked!

The Tic Tac Toe Challenge this week provided just the right excuse for me to take these out and play!  Thanks #TTTC021!  So here it is:

Swirly Snowflakes for the #TTTC021

This card is delicate and intricate; it look like you spent HOURS on this card, but the Big Shot and the dies do all the work for you!

Here’s how I made it:

The lace work behind the snowflakes was cropped from Dapper Denim card stock and the snowflakes were cropped from Whisper White  cardstock.  Both used the Swirly Snowflakes Thinlits dies.   I do recommend using the Precision Base Plate and the Big Shot Die Brush to get a good clean cut and to remove all the parts & dots.

Dapper Denim ink was used to stamp the sentiment on Soft Sky cardstock and was cropped using the Layering Oval Framelits dies.  A piece of silver Mini Tinsel Trim was added, as well as Rhinestone Jewels on the center of each snowflake.  I just love how Soft Sky and Dapper Denim pair together and the silver adds just the right touch for a silvery, snowy color combination!

I popped up the entire snowflake panels on Stampin’ Dimensionals before adding it to my Soft Sky card base.   A  few pieces of washi tape keep the Tinsel Trim in place as well.   You can see that here:

Stampin’ Dimensionals do a few things; they raise the cardstock enough to allow for the thickness of the tinsel trim to ride underneath without adding bulk to the card, and they give an added dimension to the card by having that panel raised.

Here is the Tic Tac Toe Challenge for this week:

tttc#021

I chose the Diagonal Row from the bottom left to the top right, using die cut and oval. For the free I chose to add some bling.

I knew I wanted these intricate swirly snowflake dies for the die cut and the sentiments from the Snowflake Sentiments pair so nicely with the oval framelits so my card fell together so easily and perfectly for this row.  You can see my card again here:

Swirly Snowflakes for the #TTTC021

You can see all the projects posted to the TicTacToeChallenge021 here.

Thanks for stopping by My Stampin’ Space today.  I hope you enjoyed today’s project and that you might be inspired to make some cards today.  If this post inspires you to make something with snowflakes, or the Soft Sky/Dapper Demin/Silver color combo, please let me, or better yet, send me a picture of your creation!  Leave me a comment, I love to hear from you!

Come back again soon!

Nancy Gleason

To buy any of the products used here, click on the item name in the post above, or the picture below.  Thanks!  Don’t forget you only have a few more days for the Buy 3 Get 1 Free Designer Paper Sale, or to earn the Merry Patterns stamp set with a $300 order.

Save

Save

Save

Save

Save

Save

Save

Save

Save

Save

Save

Today we Celebrate!

Today we celebrate our Wedding Anniversary!  29 years ago today we said “I do” and I’ve been doing it ever since!  Loving my husband, that is.  Through good times and hard times, the one thing I can always count on is my husband.  He is my rock, my support, my voice of reason when I need advice, the one I laugh with, cry with and do life with.

I wanted to make a card that conveyed that, but yet keep it simple and masculine.  I think I nailed it because when he opened up the envelope, he exclaimed “I like this!”

So here it is:29th Anniversary


My basic layout was inspired by Freshly Made Sketches #309.   Freshly Made Sketches #309
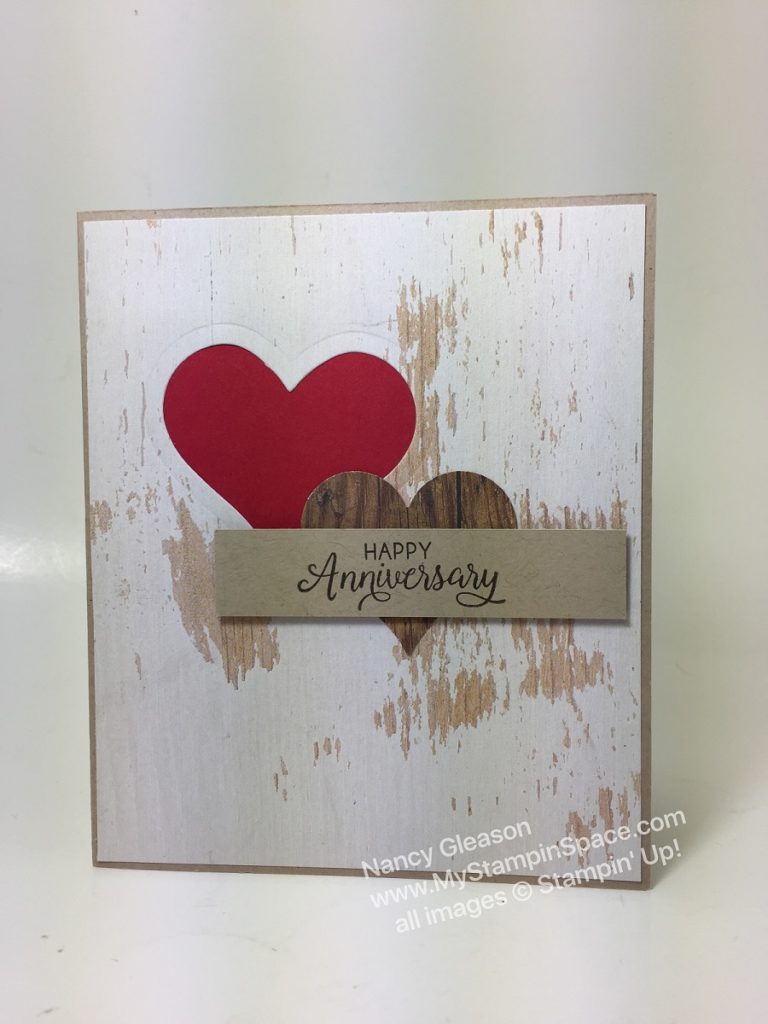
A Crumb Cake  card base layered with a sheet of whitewashed oak from the Wood Textures Designer Series Paper that was punched with the heart framelit from the Mini Treat Bag Thinlit dies.  A piece of Real Red Cardstock was glued in behind that opening.   Another heart was punched using the Sweetheart punch and a different  sheet of woodgrain paper.  A piece of Crumb Cake was stamped in Early Espresso ink with the Happy Anniversary sentiment from Beautiful Bouquet stamp set.

Easy, quick and masculine enough.  My husband has been a cabinet maker his whole life so I knew he would appreciate the woodgrain paper.  Now he is the Executive Director at the Keystone Mission which serves the area’s homeless and needy population.  The other night, the Keystone Mission (and many Rescue Missions across the country) held a Red Carpet Event for the movie “Same Kind of Different As Me”  which tells the true story of a millionaire art dealer and his friendship with a homeless man. Here is a picture of us as we walked the red carpet: On The Red Carpet for Same Kind Of Different as Me

Now you can see why he’s so easy to love!  He’s easy on the eyes! On a more serious  tone, I would highly recommend going to see that movie “Same Kind of Different As Me”, and bring some tissues.

Well, I hope you like my card, and the sketch that inspired it!  Go along to Freshly Made Sketches blog to see all the projects made with that sketch.

If you want to buy any of the supplies I used to make this card, please visit my online store where you can shop securely 24/7.  Don’t forget that the Woodgrain DSP is part of the Buy 3 Get 1 Free  Designer Series Paper Sale going on now. 

Happy Stampin!

Nancy Gleason


Going for the Gold with the GDP!

This week the Global Design Project#109 is hosting a Color Challenge.  Here it is:

Global Design Project #109

And here is my entry:Deck the Halls for the GDP

The Carols of Christmas stamp set and Card Front Builder Framelits dies make making Christmas cards a snap! (And you can bundle and save 10%!)  The perfectly coordinating images and intricately detailed dies make it look like I’ve spent hours on this card, but it was easy enough to mass produce a lot of these cards in a short time period.  The Merry Music DSP makes for a nice background and the gold doilies add the right amount of bling with over-doing it.  (The Merry Music DSP is part of the Buy 3 Get 1 Free DSP sale going on thru October 31st.)

Want to know a little secret?  I actually designed this card last week for my #WorldCardMakingDay class.  As I sat down to write this post, I saw the GDP announced their Color Challenge and since I hadn’t shared this project yet, and the colors just fit this color challenge exactly, well, if the shoe fits….   Sometimes things just fall into place perfectly.

I highly recommend this product suite!  If you can only get 1 bundle or suite from the Holiday catalog, it would be a tough choice between this Merry Little Christmas product suite and the Quilted Christmas product suite.  Both have an awesome stamp set and coordinating framelit dies that can be used for more than just Christmas, and both have a complimentary array of embellishments.  If you missed my earlier posts showing the Quilted Christmas product suite, please click here and here.

Take a few minutes to head over to the Global Design Project to see all the awesome designs.

Here is another look at my card, and the supply list you’ll need to recreate this card yourself.  Click Here to shop my online store for any supplies.  Deck the Halls for the GDP

Nancy Gleason

Save

Pals Blog Hop – Wicked Folds


Welcome to the Pals October 2017 Blog Hop featuring some very “Wicked Folds”. Thank you so much for joining us today. Sit back and enjoy the view while the Stampin’ Pretty Pals treat you with their wickedly folded projects. Whether you’re just starting the hop, or have come from a previous Pal’s blog, you’ll find the line-up toward the end of my post to help you move along.

For my project I chose to do a Double Z-Fold technique.

SweaterDeer Closed

And here it is open:

Sweater Deer Double Z Fold

Watch this video to see the Double Z Fold card in action:

My card is a monochromatic card in Cherry  Cobbler and Whisper White with a touch of silver for some ‘bling’. The buck in the Winter Sweater just makes me laugh every time I see him!  This image is from the Merry Patterns stamp set that is available for FREE during the Merry Patterns Host Promotion thru Oct. 31st.  CLICK HERE to learn more about the Merry Patterns Host Promotion CLICK HERE to download the Merry Patterns Promotion flyer.  Merry Patterns, argyle sweater on deer, tis the season, candles

I thought he would be perfect with a piece of card stock embossed with the Cable Knit  TIEF.  The tiny deer pattern on the DSP from the *Be Merry DSP just repeats the deer theme we have going on.  A tiny sliver of 1/8″ silver ribbon and the Rhinestone Jewels are the perfect accents.

*This Paper is part of the Buy 3 Get 1 Free Designer Series Paper Sale going on now.

Of course, I couldn’t make a card like this without my Stampin’ Trimmer.  Of all the paper trimmers I’ve owned over the years, the Stampin’ Trimmer by Stampin’ Up ! is hands down the best!

A Double Z-Fold card is really easy to make.  Start with your 8-1/2″ x 5-1/2″ piece of card stock scored & folded in half to make a 4-1/4″ x 5-1/2″ card base.  Then just take the front  flap of the card and fold it in half back onto itself.  You will then have a piece of cardstock, when laid flat, that is scored at 2-1/8″and  4-1/4″.  When scored and folded this will be a Z-fold.

The part of the card that makes the double Z is just another piece of card stock 8-1/2″ scored at 2-1/8″ and 4-1/4″.  The height of this piece should be less than 5-1/2″  but it can be any size.  For this card, the height is 4″.   Score and fold this piece to make another Z.  The trick comes in how you adhere the pieces.  The card base, from left to right, has the 2 small panels and 1 large panel.  The Z-fold piece is adhered to the card base with the 1 large panel on the left and the 2 small panels on the right.

To see another card I made with the Double Z- Fold, click here.

Thank you so much for hopping with the Stampin’ Pretty Pals today. Please take a minute to mark your calendar for our next hop on November 8, 2017. Now hop along using the Blog Hop Line-up below. Don’t forget to leave us a comment.  We love to hear what you have to say! 

If you need any supplies to make a card like this, please shop my online store here  or click on any of the product links above.  Please use Host Code XTHACC4H if your order is less than $150.  If your order is $150 -$299.99 you will earn Stampin’ Rewards.  If your order is $300 or more, you will earn Stampin’ Rewards AND the free Merry Patterns stamp set!  CLICK HERE to learn all about Stampin’ Rewards. 


Click here to view the Blog Hop Line-up

Nancy Gleason

Save

Save

Save

Save

Save

Save

Save

Save

Save

Save

Save

Save

Save

Save

Get Ready to BLEND!!

NEW PRODUCTS!  Doesn’t that make you happy?  Stampin’ Blends are a new line of alcohol based markers that allow you color and blend to create realistic shading & hilights.  Take your adult coloring to new heights!

COMING SOON FOR CUSTOMERS!  GET THE STAMPIN’ BLENDS NOW – DETAILS BELOW!

Customer launch date to be announced – but coming soon!   My markers are in a UPS truck right now making their way cross country to my home!  I can’t wait to get my hands on them, so glad I’m home from work Monday so I’ll be able to use them as soon as they are delivered!

Stampin’ Blends Alcohol Based Marker Features:

  • Add just the right amount of color where you need it with the brush tip or fine-point.
  • Each color (except Ivory and Bronze) has a light and dark shade marker, available individually or in a combo pack.
  • Stampin’ Up! has done in-house testing for evaporation and life testing and is really happy with the results.
  • Press fit seal prevents air from entering the barrel and causing evaporation.
  • The nestable lids are easy to keep track of and have a tight fit for long-lasting color.

I WANT THEM NOW!  Would you like to be able to purchase the brand new Stampin’ Blends markers before they are released to customers?  Purchase the $99 Starter Kit and join Stampin’ Up! for $99.  You can add the Stampin’ Blends markers to the kit during the demonstrator pre-order period NOW (Pre-order ONLY:  October 1 – 15)!

HERE’S HOW!  Purchase the $99 Starter Kit and choose a total of up to $125 in your choice of products (either with Stampin’ Blends marker selections or mix with other current products–it’s your choice). That’s $26 in free  product.  The kit ships FREE for another 10% savings!

Here are the product numbers FOR THOSE WHO ADD THEM TO A $99 STARTER KIT OCT. 1 – 15 ONLY.  The availability date for customers has not been released:

DESCRIPTION ITEM PRICE LIMIT
Bermuda Bay Combo Pack* 144600 $9.00 USD/$12.00 CAD 1
Calypso Coral Combo Pack* 144045 $9.00 USD/$12.00 CAD 1
Cherry Cobbler Combo Pack* 144598 $9.00 USD/$12.00 CAD 1
Crumb Cake Combo Pack* 144601 $9.00 USD/$12.00 CAD 1
Daffodil Delight Combo Pack* 144603 $9.00 USD/$12.00 CAD 1
Night Of Navy Combo Pack* 144040 $9.00 USD/$12.00 CAD 1
Old Olive Combo Pack* 144597 $9.00 USD/$12.00 CAD 1
Pink Pirouette Combo Pack* 144604 $9.00 USD/$12.00 CAD 1
Pool Party Combo Pack* 144605 $9.00 USD/$12.00 CAD 1
Pumpkin Pie Combo Pack* 144599 $9.00 USD/$12.00 CAD 1
Rich Razzleberry Combo Pack* 144602 $9.00 USD/$12.00 CAD 1
Smoky Slate Combo Pack* 145058 $9.00 USD/$12.00 CAD 1
Ivory Marker 144606 $4.50 USD/$6.00 CAD 1
Bronze Marker 144607 $4.50 USD/$6.00 CAD 1
Color Lifter 144608 $4.50 USD/$6.00 CAD 1
Stampin’ Blends Marker Collection
(Includes All 26 Markers And The Color Lifter)
147475 $121.50 USD/$162.00 CAD 1
Color Me Happy Project Kit 144609 $25.00 USD/$33.00 CAD No Limits
Color Me Happy Stamp Set (Wood-Mount) 144062 $27.00 USD/$35.00 CAD No Limits
Color Me Happy Stamp Set (Clear-Mount)** 144069 $19.00 USD/$25.00 CAD No Limits
Color Me Happy Bundle (Wood-Mount)
– Project Kit + Stamp Set At A 10% Discount!
148033 $46.75 USD/$61.00 CAD No Limits
Color Me Happy Bundle (Clear-Mount)**
– Project Kit + Stamp Set At A 10% Discount!
148034 $39.50 USD/$52.00 CAD No Limits

*Combo Packs include 2 markers: 1 light, 1 dark
**Also available in French

No single markers (besides Ivory and Bronze and the Color Lifter) are available for purchase during this Demonstrator Exclusive Early Release.

Have a question?  Email me.  See even more reasons why to purchase the $99 Starter Kit HERE

I am ready to blend, as soon as my Stampin’ Blends get here.  Watch my blog and facebook page as I’ll be posting and sharing my experience with the Stampin’ Blends.  In the meantime, I want you to get ready to blend!  Better yet, blend with me; order your starter kit today and get your Stampin’ Blends now! The Demo pre-order period ends Oct. 15th.

Nancy Gleason

Let’s Celebrate World Card Making Day with some SALES!

Who doesn’t like to shop when there’s a sale going on?  And who doesn’t like to make cards? October 7th is World Card Making Day  and to celebrate, Stampin’ UP! has a few good sales going on!  Win-Win!Celebrate World Card Making Day with a sale on your favorite cardmaking essentials!

From Oct. 1-1oth you can buy our set of 20 notecards & envelopes (white or vanilla) at 15% off, Fast Fuse adhesive buy 1 get 2 refills free, and a select group of stamps are 15% off!  Awesome, right?  Just what you need to make some cards for #WorldCardMakingDay!    Get all the details on this flyer.

TIP:  I Love Fast Fuse, but it wasn’t always that way!  This super strong adhesive in not just SNAIL on steriods! The way you use your Fast Fuse is different than the way you use your snail applicator even though they look similar.  It took me some ‘trial and error’ (and to be honest, a great deal of frustration!) to figure out how to use it properly for best results.  Please watch this video to show you how to use Fast Fuse to get good results every time.

But wait, there’s more.

For the entire month of October, you can buy 3 get 1 free Designer Series Paper See all the details here.

Don’t forget about Paper Pumpkin.

The October and November Paper Pumpkin kits are coordinated kits that will give you a head start on your Christmas card-making and gift-giving.   Make sure you subscribe by October 10th to get the October kit.  Already a subscriber?  Consider increasing the number of kits that you order.  Your friends and neighbors are going to want in on the action once they see what you make!  Subscribe Here.

Lastly, SUBSCRIBE TO MY MAILING LIST!  Beginning Wednesday Oct. 4th, all of my mailing list subscribers will receive my FREE GIFT; the 12 Weeks of  Christmas Newsletter campaign.  Each week, for 12 weeks,  my subscribers will receive an EXCLUSIVE project complete with pictures, step-by-step directions and a supply list so you can make those projects at home.   Aawexome. There will be cards, gifts, gift wrap & tags; everything you need to make this Christmas a handmade Christmas.  And isn’t that what we all really want?

But if you aren’t on my mailing list, well frankly, you won’t get these projects.  I  will not be sharing them on my blog, or facebook, or pinterest, or anywhere.  So sign up now or click the big blue sign up box on the right because you’ll want to be on my mailing list when October 4th rolls around so you can receive the 12 Weeks of  Christmas Newsletter in your inbox.

Lastly, when you shop these sales thru my online store, please use Host Code XTHACC4H but only if your order is less than $150.

Wishing you and yours a Happy World Card Making Day!  Have fun shopping for supplies while they are on sale.  And as always, thanks for stopping by My Stampin Space and for shopping with me!

Nancy Gleason

I’m still Quilting!

I just can’t put down the new Quilted Christmas suite of products!  I’ve already made quite a few Christmas cards using this set, (you can see a simple Quilted Christmas card here and even watch a video of how to make it!).  Today I wanted to make something using Autumn colors for the TicTacToeChallenge, and I’m still Quilting!  Who says the Quilted Christmas suite is just for Christmas?  Look what I made:I'm Still Quilting for Autumn!

TIC, TAC TOE CHALLENGE #16

For this challenge I used the diagonal from upper right to lower left; Autumn colors, paper piece and Free.

TTTC16My quilt square adorns a mini pizza box.     The autumn colors came from the Painted Autumn Designer Series paper.  The Quilt Builder Framelit dies make easy work of paper piecing.For free I chose to add metallic, which you can see is the sewing needle cropped from gold foil sheets.

Let’s take a closer look at the paper piecing.  paper piecing

Christmas:

I’m going to be featuring more of the Quilted Christmas in the next few days, including a Quilted Christmas special offer you won’t want to miss!  Make sure you come back to my blog, or better yet, subscribe to my mailing list so you won’t miss any offers from me!

And if you like Christmas, then you definitely want to make sure that you subscribe to my mailing list.  Beginning October 4th, I will be sending out my annual 12 Weeks of Christmas newsletter featuring an exclusive Christmas project each week for, yup you guessed it, 12 weeks!  These projects will NOT be available to anyone other than my mailing list subscribers as my gift to you.  So if you’re not on the list, you won’t get the newsletter.

Order Online:

If you want to purchase any of the products I used to create this little pizza box, head over to my online store, or click on any of the images below.  Don’t forget to hop over to the TicTacToeChallenge to see some of the other great projects.  But before you go, please leave a comment for me and let me know if the Quilted Christmas suite is on your wish list.

Thanks for stopping by My Stampin Space today!  Come back and stamp with me again.

Nancy Gleason

How to Make a Rectangle using only a Square Framelit Die

Well, that sounds impossible, doesn’t it?   Not only is it not impossible, it is actually quite simple!  And today I am going to show you just how to make a rectangle using only a square framelit die!

I told you that was easy!  Please leave me a comment and let me know if you like this trick.  Thanks 🙂

If you missed yesterday’s blog post, which created the necessity for me to make a rectangle from the Square Framelit die, you can view that here.

merry patterns 
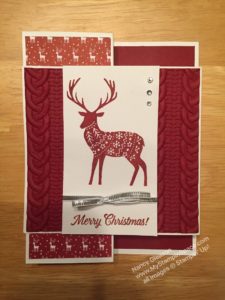
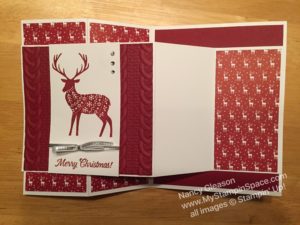
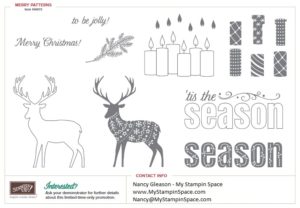
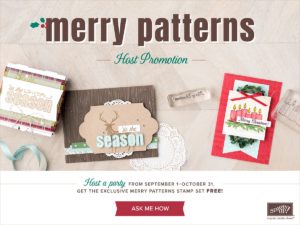
Don’t miss out on the Hostess special going on right now.  Host a qualifying order of $300 or more, (or place a large order for yourself and get everything on your wishlist!) and get this exclusive stamp set “Merry Patterns” for free!

Merry Patterns, argyle sweater on deer, tis the season, candles

Contact me if you would like to host a party, even a Facebook Party so you can earn this stamp set.


Check back with me, I have more to share from the Quilted Christmas product suite!

Happy Stampin’