How to Make a Simple Card

Hi Friends,

I finally had my chance I had to play with all of the Quilted Christmas products and even though I am not a quilter (I don’t even sew), I fell head over heels for the product suite!

Today I am going to share a video with teaching you how to make a simple Christmas card using this product bundle.  This is perfect for beginners as the coordinating products in the bundle do all the work for you to create beautiful cards!    Seasoned paper crafters will enjoy this product suite as you can create very detailed quilted projects.  #SomethingForEveryone!

Don’t miss my reference to another video within this video!  This is a trick that you will thank me for 🙂  You’re welcome!

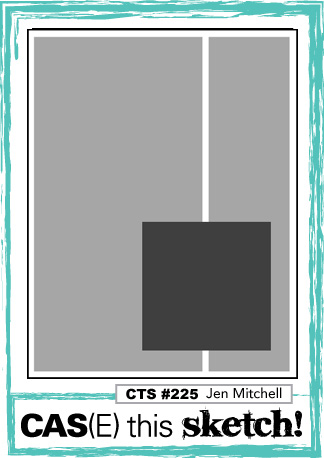
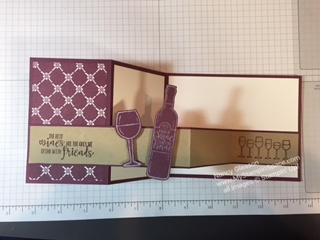
So without any further adieu, let’s make a Christmas card:

What do you think?  Please leave me a comment; I love to hear from you.

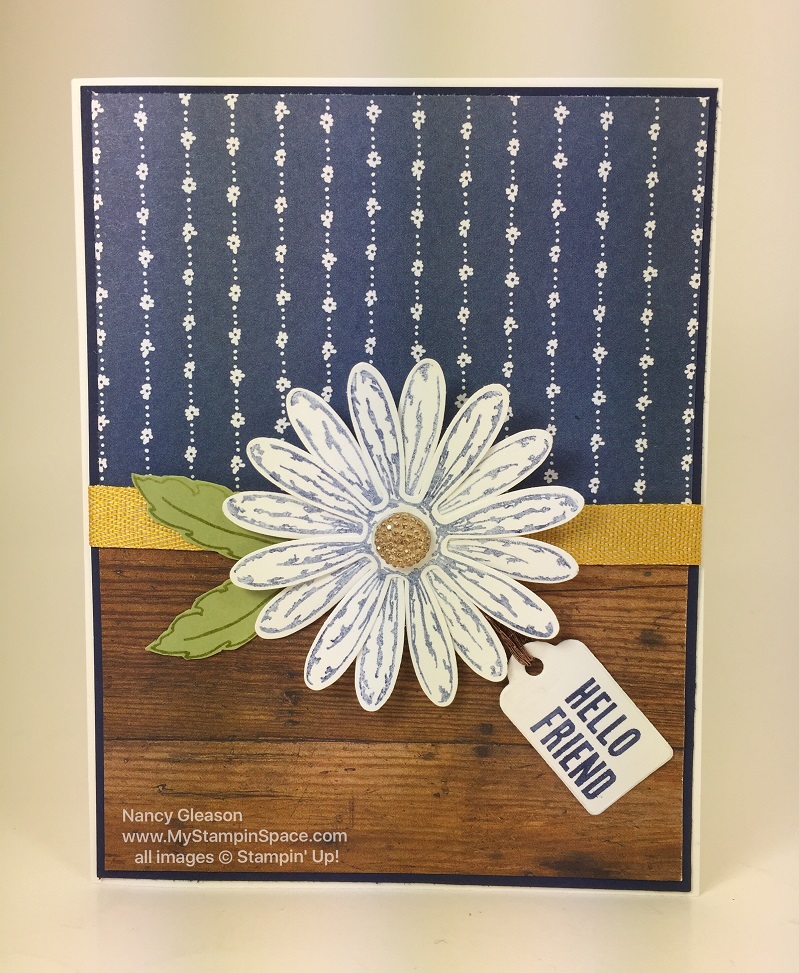
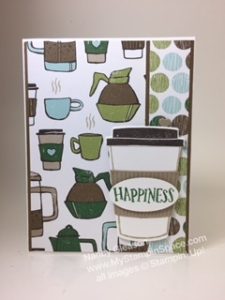
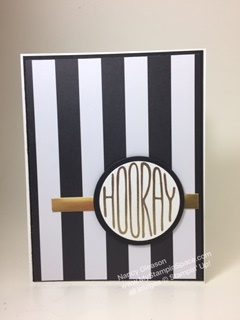
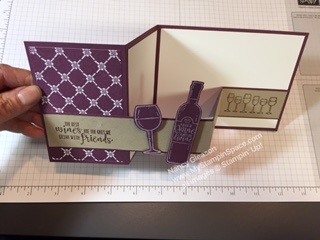
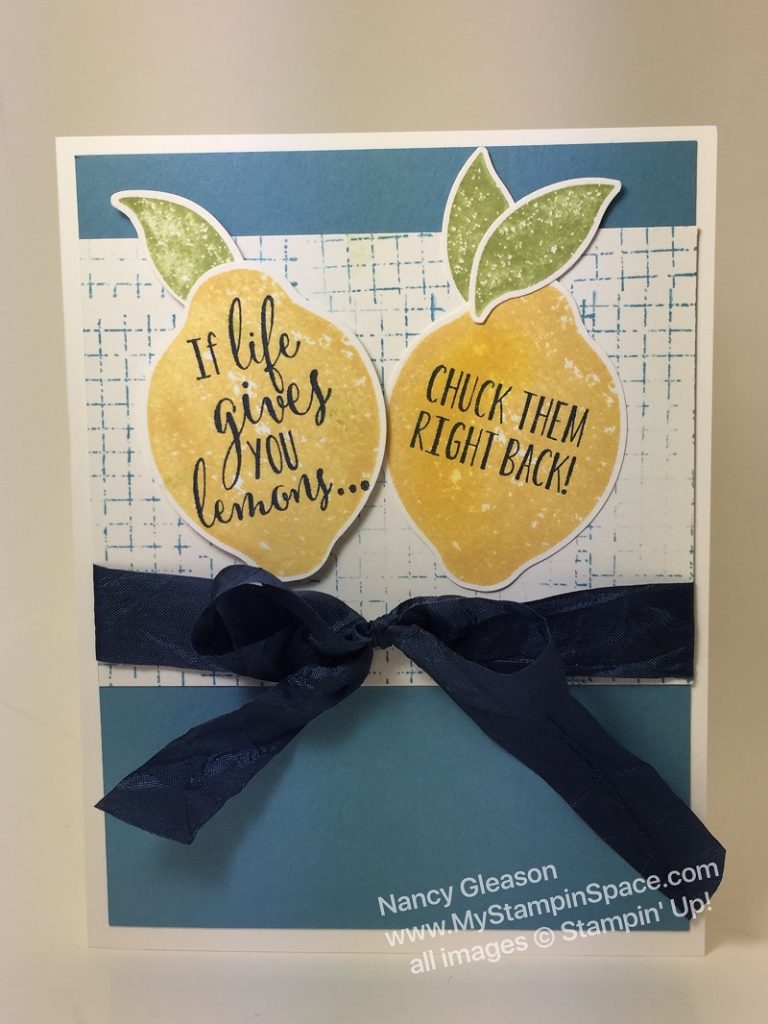
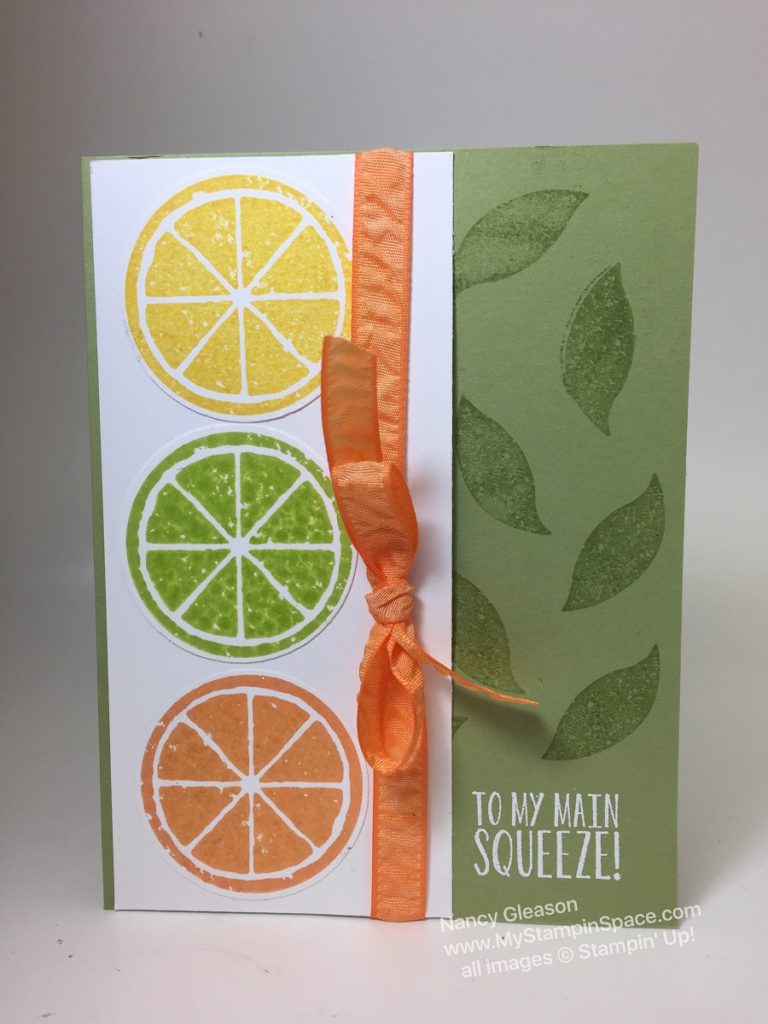
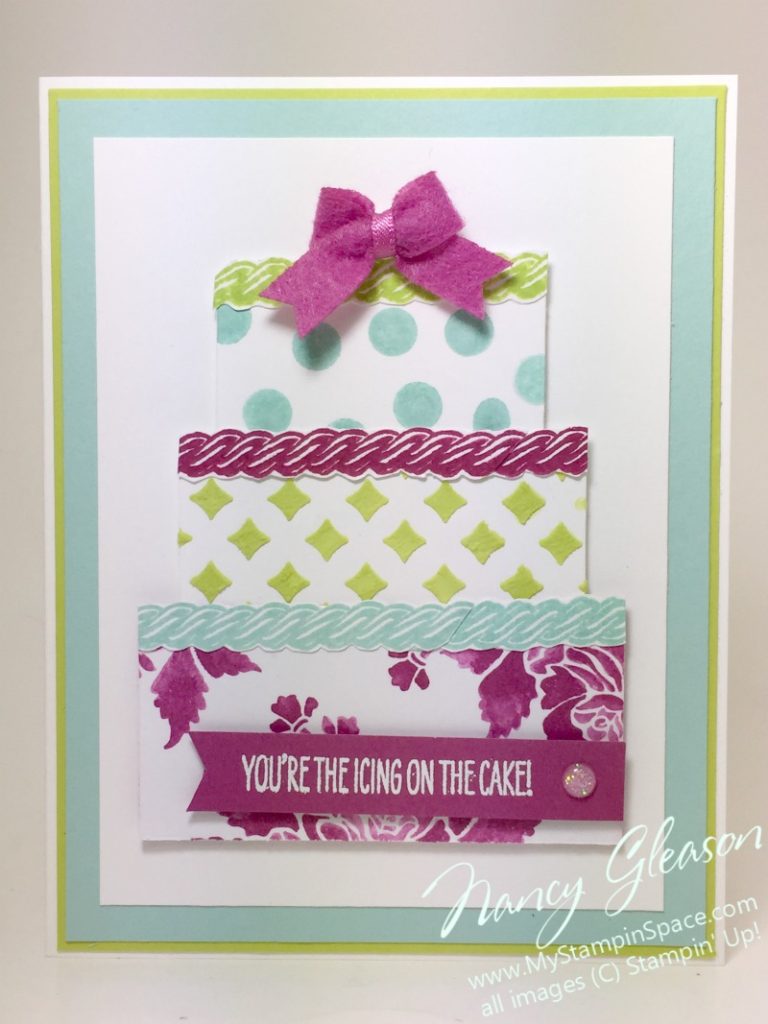
Here’s another card I made using the same layout, just a different sheet of paper.

How to make a simple card using the Quilted Christmas suite

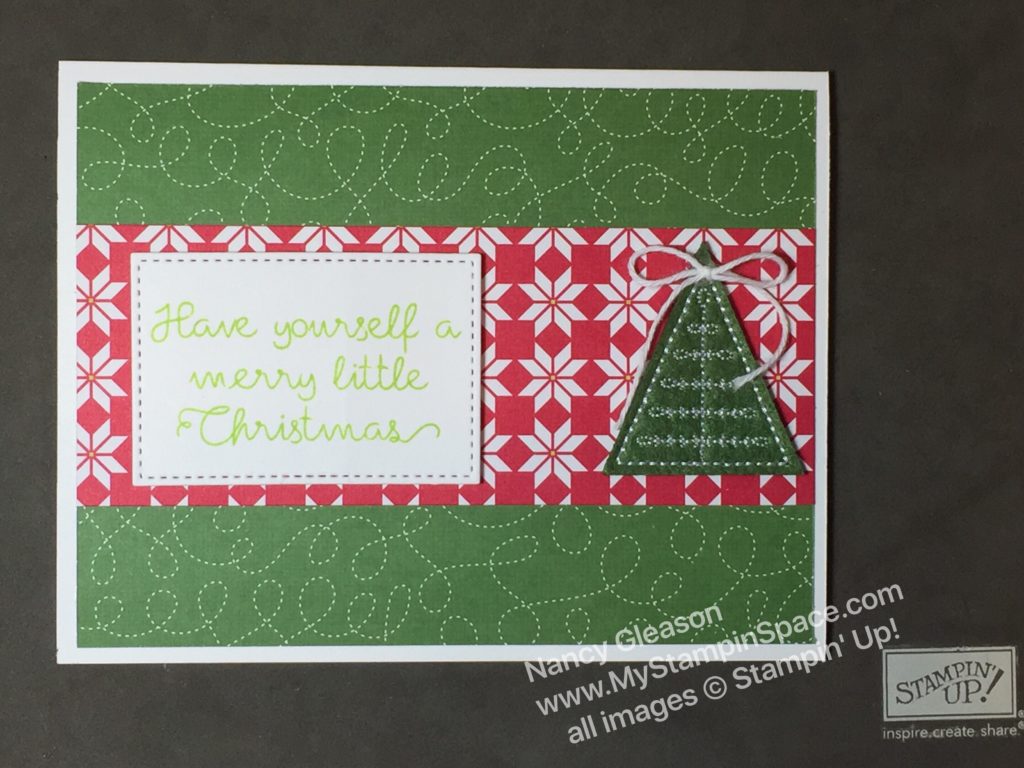
Which one do you like better?  The paper used in the video or in the photo?

I taught the ladies in my Mini Christmas Card Club how to make this card and they all loved it!  From being so simple, and just using one sheet of paper from the 6×6 stack, they all felt this was a great card when you have to make a lot.  It’s also a very versatile layout and the card can be used for any occasion just by switching the patterned paper and sentiment out.    With all the beautiful patterned paper that Stampin’ Up! offers, you can really let the paper do all the work!

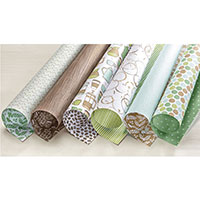
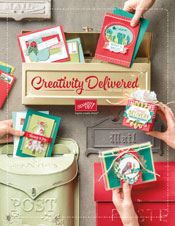
Well, I hope you enjoyed making a card with me.  I will be blogging about the other cards I made using the Quilted Christmas product suite.  In the meantime, check out some of the inspiration from the catalog:Quilted Christmas Product Suite
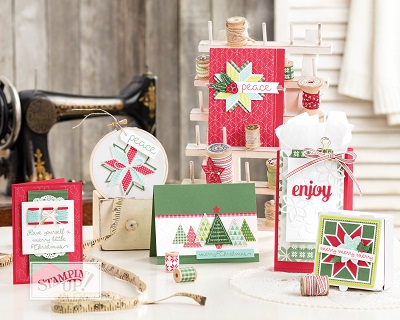
If you like Christmas, don’t forget to sign up for my mailing list.  Beginning Oct. 4th, my mailing list subscribers will get my 3rd Annual 12 Weeks of Christmas newsletter complete with an exclusive Christmas project delivered to their inbox each week.  If you’re not on my list, you won’t get those 12 Christmas project tutorials. 

If you would like to purchase the Quilted Christmas bundle, or any other products, click here to shop my online store.

Happy Stampin’,

Nancy

Sept 2017 Pals Blog Hop

Welcome to the Pals September 2017 Blog Hop. Thank you so much for joining us today. This month our theme is “My Favorite Holiday”.  Sit back and enjoy the view while the Pals treat you with projects for the upcoming Autumn and Winter holidays.

Whether you’re just starting the hop, or have come from a previous Pal’s blog, you’ll find the line-up toward the end of my post to help you move along.

Without a doubt, my favorite Holiday is THANKSGIVING!! I just love it:  I love all things about the beauty of the fall season, and I love a holiday whose focus is on giving Thanks to our Creator for all the blessings He has bestowed on us, and that focuses on family and food!  No frantic shopping and gift giving, just a day to enjoy family, food and reflect on all our blessings!

Because of that, I think the sentiment “Gather Together & Give Thanks” perfectly embodies the spirit of Thanksgiving.  The beautiful sunflower in the Painted Harvest stamp set exemplifies the beauty of the season as well.  No wonder that I chose to use this new bundle (Painted Harvest stamp set and the coordinating Leaf Punch) for my project.

Thanksgiving Card using a fall flower and stem & berry wreath using the Painted Harvest stamp set from Stampin Up for the Pals Blog Hop by Nancy Gleason My Stampin Space

Here’s a close-up of that sunflower:

Fall Flowers Autumn Sunflower from the Painted Harvest stamp set by Nancy Gleason My Stampin Space

Don’t you just love it?  I propped it up on a few stampin’ dimensionals.  You can see how that little bit of dimensions adds so much to this project.

A little flagged end banner is perfect for the sentiment and a piece of 5/8″  burlap ribbon adds a rustic texture.  The wreath was so simple to make.  I used the little berry stamp from the August Paper Pumpkin kit!

Painted Harvest for the Pals Blog Hop

I know that you know want this stamp set bundle!  So you can order it right here!

Thank you so much for hopping with the Stampin’ Pretty Pals today. Please take a minute to mark your calendar for our next hop on October 11, 2017 for “Wicked Folds”. Now hop along using the Blog Hop Line-up below. Don’t forget to leave us a comment. We’d love to hear what you have to say about our Favorite Holiday.  By the way, what’s your favorite holiday?

Thanks for stopping by My Stampin’ Space!   Did you like what you saw today?  Then sign up for my mailing list so you don’t miss my 12 Weeks of Christmas newsletter.  Only mailing list subscribers will receive 12 exclusive Christmas projects from me.

Nancy Gleason

Save

Save

Save

Save

Save

Save

Half Full Wine Themed card with a fancy fold technique

One of the first stamp sets that I just had to have was the “Half Full” wine themed stamp set.  It seems so trendy and I knew the ladies in my stamp club would love this set as well!

I taught my students how to make a Double Z fold card and used the “Half Full” stamp set.  The new Fresh Fig In-Color is the perfect wine color!  Look how fun this card is:

Half Full stamp set by Nancy Gleason My Stampin Space

The real fun comes when you open the card:

Double Z fold card by Nancy Gleason My Stampin Space featuring the "Half Full" wine themed stamp set

Here’s another angle of the Double Z fold card open:

Double Z Fold Card by Nancy Gleason My Stampin Space using the Half Full stamp set

How do you make a Double-Z fold card, you ask?  Very easy.  I started with a card base of Fresh Fig cardstock cut to 4-1/4″ x 11″ scored at  2-3/4″ and 5-1/2′.

The front panel features a decorative paper from the Fresh Florals Designer Paper Stack in Fresh Fig, and Whisper White on the other two panels.

The secret to a Double Z-Fold card is scoring the front of the card and folding it back on itself.  Another strip of Fresh Fig cardstock, cut to 1-1/2″ x 11″ is also scored at 2-3/4″ and 5-1/2″, and then layered with pieces of Crumb Cake cardstock.  Sentiments and images from the set are stamped on these Crumb Cake panels with Fresh Fig ink.

The wine bottle and wine glass are stamped in Whisper White Craft ink onto Fresh Fig cardstock, then fussy cut and adhered to the card front.   My  Paper Snips and Mini Stampin Dimensionals make that an easy task!  Easy-peasy!

I hope you will try to make a Double Z-fold card.  It’s very easy but packs a big punch of “Wow” factor!  Leave me a comment and let me know what you think of this project.

If you want to order the “Half Full” stamp set, please order from my online store.

Remember if you place a qualifying order of $300 or more (gather orders from your friends and family, or host a party with me) and earn the “Merry Patterns” stamp set.  Read all the details of the “Merry Patterns” promotion here.

Thanks for stopping by, come again on Wednesday as myself and a whole bunch of my Stampin’ Pals will be sharing our favorite Holiday in the Pals Blog Hop; prepare to be ‘wowed’!

Nancy Gleason


Save

Save

Save

Save

Place Your Holiday Catalog Orders NOW!

The 2017 Stampin’ Up! Holiday Catalog is here!  You can view the catalog here:

2017 Stampin' Up! Holiday CatalogYou can begin placing your orders now here.

This catalog is chock full of SO MANY inspiring products, from stamp sets, to framelit dies, to paper, and ribbon and embellishments and punches to send a stamper into a stamping frenzy!   Seriously, the intricacy of the framelit dies is incredible, allowing you to create things from paper that weren’t possible a few years ago.

Check out two product suites:

Whether Christmas or Halloween, Autumn or Winter; we’ve got you covered!  Which bundle is your #1 must-have?  Do you want them all?

With a qualifying order of $300 or more, whether it’s all for you, or if you host a party, you can also get a FREE, EXCLUSIVE stamp set with our Merry Pattern promotion.  Get the details here:

So when you place your order, try to place a $300 order to get this stamp set, or gather a few friends and host a party.  Use your party sales to qualify for this stamp set.  Contact me if you want to schedule a party (we can even do a Facebook party!)

I’m so excited to share the Holiday Catalog with you!  I hope you are as excited as I am.  I will be sharing some of the projects I’ve been making on my blog in the coming days, and on my Facebook page.  Make sure that you like me on Facebook and follow me on Pinterest too!   Sign up for my mailing list (click on the form to the right).  You will need to be on my mailing list to receive my 12 Weeks of Christmas newsletter, a new project each week to get you in the Holiday Crafting Spirit!

Now, get shopping!

Nancy

Cut it Out! The Pals Blog Hop

Welcome to the August 2017 Pals Blog Hop. Thank you so much for joining us today. This month we’re going to “Cut It Out”.  Participants will feature projects with “cuts” from punches, dies, Framelits, Edgelits, or Thinlits.

Whether you’re just starting the hop, or have come from a previous Pal’s blog, you’ll find the line-up toward the end of my post to help you move along.

Please take a minute to mark your calendar for our next hop on September 13, 2017 for “My Favorite Season”.   Now hop along using the Blog Hop Line-up below. Thank you so much for hopping with the Stampin’ Pretty Pals today. Don’t forget to leave us a comment. We’d love to hear what you have to say about our creative “Cuts”.

Well, it’s no secret that I love the product coordination that Stampin’ Up! offers. And I love punches, so when there’s a punch or die that easily cuts out the shape of a stamped image, I’m all in!

One of the first stamp sets/bundles that I HAD TO HAVE from the 2017/18 Annual Catalog was the Lemon Zest bundle.  I love these fun, zesty lemons and the sassy sayings that go along with them!  The coordinating Lemon Builder Punch makes it (oh, I just have to say it…)  “Easy-Peasy, Lemon Squeezy” to cut out the lemons and leaves.  The 1-3/4″ circle punch is perfectly sized to cut out the citrus fruit slices.

     Life is Short... Live It With Zest! Cut it out with the Lemon Builder Punch  

I taught a class Monday night called “When Life Gives You Lemons”  and it was centered around the Lemon Zest bundle.    I like to teach my students a new technique or a tool, or something that they can use to increase their papercrafting skills.  The teachable lesson in this class was to make backgrounds, especially when you might want, but don’t have, a coordinating Designer Series Paper.  We used the smaller of the 2 leaves to randomly stamp the leaf onto Whisper White cardstock.  The result was a coordinating patterned background that compliments the focal point, the lemons.  It’s hard to see in this photo, but the lemon slices are accented with Wink of Stella which gives them a juicy glow!

If Life Gives You Lemons, Chuck Them Right Back!

The next card also used a stamp, this one from Timeless Textures, to create a background on our Whisper White panel.  I think the blue is the perfect color to compliment the lemons.  The Marina Mist is an under-used, but perfect shade of blue for almost any occasion, like denim is a staple in any wardrobe.  The dark Night of Navy just pops against the Daffodil Delight of the lemon, and is perfectly accented by the Night of Navy Crinkled Seam Binding Ribbon.   I AM IN LOVE WITH THIS RIBBON!  ‘nough said!  Just buy this crinkled seam binding ribbon in every color!  You can thank me after you hold this soft, flowy in your own hands and tie perfectly flawless bows every time.

To My Main Squeeze

This last card is the first card I made as soon as the Lemon Zest Bundle arrived at my door step!  The citrus slices are stamped as Lime, Lemon & Orange slices and have a piece of Peekaboo Peach Ribbon.  I used the same leaf to stamp a background as I did in the first card of this post.  The sentiment is heat embossed in Whisper White.  Of course,  “To My Main Squeeze”  was meant for my husband!  The card didn’t require a special occasion.  After writing some sappy, lovey-dovey note inside, I tucked it in his lunch box to brighten his day!  A sweet surprise.

Cutting out the lemons, the slices and leaves are a breeze with punches.  I really think that punches are a must-have for any paper crafter, and definitely for someone just starting out.  Basic shapes, like circles, and punches that coordinate with stamps are the best value.  Bundling is an even better value when you can save 10%.

Well I hope that you like my “cuts”.   Please leave me a comment and tell me what you think. Then hop along and see what other project the Pretty Pals have cut out for you.  Come back around and visit me and my blog again. 


If you don’t currently have a relationship with another Stampin’ Up! demonstrator, and want to order any of the products I showed here, please feel free to shop my online store.  Your order will be shipped right to your home. 

Thanks,

Nancy

Save

Save

Save

Save

Save

Save

Save

Save

Save

Save

Save

Save

Save

Save

Save

The Holiday Catalog is here!

Oh my!  The 2017 Stampin’ UP! Holiday Catalog is here and it couldn’t be more breath-taking!  Demonstrators were given a sneak peek into 3 different product suites over three days last week, and we finally got to view the catalog in full last week too!  Today is the day we get to place our pre-order!  If you want to share in this excitement, then order your Starter Kit ($99 – free shipping – filled with $125 worth of whatever product you want, even Holiday catalog merchandise!  Sweet, right?)

If you don’t want to order a Starter Kit, but want to see what’s in the Holiday Catalog, then pop some popcorn, sit back and hit “PLAY”.  I’ll be sharing videos from Stampin’ Up! with some product suites from the soon to be released catalog.  Then fill out your Wish List, and get ready for September 1st when you can order from this catalog.

Wow! Who needs Netflix? It’s like a Stampin’ Up! Marathon 🙂  After binge-watching Stampin’ UP!, who needs a Wish List? Me too! Fill out this Wish List here (click to download the PDF file), then return the Wish List to me.   I’ll contact the folks on your list and let them know what you want!  They’ll buy what you want, you’ll get what you want, and everyone’s happy!

If all this has you in the mood for Christmas, don’t forget that there are plenty of really nice stamps, papers, embossing folders, etc. in the Annual Catalog too that you can order right now.  Click here!

I can’t wait to share many of the items from the Holiday Catalog with you.  Please leave me a comment and let me know which product suite is your #1 fav! Thanks,

Nancy

Savvy Shoppers Don’t Do This!

Are you a Savvy Shopper?  Of course you are! There are several things that Savvy Shoppers are always doing; searching for the best bargains, cutting coupons, shopping the sales, crunching the numbers, and so on.  But there is one thing that Savvy Shoppers DON’T do, and that is to PAY FULL PRICE!   

And since I know that you like to get the most Stampin’ Supplies for your money, you are a savvy shopper.  So you are really going to LOVE this promotion offer!   Let’s do it in pictures:

Would you rather buy this:

$99 worth of Stampin' Up

Or would you rather buy this?

$99 Starter Kit

Of course, you want the 2nd option! $125 worth of your choice of Stampin’ Up! products for only $99 plus FREE SHIPPING!!! 

Now what if you got all this too?

AND THIS?

FREE ESSENTIALS GIFT PACK

So, Savvy Shopper, What Would You Rather?  $99 of supplies for $108.90,   or $197 worth of supplies for $99?

Do I even have to ask?  It’s a no-brainer!  When you purchase the Starter Kit between July 1-31st, you’ll get all these extras thrown in!  Then you’ll get to save a minimum of 20% off all of your future orders, qualify to pre-order from the 2017 Holiday Catalog, and the 2018 Sale-A-Bration and 2018 Occasions catalog, as long as you stay an active demonstrator and meet a modest quarterly minimum in purchases (sales).

Ok, so choose $125 of your favorite Stampin’ Up! products,  click here to purchase the Starter Kit and complete the IDA agreement and you’re done!  All the Free extra’s will be included with our Starter Kit.

Join NowThere are so many reasons TO take advantage of this offer, and I can’t think of a single reason NOT TO.  So what are you waiting for?  Click that big button now!  You’ll be so glad you did! 

Looking forward to having you on my team!

Nancy

Let there be CAKE!

And cake without calories is the best kind! 

I’m excited today for two reasons;  first I got to break out one of my new stamp sets, Icing on the Cake!  Yeah, always fun, right?  Second, I get to play along with the Global Design Project this week!  And if the designers over there like my entry enough, I may even get the distinct honor of being their Guest Designer!  Let’s keep our fingers crossed that they like my entry as they are sorting through all of the entries this week!  I think that would be so cool!

So here’s the Color Challenge from GDP:

GLobal Design Challenge 093

I just love these colors together – so bright and playful!!!  Here is my entry:

Birthday cake

So many different techniques and textures came together to make this card.

The Recipe:

This card started like so many others; a 5-1/2″ x 4-1/4″ Whisper White card base with a few layers, in this case Lemon Lime Twist and Pool Party.  That was followed by another layer of Whisper White which is supporting panel for my focal point; the awesome layer cake!  The bottom layer of the cake features a scrap of the Berry Burst Fresh Floral Designer Series paper, the middle layer is a scrap of Whisper White cardstock embossed with our new Embossing Paste that was colored with Lemon Lime ink, and decorative masks.  The Top layer is a scrap of whisper white cardstock that was stamped in Pool Party ink with the polka dots from the retired Celebrate Today stamp set.  Each layer was topped with a line of frosting from the Icing on the Cake stamp set.  A sweet little In Color Bitty Bow in Berry Burst tops it all.

The sentiment was heat embossed in White Embossing Powder on a scrap of Berry Burst cardstock.  I think being chosen as a guest designer would be the icing on the cake!

If you like my cake, please leave a comment for me.  Then be sure to head over the Global Design Project to see all the other entries.  The judges sure will have their work cut out for them!

The Icing on the Cake stamp set is going to be so versatile and I’m sure I’ll be reaching for it quite a lot for upcoming birthdays.  If you want to order this stamp set, or any of the items on your wish list, then you’ll want to make sure you take advantage of our Bonus Days promotion going on now.

What are Bonus Days you ask?  For every $50 you spend in my online store between July 1-31, you will earn a $5 Bonus Days coupon that you can redeem in August!  Bonus!  To learn more, click here.

To start shopping and earning free stuff, Click here.

Shop NowThanks for stopping My Stampin Space, and for shopping with me!  I love to have here.  Have a safe and happy Independence Day!

Nancy

WaterColor Pencils

Yesterday I shared a card that I made which featured a floral stamp colored in with the WaterColor Pencils.

In case you missed it, you can view that project here.

I made a video showing just how amazing our WaterColor Pencils are.  You can view that video here.

Please subscribe to my YouTube Channel.

Our water color pencils are simply amazing and something you definitely want to add to your paper crafting supply.  You can create awesome backgrounds, fill in color on stamps, use them on watercolor paper, shimmery cardstock, or standard cardstock. Use them alone, with blender pens, or aqua painters.  The possibilities are endless! And since the colors are standard Stampin’ Up! colors you get that color coordination with all the great Stampin’ Up! papers, inks, ribbons, embellishments, etc.

So if you don’t  already own them, order your WaterColor Pencils today.  Right now!  I’ll wait.  And pick up a blender pen and aqua painter and the different paper types.  Then have fun!  Share with me your favorite way to use our WaterColor Pencils in the comments below.

Thanks, friends.

Nancy

Occasionally I like to do this….

Occasionally I like to do this…… Do What?  You’ll see.   First, I want to say that I’m so excited to join an amazing and talented group of crafters to play along with the TicTacToe Challenge this week. I am also excited that I got to break out my new stamp set “Touches of Texture” and the scallop edge die from the Seasonal Layers framelits for this project.

So without any further ado, here is my project.  simple floral for the TTTC03

I used Calypso Coral for the background, a strip of DSP from the Color Theory Designer Paper Stack which I cropped with the scallop border.  A rectangle of Whisper White cardstock was layered with a piece of Old Olive and stamped with the floral image from the “Touches of Texture”  stamp set using Sahara Sand ink.  I broke out my WaterColor pencils and Blender pen to give the flowers and leaves some color.  A simple bow made from the new 3/8″ Mini Chevron Ribbon in Old Olive tied the whole project together!  (Did you catch my pun there: the ribbon “TIED” the whole project together? – of course you did.)

Here is the TicTacToeChallenge that inspired this piece. TicTacToeChallenge 003

You’ll see that I  chose the Right Side Down – bow, scallop & rectangle for my card.  Feel free to visit the TicTacToeChallenge page to see what others did with this challenge and be inspired to use this as a springboard to make your own projects.

Now to answer the big question.  What do I like to do occasionally?  Well, it’s more ‘not do’ than ‘do’ – I purposely chose to not put a sentiment on my card, to just leave it blank.  The soft tones and floral design lends itself to many occasions and I thought it would be good to make a few of these cards to have on hand.  I can always throw a sentiment on the inside of the card, or just leave blank to write a personal note.  Either way, this is an easy card to re-produce.  If you want to purchase any of the supplies I used to make this card, please shop my online store.  Or just click on any of the product names above or below in the supply list.

Sign up for my mailing list here to receive my (almost) weekly email.   Please leave me a comment and tell me whether you like a sentiment on every card your make, or if you like to make a card without a sentiment every now and again.

Thanks for stopping by My Stampin’ Space.  Come back soon.

Nancy


Save

Save

Save

Save

Save

Save

Save

Save

Save

I did something last night that I haven’t done in 25 years!

Hi Friends,
Ok, so I may be giving my age away here, but I did something last night that I haven’t done in 25 years, maybe more!  Truth is I haven’t done this in so long that I can’t exactly remember the last time I did it, but boy it sure did bring back some fun memories.  No, it wasn’t illegal!  No, it wasn’t anything childish.
I went to the Drive-In Movies!  
Drive in Movie theater
With my husband & son.  It was SO.MUCH.FUN!   I’ve been planning this, and looking forward to it, all week, and I’m so  glad the weather was nice!  My son, who is 24, has never been to a drive-in movie theater so I know it’s been at least that long.  Actually, I have never been to a drive-in since moving to PA and that’s been over 30 years ago! 
Gone are the days of the old metal speakers that you hung on the car window, although the poles were still there. (Does anyone else remember them?) Now, the movies are in HD and you tune your radio to a specific frequency to hear the audio. 
We saw Cars 3.   The movie was a double-feature with Pirates of the Caribbean – Dead Men Tell No Lies but we didn’t stay for that movie. 
Cars 3 was FABULOUS!   I really love the Cars movies.  I think it’s because of the friendship between all the characters.  You’ve got so many different personalities but everyone works together and everyone encourages one another to use their gifts and talents, and to unite together for the greater good.  No one is too old or too rusty to be useful.  I think it is a beautiful picture of how life could be if we all just valued one another, rather than trying to compete with one another. 
It was a wonderful, heart-warming story and the story has been with me all evening and all day today.  I love a good sappy movie that stays with you long after you’ve watched it. 
The Cars community actually reminds me of my online Community, the Pals.  We are a group of Stampin’ Up! demonstrators under Mary Fish, my upline, from all over the country.  Some are old, some are young, some are new to stamping and some have been around a while.  Some are business builders, many others are hobby-ists.  But we all share a common love of stamping and it is the most positive, uplifting, community and it’s a place that I love to hang out in.  If you would love to belong to a group like that, than please email me  or just join now. 
I hope that you have something fun planned for your weekend.  Maybe you can take your Dad, your hubby and your kids to see Cars 3 for Father’s Day! 
But whatever you do, I hope you manage to carve out some time to get in your Craft Room and do something creative for yourself. 
My Paper Pumpkin kit came yesterday and I know I will be get that all inked up this weekend (you can see the June kit on my facebook page).
If you want to subscribe to Paper Pumpkin, or order some other supplies from the new catalog, just click here or on the catalog cover below to go to my online store. Please use Host Code PMNEDFV3 for your order less than $150.- thanks!
Be sure to check my blog and my facebook page regularly to be inspired and stay on top of current promotions. 
Thanks,
Nancy

Getting my Creativity on with The Paper Players

A cool color challenge

I got so many new stamps and such this week and I want to use them all!  But since I can only use one, or two, stamp sets at a time, I will have to carve out time each day to make something creative!  The color challenge from the Paper Players served to stretch my creativity and I’m so glad I played along!  Here is the color palette I had to work with:

The honest truth is that I probably never would have paired these colors on my own, but I forced myself to use them.  That got me thinking that, other than a floral, I would have to use 3 of something – one for each color.  Looking thru my new stamps for something that would work, the clothespins wrapped in baker’s twine from the Crafting Forever stamp set would be perfect!  I played with a layout and ultimately, this is what I came up with: Bakers Twine from Crafting ForeverI used the new Pinewood Planks TIEF to add texture to the background layer of Pool Party.  Then a layer of Lemon Lime Twist card stock behind the main Whisper White panel repeats the Lemon Lime splattered on that panel.  Touches of Texture was used for the splatters.   The saying is stamped in Pool Party ink.  Each clothespin wrapped in Baker’s Twine is stamped in the three colors from the Color Challenge: Daffodil Delight, Lemon Lime Twist and Pool Party, and then fussy cut.  The new Mini Dimensionals propped up these little guys with no trouble!  (Thank you, Stampin’ UP! for added those mini’s – they are the Best.Thing.Ever!)

Do you like my entry to the Paper Players?   I really, really love how this card turned out, and I have the Paper Players to thank for that!  This  really stretched my creativity but I’m so glad I participated!  Hop over to the Paper Players and see what others did with this color challenge.  But before you do, please leave me a comment and tell me what YOU think of my project.

Then make sure to come back here again because I have something juicy and zesty to share with you! I have a class tomorrow night so I may not be to write another blog post tomorrow,  even though I have my project ready to share. (I’ll try to remember to snap some photos and share them on my Facebook page.  My class is centered on the Color Theory bundle and we’ll be making some cool cards just in time for summer reading!)  Remember, if you want to get any of the products I used tonight, you can click on the item below, or just click here to start shopping.  A host code for June is listed to the right for any order you place with me that is less than $150 dollars.  Thanks,

Happy Stampin’ Friends,

Nancy

Save

Save

Save

Save

Save

My Favorite Daisy -the Delightful Daisy bundle

Do you follow me on Facebook?  If you don’t, you missed out on seeing my bestie fav, My Favorite Daisy, that I made with new catalog products.  So click here to  Like my page right now.  I’ll wait.  Ahh, all done.  Now, you won’t miss another thing from me again!

Back to my favorite card.  The wood grain designer series paper was one of the things calling my name the loudest!  And that Daisy stamp and punch!  And the embellishments and ribbon.  Combine it with the luscious patterned Designer Paper in the Delightful Daisy suite and mix it all together and what do you get?  This:

Delightful Daisy and Woodgrain

Don’t you just love this?  The Wood Textures DSP is so realistic looking, and the patterned paper from the Delightful Daisy DSP reminds me of wall paper.  The gorgeous Crushed Curry 3/8″ Mini Chevron Ribbon provides the perfect way to cover the seam where these two papers met.

The star of the show is the Delightful Daisy!  This stamp set and punch bundle has been uber popular since making it’s debut at the OnStage event in April where it was available as a pre-order for demonstrators.  As such, the Daisy Punch is currently on backorder and expected to be available at the end of the month, along with the Faceted  Gems (clear and gold) .  The Daisy Delight stamp set is available.

Did you notice the cute little tag? Of course you did!  It’s from the Wood Crate Framelits die set.  The sentiment is from Wood Words stamp set ( I used a marker to isolate and stamp each word individually to make it fit on the tag), and that gorgeous Copper 1/8″ ribbon adds the finishing touch!

I think the Daisy Delight product suite is going to be one of your favorites too!  You can see other projects I made with the Daisy Bundle here.  Please place your order for this bundle as soon as it becomes available again, so you are assured of getting it.  Now that you follow me on Facebook, I’ll be sure to keep you updated of the status of the punch, the bundle, the Faceted Gems and the 1/8″ Copper trim.

Thanks for hanging out in  My Stampin Space with me today.   I hope you enjoy it here. Please leave me a comment at the end of this post and tell me what you think of this card.  I love to hear from you!

And thanks for shopping with me when you need to place orders for your stampin’ supplies.  I’m always grateful!  I like to show my thanks by sending an email or even a handmade ‘thank you’ card in the mail, but when you select “No Contact”, I don’t even know who placed that order!  So a big ‘thank you’ to who placed an order – I don’t know who you are, but I’m still thankful for you!

See you, and Happy Stampin!

NancySave

Save

Save

Save

Save

Save

Save

Save

Save

Save

Coffee is Happiness

When I first saw this sketch challenge from Case This Sketch, I knew EXACTLY what I wanted to do!  The problem?  Everything I wanted to use to make it was in transit.  Hurry up, Mr. UPS-man!  So he got here today, and this is what I made!

Coffee is Happiness

And here is the sketch that inspired it:

Don’t you just LOVE this Coffee Break Designer Series Paper?

Coffee is Happiness

It’s so retro, and while I usually don’t gravitate towards paper with a busy design, I just Love this!  Maybe it’s all the different types of coffee pots and cups.  The polka dot pattern is just plain fun and playful!  Then there’s the coffee cup itself.  It’s so realistic looking thanks to the Coffee Cafe stamp set and coordinating Coffee Cups framelit dies.  (Bundle and Save 10%!)  The lid popped on in a snap (no worries about spills either!)  The corrugated cardboard sleeve keeps my hand from getting burned and it makes a nice place for the oval die cut featuring the word “Happiness”.  I do believe that coffee = happiness, but the word “happiness” is cropped from the sentiment.  The rest of the sentiment is on the inside:

Happiness is coffee shared with a friend

How true, right?  And I’m glad that I can share this with my friends over at Case This Sketch.

And it makes me so happy so share MyStampinSpace with you!  I’m honored when you choose to spend time with me and hang out here at My Stampin’  Space.  Feel free to kick back and enjoy a cup of coffee while you’re here!  My hope is that you will be inspired to make your own paper projects  and that you’ll pick up some tips and tricks along the way.

If you want to  get this stamp set, or all of the products in the Coffee Break Suite, pg. 30-31, (there’s ribbons and corrugated elements, too!) please head over to  my online store.

I’ve gotten so many items in my delivery today and I can’t wait to share eeverything with you so please stop back again.  Like me on Facebook, and subscribe to my newsletter so you won’t miss a thing!

Happy Stampin,

Nancy

Save

Hooray for the TicTacToe Challenge!

Three cheers for the TicTacToe Challenge!  A bunch of my fellow Stampers, and Pals, from Mary Fish’s Stampin’ Pretty Pals, have created a new weekly challenge group.  It’s a tic tac toe challenge!  Just like the child’s chalk game, this features a grid with 9 squares.  Each square contains an element you can use in card making.  You can get tic tac toe by any row across, any column, or a diagonal line.  Here is the TicTacToe challenge for the week.

TicTacToe Challenge #001I chose the top line across, and here is my card:

Hooray for TTTC#001

Stripes, circle & gold!  So Easy and so elegant.  Black and gold always combine to a elegant and classy color combo.  I wanted to make something to congratulate the design teams over at TicTacToeChallenge for the new challenge. I’m really looking forward to playing along with this challenge every week.

I did heat emboss the “Hooray” in Versmark ink and gold emboss powder.

I am a self-professed paper hoarder.  I buy pretty paper and then I don’t use it because I hate to cut it up. I have made myself promise that I WILL USE up some of my retired DSP, and that I will use, use up, and buy again, any new DSP that I buy.  This piece of DSP, from the Pop of Pink paper set, fits the bill of using up my retired DSP.  I hope that you might have some of this paper left over; it really is so stunning.

A simple circle cropped with the layering framlit dies, popped up on another circle of carstock.  A little banner of Gold foil sheets accents it just perfectly.

So join me in saying “Hooray for the Tic Tac Toe Challenge!”  Then head on over to the challenge to see the what the design team came up, and they play along with the challenge for yourself.

Thanks for stopping by MyStampinSpace.  Come back again as I have alot to share with you this week.

Happy Stampin’,

Nancy

Save

Save