Free Tutorial to Make Quick & Easy Gift Card Holders

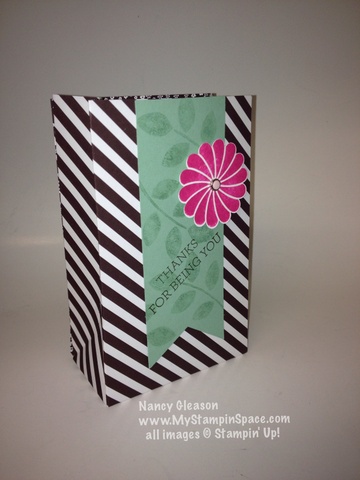
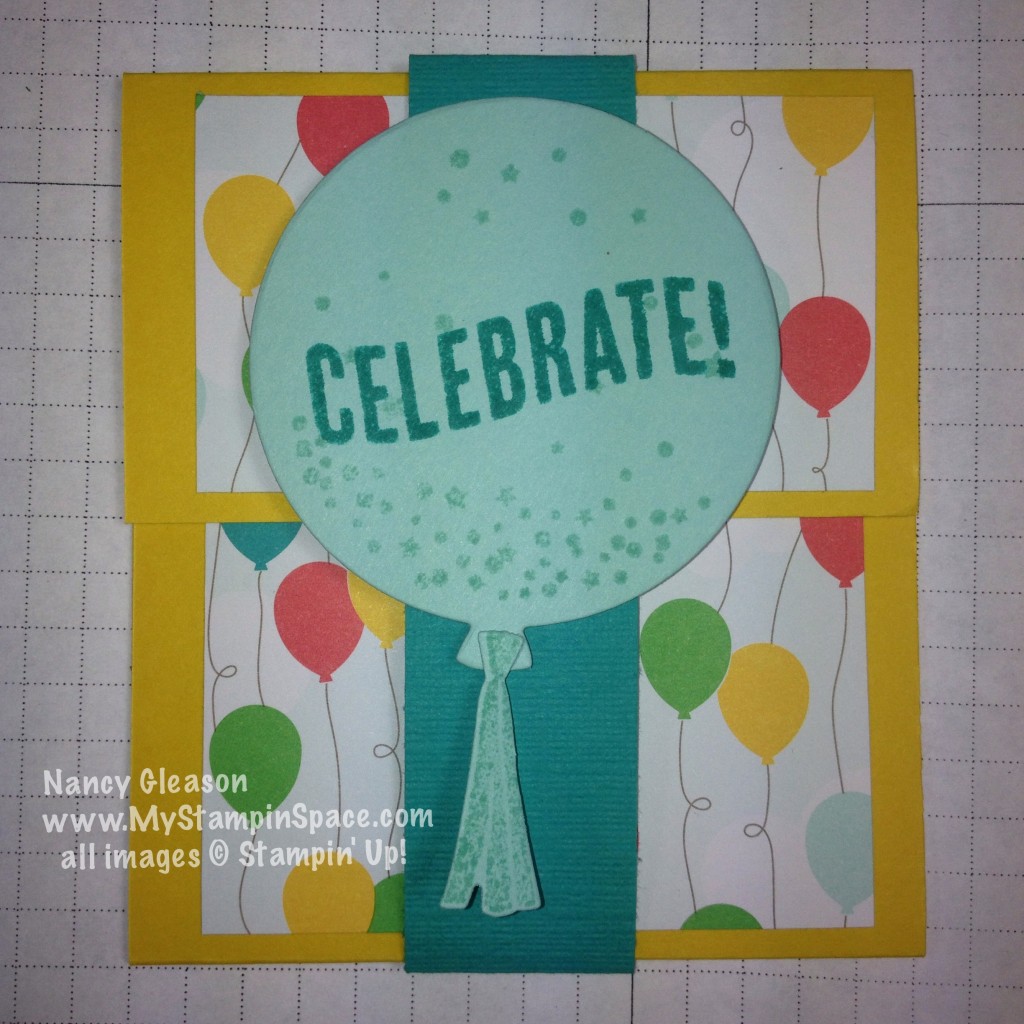
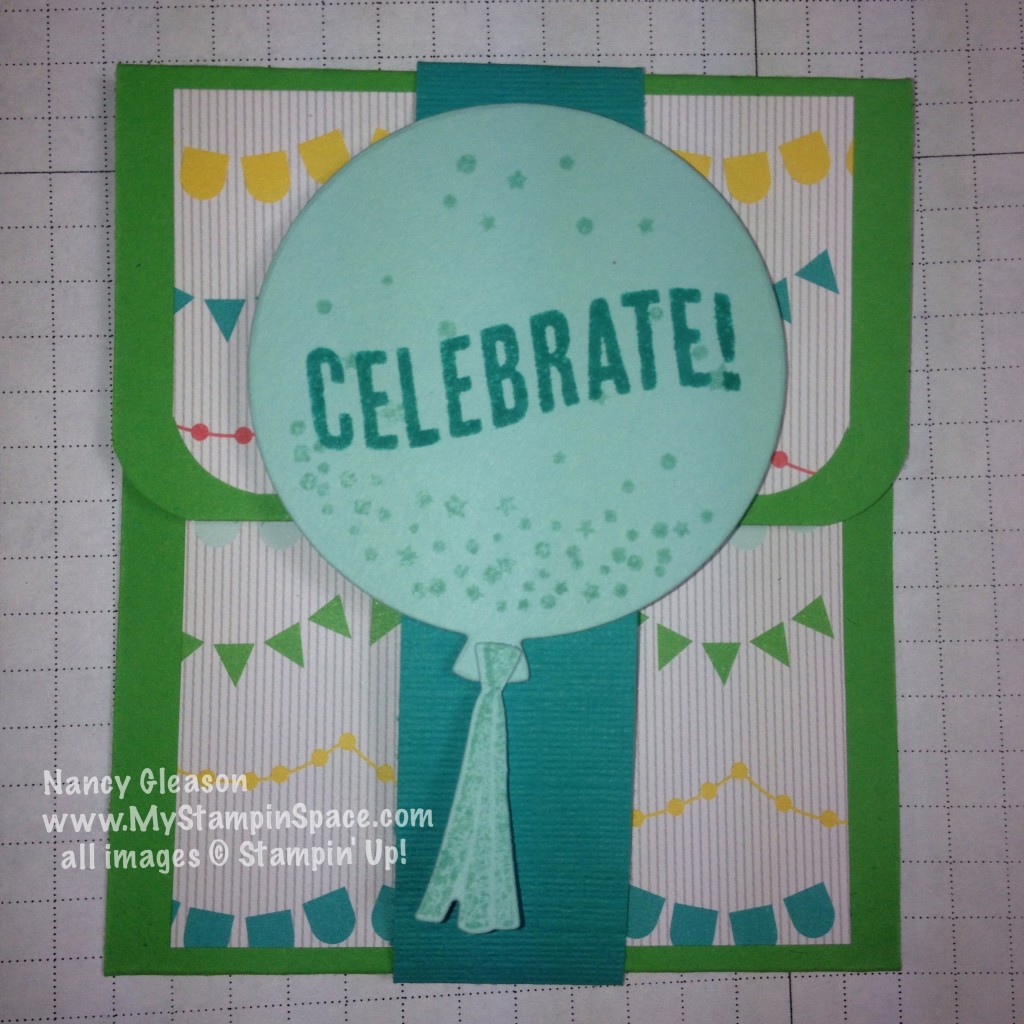
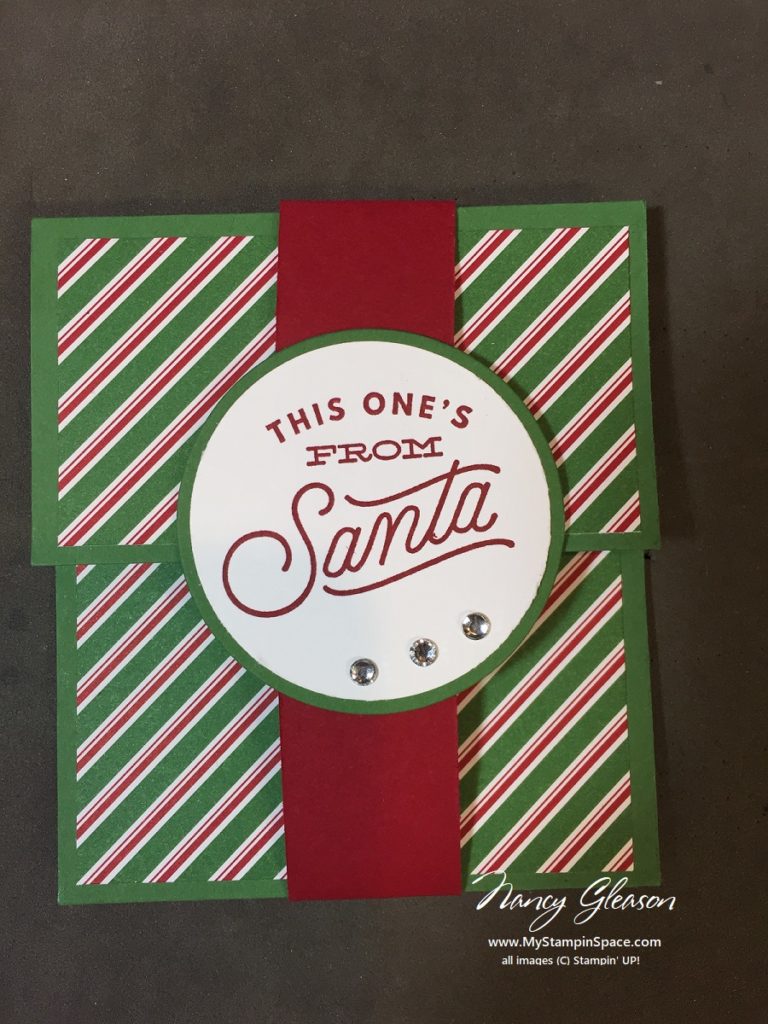
One of my ‘go-to’ projects this time of year is a cute gift card holder.  My design is quick and easy to make:  you could knock a dozen or so in under an hour!  Seriously.  And it was designed so that you could maximize the yield from a sheet of cardstock and DSP with very little waste.  BONUS!    And if that weren’t enough, you could easily customize this for any occasion simply by changing out the color combination, DSP, and the design element/sentiment.

Quick & Easy Gift Card Holder

Click here for a FREE PDF Tutorial detailing how to make this gift card holder.

I was live on Facebook making this gift card holder if you’d rather see it in action.  Go to my Facebook page and look for the live video.

Enjoy this project, and as always, leave me comment if you enjoyed this project.


A Special “50” Gift

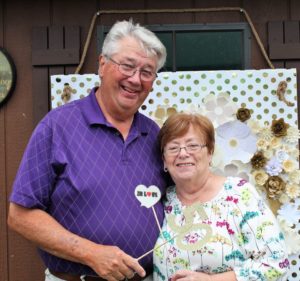
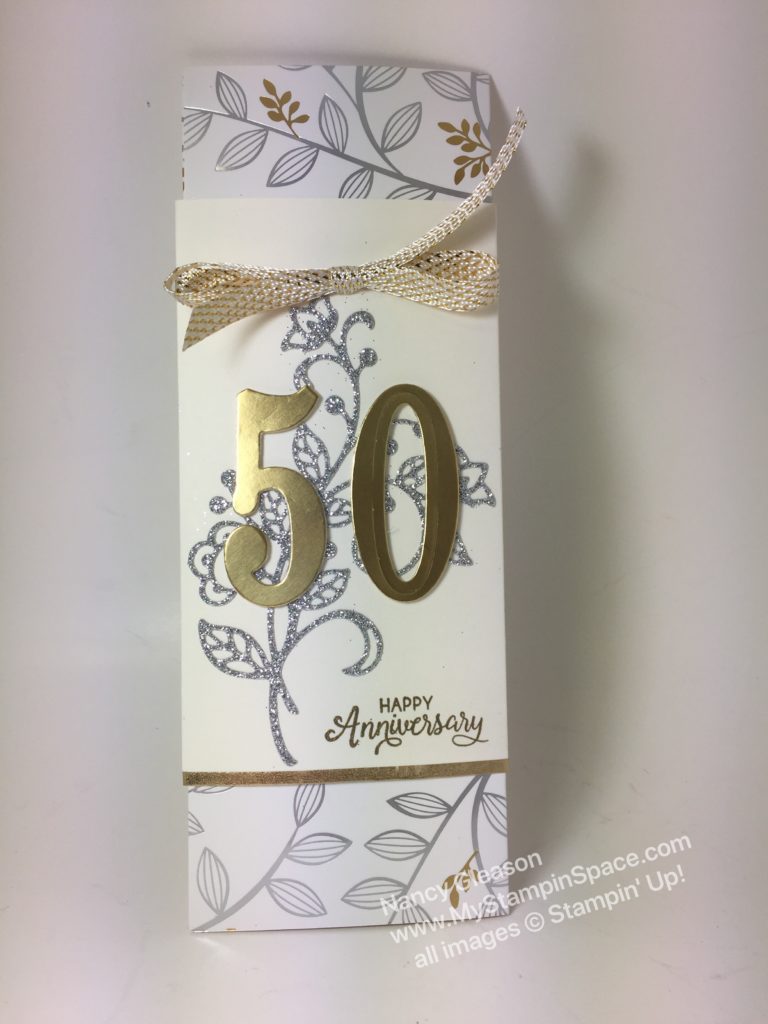
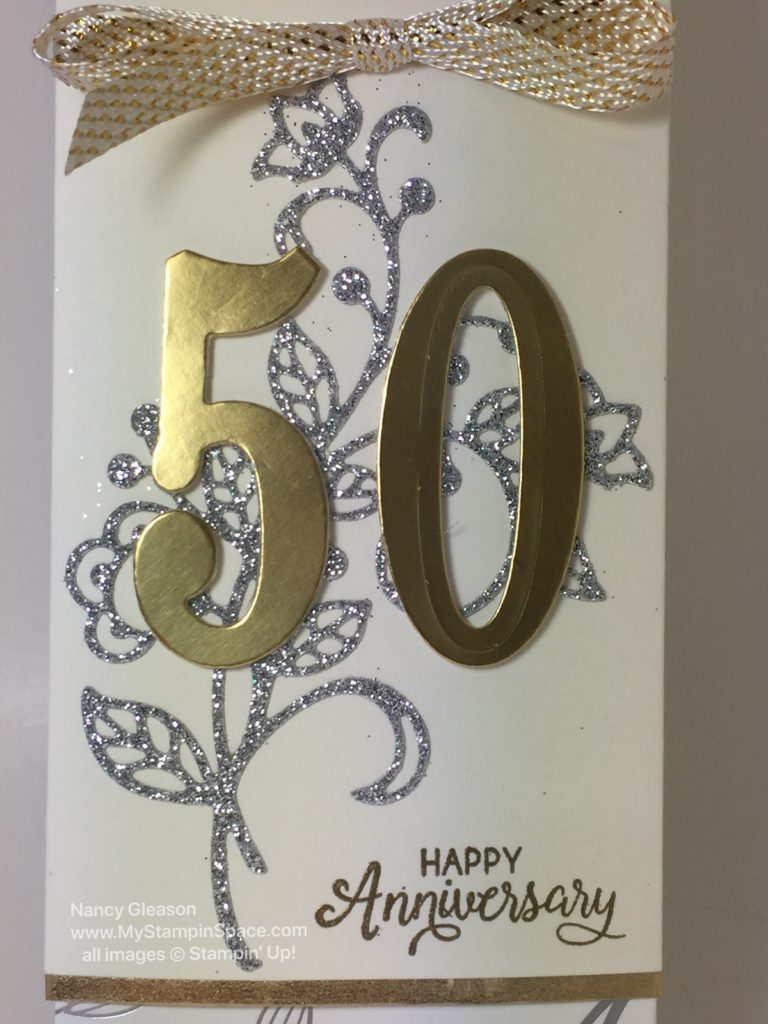
Recently friends of mine celebrated their 50th Anniversary!  Yes, that is wonderful!  Not only did God bless them with a wonderful marriage, but also with a wonderful family.  I am also proud to call their daughters my friends as well.  And 2 of the 3 daughters are my fellow stampers too!  All 3 children and their spouses, and their children, threw them a big party to celebrate!  Here’s the happy couple:And I made this gift card holder card to give them. 

The gift card holder was made from the now retired Springtime Foil DSP. (I stocked up on this gorgeous paper before it retired!  I hope you did too!)  A belly band of Whisper White cardstock was trimmed with gold Washi Tape and stamped/heat embossed with gold embossing powder using the sentiment from Beautiful Bouquet.  I was so happy to use the Gold Foil Sheets and my Large Numbers Framelit dies to crop the numbers which I placed over a flourish cut from Silver Glimmer paper and the Flourish thinlit dies.

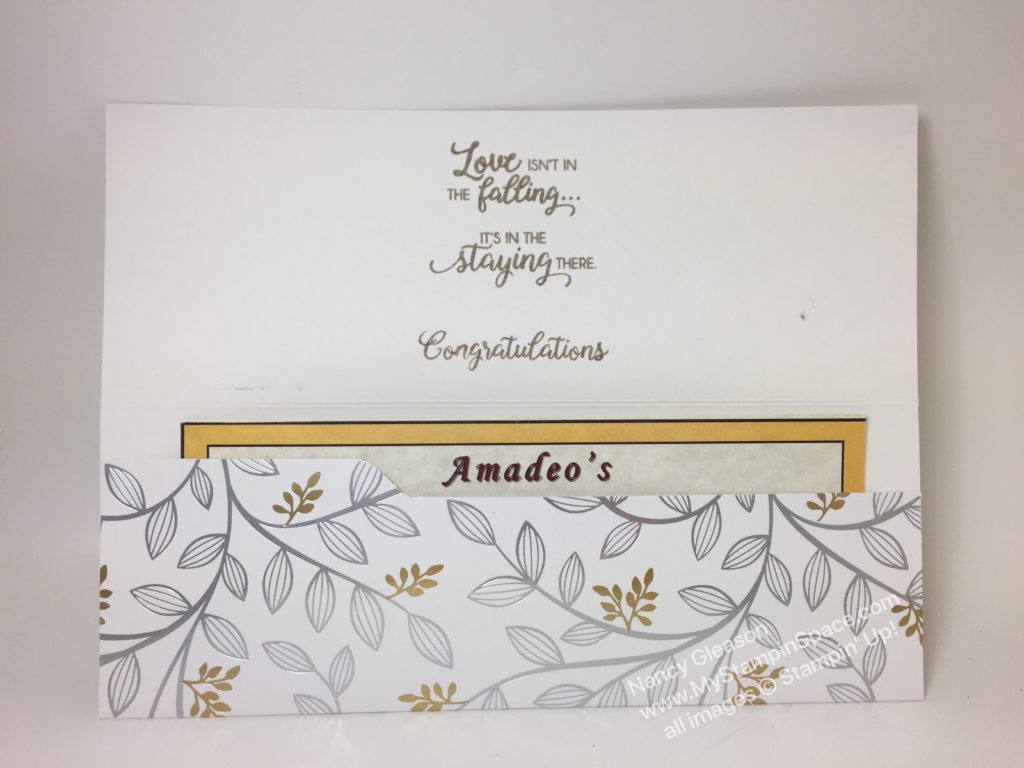
Here’s a look at the inside:A gift certificate to a local restaurant was tucked inside.  The envelope punch board made it simple to add that ‘file folder’ tab-edge to the inside.

a gift card holder created for a 50th Wedding Anniversary by Nancy Gleason of My Stampin SpaceThis was a snap to make, you can be sure that I’ll be making many more with a Christmas theme in the coming weeks!

making Christmas CraftsSpeaking of Christmas, do you like Crafting at Christmas time?  Of course you do, that was a silly question!  I should really ask if you would like to receive tutorials for 12 exclusive Christmas projects for FREE.   I’m sure the answer to that is a “Of course I want to!”  My 4th annual 12 Weeks of Christmas newsletter is slated to begin this week.   Only the folks who have subscribed to my mailing list will receive this newsletter and the 12 project tutorials delivered to their in-box for the next 12 weeks.  It’s not too late, you can subscribe to my mailing list right here, or fill in the box that pops up when you come to my blog.  And please be sure to pass this on to your friends who want to receive 12 free Christmas project tutorials in their in-box also.

World Card Making Day

Did you know October is World Card Making day?  Sweet, right? Since it’s right up our alley, Stampin’ Up! is celebrating with a sale all week long.  Select card making kits and supplies are on sale.  Click here to see the list of items.

World Card Making Day Sale Flyer PDF

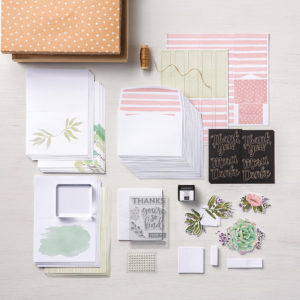
My favorite kit from the sale list?  The Notes of Kindess Card Kit makes 20 cards and comes with an exclusive photo polymer stamp set, ink, card bases & envies, and all the die cut embellishments you need.   The World Card Making Day sale only lasts 1 week!  Ends on Oct. 7, 2018.

Thanks Stampers and Friends for stopping by My Stampin Space.  See you soon!
Nancy

This is what I promised you….and a bonus!

If you read my blog regularly, then you’ll know that I had my first stamp class in a long while on Monday night.  It was SO GOOD to stamp you again!  I’ve missed it.  I’m glad to be back 🙂

Yesterday I shared one of the two projects we made in my Monday night class.  If you missed that post, you can see it here.

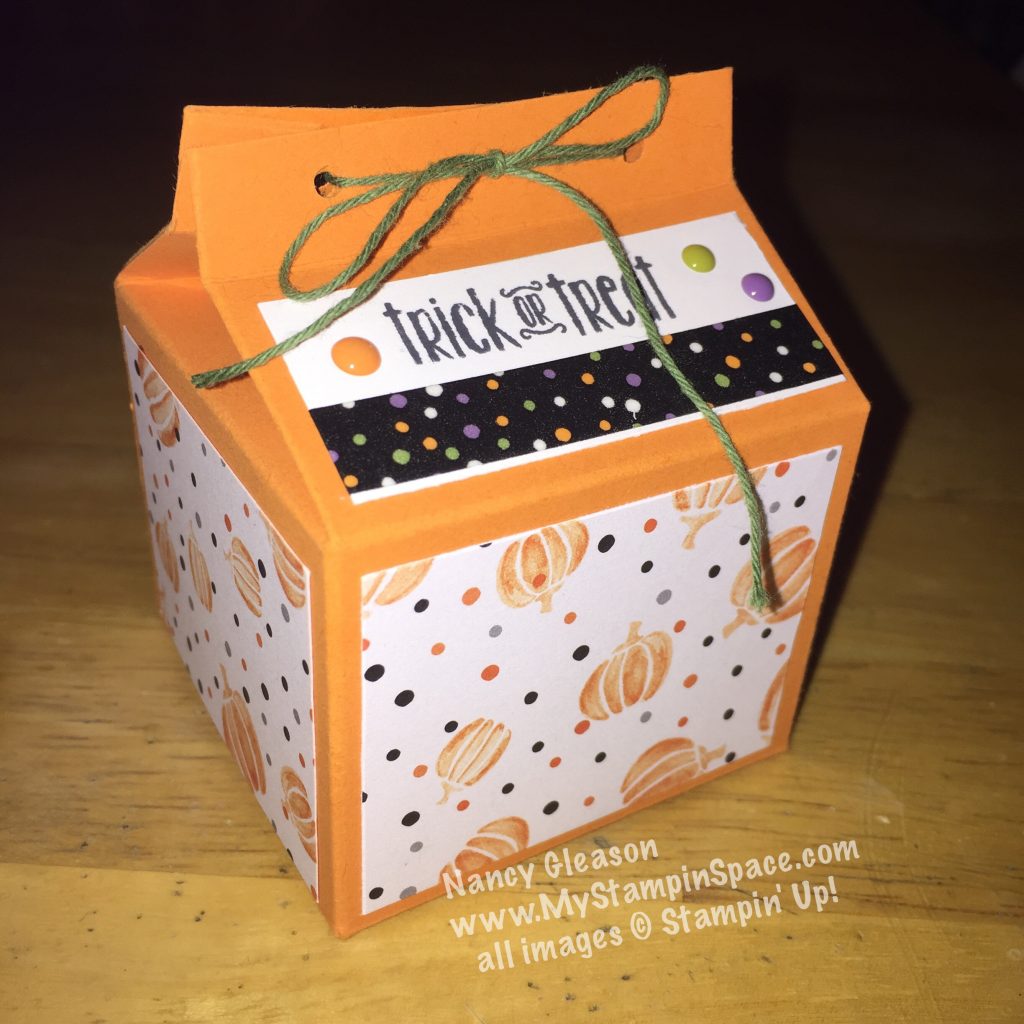
This is the second project we made:  Milk CartonI’ve been seeing these little milk cartons a lot lately on my Pals Facebook Groups, and while I did not come up with the idea, or the measurements, to make this, I wanted to share it with my class.  Of course, we filled ours with candy!  What would Halloween, or a Stamp Class be without chocolate?

Milk Carton

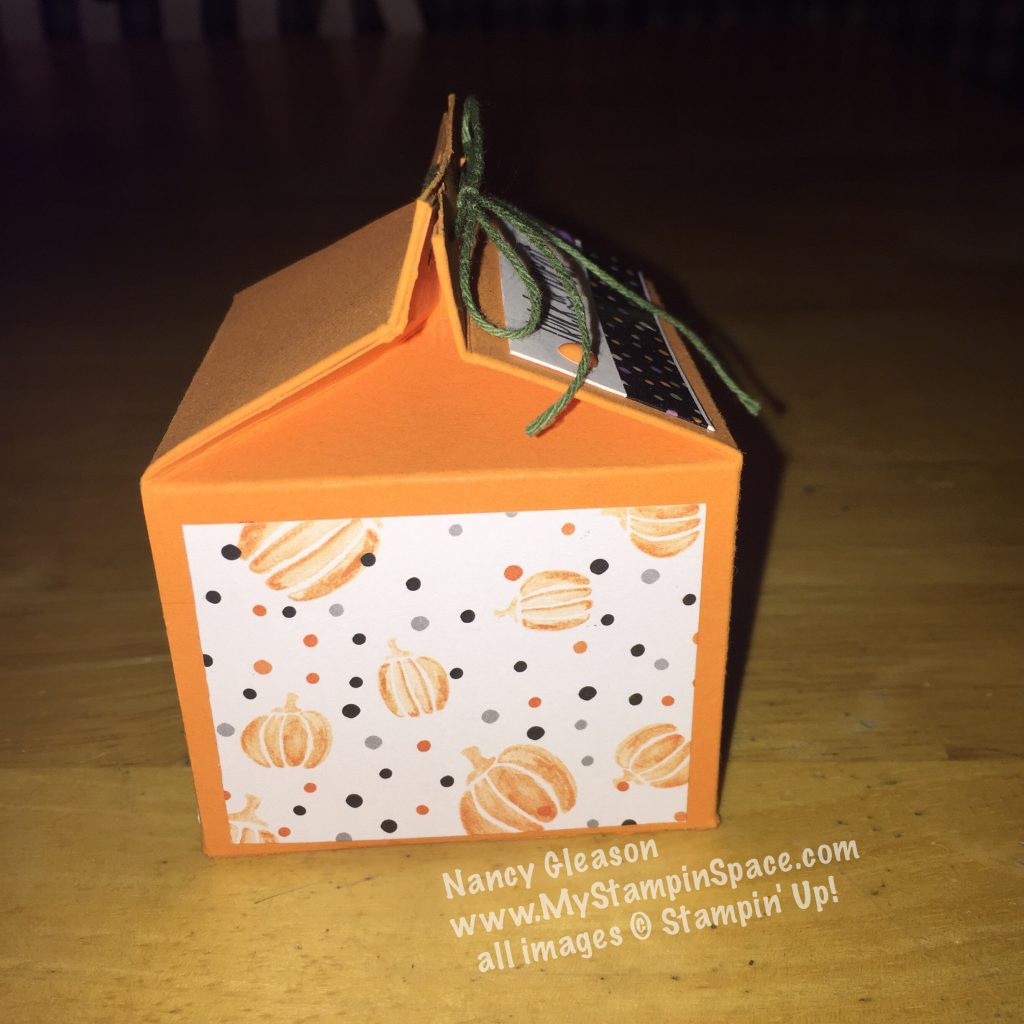
The side view shows the fold that creates the milk carton look.

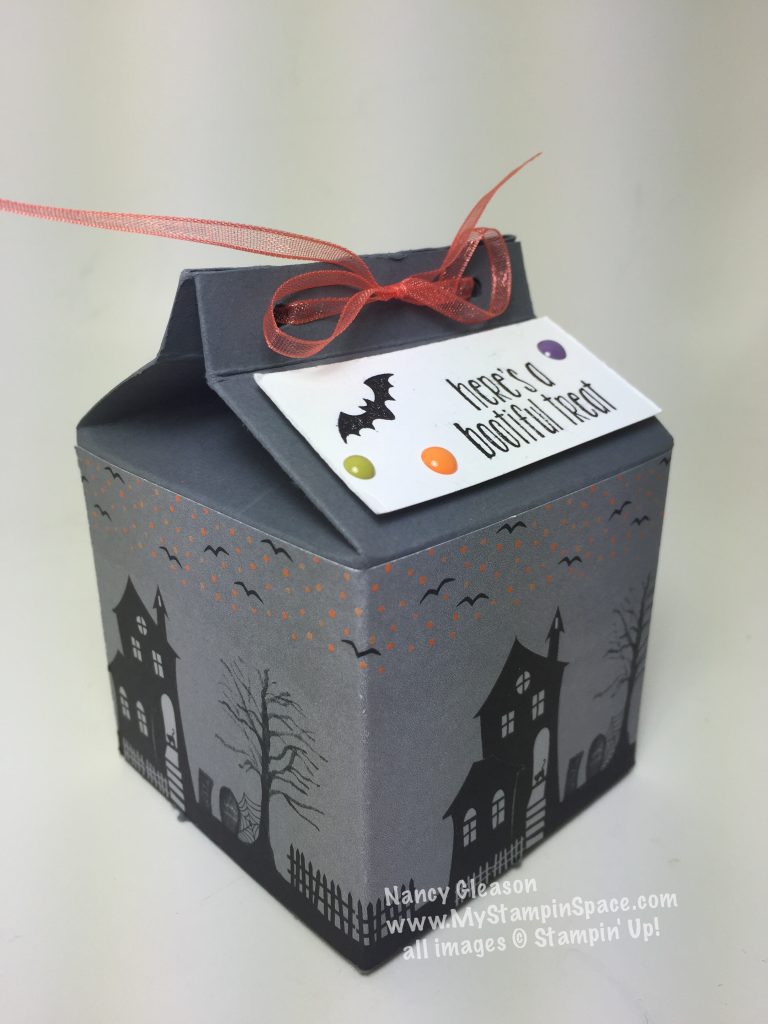
I made another one; just a tad taller, to perfectly fit the scene from the new Halloween Night Specialty DSP.

Mini Milk Carton Grey I love how the sentiments from Spooky Fun combine with the Halloween Night Enamel Dots to create the perfect little message panel.

The perfect way to close up these milk cartons is with the 1/8″ Circle Punch and the Coordinating Halloween Night Baker’s Twine.  But as you can see, my cartons are conspicuously missing this Twine.  That’s because someone forgot to order it!!!  How can I be so foolish, you ask?  Well lets just say that sometimes the best lessons are learned from the mistakes we make.  So please learn from my mistake:  when you order a Product Suite, make sure you order everything in that suite; especially when the item is on your wish list!    You’re welcome!

I wrote up instructions on how to make these cute little boxes, along with a diagram, for the ladies who attended my class last night.  And I’ll share those instructions with anyone who orders from my online store and uses HOST CODE 9QWR7K6M (if your order totals $150 or greater, before tax & shipping – do not use the host code but redeem the Stampin’ Rewards for yourself!)  This Host Code will expire at midnight on 9/14 so don’t wait!  Just email me to let me know you’ve placed your order and I’ll email the file to you!  Easy Peasy!

I hope you enjoyed these projects as much as the ladies last night.  What a fun way to send in treats to your childrens’ or grandchildren’s class, or for your own co-workers.  You can even give out treats to all the kids in the neighborhood in these little boxes on Halloween night!  You can decorate the boxes for any occasion; maybe even a baby shower, just by changing up the color, paper pattern & sentiment.

When ordering, don’t forget to shop the newly stocked Clearance Rack and our weekly Special Offers to for great savings!  And please remember to use HOST CODE 9QWR7K6M.

Thanks for stopping by today.  I hope you were inspired by what you saw here today.  Please leave me a comment; I love to hear from you.  Now go create something fun!  Creative time is therapy 🙂

Happy Stampin’

Nancy

Save

Save

What did my Stamp Club want to make?

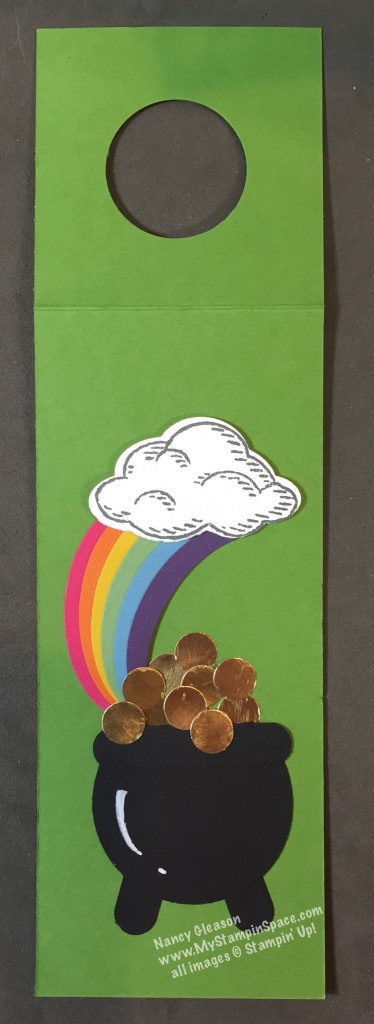
Pot of Gold at the end of the RainbowWhen I asked the ladies in my Stamp Club if there was anything special they wanted to make, they answered that they wanted to make something for St. Patricks’ Day.

Well, I didn’t want to just make a run of the mill, ordinary 3 or 4 leaf clover.  So I thought of a pot of gold (I’d seen a cute punch art pot on Pinterest) but I knew we would need a rainbow.  After all, the pot of gold is found at the end of the rainbow, so I needed to make a rainbow.  Well, since I didn’t own a rainbow stamp, I really had to put my thinking cap on and get my creative juices flowing at the same time!  Not any easy feat if you know me!  Ha Ha.

Since I had my punches out to make the pot of gold, I thought maybe I could just punch art my way to a rainbow.  The extra large oval punch and thin strips of cardstock combine to give me thin arched shapes of paper which I glued together to form the end of the rainbow.  A cloud stamped from the “Sprinkles of Life” stamp set and punched with the coordinating Tree Builder punch gives the rainbow a starting point.

For the rainbow, I used Melon Mambo, Pumpkin Pie, Daffodil Delight, Wild Wasabi, Marina Mist, and Elegant Eggplant cardstock.  The pot was made by slicing the top off a 2″ circle punched out of Basic Black Cardstock.  A Word Window punch was used for the rim of the pot, and another was cut in half and used for the legs.  A white Uni-ball gel pen let me create the hi-light on the side of the pot.  The 1/2″ circle punch was used to cut out the coins from gold foil.

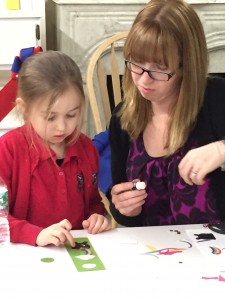
This was a fun little project to put together.  The ladies really enjoyed it, and we had a special guest stamper with us that night!IMG_6391

IMG_6393

Even Sadie, 5, enjoyed making her project and did a great job!  She was grinning from ear to ear and couldn’t wait to show her Dad when he came to pick her up!  (We believe in starting ’em young!)

If love to know if you are going to try making this yourself too.  We put ours on water bottle tags, what will you put yours on?  A bookmark, a card, a gift tag?  Please leave me a comment and tell me what you will do.  And save this to your Pinterest board for future reference too.  You can follow me on Pinterest too.

Well, thanks for stopping by My Stampin’ Space today, and Happy St. Patrick’s Day to you !

Don’t forget to shop my store if you need to order any supplies to make this or anything else.  With every $50 you purchase, you get to choose a free Sale-A-Bration item as well.

Nancy

Festive Flower Gift Set

I wanted to make a special little gift for a friend to whom I owe alot; she is the person who introduced me to Stampin’ Up!  Honestly, when I got invited to a ‘rubber stamping class’ I thought “Ink, Stamp, Boring!”.  I mean what could you do with a rubber stamp to make something decorative?  (My exposure to ‘stamps’ was basically a black ink pad and a date stamp, a paid stamp, and a copy stamp so I didn’t really have high hopes!)  But when I put a decorative stamp to a colored ink pad, and used markers to add various colors to one stamp, added ribbon and some decorative paper, I WAS HOOKED!   All I wanted to do from that night on was stamp!

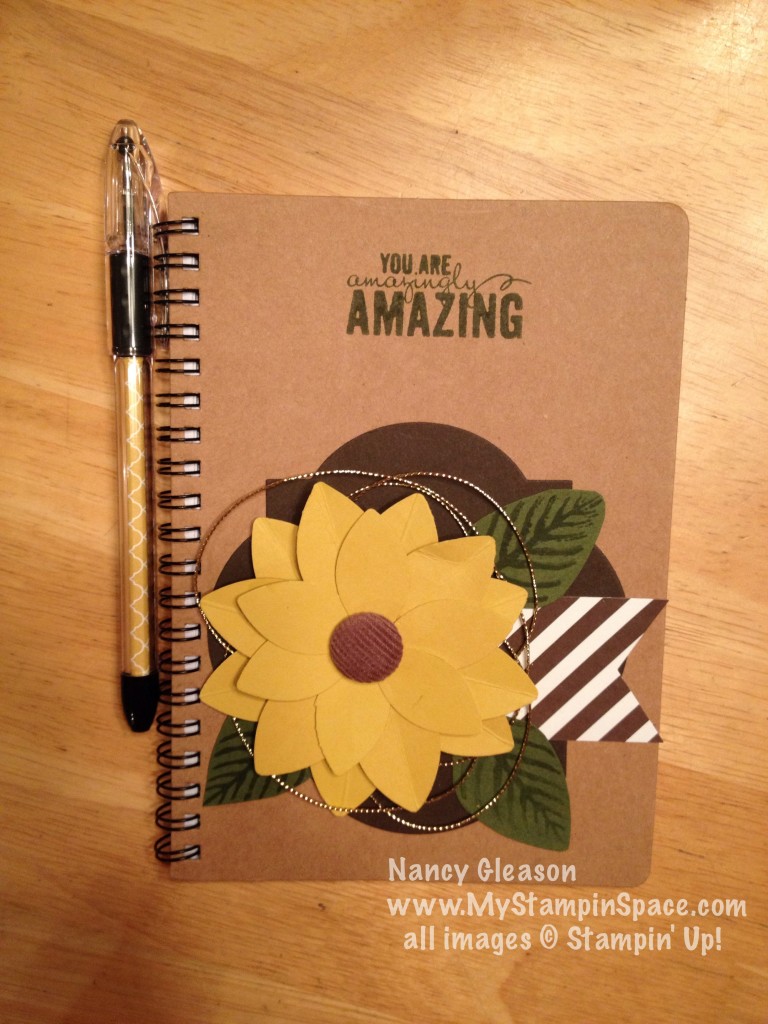
Well, I’ll be going to Baltimore later today for the Stampin’ Up! OnStage event and I’ll be traveling and rooming with Sue.  So I decorated this plain old notebook, added a coordinating pen, and decorated a coordinating gift bag.  (Of course, they’ll also be chocolate in the gift bag too, along with some other essentials for a road trip!)

WARNING:   A few retired items were pulled from the archives in the making of this coordinating gift set. 

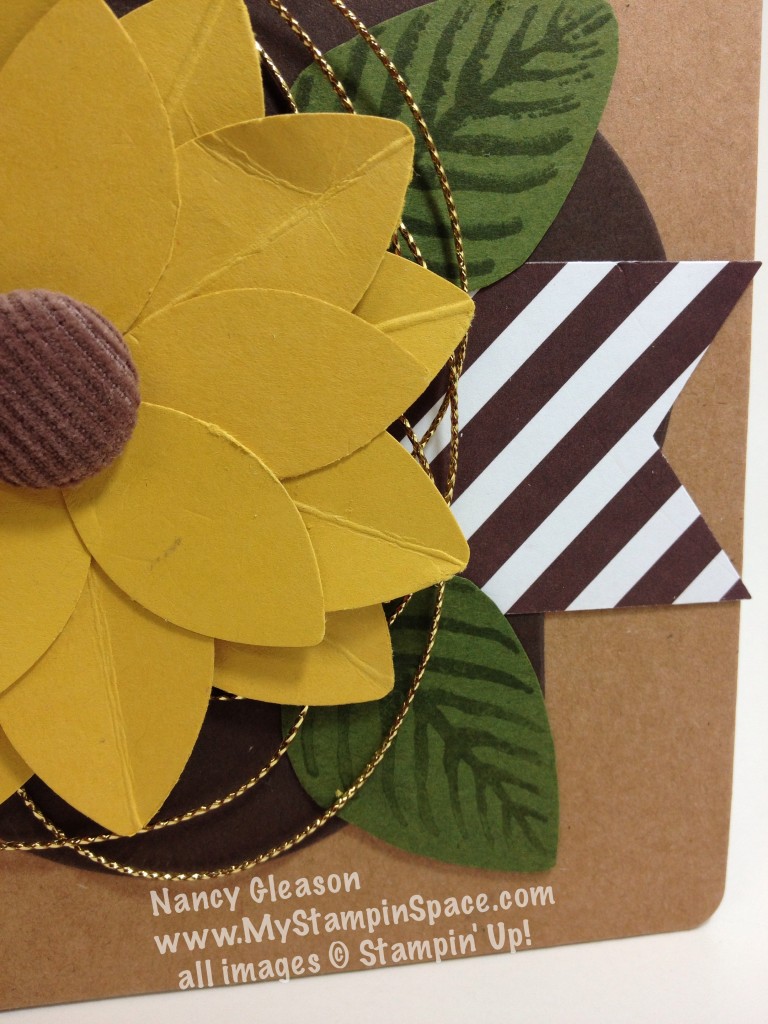
Decorative NotebookI used Early Espresso cardstock cut out with a (retired) framelit dies. A piece of Early Espresso DSP from the Neutrals Paper Stack was cropped with the triple banner punch to create the flagged end.  But the really star of the show is the Sunflower created from the Festive Flower Builder Punch (on sale this week!).  I punched 12 large leaves in Hello, Honey cardstock, and 6 small leaves (and one circle from the 1-1/4″punch).  I used the circle to form a base, covered it with glue and started arranging 6 petals in a circle.  I added another layer of glue and another layer of 6 petals, overlapping the first circle.  Lastly, I added the 6 smaller petals, again staggering them.  From my stash of really old, I mean vintage, Stampin’ Up! supplies, I pulled out this Chocolate Chip Corduroy brad.

I stamped a few leaves in Mossy Meadow ink on Mossy Meadow cardstock and fussy cut these using my trusty paper snips.  A little bit of gold metallic cording adds some bling behind the flower when it was assembled.

sunflower close up

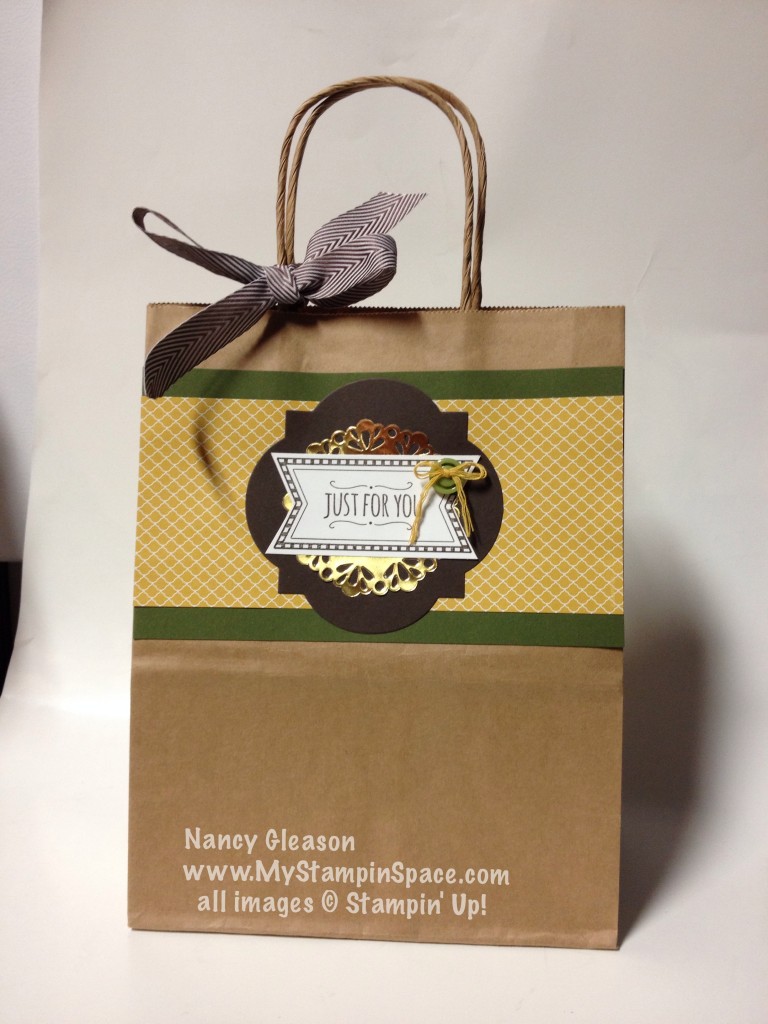
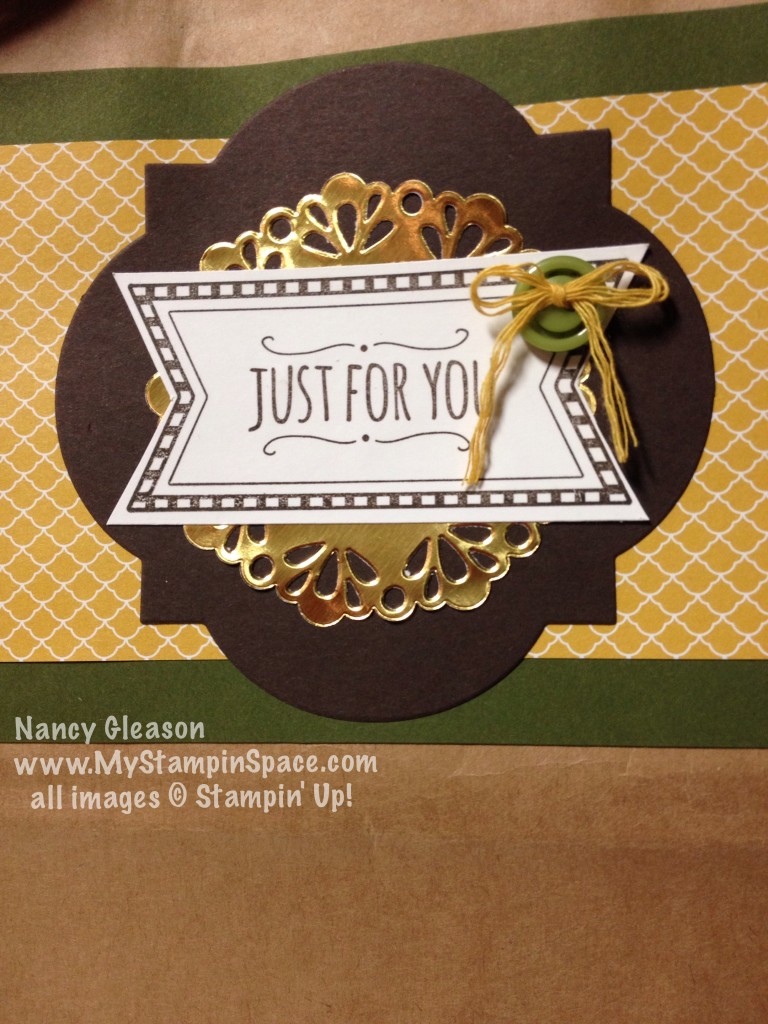
Now for the bag!  decorated gift bagI used Mossy Meadow cardstock, Hello Honey DSP cut to the width of the kraft gift bag.  I used Early Espresso cardstock to cut out the decorative shape with the same retired framelit die used on the notebook.  A gold metallic doily added a little accent behind the banner flag.  A little button adds a decorative touch.

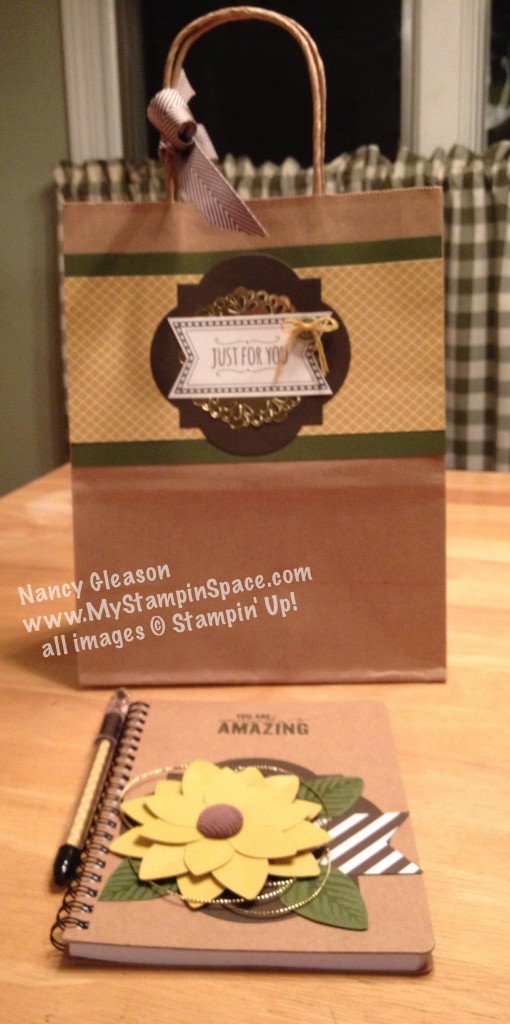
decorative medallion close upYou can see both items together here.  I think that they coordinate well together, don’t you?  bag and bookWell, I hope that you enjoy this project.  It was really fun to put together and I would encourage you to find a plain boring notebook (think Dollar Tree!) and dress it up!  A Pentel RSVP pen, a strip of 1″ x 3-1/4″ DSP is all you need to add a coordinating pen to your notebook.  When you put that in a matching gift bag, your recipient will be sure to know how much you care.

If you would like to make this and need any supplies, click on the supply list below to go straight to my online store.  Bonus:  the Festive Flower Builder Punch and the Metallic Foil Doilies are on sale in the WEEKLY DEALS this week!

Built for Free Using: My Stampin Blog

You can see the Weekly Deals here:

Built for Free Using: My Stampin Blog

 Make sure to Follow me on Facebook, I’ll be sharing pics of my at the OnStage Event in Baltimore this weekend.  Hard to believe but I’ll actually be getting a sneak peek of the 2016 Occasions Catalog and 2016 Sale-A-Bration catalogs!!!  We are prohibited from posting the catalogs or pics of new products but I’ll be sharing some of the excitement!

Happy Stampin’,
Nancy

“So Thankful” for the Pals Blog Hop

Pals November Blog Hop BadgeWelcome to the Pals November Blog Hop, we’re so thankful you stopped by!  This month we’re showcasing projects that feature Stampin’ Up! Thanksgiving and “Thank You” products.  We hope you enjoy our creations.

You may just be starting the Blog Hop or you may have come from the previous blog on the Pals Blog Hop listing shown below.  The full lineup will help you move along from blog to blog so you can enjoy each and every beautiful project.

I have SO MANY things to be thankful for: a wonderful husband (we just celebrated 27 years of marriage!), our son, our home, good health and jobs, etc.  I am also thankful to be involved with Stampin’ UP!  I have met so many wonderful people and the friendships I have because of Stampin’ Up!  I am so thankful to be part of the Stampin’ Pretty Pals and to be part of their monthly Blog Hop.   ‘Nuf said, let’s get on to the stampin’:

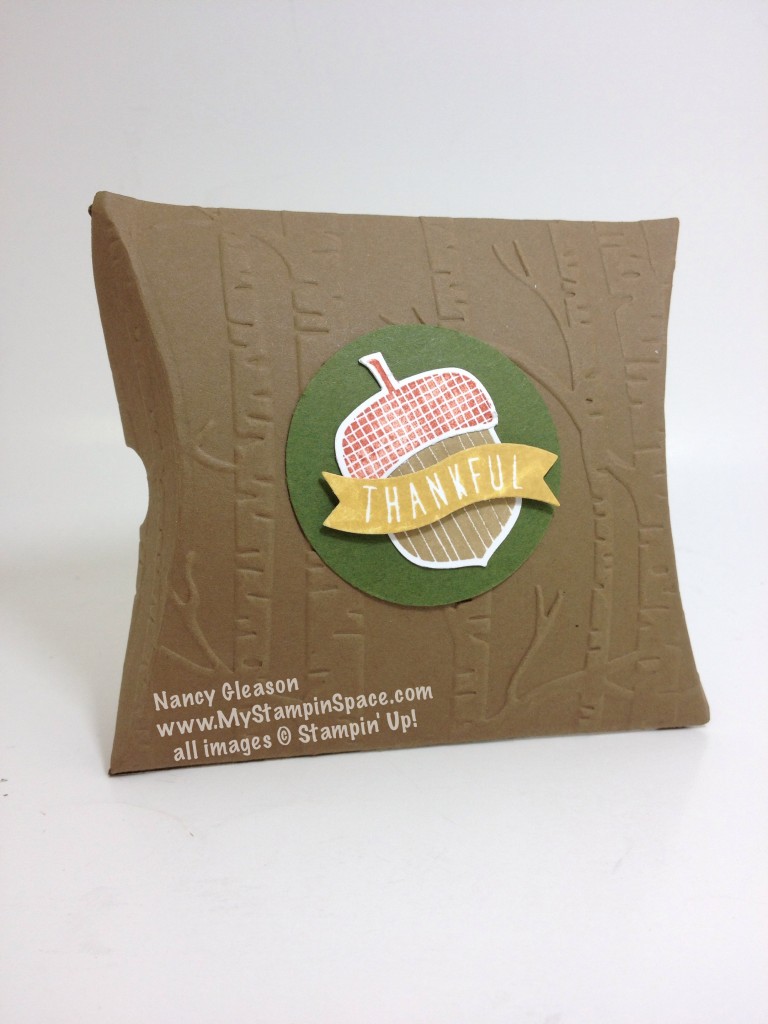
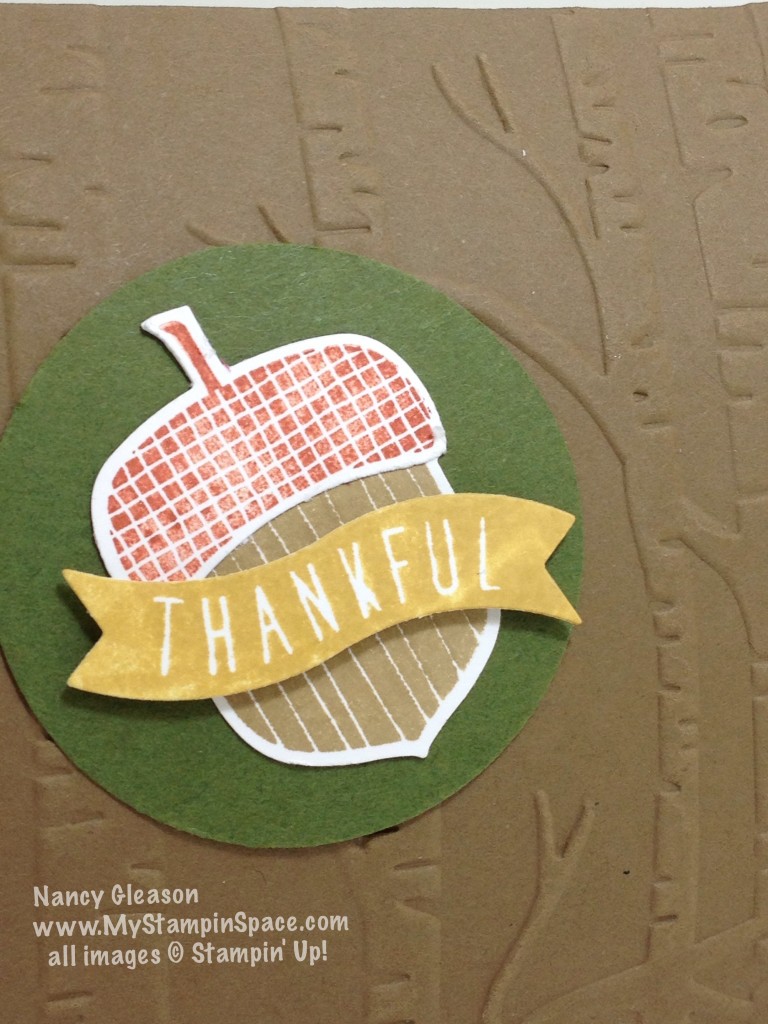
Acorny Pillow BoxI’ve been hosting Thanksgiving Dinner for several years now, and I love having my family over!  Each year I make a special party-favor item (usually filled with chocolate!) for each of my guests.  This year, I plan on using the popular Square Pillow Box for my treats.   Can you tell that I also embossed the Soft Suede cardstock with the fabulous Woodland Textured Impressions Embossing Folder?

Acorny Thank YouI kept the decorations simple and to the point.  A circle punched from the 2″ circle punch serves as the backdrop for the awesome acorn.  The acorn is stamped and punched using the Acorny Thank You stamp set and coordinating Acorn Builder Punch (Bundle & Save 15%).  Soft Suede and Cajun Craze inks were used for the acorn image while Hello Honey ink was used to stamp the banner.  Bitty Banner Framelits  made easy work of cropping out the sentiment banner.

Thanks for visiting.  To continue with the hop, please refer to the Blog Hop Line-up below. We hope to see you on next month’s Pals Blog Hop!

  1. Jennifer Michalski at Stampin’ Serenity
  2. Shawn de Oliveira at Shawn Stamps
  3. Katy McGloin at Just Fun Stamping
  4. Kim Jolley at Stampin’ Artfully
  5. Becky Volpp at InkBlossomwithBecky
  6. Peggy Noe at Prettypapercards
  7. Rae Harper at Wild West Paper Arts
  8. Kelly DeTommaso at Kelly’s Creative Corner
  9. Beth McCullough at Stamping Mom
  10. Wendy Klein at Doggone Delightful Stampin’
  11. Kalyn Shubnell at The Stamping Chronicles
  12. Jackie Diediker at Stampin’ Jackie
  13. Susan Itell at Simple Stampin
  14. Lisa Ann Bernard at Queen B Creations
  15. Pamela Sadler at Stampin Pink Rose
  16. Karen Hallam at Karen’s Stampin’ Habit!
  17. Mary Fish at Stampin’ Pretty
  18. Debra Simonis at Deb’s Stampin’ Grounds
  19. Nancy Gleason at My Stampin Space —YOU ARE HERE—
  20. Brian King at Stamp with Brian
  21. Dawn Tidd at Tiddbits from Dawn
  22. Jane Knudsen at see jane stamp
  23. Sherrie Gross at Stampin’ Sunshine
  24. Tricia Chuba at ButterDish Designs

Don’t forget to come back again in the next few days.  I’ll be traveling to  Baltimore, MD to attend the Stampin’ Up! OnStage event.  I’ll be getting a sneak peek at the 2016 Sale-A-Bration catalog!  Like me on Facebook and sign up for my mailing list so you won’t miss a thing!

Thanks for stopping by My Stampin Space.  If you’d order any of the products I’ve used here, please feel free to shop my safe & secure online store.  Thanks!

Nancy

This is What Inspired Me

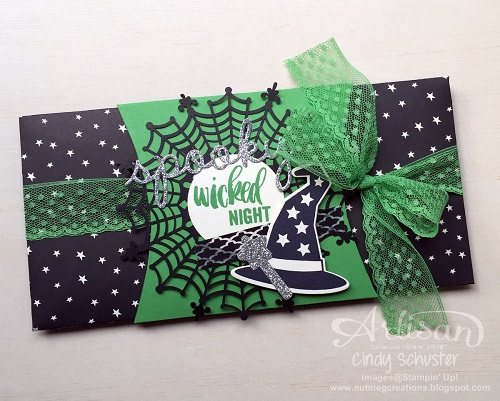
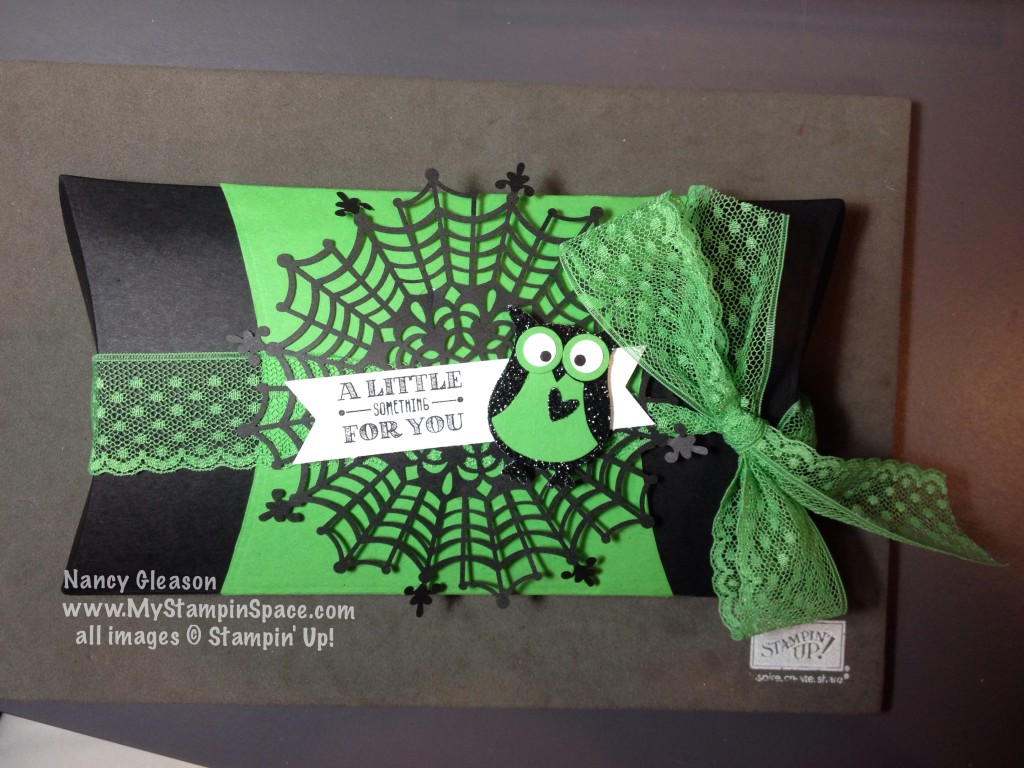
Yesterday I shared a photo of something that inspired me to make a cute little Frankenstein-styled card.  Today, I want to share another project with you.  This was made by one of Stampin’ UP!’s Artisan Design Team.  (You can see the original blog post here).WickedI just absolutely LOVE the color combination!  Tradition says we should pair Orange & Black for Halloween.  Maybe throwing in a splash of green or purple is in order, but no orange?  Just black & green?  YES, it works!  And works wonderfully.  Yes, I loved this so much I wanted to copy it for myself!  But I didn’t have the WICKED sentiment, or the Owl from the Howl-o-ween Treat stamp set but that wasn’t going to stop me!  I did have the Spider Web Doilies and my trusty Owl Builder Punch, Basic Black & Cucumber Crush card stock and Cucumber Crush Dotted Lace Trim Ribbon.  Here’s what I came up with:

hershey bar holder

I wanted to make something to hold a full size Hershey Bar.  So my Pillow Box Thinlits die would come to the rescue.  To make it work, I had to do some finagling.  (That’s a very technical term which means I alter it to fit what I needed!)  I actually cut a black pillow box part in half, spread the two pieces apart, and use the green piece to  ‘bridge the gap’ to create the length I needed.

My sister is just going to LOVE this when it arrives in her mailbox.  She loves Hershey bars and she enjoys getting little treats in the mail from me too.  But, shhh, don’t tell her it’s for her.  I want it to be a surprise!

Look for opportunities all around you to inspire you in your paper crafting projects.  Look for color combinations in clothing, patterns in home decor.  You’ll be surprised at what you’ll see when you look at things with a discerning eye.

Just look outside, all the beautiful fall colors are inspiring too.  What will you make?  I hope you make something absolutely inspiring!

Nancy

Don’t forget to shop our Weekly Deals, they update every Tuesday.  And our Holiday Catalog is filled with Bundles to help save you money.  And beginning today until Nov. 9th, earn extra Stampin’ Rewards when you place a qualifying order of $300 or more.


Built for Free Using: My Stampin Blog


Money Holder Tutorial

Yesterday was an exciting day, the Pals Blog Hop!  We featured projects showcasing the new 2015-17 In Colors.  I hope you were able to hop from blog to blog and see all the various projects using these colors.   You can see my post here.

I featured a project modeled after a gift card holder that is my go-to design when I need a quick & easy gift card holder and decorate it for any occasion.  But what about when you want to give cash?  I adapted the gift card holder to fit a dollar bill.  Here it is:
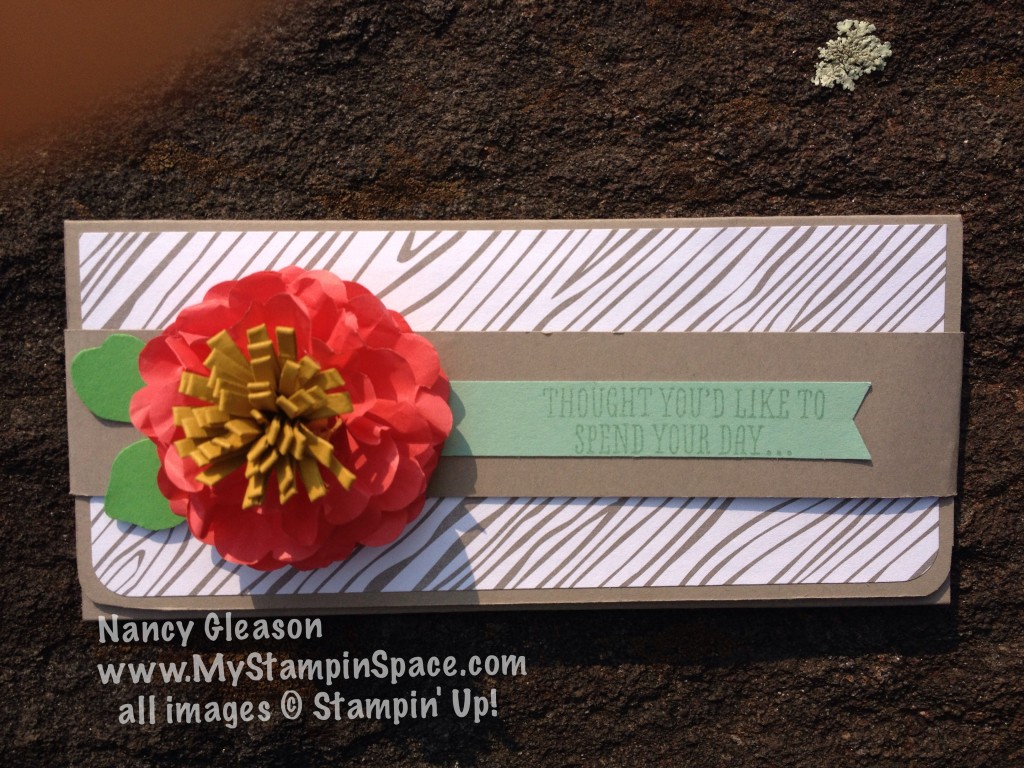
In Color Money Holder

A belly band holds the flap closed.  Just slip it off and here it is open:
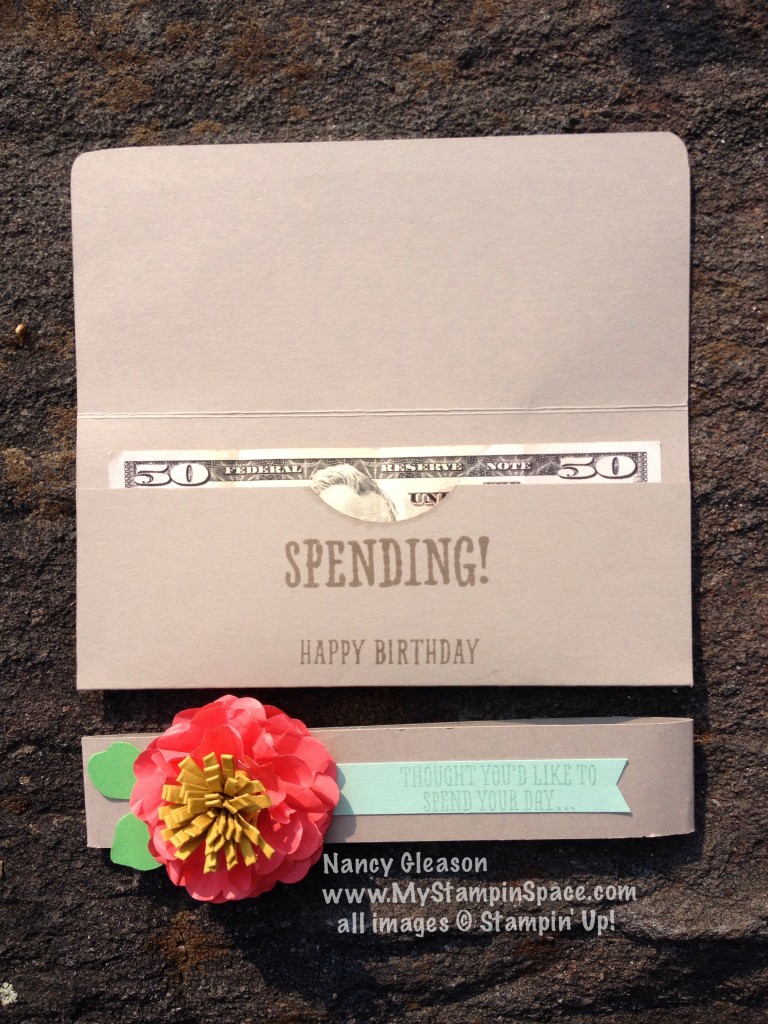
money holder open

Well, I promised I would share a step-by-step tutorial and here it is: (Keep in mind that this pattern can be adapted for any occasion you want to give a gift of cash – any color, any patterned paper, any embellishment YOU want to customize it to the occasion and the recipient.  Just keep the same measurements.)

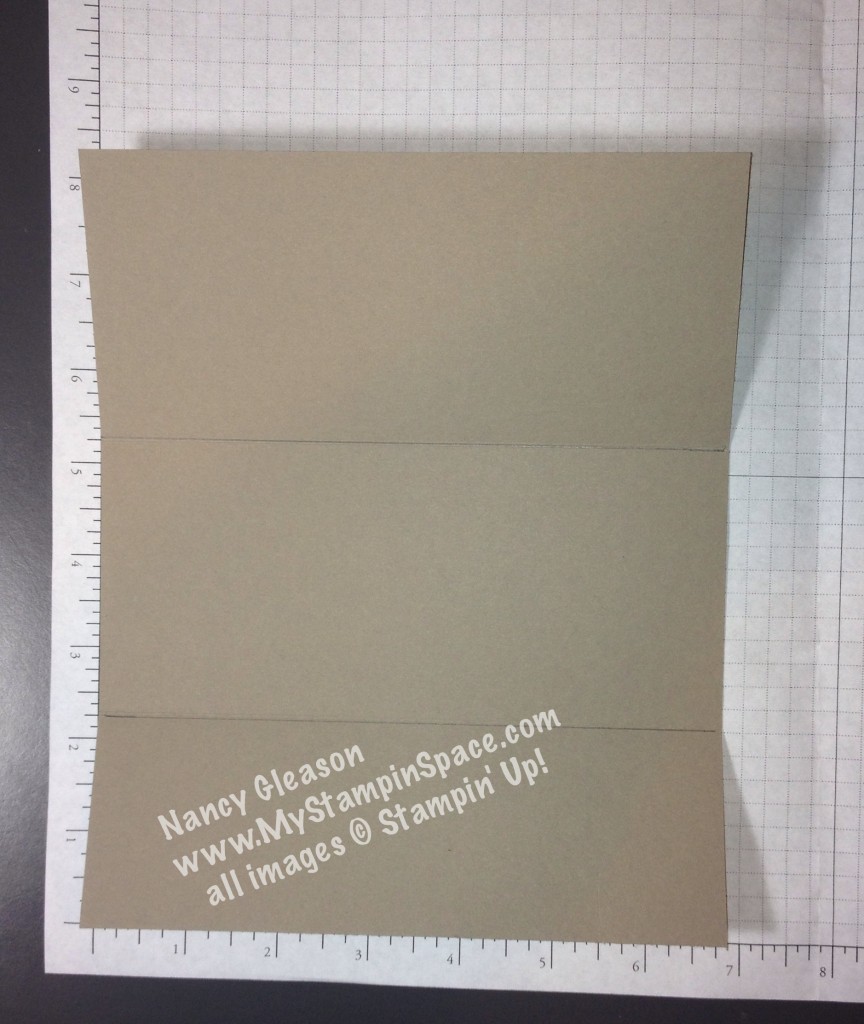
I started with a piece of Tip Top Taupe cardstock cut to 6-3/4″ wide x 8-1/4″ tall.
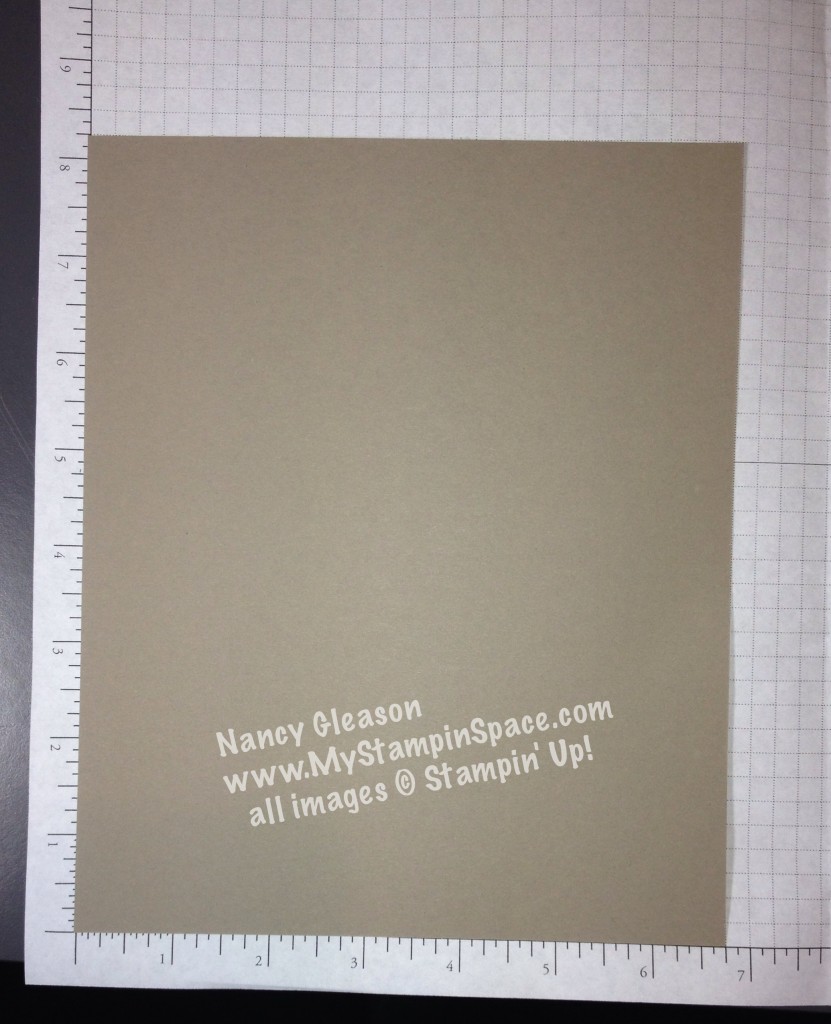
money holder cut cardstock

I scored the paper 2-1/4″ from the bottom edge, and at 5-1/4″.   (I love that I can cut and score on my Stampin’ Trimmer!)money holder score
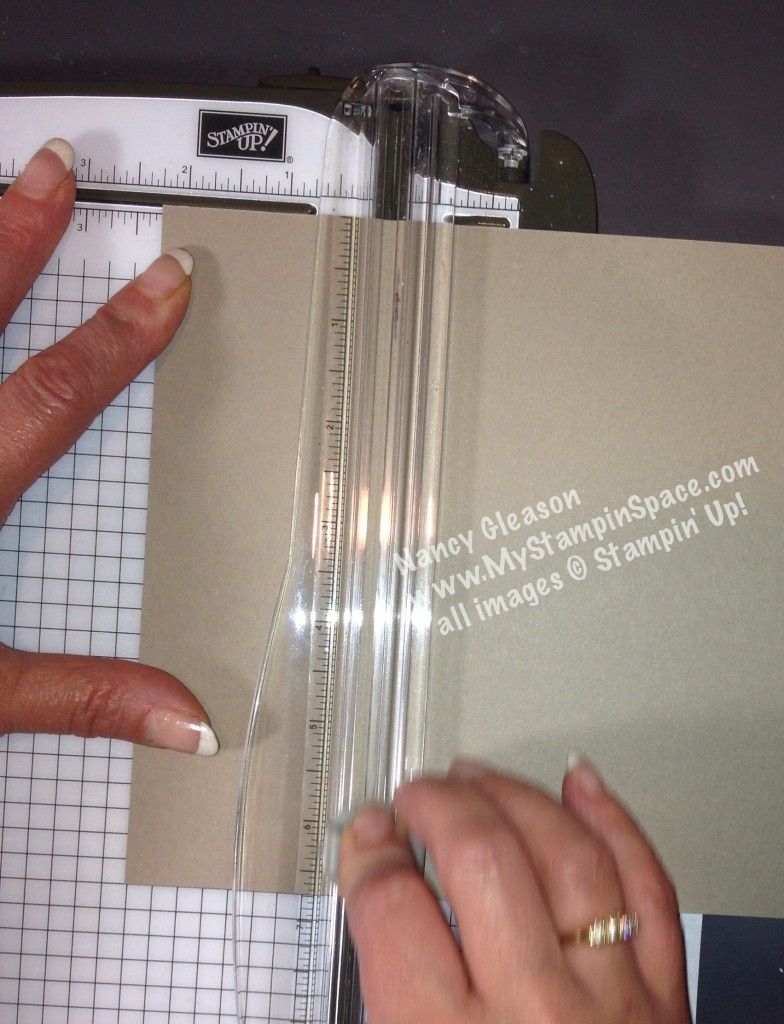
Here is the paper scored in 2 places: money holder scored

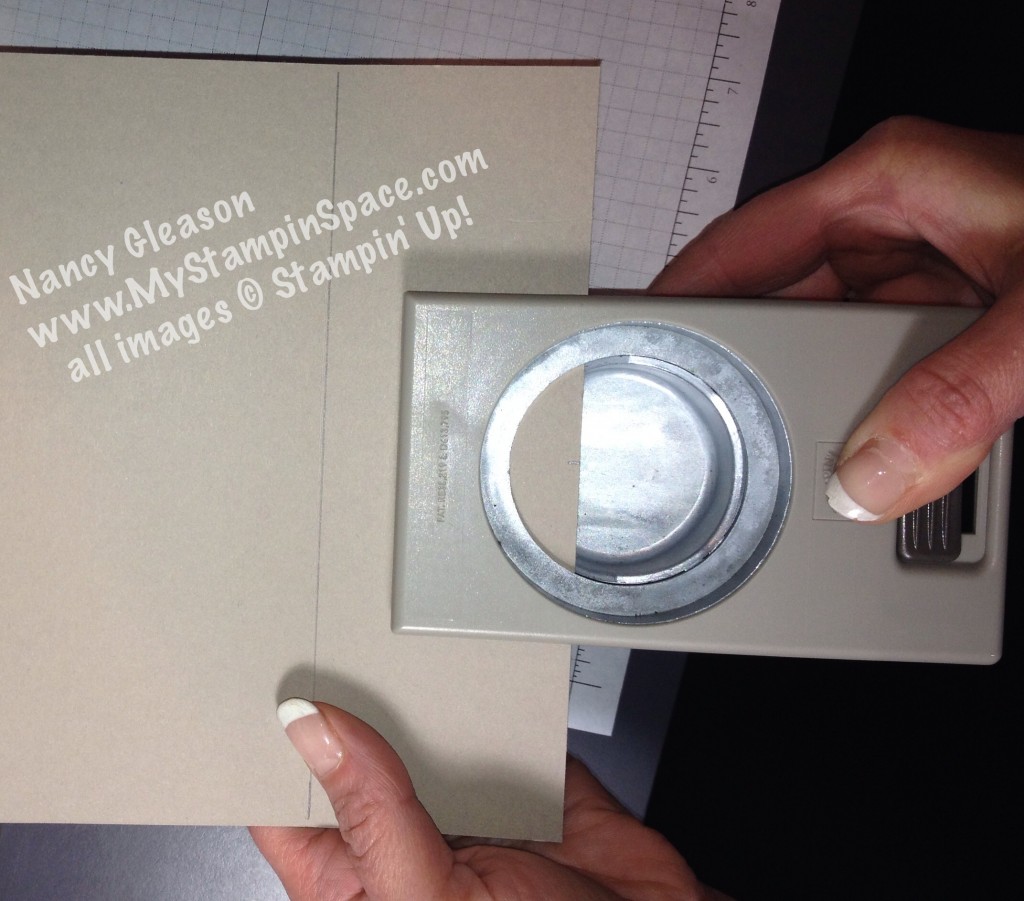
To create the thumb notch for the dollar bill, I used a 2″ circle punch to partially  punch creating the notch.  I centered this left to right at 3-3/8″.  money holder punch notch
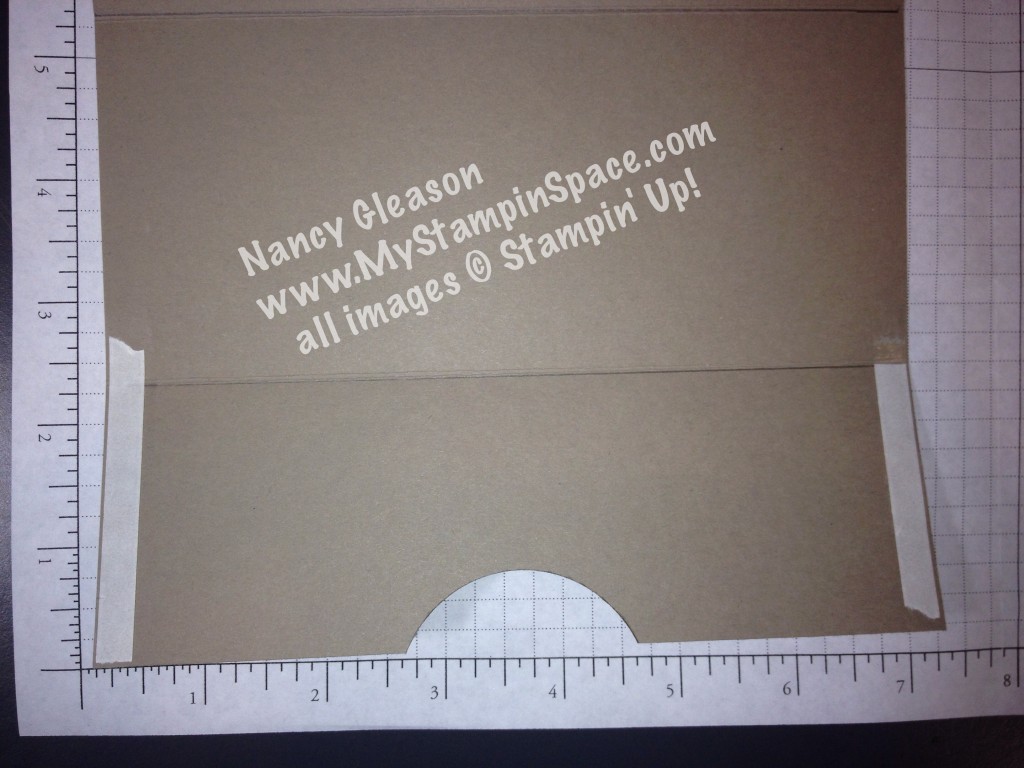
I then applied strips of Tear & Tape adhesive along the outer edges of the lower portion.  (Have I mentioned that I LOVE this new Tear & Tape adhesive? – This project was the first time I used this adhesive, and it is far superior to the old ‘red’ tape; both in terms of stickiness AND ease of use!  No more red pieces of plastic stuck to your hands, clothes, etc.)  money holder tear & tape
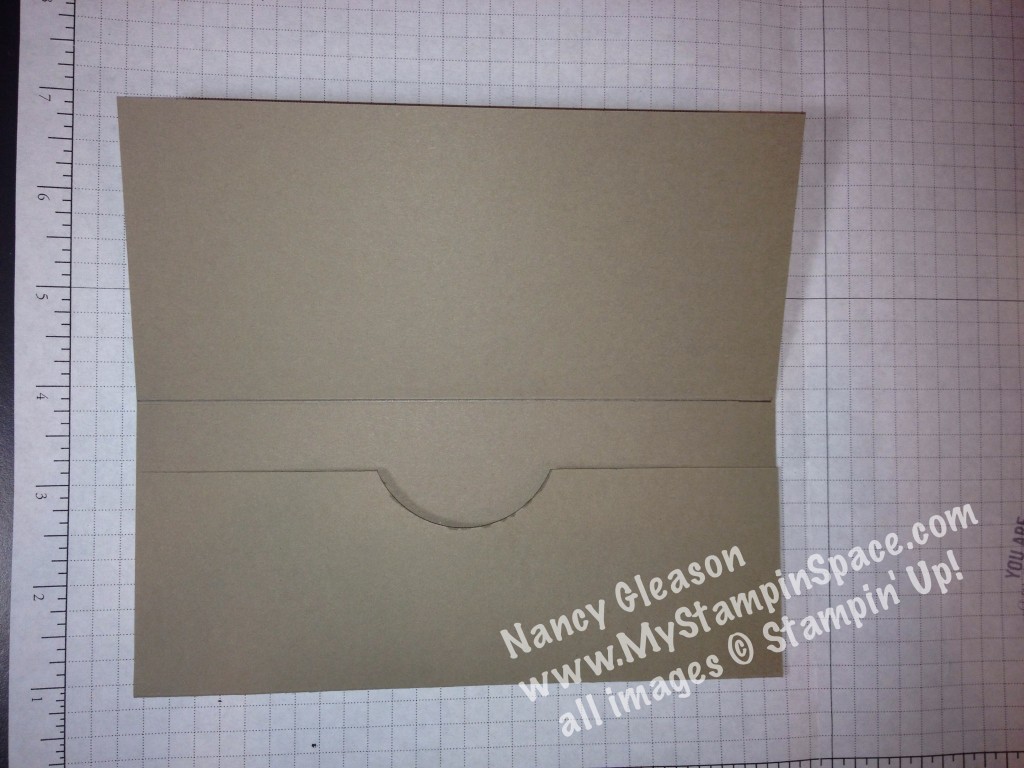
Fold up the bottom portion, and you’ve just created the perfect pocket to fit a dollar bill.  Any denomination will fit!  (Make mine 50’s or 100’s, please!) money holder assembled
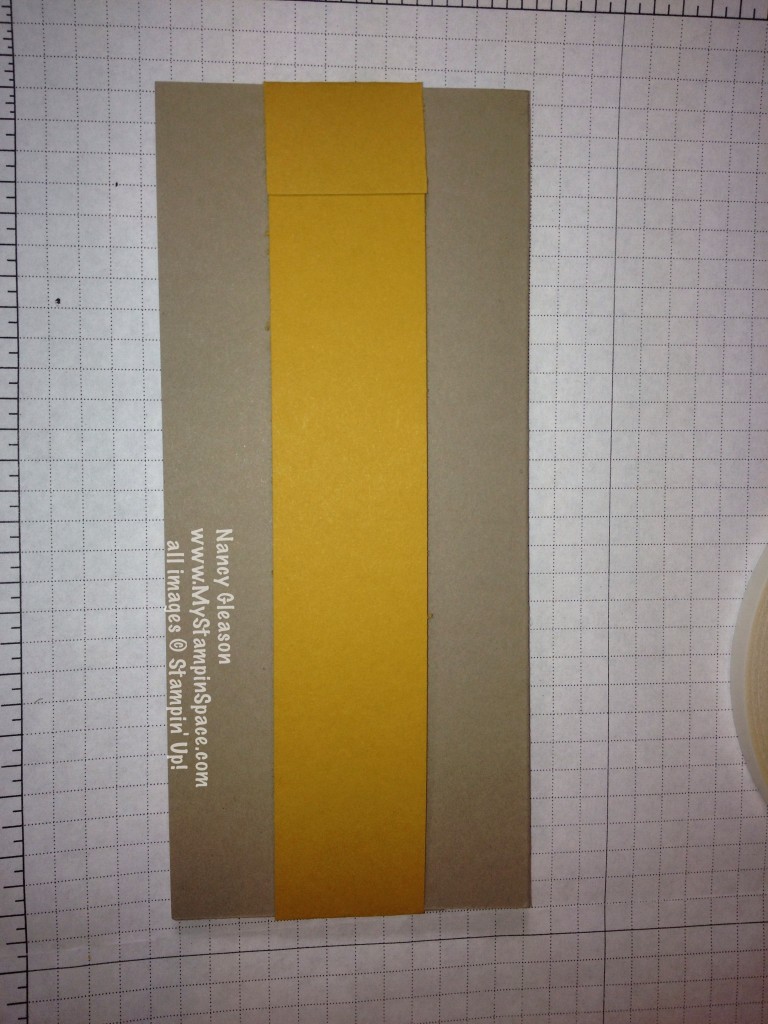
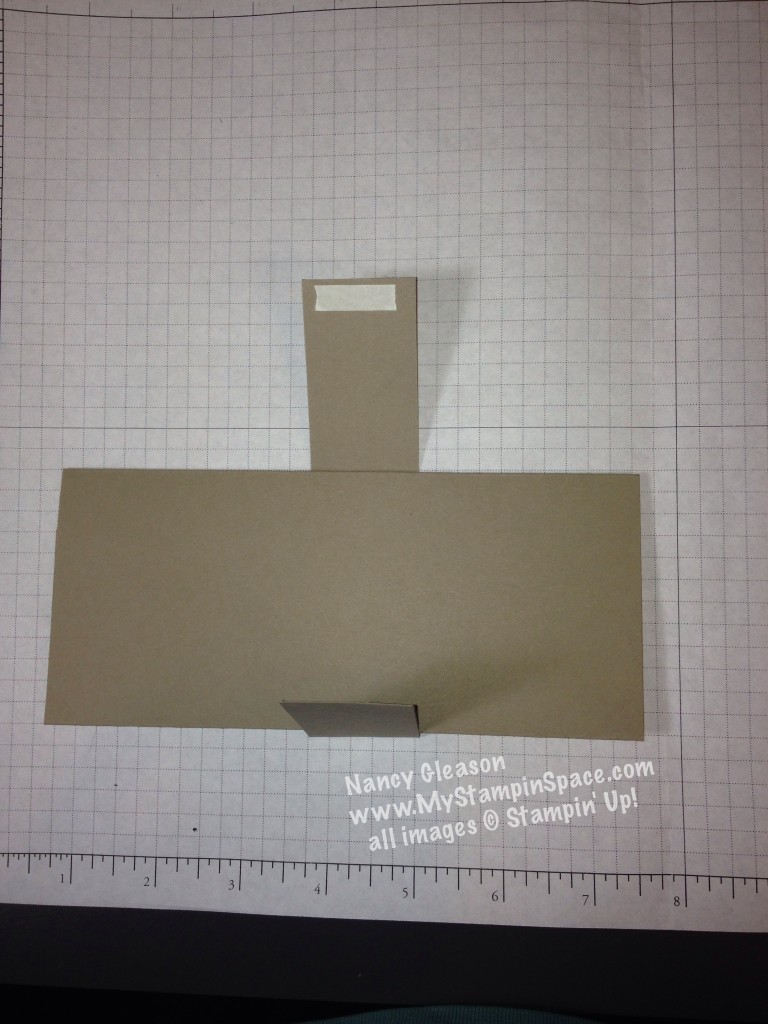
Now for the belly band.  You can create a belly band that wraps around the money holder vertically or horizontally.   I used a 1-1/4″ wide x 7-1/2″ strip of cardstock and another piece of Tear & Tape adhesive and just wrapped it around the money holder.  (TIP:  Don’t wrap it too tight; leave enough room for the belly band to slip on & off with ease!). money holder vertical band
To wrap horizontally, you will need to adhere 2 strips together to get a strip long enough to wrap around the width of the card.  I strategically placed the butt joints in the least conspicuous places; behind the flower and at the back edge of the money holder.  (I am using a contrasting piece of cardstock so you can see the two pieces better).
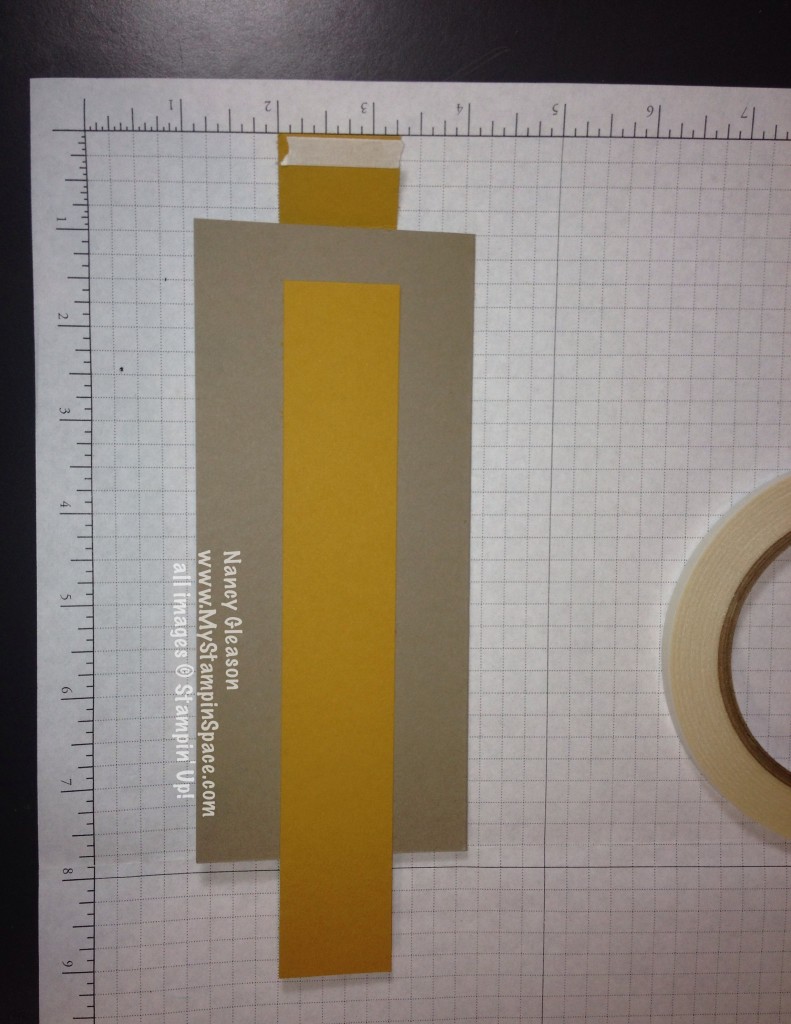
money holder horiz band

money holder with belly band

Now for the fun part!  You can decorate your money holder any way you wish!

On my project,  I used the Corner Rounder Punch to punch the two bottom corners of the face.  I cut the new Envelope Paper in the woodgrain pattern in Tip Top Taupe to 6-1/2″ x 2-3/4″ and corner rounded the bottom two corners.  I adhered this layer on the face of the closed money holder.

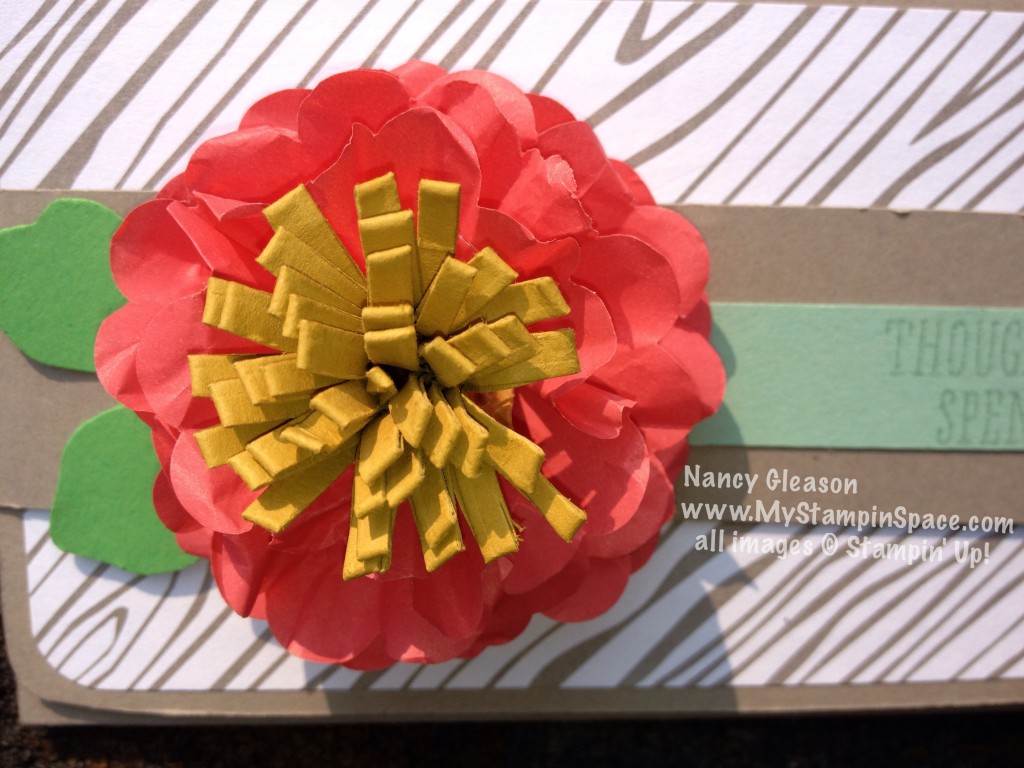
In Color Money HolderI chose to create this gorgeous flower using the new Cotton Paper in Watermelon Wonder.  The flower center is created from Delightful Dijon and fringe scissors!  The leaves are Cucumber Crush card stock using the Fun Flower punch.  A little flagged end banner in Mint Macaron  says: “Thought you’d like to spend your day spending….” from the B.Y.O.P. stamp set.  The inside sentiment simply says:  “SPENDING”

I will be making a video showing just how to make this flower, and some tips on how to work with this new Cotton Paper.  Watch for that next week.

If you want to grab some of these supplies to add to your stash so you can create this at home, simply click here to go to my online store.  Or just click on any of the items in the supply list below.

I hope that you try to make this;  please let me know if you do.  This is a project tutorial that you’ll want to keep close by;  it will come in handy whenever you are giving cash as a gift.

Be sure to LIKE my Facebook page so you’ll be the first to know when I share my video.  You can also subscribe to my YouTube channel so you won’t miss out any of my tutorial videos.

Please give me feedback on my tutorial.  I need your help to know if I am giving enough details, or not, for you to be successful in recreating this project for yourself.  Thanks for your constructive input!  Thanks for stoppin’ by My Stampin’ Space.  Come back and stamp with me soon.

Nancy

Built for Free Using: My Stampin Blog


Don’t forget to shop our WEEKLY DEALS!
Built for Free Using: My Stampin Blog


New Hues Review – July Pals Blog Hop

july blog hop badge

Welcome to the Pals Blog Hop for July.  This month we are excited to show off the new 2015 – 2017 Stampin’ Up! In Colors, namely, Cucumber Crush, Delightful Dijon, Mint Macaron, Tip Top Taupe and Watermelon Wonder. The In Color products include card stock, designer series paper, ribbon and other embellishments.  We hope you find great inspiration from the projects.

You may just be starting the blog hop or may have come from Susan Itell at Simple Stampin, number 9 on the Pals Hop.  If you get off track at any time, the full lineup below will help you move along from blog to blog so you see all the projects.

I have to confess that every year when the new In Colors are introduced, I get a little anxious wondering what they be like.  There is a courting period, if you will, when I take the time to get the know the new colors.  What colors pair well with other colors, do the colors stand alone, or do they need to be used in combination with other colors?  Where do they stand in our color palette in relation to the other existing colors?  I really feel like I need to spend some time with each of these colors to truly appreciate each one.  Does that sound weird?  Or do you do the same thing?

Well, for this blog hop, I was determined to make a project that used ALL 5 of the new In Colors.

In Color Money HolderSo what do you think?  Did I pull off a project that uses all of these colors well together?   I really think this color combo is a winner!  These colors are GREAT, aren’t they?

I wanted to make a project that was a little special too.  I think the money holder fits the bill (and the bills fit inside the money holder too!)  Too many times presents consist of gift cards, but sometimes cold, hard cash is king!  So  I adapted a gift card holder that I love to make, to hold cash.

money holder openI used Tip Top Taupe cardstock for the money holder base, and the brand new Envelope Paper also in Tip Top Taupe for the snazzy woodgrain patterned paper on the face.  The star of the show really is the new Cotton Paper in Watermelon Wonder for the flower.  This is the first time I’ve used the Cotton Paper, and I LOVE IT!   I see many more flowers in my future!   The flower center is created from Delightful Dijon.  The leaves are cropped from Cucumber Crush cardstock using the Fun Flower punch.  Finally, the little flag featuring the sentiment is cropped from Mint Macaron cardstock.

cotton paper flowerSo, now that you’ve gotten to meet the new colors, and get to know them, which of the new In Colors color is your favorite?  Want to know which one is my favorite?  All of them!

Tomorrow I’ll have all the details on how to make this money holder, including measurements and step-by-step directions, so be sure to stop back. Sign up for my newsletter, and you’ll also get my blog posts delivered to your inbox so you won’t miss a thing.

The next stop is Kalyn Shubnell at The Stamping Chronicles, number 12 on the Pals Blog Hop!  Thanks for visiting; I hope to see you on next month’s Pals Hop!

  1. Jane Knudsen at see jane stamp
  2. Katy McGloin at Just Fun Stamping
  3. Jackie Diediker at Stampin’ Jackie
  4. Beth Beard at My little craft blog
  5. Nicole Watt at Pixel Maven’s Retreat
  6. Debra Simonis at Deb’s Stampin’ Grounds
  7. Brian King at Stamp with Brian
  8. Beth McCullough at Stamping Mom
  9. Susan Itell at Simple Stampin
  10. Nancy Gleason at My Stampin Space —YOU ARE HERE —
  11. Kalyn Shubnell at The Stamping Chronicles
  12. Sherrie Gross at Stampin’ Sunshine
  13. Candy Ford at Stamp Candy
  14. Dawn Tidd at Tiddbits from Dawn
  15. Wendy Klein at Doggone Delightful Stampin’
  16. Karen Hallam at Karen’s Stampin’ Habit!
  17. Amy Whelan at Amy’s Inklings
  18. Natalie Bradley at Natalie Bradley Events
  19. Maggie Mata at Maggie Made Cards
  20. Mary Fish at Stampin’ Pretty
  21. Peggy Noe at Pretty Paper Cards
  22. Debbie Mageed at Secret Stamper
  23. Lynn Kolcun at Stamping With Avery’s Owlery
  24. Kimberly Sparks at Stampin’ Daisy
  25. Becky Volpp at InkBlossomwithBecky
  26. Shawn de Oliveira at Shawn Stamps
  27. Denise Hoepfner at The Mountain Magpie

Thanks for stopping by, come back again and hang out at My Stampin Space.  See you soon!

Nancy

In With The New…Pals Blog Hop

june badge

Welcome to the Pals Blog Hop for June.  This month we are excited to show off new Stampin’ Up! products from the just released 2015 – 2016 annual catalog.  We hope you find great inspiration from the projects.  Get your wish list ready!

You may just be starting the blog hop or may have come from Beth McCullough at Stamping Mom number 29 on the Pals Hop.  If you get off track at any time, the full lineup below will help you move along from blog to blog so you see all the projects.

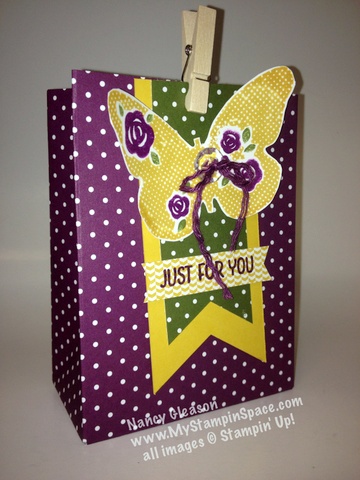
Well I have to say that I am in LOVE, LOVE, LOVE!  Yes, I LOVE my husband – he’s the best!  But some days he just has to step aside for my Stampin’ Obsession!  And right now, there are a few products that I just can’t get enough of.  And when you put them together, LOVE is in the air!  The Gift Bag Punch Board, the Triple Banner Punch and the Floral Wings stamp set.

IMG_5192-001

Don’t you just love it!  I’m making Gift Bags with the Gift Bag Punch Board left & right!  And thanks to you, I have over 750 views on the tutorial video I made showing how to use the Gift Bag Punch Board!

Of course, the Triple Banner Punch makes flagged end banners a cinch; especially if you want to layer different sizes like I did here.  (True Story:  I almost didn’t order the Triple Banner Punch because I thought it was a triangle punch!  Good think I read the fine print description and realized what it was!)

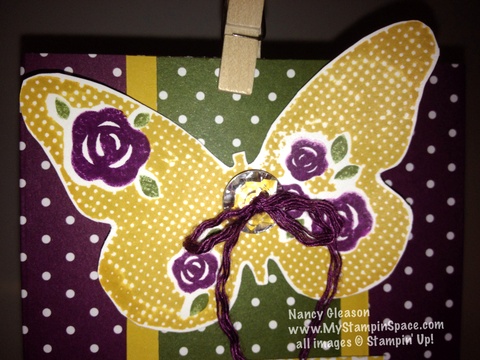
But my most fav is the Floral Wings stamp set!  And again, I didn’t realize the potential of this set until I got it and started using it.  The ‘blank spots’ in the butterfly are shaped for the roses & leaves just perfectly.  We were introduced to triple stamping with tab alignment back in the fall with the Wonderful Wreath, and this stamp set uses that tab alignment for the leaves and roses inside the butterfly wings.

IMG_5195-001See those leaves?  You don’t stamp them individually; it’s all one stamp!  And the roses?  The 5 roses are one stamp set so you get perfect placement in one impression.

Here’s another bag I made:  This one shows how cute the bag looks with the top open, (like a convertible!)IMG_5197

And another:  This uses the new 1″ Dotted Lace Trim in Cucumber Crush – another new product I am in love with!  I’m so glad I purchased every color 🙂IMG_5204[1]Each gift bag has a different closure: a clothespin, an open top (which has no closure) and a ribbon.  The Gift Bag Punch Board allows you to put holes for ribbons if you want, or not.  It’s so versatile.

WORD TO THE WISE:  When working with paper that has a definite direction to the paper (like the printed words), remember that the punch creates the bottom flaps of the gift bag.  So, you want to put your paper into the punch with with the top of the paper towards you and the bottom of the paper in the punch, like this:

IMG_5203[1]Before you get all mushy, saying how smart I am, and how much paper I will save you, and all of that, I have to confess that mistakes are the best teachers!  Another episode of the blooper reel – we were making these gift bags at a workshop this past weekend.  Well, all I can is that we learned the hard way!  But you can learn from my mistake….you’re welcome!  🙂

I hope you will get ‘punchy’ with the Gift Bag Punch Board, the triple banner punch, and spread your wings with the Floral Wings stamp set.  I have a product list at the end of this post so you can see exactly what I used if you want to recreate any of these projects.   Please contact your demonstrator to order products, or to get a new catalog.  If you don’t have a relationship with a demonstrator, feel free to email me.  Thanks for stopping by My Stampin’ Space today.

Please leave me a comment and tell me which gift bag is your favorite, and why.  I absolutely love hearing from you!

The next stop is Sue Becker at RnR Stamping, number 31 on the Pals Blog Hop!  Thanks for visiting; I hope to see you on next month’s Pals Hop!

  1. Peggy Noe at prettypapercards.com
  2. Shawn de Oliveira at ShawnStamps
  3. Lisa Pretto at InkBig Academy Stamps
  4. Kerry Willard Bray at Peonies and Paper Chains
  5. Lisa Ann Bernard at Queen B Creations
  6. Candy Ford at Stamp Candy
  7. Wendy Klein at Doggone Delightful Stampin’
  8. Mary Fish at Stampin’ Pretty
  9. Jennifer Michalski at stampingserenity.blogspot.com
  10. Becky Volpp at InkBlossomwithBecky
  11. Natalie Bradley at Soirée by Natalie Bradley
  12. Martie Pollard at The Crafty Bandit
  13. Jackie Diediker at Stampin’ Jackie
  14. Deb Cozzone at Deb Cozzone’s Stamping Zone
  15. Jane Knudsen at see jane stamp
  16. Maggie Mata at Maggie Mase Cards
  17. Denise Hoepfner at The Mountain Magpie
  18. Susan Itell at Simple Stampin
  19. Debra Simonis at Deb’s Stampin’ Grounds
  20. Brian King at Stamp with Brian
  21. Dawn Tidd at Tiddbits from Dawn
  22. Katy McGloin at Just Fun Stamping
  23. Pamela Sadler at Stampin Pink Rose
  24. Michelle Gleeson at StampinMojo
  25. Amy Whelan at Amy’s Inklings
  26. Nicole Watt at Pixel Maven’s Retreat
  27. Jessica Wilson at My Prapercraft Universe
  28. Tricia Chuba at ButterDish Designs
  29. Beth McCullough at Stamping Mom
  30. Nancy Gleason at My Stampin Space
  31. Sue Becker at RnR Stamping
  32. Kalyn Shubnell at The Stamping Chronicles
  33. Shannon Hokanson at Paper Works by Shannon

So if you just can’t live another day without a Gift Bag Punch board, or a triple banner punch, or the Floral Wings stamp set, click here to go to my online store or click any of the items below.

My Gift for You!

This is my second blog post for today. If you missed my earlier post, please click here.

At my class Monday night, we made gift card holders.  As I was prepping for class, I snapped a pic of the various parts – cut and layed out.  I posted that pic on my Facebook page and asked people to guess what I was making.  I decided I would give the finished project to the first person to correctly guess.  RayAnn guessed correctly, and she won the completed gift card holder (and I tucked a gift card to Dunkin Donuts inside!).  (To make sure YOU don’t miss out – Like my facebook page, www.facebook.com/mystampinspace).

Well, here is one the 2 different styles of gift card holders we made.

IMG_5140

IMG_5141The gift card holders were made with card stock (Crushed Curry or Cucumber Crush) and then decorated with paper from the new paper stack A Cherry on Top.  A Bermuda Blue belly band was embellished using the Celebrate Today stamp die and matching balloons framelits dies.  A quick & easy gift card holder that could be made in any color, for any occasion.  Timeless, right?

Would you like to make this gift card holder yourself?  Well, RayAnn may have won the finished project, but my gift to you is the step-by-step directions so you can make them yourself.  I only ask that you leave a comment for me in this blog post and tell me what you think.  The ladies in my class all LOVED them.  I hope you will too 🙂

GIFT CARD HOLDER TUTORIAL – PDF

Tell me what occasion you have to give a gift card for, and how you decorated.  If you send me a photo of your finished project using my tutorial, I’ll even post it on my blog!

Thanks for stopping by.  If you want to order any card stock, designer series paper, stamps or punches, you can order safely & securely from my online store.  I do appreciate your orders.  And I really appreciate you taking the time to hang out in My Stampin’ Space with me!  Come back again – I’ll be sharing the other gift card holder we made too!

Nancy

A Perfect Birthday Wrap

Today is my sisters’ birthday; my OLDER sisters’ birthday.  I just had to throw that in there.  I’m sure she won’t mind!

I made the perfect  gift wrap for her present.  A mini treat bag created from the Stampin’ Up! Mini Treat Bag Thinlit die.

mini treat bagIt was the PERFECT size to tuck the gift I bought her inside.  I can’t reveal what the gift is:  due to the snow, I never made it to the post office so the package is still en route.

Strawberry Slush is one of the soon to be retired 2013-2015 In Colors.  I’m going to miss it.  What color is your favorite from this collection?  Which color are you going to miss the most?

2013-15 In Colors Bakers TwineFor me, the answer is obvious:  ALL OF THEM!   My advice – start stocking up on these colors (cardstock, ink pads, ink refills, DSP, markers, baker’s twine) NOW.  Last year the In-Color collection was virtually SOLD OUT within hours of the retired list going public.  Don’t let that happen to you with this collection.  Many colors of the cardstock are already on back order, but any order placed now is guaranteed to be filled.  Once an item is on the retired list, supplies are limited to stock on hand so once it sells out, it’s gone for good.   Click here to shop now.

If you are interested in making this treat bag, I’ve listed all of the supplies I used below.  Just click on any item to go right to that item in my store.

A treat for you

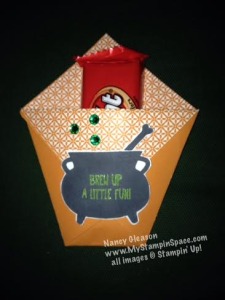
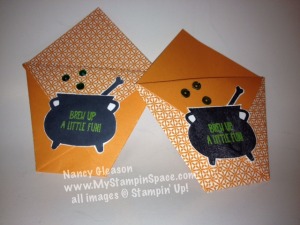
Want a cute and quick way to give someone a candy bar this Halloween?  This little treat holder is the answer.

treat holderIt’s adorable, right?  And it’s made with only a 6″ x 6″ piece of double sided paper.  That means you can get 4 of these out of one 12″ x 12″ piece of DSP!  Just fold the paper in half, point to point, then fold the left point over to the right.  Fold the right point over, and finally end by bringing the top fold down.    It’s that simple.  You don’t even need to glue it if you don’t want to.  But I do recommend using your bone folder to get sharp creases at every fold.   Come back tomorrow and I’ll post a quick video showing you step by step exactly how to make these.

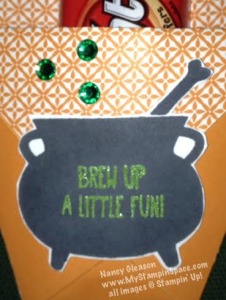
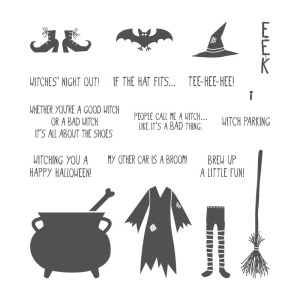
treat holder emptyI used the witches cauldron from the Tee-Hee-Hee stamp set to decorate this, but you could use almost any stamp, sentiment & paper combination for whatever occasion you wish.  A candy bar is always in season!  You could also put movie tickets inside.    treat holder close upFirst I stamped the witches cauldron in Momento Tuxedo Black ink.  Then I used my stampin’ buddy and Versamark ink to stamp the sentiment onto the image I just stamped.  Wild Wasabi embossing powder makes the sentiment pop on the black ink.  A few Rhinestone jewels, colored with a sharpie marker, look like bubbles rising from the creepy potion being brewed!  My paper snips make it so easy to fussy-cut the cauldron.

135125GI’m giving away this stamp set;  all you have to do is leave me a comment and one lucky winner, randomly chosen, will be the winner!  Of course, the winner will have to get back in touch with me to give me their address so I can mail the stamp set to them.  I can only ship to the United States, so my apologies to my blog readers from Canada and beyond.

So, leave me a comment at the end of this post.   I’ll give my readers until 10 PM Friday night to leave me a comment to enter to win the stamp set giveaway.  A winner will be chosen and will have until Tues to claim their prize.  Good luck to all who enter!  I’ll post the video late Friday night or Saturday afternoon showing how to make these.

Thanks for stopping by,  see you soon.

Nancy


Treats for your Trick-or-Treaters

I like to give special treats to those special trick or treaters in my life; whether they are in costume or not!  (Yes, I mean “my boys”, my co-workers and other family).  Of course, you could make a whole bunch of these to hand out to every trick or treater at your door if you really wanted to!

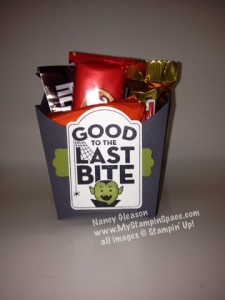
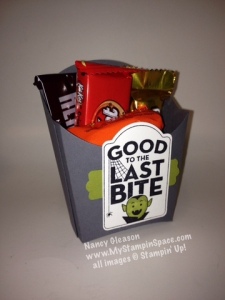
photo 2I used the Fry Box die and Basic Gray cardstock to make the box.  The image is from the “Merry Everything” stamp set.  I love the little dracula, and the little spider behind him.  This set has a coordinating punch, Note Tag Punch, which made cropping out the shape a snap.   Now, you know how I love the coordinating products.  But I love saving money just as much too!  And when these two products are bundled together, you save 15%!  Bonus!

Momento Tuxedo Black ink is my new favorite black ink.  It is crisp and dark, and doesn’t run when you color in it.  I stamped the image with that, then  I used my Old Olive Stampin’ Write Marker to color in his little face.   Old Olive cardstock and the Modern Label punch made a little splash of color behind the image.

photo 3

I love how this fry box can be stuffed with candy.  And it holds a pretty decent amount of candy.  I’m also planning on making these for Thanksgiving to set at each place setting.  I may fill a clear bag with either candy corn , or cookies to put in the box.   This little box is so versatile;  I could see it filled with nail polish & lip stick for a little girl’s birthday party.  Or Legos or Matchbox cars for a little boy.  What will you put in yours?

Don’t forget, I’m giving away the Tee-Hee-Hee stamp set on Halloween!  All you have to do is leave me a comment.   All comments received this week will be entered in to win.  I’ll pick a winner on Friday!

135125GAnd if you’d like to order any of the items I used to make the treat box above, you can click here to go to my store, or click on the picture below.

Don’t Fear the Pom-Poms!

http://alwayshappystampin.com/wp-content/uploads/2014/10/sweet-as-pie-october-kit.jpg

When I saw the October Paper Pumpkin kit was called “Sweet as Pie”  I couldn’t wait to see it!  When I saw that you had to make your own pom-poms, and all the yarn necessary to do that, I have to admit I was kind of fearful!  But this video takes away all my fear of making Pom-Poms!  In fact, I’m really looking foward to it now!  Watch & see for yourself:

Each little piece of pie is actually a box that you can fill with candy or whatever.

piece of pieAs much I really love the pie, I’m thinking I can’t really ‘serve’ that on Thanksgiving Day;  I usually have about 15 for dinner.  So what’s a girl to do?  Well, I could get an extra refill kit and make 2 pies.   Or, I could use my kit and create something else.  Here are some alternative ideas all made with all the parts included in the Sweet As Pie kit:

A Banner:  Oooh, I could decorate!  Love it!

Banner

A Card:  I love the idea of sending Thanksgiving cards. How totally cool is this?

Card

Or I could create a scrapbook to preserve my Thanksgiving 2014 memories:

Memory Keeping

So what will YOU do with your Paper Pumpkin?   Please tell me.  Leave me a comment at the end of this post and tell me how you will use yours.

What?  You’re not receiving a Paper Pumpkin kit in your mail box each month?  Why not?  It’s so easy to sign up,  AND it’s only $19.95!  The Sweet as Pie Paper Pumpkin Kit includes instructions, alternative use ideas and:

  • Sweet as Pie Photopolymer Stamp Set (exclusive to this Paper Pumpkin kit)
  • Old Olive Classic Stampin’ Spot ink
  • 8 food-safe pie boxes
  • 16 pie box label stickers
  • 4 sheets of die-cut feathers
  • 8 pieces of yellow yarn (9 yards each)
  • 8 cardboard pom pom makers
  • 1 sheet of large adhesive circles (to adhere pom poms)
  • 1 sheet of small adhesive circles

The Paper Pumpkin kits are great for the busy crafter, the person who wants to craft but doesn’t have a lot of time, ideas or supplies.  Don’t miss out any longer; sign up today!  Know someone else who would love it?  Give a gift subscription:

A GREAT GIFT FOR YOU OR A FRIEND!  Subscribe to Stampin’ Up! Pre-Paid Paper Pumpkin kits or consider giving Paper Pumpkin pre-paid subscription as gifts.  They are simple way to experience paper, stamps and ink without needing additional supplies.  You can add them to an on-line order with other Stampin’ Up! products, too!  

With a pre-paid subscription, you can choose the subscription length of your choice, and you’ll receive a redemption code where you can use it to redeem your subscription or gift it to someone else to redeem on mypaperpumpkin.com.

Item Paper Pumpkin Prepaid Subscription Price (Shipping Included)
137858  1 month $19.95
137859  3 months $59.85
137860  6 months $113.70 — save $1 per month
137861  12 months $215.40 — save $2 per month

Here’s more information on Paper Pumpkin pre-paid subscriptions.

Another perk for subscribers is that they can order past refill kits!   See what’s available here.

Well, I’m off to got tackle my Pom-Poms!  What do you think I am going to make with my Sweet As Pie kit?  Leave me a comment and tell me your guess, then go sign up for Paper Pumpkin so you won’t miss out next month!  And consider giving a Gift Subscription to someone you’re thankful for!  They’ll get their subscription redemption code in time to get their November kit!   It’s also a great way to get your Christmas shopping done a little bit early this year, without any hassle!  Now that’s “Sweet”!

Nancy