You’ll be seeing stars!

Stampin’ Up! has done it again!  They seemed to have hit it out of the ballpark with the new Holiday Supplement catalog.20141020TH_HolidaySupplement_en-US
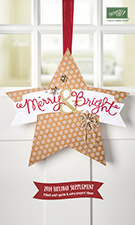
My first thoughts, quite honestly, were “A holiday supplement catalog?”  Really, I haven’t even gotten everything from the main holiday catalog that I wanted yet.   What more could they come up with to produce a supplement to the holiday catalog?”

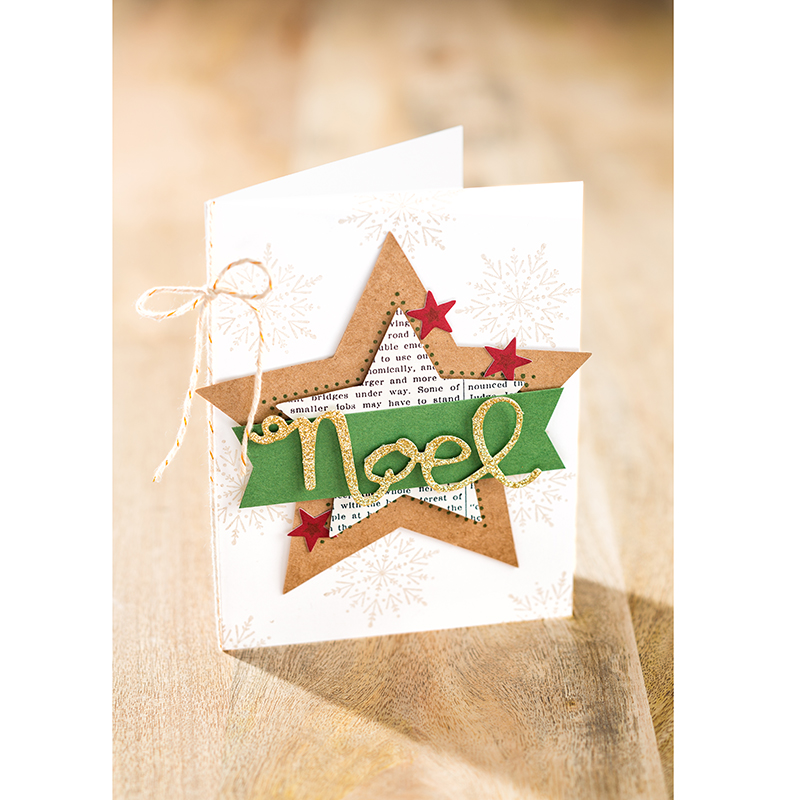
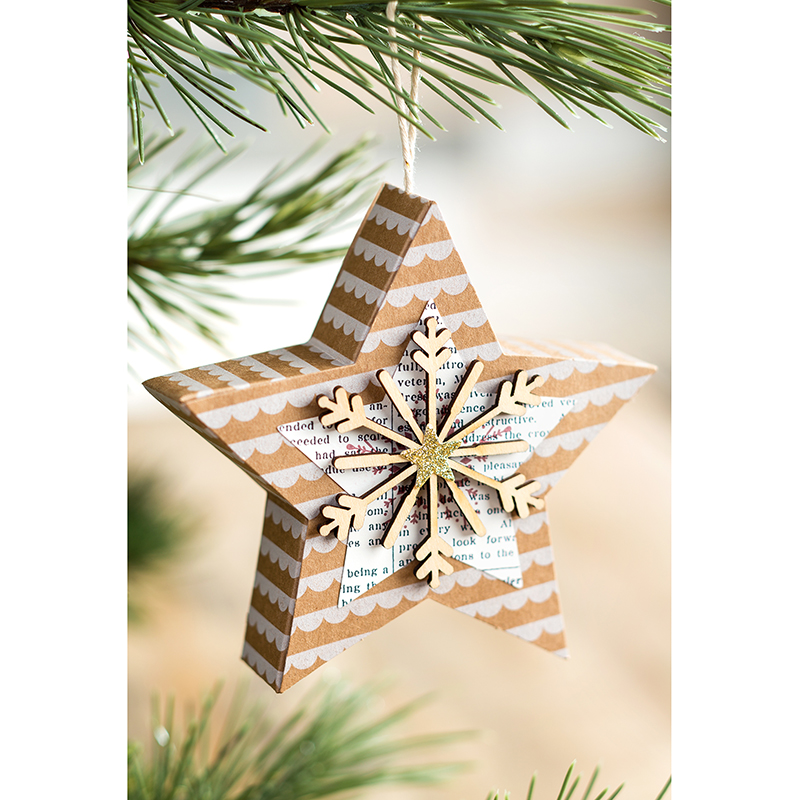
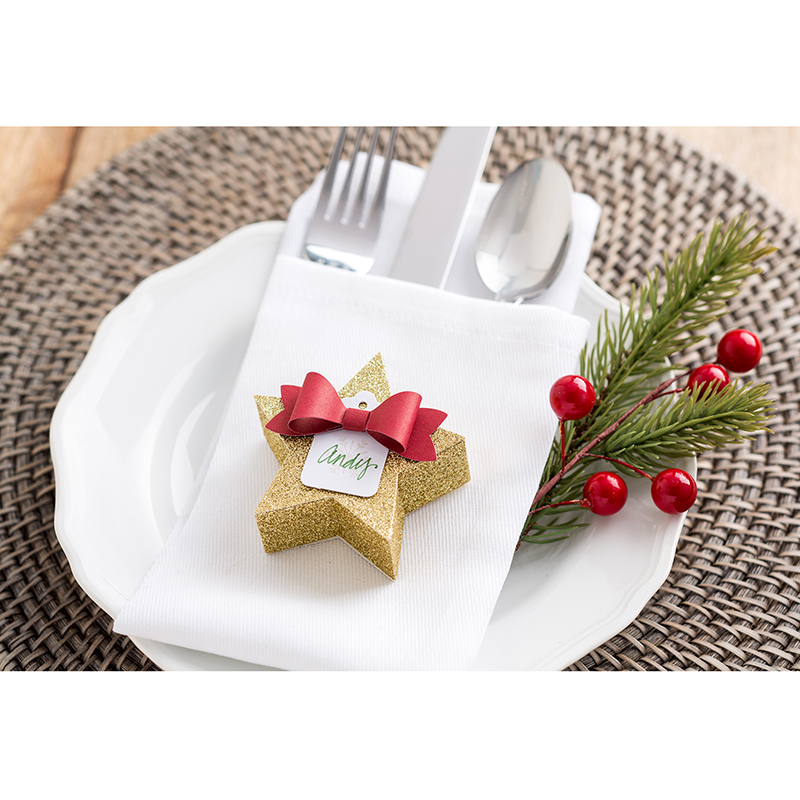
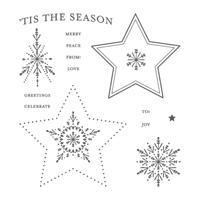
But the Many Merry Stars Simply Created Kit (#138104 $25.95) is a knock-out!  It is a kit that gives you ALL the material you need to create 26 3-D stars, plus all the embellishments you need to jazz them up!  There is one star that is 15″ diameter (that’s one big star!) and you’ll make 5 each of 5 sizes ranging from 2″-6″.   Look at all the possibilities:
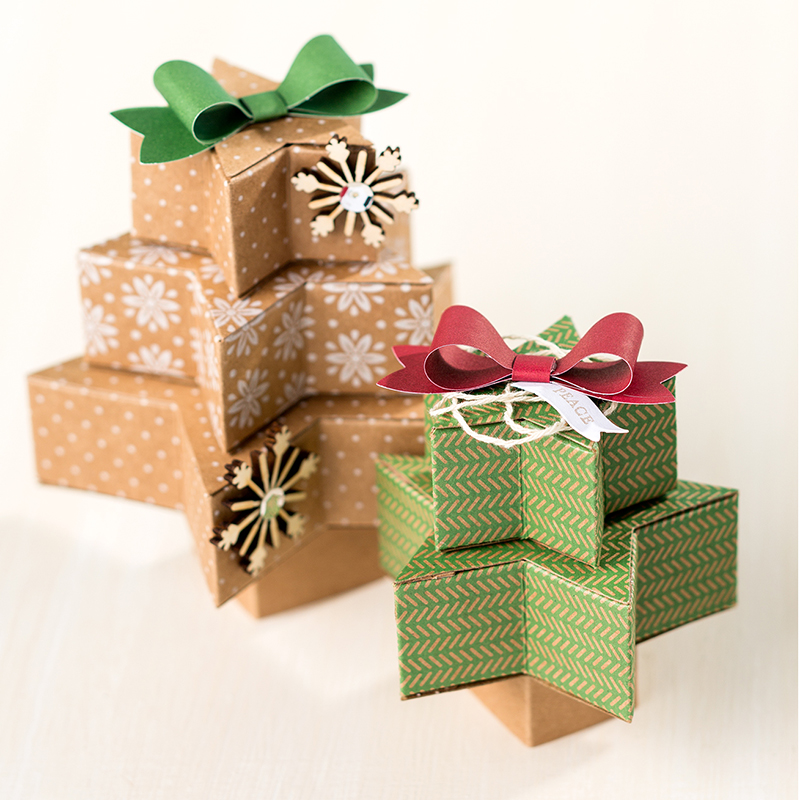
Many Merry Stars Simply Created Kit  Many Merry Stars Simply Created Kit Many Merry Stars Simply Created KitMany Merry Stars Simply Created Kit

When I showed the ladies in my class last night and asked if anyone was interested in purchasing the kits and assembling them as a group, the screams of “YES!”, “YES!”, “YES!” was almost deafening!   If you’d like to join us, we will be meeting on Monday, Nov. 3rd at 6:00 PM at Walden Pond Therapy Center in Moosic, PA.  Just order a kit using this link  (and please use host code MY2GZETU) and bring your kit and come join us!   Can’t make it?  That’s ok, just order your kit and gather a friend, or find some alone time, and get creative.  Watch these videos to see how easy it is to assemble this kit.

That’s not the only thing in the 2014 Holiday Supplement Catalog.  Here’s a quick rundown:  Click on any item to see that item in full detail.

 Everything in the Holiday Supplement is only available on a ‘while supplies last’ basis.  I expect a sell out of the Many Merry Stars Simply Created Kit, so order yours today before it’s too late!.
Don’t forget to check out our weekly deals while you’re at it:
CM1634BClick on the image above to go right to the Weekly Deals section of my website and see all of the items on sale this week.  Every Tuesday, Weekly Deals are updated so check back each week.
Thanks for stopping by My Stampin’ Space.  I enjoyed having you here.  🙂
Have a blessed day,
Nancy

Another Way to use your Pinwheels

I shared with you an ‘out of the box’ way to use some of the pinwheels from the June Paper Pumpkin kit and here’s another really clever way to use them!  This was created by one of the ladies in my  Stamp Club.  Christy Seaman is really crafty and I was so excited to see how she used some of her pinwheels that I asked her if I could share her idea with you.  She agreed so here it is:

IMG_6095Mason Jars are so popular right now and Christy combined this trendy subject material with the Pinwheel she created as well as some pennant flags stamped with the stamps provided in the kit, tied everything up with some sparkly patriotic ribbon, and voila, a gift jar suitable for filling with all sorts of treats.

(Personally, I think it would be great filled with M&M’s!)  I would love that!  What would you like to see in your jar?

If you don’t already subscribe to My Paper Pumpkin, what are you waiting for?  It’s a complete craft kit in a box, shipped right to your door each month, for only $19.95!   Each month, a different project.  Instructions are included but most kits can be used in a myriad of ways, like I’ve been showing you here.

Please do yourself a favor, and sign-up now!  You need to sign up before July 10th to get the July kit.  You can also ‘gift’ a subscription to someone else.  You can prepay for a 1, 3, 6 or 12 month subscription.  The subscription can also be added to an on-line order, or a customer workshop order.  Savings are offered on the 6 & 12 month subscriptions.   Subscriptions need to be redeemed (either by you or your gift recipient) before the 10th of the month to receive that months’ kit.

You can make these pinwheels from any square of double sided  Designer Series Paper.  And now in July, you can buy 3 get 1 free of our exclusive DSP

Buy 3 DSP Get 1 Free

Click here to see all the Designer Series Paper included in this offer and to order yours today.

Leave me a comment and tell me what you think about Christy’s pinwheel mason jar.  I’ll be sure to pass along all those comments to Christy.  This is her first debut on my blog so I want to make sure my readers give her a warm welcome.  Thanks!   Nancy

Be Mine, Valentine

photo-1   Be Mine, Valentine!  I just love this adorable little bee, and his sweet message.  What better image to adorn this sweet Hershey Nugget treat holder?    Today is the Pals Blog Hop, but I choose not to participate in the blog hop.  Why?  I was transferring the hosting of my blog and had some technical difficulties.  Because I did not want to compromise the blog hop, I chose to not participate; just in case my blog wasn’t up & running in time.  But I still want to show off this little treat holder.

Easy Peasy to make, thanks to our new Scallop Top Tag Punch.  Just cut a piece of cardstock (I used Primrose Petals) to 2″ x 8-1/2″.  Score at 3-1/2″ and 4-7/8″ then punch each end.  Wrap Hershey Nuggets in coordinating DSP (I used 2012-2014 In Color DSP).  Cut the DSP to 1″ x 3-1/2″.  I placed four nuggets in the treat holder, folded it up and tied it together with Raspberry Ripple ribbon.  The bee was stamped in Smoky Slate ink, and punched with the full heart punch.  Another heart was punched in Raspberry Ripple cardstock and the two hearts were adhered to the face of the treat holder.  A tiny heart from the owl builder punch fits perfectly inside the bee’s wing.

Easy enough to churn these out by the dozen!  So be the coolest mom in school when you send your child to school with these sweet treats for Valentine’s.

To order any products, just click on a link or click here to go directly to my store.  I sure do appreciate your orders.  Don’t forget, Sale-A-Bration is in full swing; for every $50 of product you order, you can choose any one item from the Sale-A-Bration catalog.

Thanks for stopping by My Stampin Space today.  Come back again.

Nancy

So Grateful for Thanksgiving

I LOVE Thanksgiving!   I really do, and I feel bad that this holiday, one in which we pause from our hectic, busy lives, to give thanks to God for all the blessings he gives to us each & every day, gets crowded out in all the commercialism of Halloween & Christmas.

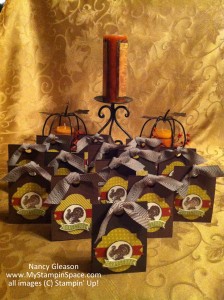
I am hosting Thanksgiving at my house again this year (I enjoy this!) and I made these adorable little treat holders for each of my 13 guests.  I actually made some more to bring to my co-workers too!

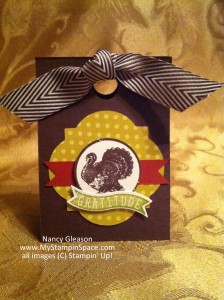
Thanksgiving Treat HoldersHere is a close-up of just one treat holder.

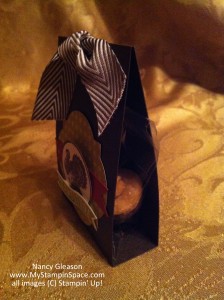
Thanksgiving Treat HolderAnd here’s a side view:

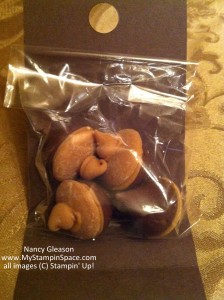
2013-11-27 16.45.39Want to see what’s inside?  Of course you do!  It would be rather mean to just leave you hanging in suspense, not really knowing what was inside, wouldn’t it?  I would not do that to you, so here’s a picture of what is inside:

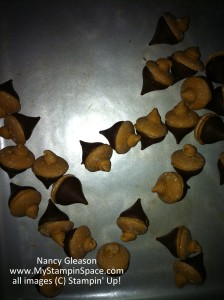
Acorn Candy TreatsAdorable little candy acorns.    Here’s a better shot of the acorns coming off the  assembly line:

Acorn Candy treatsThese were so easy to make too!  Can you tell what they’re made from?  A Hershey Kiss.  The kiss is topped with a peanut butter wafer then a peanut butter chip.  I ‘glued’ all the candy pieces together with melted peanut butter chips.  So easy and so darn cute!  I suppose the taste combination is incredible too!  But, unbelievably, I haven’t eaten one.  I can just imagine popping one in my mouth, and the chocolate & peanut butter taste combination melting together, yum, yum, yum!

And my gift to you this Thanksgiving, since I can’t make and give a treat to each and every one of my dear blog readers, is the instructions on how to make this yourself. CLICK HERE for the PDF file with step-by-step directions and photos.

It could easily be adapted for Christmas, Valentine’s Day, a birthday or any occasion.

If you would like to make this, I would appreciate if you would shop on my on-line store if you need any supplies.  Don’t forget about our ongoing Holiday Sale and our Weekly Deals.  Be sure to check these out before placing an order.

Please leave me a comment and let me know how you like this and if you plan to make them yourself too.  I love to hear from you and treasure each and every comment you leave for me.

Have a Happy Thanksgiving, and Happy Stampin’!

Nancy


Thank You, Thursday!

Stampin’ Up! has reached a milestone–250 posts on our customer blog–and they want to celebrate with you! For the month of October, they will offer a series of Thank You Thursdays posts, where they will offer discounted products for one day only (while supplies last)!

THANK YOU THURSDAY!  – Oct. 24th

This week’s Thank You Thursday’s are a “big” deal! We hope you enjoy this assortment of Big Shot accessories!  Remember, this is a ONE DAY ONLY SALE!  These items go back to their regular price after midnight tonight.

Hearts a Flutter Framelit Item # 130159
Regular Price: $24.95
Discount Price: $18.71
Honeycomb Textured Embossing Folder Item # 129378
Regular Price: $7.95
Discounted Price: $5.96
Envelope Liners Framelits Dies
Item # 132172

Regular Price: $26.95
Discounted Price: $20.21
Alphabet Press Textured Embossing Folder
Item # 130916
Regular Price: $7.95
Discounted Price: $5.96
Window Frames Framelit Item # 129021
Regular Price: $26.95
Discounted Price: $20.21
Chalk Talk Framelit Item # 129983
Regular Price: $24.95 US/$30.95 CAN
Discount Price: $18.71 US/$23.21 CAN

You can combine these offers with our 25% off 25 Stamp Sets specials and get savings on both your stamps and framelits dies.  Shop now for extreme savings!

Look Who’s in My Stampin’ Space.

photo(1)

A few weeks ago, I shared my first video tutorial class with you, my readers.  Many people purchased this class, and although there were a few technical errors, they quickly resolved and I received many compliments from everyone who viewed this class.  One of my ‘students’, Mali Ringel, made this project with her group of fellow demos and they all thoroughly enjoyed the project.  Mali graciously forwarded this pic of the All Dressed Up Lipstick Holder that she made.  I LOVE that Mali chose to put a package of Smarties candy in the holder rather than a lipstick.    I spy a piece of Naturals Compostion paper used as the base and a piece of DSP for the dress.
Thank you, Mali, for your creative use of this cute little lipstick holder as a candy treat.

If you like this and would like to take the video tutorial class, click here to see the original post and the link to purchase the class.  Then put your creative hat on to see how many ways you use this lipstick holder party favor!

Thanks for stopping by My Stampin’ Space.  I hope that you will stamp with me.

Nancy

All Dressed Up, With Somewhere to Go!

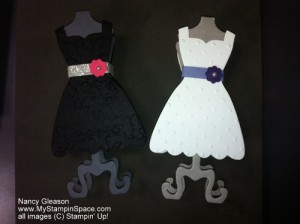
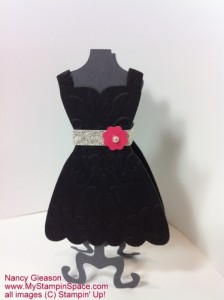
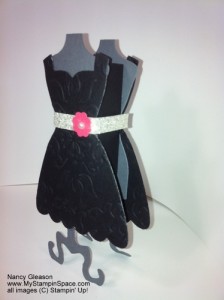
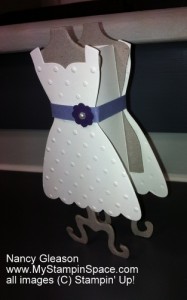
Today, I’m so happy to be able to share this adorable little lipstick holder with you, and I’m so thrilled to be a guest on Mary Fish’s Stampin’ Pretty blog today as well.Dressed Up Blistek Holder

All Dressed Up Lipstick Holder Black Front ViewAll Dressed Up Lipstick Holder - Black Side View


all dressed up lipstick holder in white


I think this would be adorable for either a Sweet 16 party favor, a little girl’s dress up party favor, bridal shower favor (in the brides’ colors of course!)


I hope that you like this project.

If you’d like to learn how to make it; you can can purchase my on-line video class where you’ll learn how to make this step by step, including all of the cutting & scoring dimensions.

BUY THE CLASS for only $6.95

After you add to cart, please scroll down to bottom of page where you will see your shopping cart and you can continue to Check-Out and pay securely with PayPal!

October Pals Blog Hop

Trick-or-Treat! It’s time for some fun and festive crafting with the Stampin’ Pretty Pals! You’ve probably hopped over from Sandra Conner at Pretty Provisions, I’m stop number 22 on the Pals Hop and I’m glad you hopped in! I’ll help you “hop along” from blog to blog where you’ll find great ideas for Stampin’ Up! Halloween projects along with some tricks and treats along the way! Should you hop off course, simply click on any of the links in the Pals Hop Line-up below and you’ll be back on track.

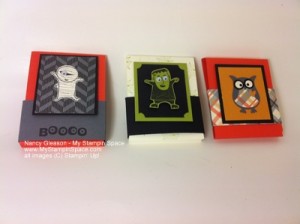
My Stampin Space treat holderCrafting & Chocolate are 2 of my favorite things – so when you combine them, how good is that? And today’s project incorporates both!

This matchbook style treat holder also uses my favorite color, Lucky Limeade, and my favorite stamp set of the day, Googly Ghouls.  It doesn’t get any better than this!

My Stampin Space treat holder projectThis photo shows the treat holder closed and the next photo shows it open, revealing the treat inside.

Perfect!

To purchase any of the supplies used to create this treat holder, feel free to click here to visit my secure on-line store.

Paper:  Lucky Limeade Cardstock, Basic Grey cardstock, Basic Black cardstock, Very Vanilla cardstock and Howlstooth & Scaringbone DSP.

Stamp Set:  Googly Ghouls

Ink:  Staz-On Black ink, Lucky Limeade Classic Ink Pad

Cool Tools:  Word Window Punch, Blender Pen, Score-Pal

Embellishments:  Googlies Adhesive Eyes

Adhesives:  Snail & Sticky Strip

I’m giving away a TREAT! Lucky you!

One lucky winner will receive this project AND  3 other treat holders for a total of four (4) Matchbook style treat holders AND instructions on how to make them!Pals October Blog Hop Blog Candy   This project is so versatile, you can make treats or party favors for just about any occasion.

If you’d like a chance to win, simply leave a comment below by Friday. One random winner will be announced here next Tuesday, so be sure to come back!
Note: I only ship within the U.S.   Winner has 24 hours to email me their name and mailing address so stay tuned for the announcement of the winner!

Now hop along for more tricks and treats and some spooky ideas from Barb Furlong at The Love of Stamping, stop number 1 on the Pals Trick-or-Treat Blog Hop! Thanks for “hopping” by!

  1. Barb Furlong at The Love of Stamping
  2. Kim Czenszak at Live Love Stamp
  3. Nicole Picadura at Scraps & Stamps
  4. Mary Fish at Stampin’ Pretty
  5. Beth Beard at My Little Craft Blog
  6. Peggy Noe at Prettypapercards.com
  7. Kerry Willard Bray at Stampgoodness
  8. Debbie Crowley at expressively deb…
  9. Naki Rager at …notes from Naki
  10. Sherrie Gross at Stampin Sunshine
  11. Claire Crotteau-Hutt at Stamppaperscissors
  12. Diane Roberts at Score at Four and a Quarter
  13. Laurie Chilton at Stampin’ Ink
  14. Katy McGloin at Just Fun Stamping
  15. Rae Harper at Wild West Paper Arts
  16. Brian King at Stamp with Brian
  17. Ann Schach at The Stampin’ Schach
  18. Nicole Watt at Impressions by Nicole
  19. Shannon Hokanson at My Stampin Blog
  20. Maggie Mata at Maggie Made Cards
  21. Sandra Conner at Pretty Provisions
  22. Nancy Gleason at My Stampin’ Space