Today we Celebrate!

Today we celebrate our Wedding Anniversary!  29 years ago today we said “I do” and I’ve been doing it ever since!  Loving my husband, that is.  Through good times and hard times, the one thing I can always count on is my husband.  He is my rock, my support, my voice of reason when I need advice, the one I laugh with, cry with and do life with.

I wanted to make a card that conveyed that, but yet keep it simple and masculine.  I think I nailed it because when he opened up the envelope, he exclaimed “I like this!”

So here it is:29th Anniversary
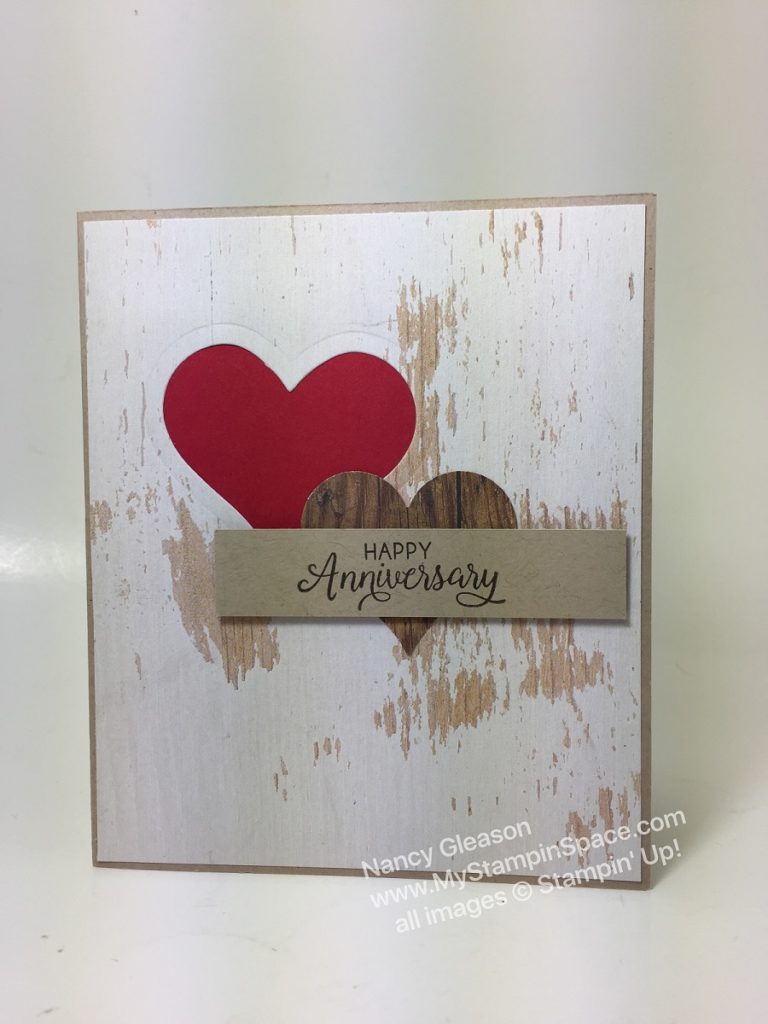
 

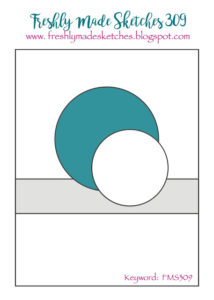
My basic layout was inspired by Freshly Made Sketches #309.   Freshly Made Sketches #309A Crumb Cake  card base layered with a sheet of whitewashed oak from the Wood Textures Designer Series Paper that was punched with the heart framelit from the Mini Treat Bag Thinlit dies.  A piece of Real Red Cardstock was glued in behind that opening.   Another heart was punched using the Sweetheart punch and a different  sheet of woodgrain paper.  A piece of Crumb Cake was stamped in Early Espresso ink with the Happy Anniversary sentiment from Beautiful Bouquet stamp set.
Easy, quick and masculine enough.  My husband has been a cabinet maker his whole life so I knew he would appreciate the woodgrain paper.  Now he is the Executive Director at the Keystone Mission which serves the area’s homeless and needy population.  The other night, the Keystone Mission (and many Rescue Missions across the country) held a Red Carpet Event for the movie “Same Kind of Different As Me”  which tells the true story of a millionaire art dealer and his friendship with a homeless man. Here is a picture of us as we walked the red carpet: On The Red Carpet for Same Kind Of Different as Me
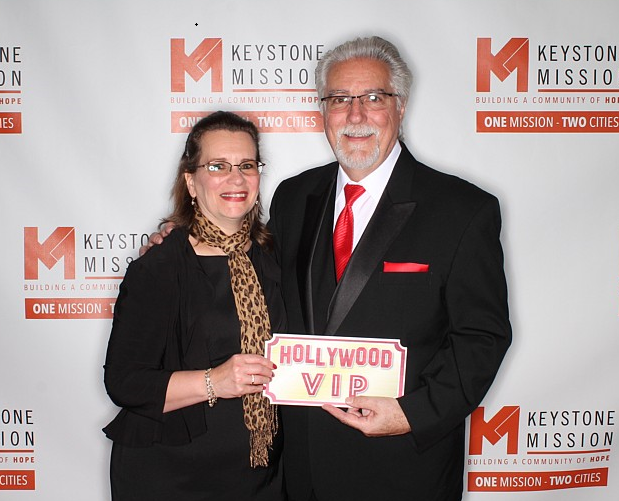
Now you can see why he’s so easy to love!  He’s easy on the eyes! On a more serious  tone, I would highly recommend going to see that movie “Same Kind of Different As Me”, and bring some tissues.

Well, I hope you like my card, and the sketch that inspired it!  Go along to Freshly Made Sketches blog to see all the projects made with that sketch.

If you want to buy any of the supplies I used to make this card, please visit my online store where you can shop securely 24/7.  Don’t forget that the Woodgrain DSP is part of the Buy 3 Get 1 Free  Designer Series Paper Sale going on now. 

Happy Stampin!

Nancy Gleason


Hooray for the TicTacToe Challenge!

Three cheers for the TicTacToe Challenge!  A bunch of my fellow Stampers, and Pals, from Mary Fish’s Stampin’ Pretty Pals, have created a new weekly challenge group.  It’s a tic tac toe challenge!  Just like the child’s chalk game, this features a grid with 9 squares.  Each square contains an element you can use in card making.  You can get tic tac toe by any row across, any column, or a diagonal line.  Here is the TicTacToe challenge for the week.

TicTacToe Challenge #001I chose the top line across, and here is my card:

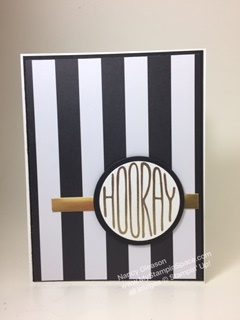
Hooray for TTTC#001

Stripes, circle & gold!  So Easy and so elegant.  Black and gold always combine to a elegant and classy color combo.  I wanted to make something to congratulate the design teams over at TicTacToeChallenge for the new challenge. I’m really looking forward to playing along with this challenge every week.

I did heat emboss the “Hooray” in Versmark ink and gold emboss powder.

I am a self-professed paper hoarder.  I buy pretty paper and then I don’t use it because I hate to cut it up. I have made myself promise that I WILL USE up some of my retired DSP, and that I will use, use up, and buy again, any new DSP that I buy.  This piece of DSP, from the Pop of Pink paper set, fits the bill of using up my retired DSP.  I hope that you might have some of this paper left over; it really is so stunning.

A simple circle cropped with the layering framlit dies, popped up on another circle of carstock.  A little banner of Gold foil sheets accents it just perfectly.

So join me in saying “Hooray for the Tic Tac Toe Challenge!”  Then head on over to the challenge to see the what the design team came up, and they play along with the challenge for yourself.

Thanks for stopping by MyStampinSpace.  Come back again as I have alot to share with you this week.

Happy Stampin’,

Nancy

Save

Save

Happy Birthday, Gorgeous

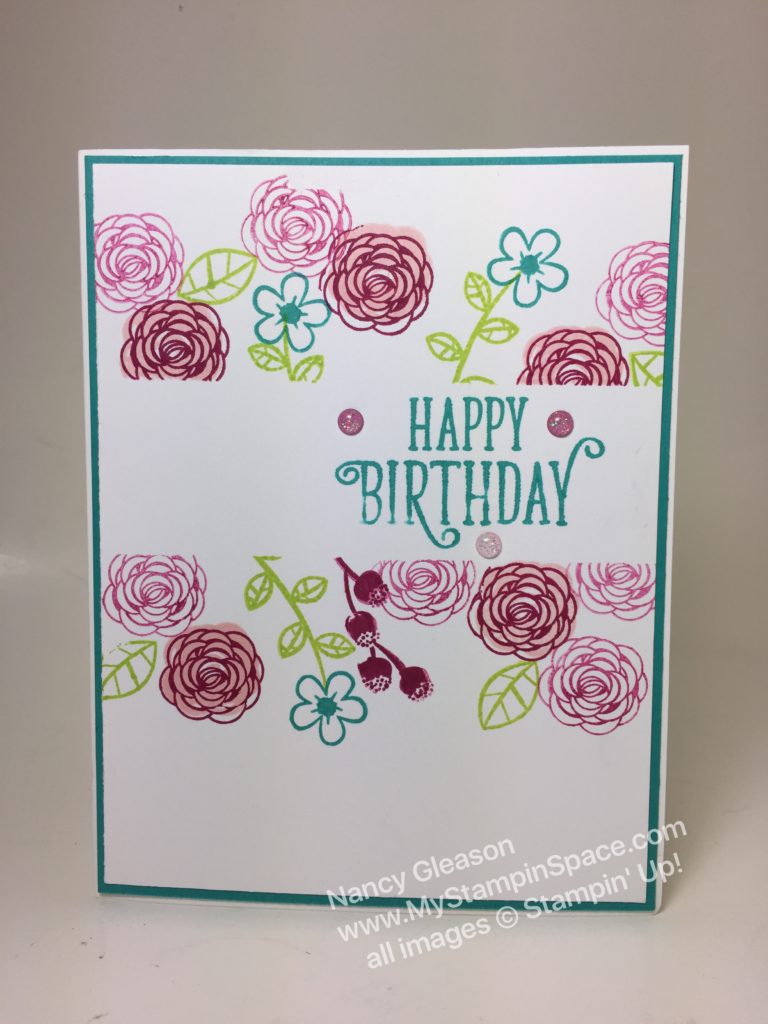
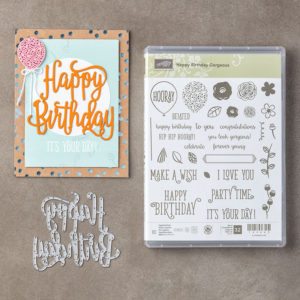
Happy Birthday, Gorgeous.  I have to admit I I ‘passed over’ this stamp set my first, and probably second, trip thru the catalog.  I did like the die that is bundled with it, and LOVED that Stampin’ Up! is now offering adhesive sheets for the intricate dies like the “Happy Birthday” die.  But the stamp set just wasn’t calling my name, truth be told.  But I earned this bundle for free, so  I started taking notice of the potential of this ‘sleeper’ stamp set and discovered how much I LOVE this bundle called Happy Birthday, Gorgeous!  The flowers works great with the 2-step stamping and just as well on their own.

I needed a project to do at a workshop.  I wanted something easy for any skill level, yet something that would have some ‘Wow!” factor.  These flowers are so easy to work with, and a simple masking technique creates the “Wow!” factor.

Happy Birthday Gorgeous

A few of the absolutely gorgeous Glitter Enamel Dots add the finishing touch!

You can easily recreate this card – just place a 1-1/4″ strip of scrap paper across the center; stamp your flowers then remove the scrap paper.  You’ll be left with a nice clean slate to stamp your sentiment. Easy Peasy!

You can purchase this stamp set by itself or bundle it with the HappyBirthday die  and save 10%.

This is one bundle that I would highly recommend make it to the top of your ‘must-have’ list.  It is so versatile and fun and everyone needs birthday cards so you’ll reach for this over and over again, and every project can have a totally different look!  From the flowers to the balloons to the banners and the great sentiments that can be paired together and the various font and sizes, it’s an all around winner!

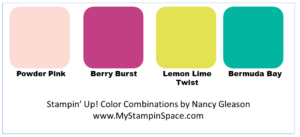
The colors I used to create this card are Powder Pink, Berry Burst, Lemon Lime Twist and Bermuda Bay.  A great colorful color combination!  Feel free to save this color combination for your own use.  You can ‘pin’ this picture.

Stampin Up Color Combo

Thanks for visiting My Stampin Space today.  Be sure to visit my online store to grab your Happy Birthday Gorgeous bundle today!   Please leave me a comment and tell me what you like most about this card!

See you soon!

Nancy


Save

Save

Save

Save

Don’t miss out!

There are only a few more days to get your favorite items that are on the Retiring List.  Because I care about you, and I want to make sure you don’t miss out, I am reminding you to go ahead and place your order today, right here, right now for those items that you know you want but for some reason you haven’t gotten yet.

Retiring Products

Do you want to know what stamp set I am going to miss the most?

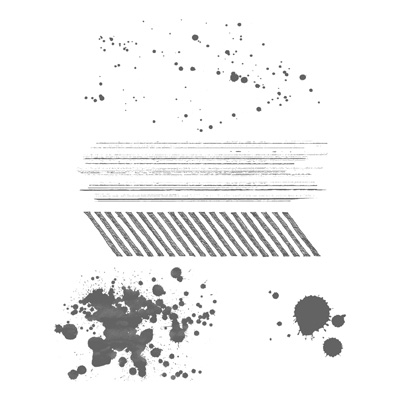
Gorgeous Grunge!  

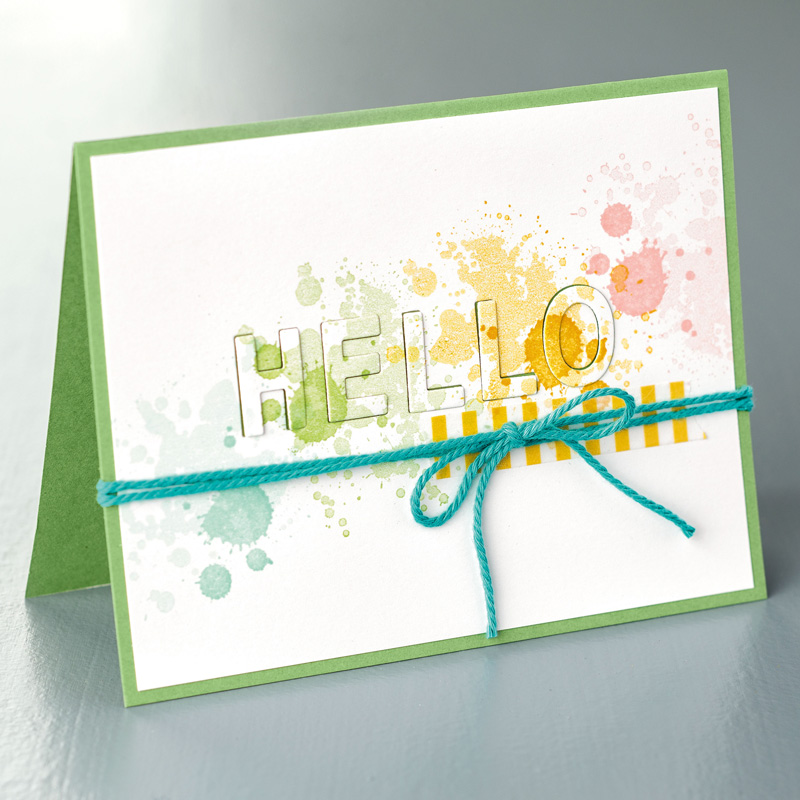
Hello, Gorgeous Grunge!

Just look what you can do with these stamps:

It’s still available in both Clear Mount and Wood Mount as I write this but supplies are limited to stock on hand and can sell out any minute.  So, click here to start shopping.  I’ll wait for you.

Get 25% off your first 3 months of Paper Pumpkin

Haven’t tried Paper Pumpkin yet?  Now’s your chance!  New customers who subscribe to Paper Pumpkin by June 10th will save 25% off your first 3 months!  It’s as easy as 1, 2, 3!

  1.  Click here to subscribe
  2.  Use Promo Code “Start Here”
  3.  Enjoy!

Save

Save

What’s Better Than Seeing the New Products?

If you follow my Facebook page (and you should!), then you know that I just spent the weekend at a Stampin’ Up! event called OnStage in Richmond, VA. Along with seeing so many other Stampin’ friends, and making many new friends, the hi-light of the event is the reveal of the 2017-2018 Annual Stampin’ UP! Catalog, including the new 2017-2019 InColors, and the new products being introduced in this catalog.

While I LOVE, LOVE, LOVE seeing the new catalog, do you know what I love even more?  Yes, my hubby & son, of course.  But aside from that, more than seeing the new products, I love getting the new products!  And part of the event includes getting several stamp sets that I get to take home with me. How cool is that?   Of course I had to break out these new stamps and play with them today.

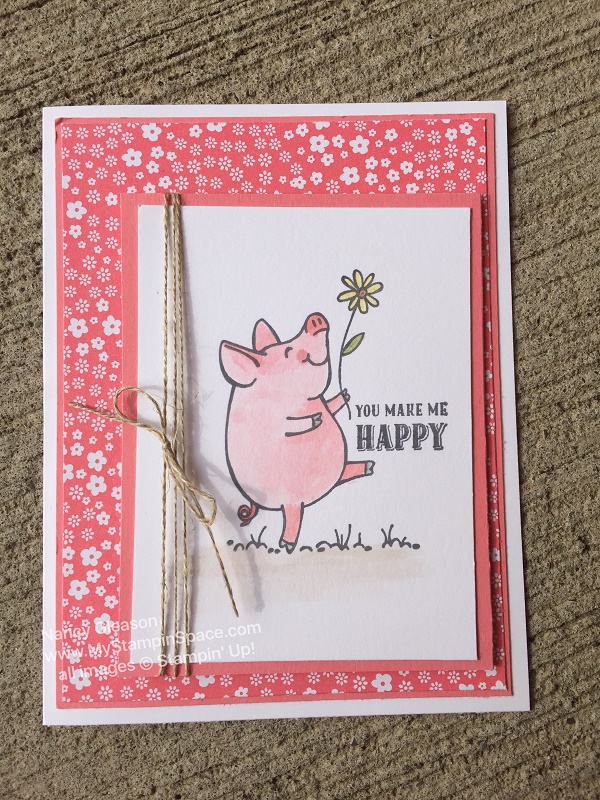
My new friend to play with?  This little piggy:

This Little Piggy Makes me so Happy New Products

Isn’t this little just absolutely adorable?   I love him (or her)!  And I’m pretty sure that you love him too, am I right?  This is just perfect for coloring in, I just grabbed my aqua painters, and took a little bit of Flirty Flamingo ink from my ink pad, and filled in a bit of color.  Easy-peasy!  It took me longer to decide if I wanted Flirty Flamingo baker’s twine, Wild Wasabi Baker’s twine, or Linen Thread.  As you can see, I decided on the Linen Thread.  It was just the right weight to add a little something without taking your eye away from the darling piggy!  The Flirty Flamingo flower DSP (Designer Series Paper) in the paper adds to the light-hearted, happy, flowery feeling!

Leave me a comment below if you like this little Piggy, and tell me what you would name him/her.  I think the perfect name would be Daisy.

See you soon with more from the new catalog!

Nancy


Baby Wipe Technique with Video Tutorial

Last night I taught the “Baby Wipe Technique” to the ladies in my stamp class.  It’s a really fun way to create a mottled, multi-colored effect and it’s perfect for any stamp with a large image area.

We had a really fun class and I always love when new people join me for a class!   I consider it a great compliment when a regular student invites a friend to come!  I had two ‘regulars’ invite friends and had 3 new peeps in class!  It really was a great night.  And despite the impending snowstorm/blizzard headed our way, everyone wanted to come to class!   We decided since the snow wasn’t supposed to start until around 11PM, we could have class and get home before any real snow started.  Here is the first project we made:

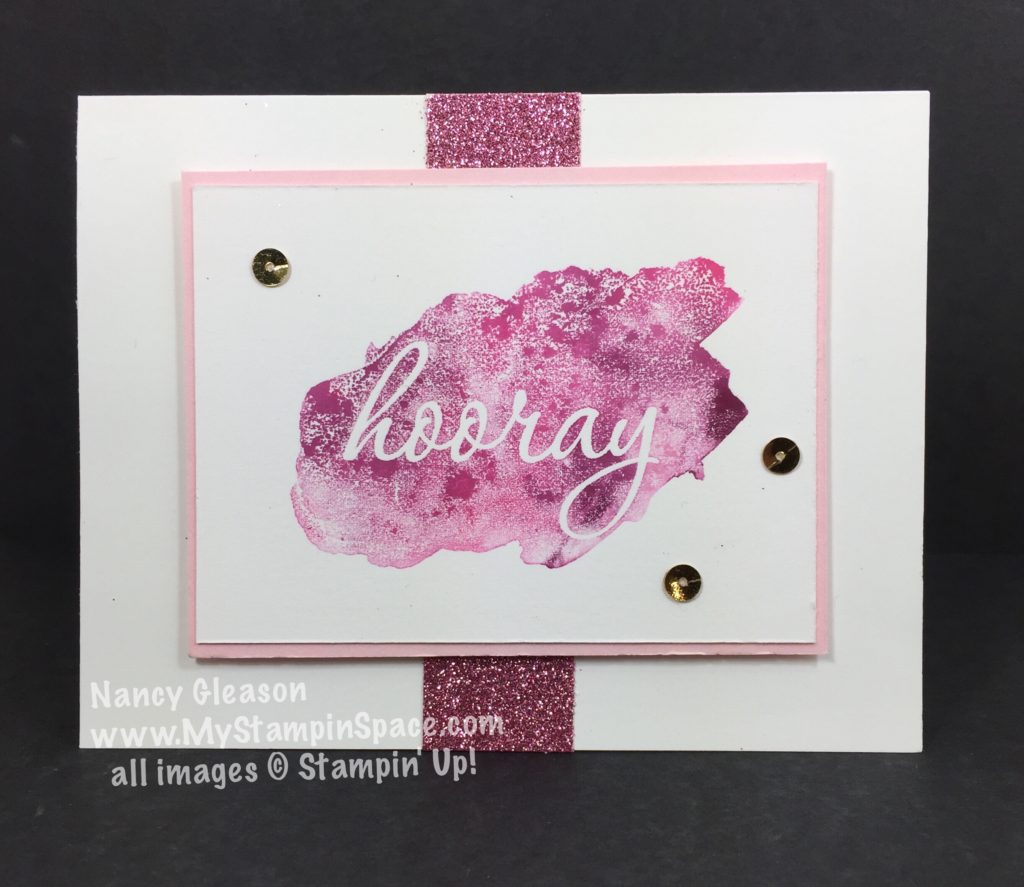
Baby Wipe Technique, Reverse Words, SaleABration, HoorayFor this card, we used the Reverse Words stamp set (available for FREE thru March 31st during Sale-A-Bration).  I used Pink Piourette, Melon Mambo and Rich Razzleberry ink.   A bit of bling from the Glimmer Paper Assortment (also FREE during Sale-A-Bration!) and a few metallic sequins finished it off.  Quick, easy and so much WOW!

The next project also featured the Baby Wipe Technique, but we stepped it up a bit with more layers and stamping.

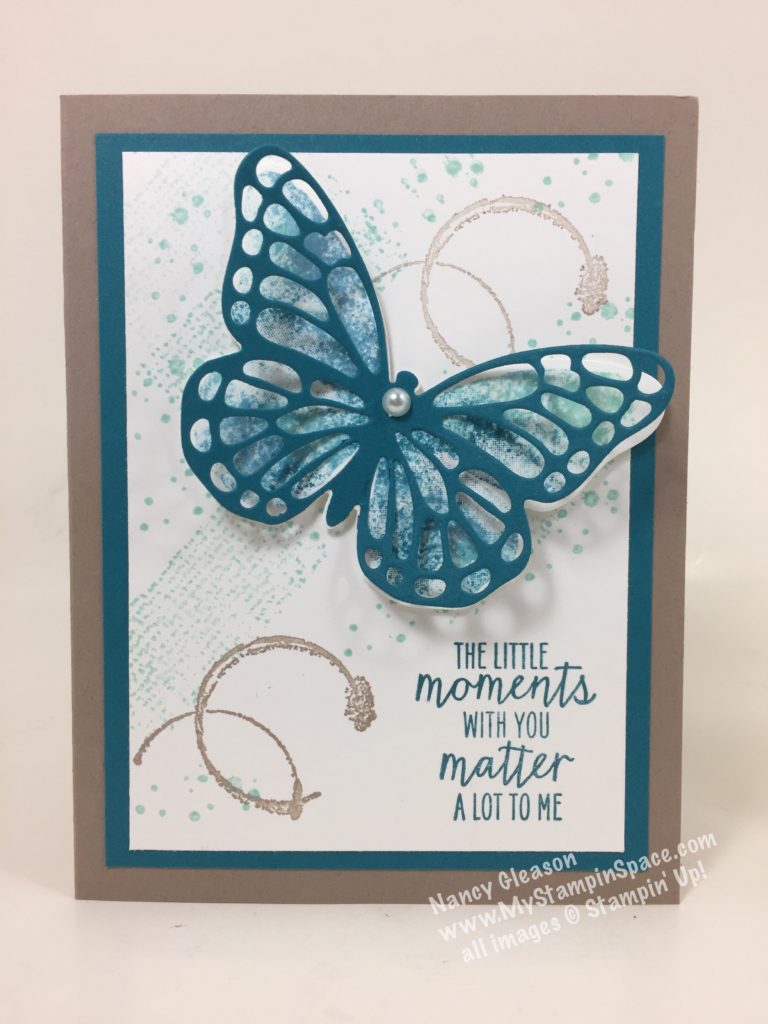
Baby Wipe Technique, Watercolor Wings, Butterfly, Timeless Texture

The Baby Wipe Technique was used to color the background layer of the butterfly which was stamped using an image from the Watercolor Wings stamp set and cropped out using Bold Butterfly Framelits.  A detailed Butterfly was cropped from the Butterflies thinlits from Island Indigo cardstock and layered on top.

The Whisper White layer was stamped using the Timeless Textures stamps in Pool Party and Tip Top Taupe.  The sentiment, from Watercolor Wings, was stamped in Island Indigo ink.

I love this color combination, and I hope you do too!  Don’t forget that Tip Top Taupe will be retiring in a few months.  Stock up now on your favorite Tip Top Taupe items before they are gone.

If you would like to learn how to do the Baby Wipe Technique  you can watch a video tutorial I made here:

Don’t forget to subscribe to my YouTube channel.

Please leave me a comment and tell me what you think of the Baby Wipe Technique, and my projects!  I love to hear from you and cherish each and every comment 🙂

If you want to purchase any of the items I’ve used here, please head to my online store and place your order. Remember, for every $50 you order (before shipping & tax) you earn 1 FREE Sale-A-Bration item!  Please use Host Code SZYAENSF if you place an order that is less than $150 dollars.  Thank you!

Well, if you’re in the Northeast and affected by Blizzard Stella, stay safe and warm!  It’s a good day to hunker down and stamp, in between rounds of shoveling & snowblowing.  Happy Stampin’!

Nancy

Save

Save

Save

Save

Save

Save

Save

Save

Save

Save

Save

Save

Playing with the Paper Players

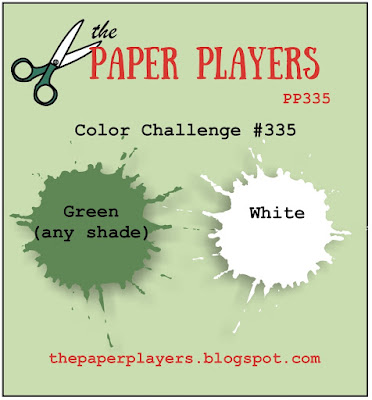
I just love when I make a project, and before I have a chance to post it anywhere, I discover that it fits the bill for a challenge.  Well that’s exactly what happened here when The Paper Players posted their color challenge today.

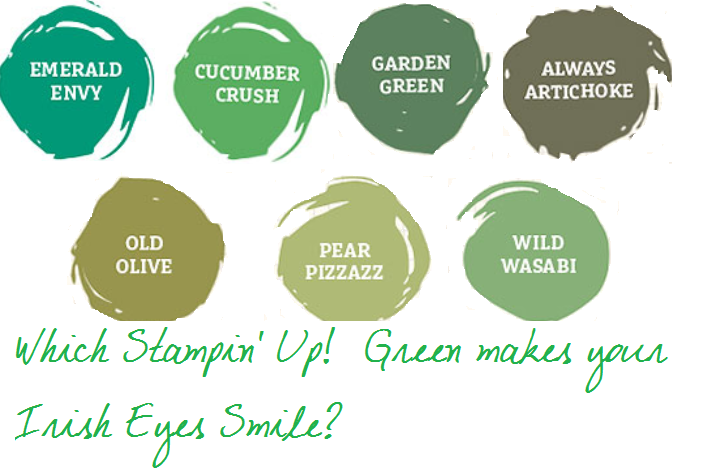
I posed a question on my Facebook page, asking my readers to respond with their favorite choice of green for St. Patty’s Day.  I promised to randomly select a winner from all the comments to send a St. Patrick’s Day treat.  stampin' up! greensWhen I selected the winner, I wanted to send along a card, and of course the card had to be green, Cucumber Crush, to be exact!  I thought a touch of gold was fitting.  So here is my card:
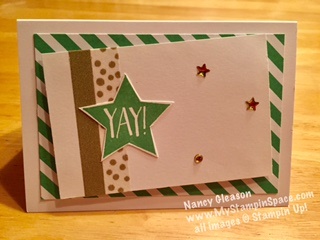
Yay for Green!

Lots of white and Cucumber Crush green accented with gold!  Just perfect for the Paper Players challenge:

I started with a Stampin’ UP! notecard in Whisper White, added a layer of Cucumber Crush & White diagonally striped paper, a layer of Whisper White adorned with Washi Tape in gold, and a few gold metallic enamel shapes, and a star stamped in Cucumber Crush ink from the Confetti Celebration stamp set.  A few snips from my paper snips cut out the shape in no time!  Fast. Easy. Wow!

By the way, My Green Color Quiz?  It was a dead heat between Emerald Envy and Cucumber Crush!

Sale-A-BrationDon’t forget, we are in the final days of Sale-A-Bration!  Your chance to earn all of these fabulous items is running out.  Place a qualifying order of $50 or more from my online store to earn a free Sale-A-Bration item.  Not sure what Sale-A-Bration is?  Everything you wanted to know about Sale-A-Bration can be found here.

HOST CODE for March is SZYAENSF – please use this code if you place an order thru my online store that is less than $150 (before shipping and tax).  If your order is over $150, do not use the host code.

So thanks for playing with me and The Paper Players today.  Please follow my Facebook page, and sign up for my mailing list, so you won’t miss any contests that I run!  Thanks for stopping by, come back soon.

Nancy

Save

Save

Save

Save

Taking Layering to a New Level

Today is the long-awaited for day!  And I’m not just talking about a day off of work!  But today is the day that the Stitched Shapes Framelits dies are back in stock!

145372 Stitched Shapes Framelits
Stitched Shapes Framelits dies – # 145372

The Stitched Shapes Framelit dies were introduced back in November as a teaser of what would be coming in the 2017/2018 Annual catalog to be released in June.  They were so hugely popular that they sold out faster than expected, put on backorder, and then put into a ‘non-orderable’ status  until today.

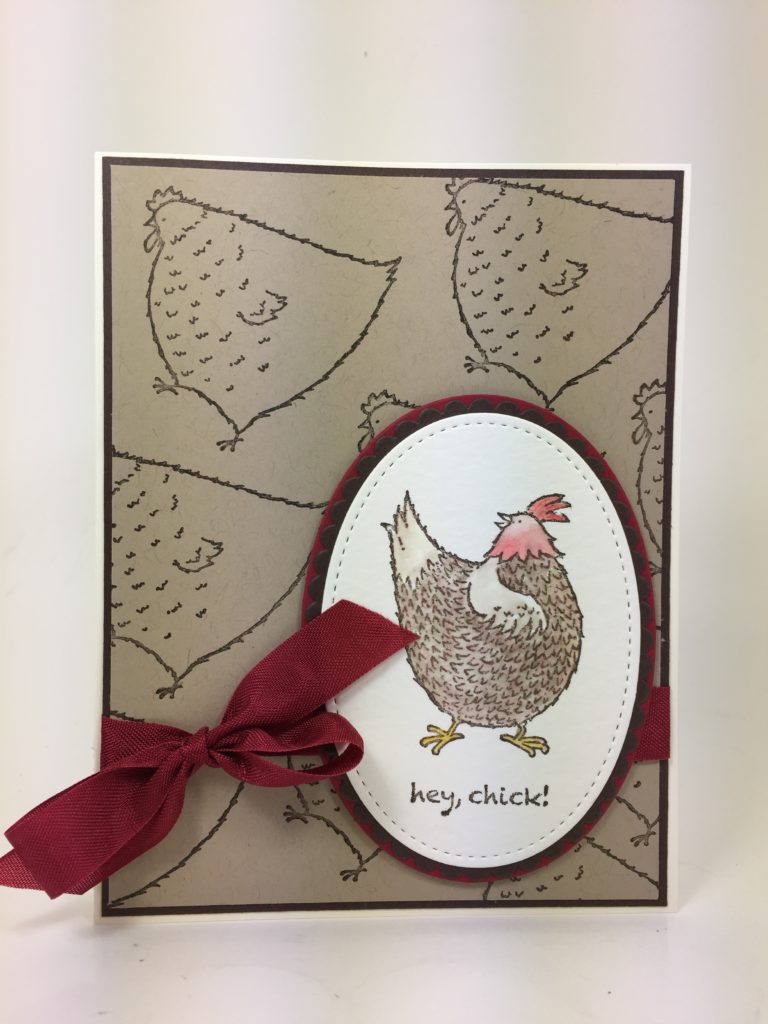
Why are they so popular, you ask?  What’s the big deal?  Well, I’ll tell you.  This set of 12 (4 each of square, oval and circles) basic geometric shapes have tiny stitching around the edges.  And they pair perfectly with our Layering Framelits in Squares, Ovals & Circles to create perfect layers with just the right amount of detail.    Let’s have a look:  IMG_8339[1]

IMG_8411[1]

Hey Chick

See how the tiny stitches makes the shaped so much more ‘finished’ and adds just the perfect finishing touch to the basic shape?  And how the straight and scallop edges of the layering framelits dies coordinate so perfectly?  The Stitched Shapes Framelits and layering framelits are going to take your layers to a whole new dimension.  And the sizes of the shapes coordinate with so many stamp sets; both images & sentiments.

Now, what if you don’t own any of these basic shape framelit dies.  Can you still get the Stitched Shaped Framelit dies?  YES!!  Having both the layering framelit dies in all the shapes, AND the Stitched Shaped Framelits, will be an investment in tools for your paper crafing that you will have for years & years.  The best way to get all of these?  Ultimate Bundle SAB

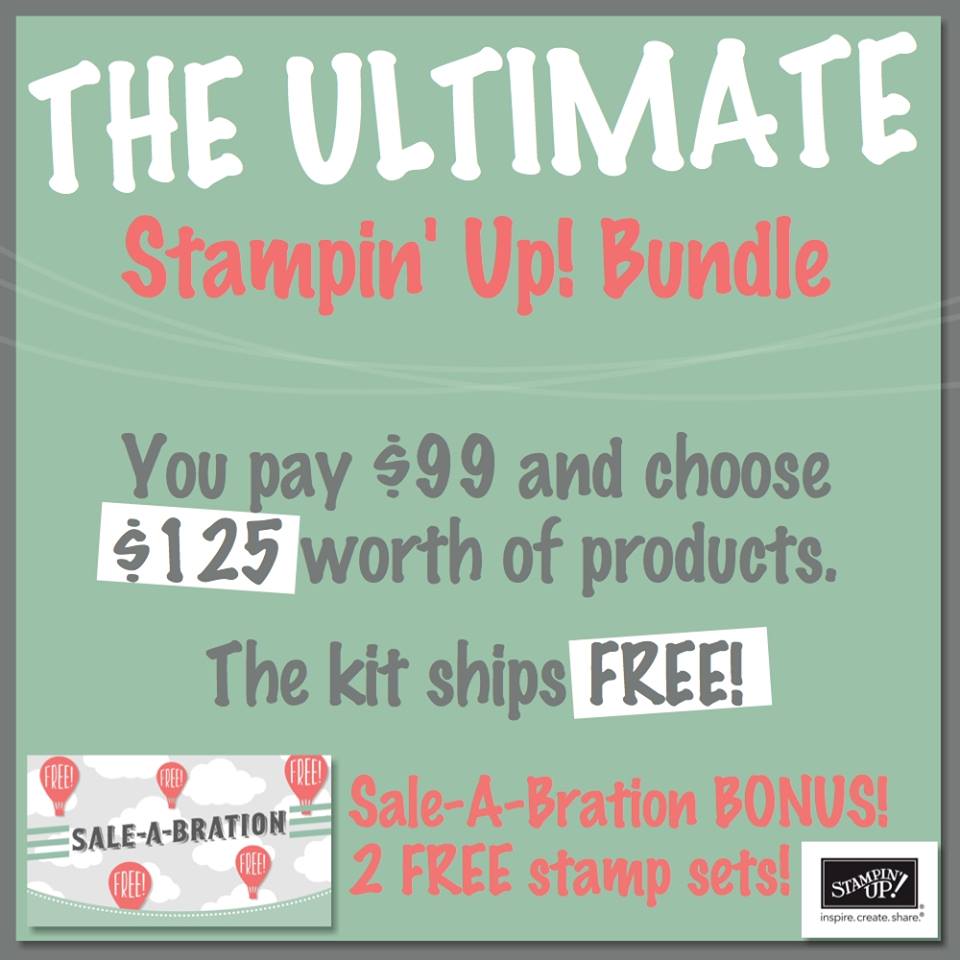
When you purchase the Ultimate Starter Kit!  You can choose $125 worth of product for only $99 and not pay any extra for shipping!  But during Sale-A-Bration, you’ll get to choose 2 FREE stamps on top of that!  If you purchase this now, you’ll get a 20% discount on all of your purchases until the end of July 2017!  And you don’t ever have to host a workshop or sell anything if you don’t want to.  Get all the benefits of belonging to the Stampin’ UP! family by being a wholesale customer.  Purchase your Ultimate Starter Kit here.

If you choose not the order the Ultimate Starter Kit!  you can still earn FREE merchandise during Sale-A-Bration.  Just place your order here, and for every $50 you can choose one Sale-A-Bration item for FREE.  Please remember to use Host Code 2BUYMMWN when placing an order under $150.

Thanks for stopping by today.  See you soon!

Nancy


Save

Save

Save

Save

Save

A Million Dollar Hooray

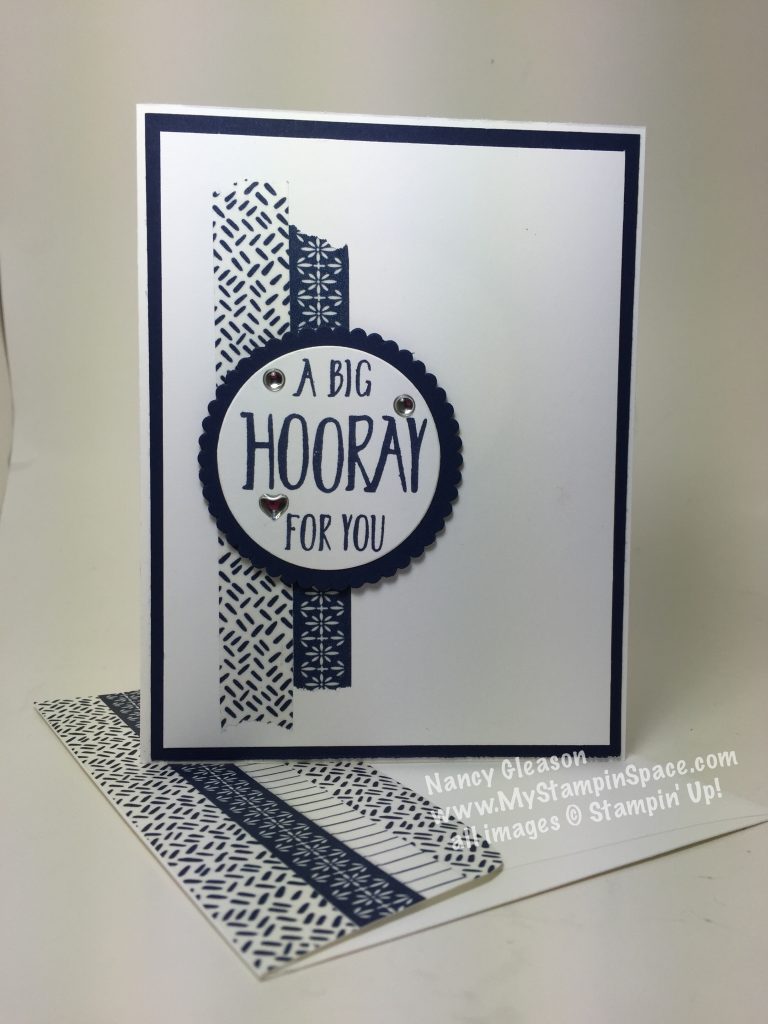
A  clean and simple card for a big celebration:A million dollar Horray

When I got started in my Stampin’ Up! hobby, I turned to Mary Fish of Stampin’ Pretty for a daily dose of inspiration.  And when I joined Stampin’ Up! as a demonstrator, I joined under Mary because A) I liked her papercrafting style, and B) she had a reputation for being a great support to her team, hence her nickname as “The Fearless Leader”.  Mary just achieved a major milestone in her career; she just became the 14th demonstrator to sell $1,000,000 in lifetime sales!   This card is on it’s way to Mary to congratulate her on this success.

A simple striking color combination of Night of Navy and Whisper White and lots of white space keeps this card Clean & Simple.  A few strips of Washi Tape, and a sentiment from the Perfectly Wrapped stamp set cropped with Layering Circles Framelits topped off with a few Metallic Enamel Shapes.  Simple, quick, clean and uncluttered.

I made my envelope to match by just layering strips of Washi Tape on the flap.   Speaking of Washi Tape, let me share with you my tip for keeping your Washi Tape organized.  I have little mesh bins on the wall in my stampin’ space that I keep my rolls of Washi Tape.  They fit perfectly but I don’t always know what roll goes with what, or what color it is.

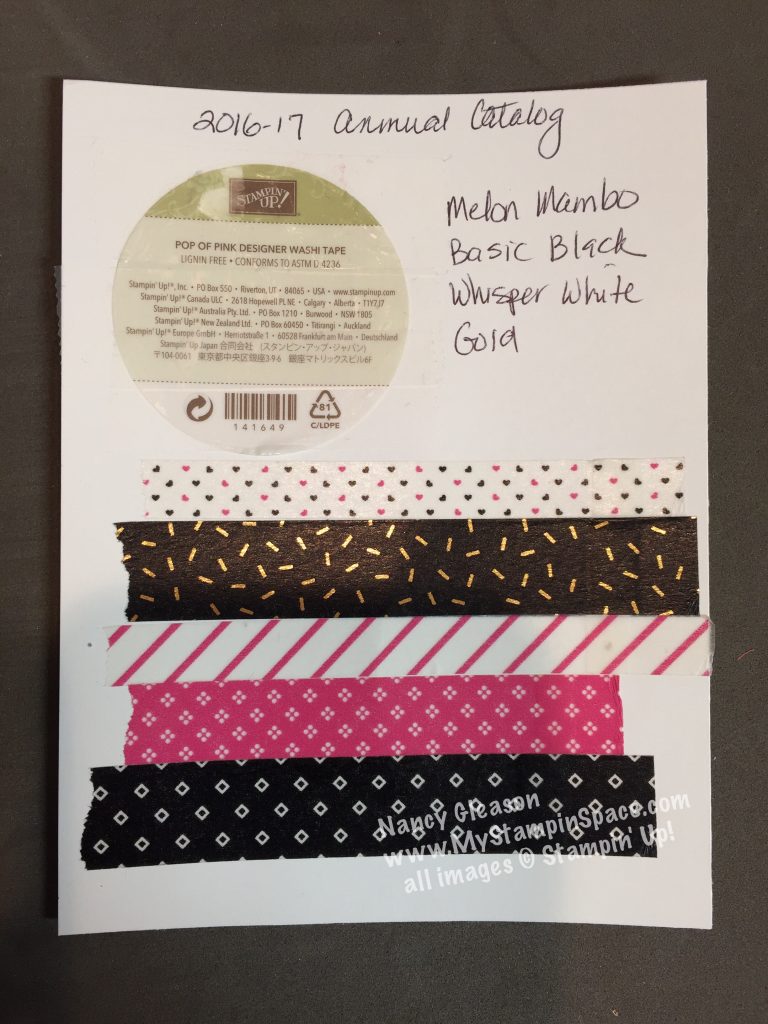
Solution?  I cut a piece of cardstock (4-1/4″ x 5-1/2″) and I gently peel off the sticker from the roll and adhere that to the cardstock.  I write the year and catalog name on top; list all the colors, and finally a strip of each pattern.  These cards go in the basket with my Washi Tape.  Organized!  🙂
axux42501

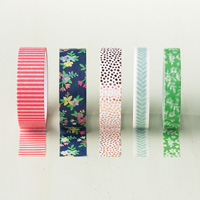
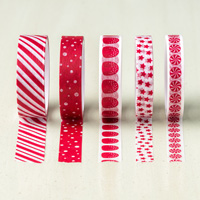
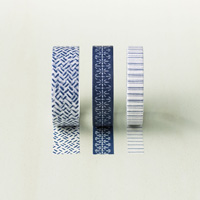
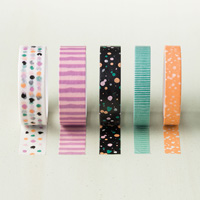
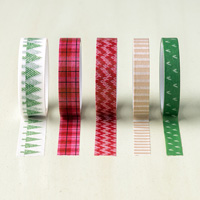
Stampin’ UP! offers so many Washi Tape assortments. So versatile and easy to use, Stampin’ UP! offers them in patterns and colors to coordinate with other products.  My card features a 3-roll assortment from the Floral Boutique Product Suite.  The card above is a 5-roll assortment from the Pop of Pink product suite.

Why don’t you add a package or two of Washi Tape in your next order and see how simple it is to use.   You can view the different collections below, and You can order Washi Tape right here. 

Affectionately Yours Designer Washi Tape Candy Cane Lane Designer Washi Tape

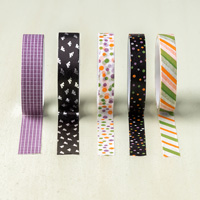
Floral Boutique Designer Washi Tape Halloween Night Designer Washi Tape

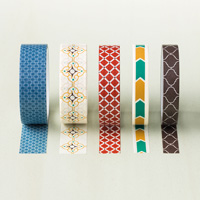
Moroccan Designer Washi Tape Playful Palette Designer Washi Tape

Warmth & Cheer Designer Washi Tape

I hope you enjoyed my card, and I hope Mary will like it too!  Please leave me a comment and let me know what you think.   If you would like to buy any Washi Tape, or any other Stampin’ Up! products, click here to shop my online store.

Thanks for stopping by My  Stampin’ Space today.  I hope that you find inspiration when you visit my blog.  Make sure to subscribe to my mailing list  – the 12 Weeks of Christmas is coming and I don’t want you to miss out!

Nancy


The Beauty of the Butterfly

“As with the butterfly, adversity is necessary to build character in people.”  – Joseph B. Wirthlin
Butterflies are such complex creatures; they are so fragile and intricately detailed, yet the fight they endure to emerge from the cocoon is inspiring!
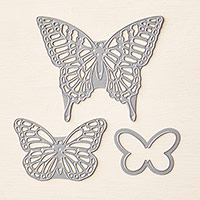
I love all the Butterfly stamps and thinlits and framelits dies that Stampin’ Up! offers; we have so many options when we want to add a butterfly to our cards.  Today I chose to use the Medium sized Thinlits die in the Butterflies thinlits as the focal point of my card.  I love the intricate detail of this thinlit.
IMG_6664[1]
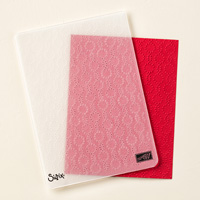
I also wanted to add some embossing as I was teaching a class on the Big Shot die cutting and embossing machine and wanted to show how it die cuts AND embosses.  The Elegant Dots TIEF was chosen for the way it coordinates with the Crushed Curry design of the Cherry On Top DSP stack.  A simple design of one color and white is all that is needed to make the focal point stand out.  (You could recreate this card in any color, but a bright, bold color will work better than a light, subtle color).
I cropped the butterfly out of the center of the Crushed Curry cardstock panel.  I then adhered the DSP panel and the embossed Whisper White panel on top of the Crushed Curry panel.  No one can tell that the butterfly was cropped out of it!  A piece of Crushed Curry ribbon (retired) covers the butt joint of the two pieces of paper.  The butterfly is embellished with a single Rhinestone jewel.  A wooden embellishment from the Expressions Natural Elements was adhered to the lower right section of the card.
Simple, yet elegant.  Just like a butterfly.  And my friends over at the Paper Players are featuring cards with Butterflies this week!  Click here to see all the butterfly inspiration from the Paper Players.  Come & Get It Challenge is featuring ‘things with wings’ so I get to enter this into both challenges; SWEET!
To purchase any of the items I used to make this card, click on the item hi-lighted above, or on the product list below.
BIG NEWS!!!  As you know, the current catalogs are set to expire on May 31st.   On April 18th, the RETIRING LIST will be posted!  Any items that will be retired by May 31st will be posted and from now on, will be available on a ‘while supplies last basis’.  So anything you’ve been wanting, scoop it up before it’s gone!  We know that all of the 2014-2016 InColors will be retired.  Any product with those colors in it, will also retire.  Usually all of the DSP patterns  retire too.  Click Here to go right to my online store to start shopping before those items you want are gone.

How Much Fun Can You Have in One Night?

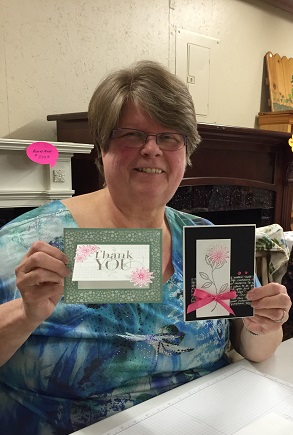
Another Stampin’ Class, another night of fun!  I enjoy getting out of the house, and having a fun night with the ladies that come to my PaperCrafting classes!  Of course, I love papercrafting, but the camaraderie and friendship are so special to me.  The ladies always love the projects we make, and I wanted to share one of those projects with you now:

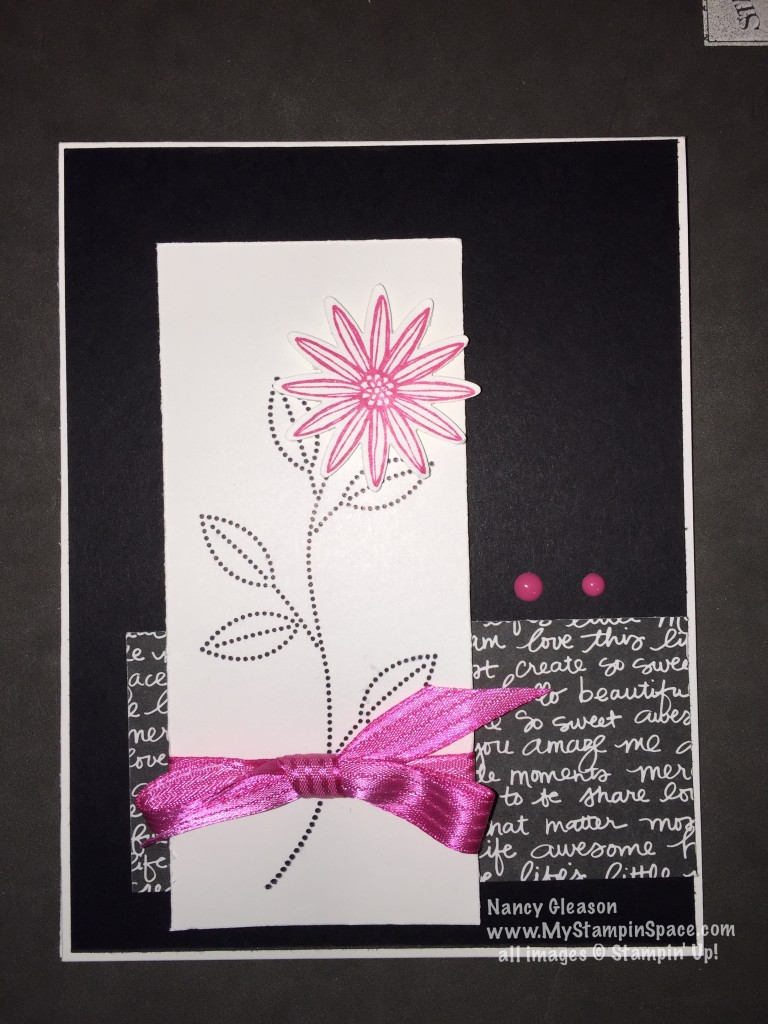
A Grateful BunchI love the look of a Black & White card with a pop of a bold, bright color.  Melon Mambo, this deliciously bright pink, does the job!  It really Pops against the B&W!  This card follows the rule of thirds:  a color should be repeated 3 times.  I used the Melon Mambo for the flower, the ribbon and the enamel dot accents.  This is a simple card to make but it really says “WOW!”
I started with a piece of Whisper White cardstock, cut to 4-1/4″ x 11, then scored to created a standard size card with the fold at top.  A piece of Basic Black cardstock cut to 4-1/8″ x 5-3/8″ was adhered to the face.  A small strip of Black DSP from the Neutrals DSP stack, cut to 2″ x 3-3/4″ was adhered along the right side about 3/4″ up from the bottom.  A strip of Whisper White was stamped with Black Archival ink and the stem from the Grateful Bunch stamp set.  The flower was stamped in Melon Mambo ink and cropped out using the Blossom Bunch Punch and popped up on a stampin’ dimensional.  A piece of Melon Mambo ribbon was tied around and this layer was also popped up on dimensionals.  A few enamel dots in Melon Mambo finish off the card!

Easy peasy, but oh, so striking!

The Ladies had so much fun.

Ruthie 40516

And they were so proud of the finished projects they made!  Nothing makes me happier than to see someone who has never stamped before  complete a project they can be proud of!   I love sharing my passion for papercrafting, and the tips & techniques I’ve learned along the way with others!  Classes are a great way for me to do that.

I wish everyone reading this could come to my classes!  If you are in the Scranton, PA area, you can!  If you don’t, well, it probably won’t be very convenient, but…..maybe you won’t have to!  I am going to start on-line classes in June!  Yes, you read that right.  So that means that no matter where you live, you can still stamp with me, via video!  Cool, right?

I’ll be sharing more info on that shortly, and you, my blog readers will be the first to hear about it!  But in the meantime, you can send me ideas of things you’d like to learn!  I’ll be happy to take your questions and suggestions and turn them into classes!

And I’ll be sharing the 2nd project we made in a few days so stop back.  And remember, if you want to order any of the supplies I used to make this project, please shop my online store here.  Thanks!  And feel free to pin this project or share it with your on facebook if you like it.

See you, soon!

Nancy


Playing with the Pals Papers Arts

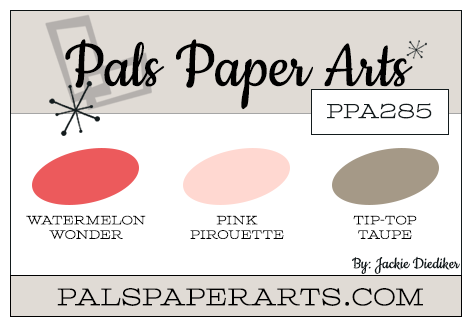
I am blessed to be part of a wonderful on-line community of Stampin’ UP! demonstrators called the Stampin’ Pretty Pals, under Mary Fish.  The Pals have their very own place to play with paper,  called Pals Paper Arts.  Twice a month, they offer an opportunity to play with paper: a sketch challenge and a color challenge.

PPA-285-Jan28-1

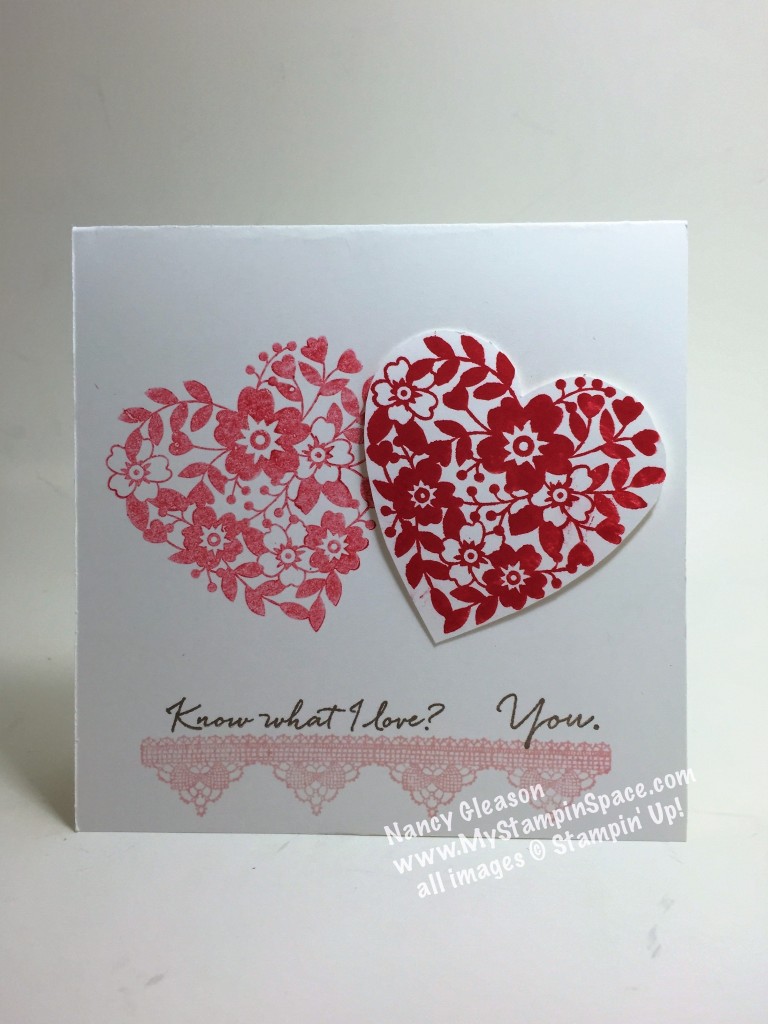
This lovely color combination is the inspiration for this weeks challenge.  I have to admit ,I’m not sure why but at first I wasn’t too keen on these colors.  But I stretched myself to use them together, and this is what I came up with:

IMG_6285

I wanted a simple one-layer card and this really came together much better than I anticipated!  And once I sat back and admired my work 😉  I REALLY LIKED THIS COLOR COMBO!  All because I tried it.

Now, I can tell you there are some really talented folks who play at the Pals Paper Arts.  You can click here to head over there and take a look at all the fabulous creations made with these colors.  It will knock your socks off!

I used the Grateful Bunch stamp set for the lace border, Bloomin Love for the hearts and What I Love for the sentiment.  You can order any of these by clicking on the stamp set name, or clicking here.

The Grateful Bunch is part of bundle – add the coordinating Blossom Bunch Punch and SAVE!  The What I Love stamp is FREE with a $50 order during Sale-A-Bration.  (I love FREE!)

Sale-A-BrationWhat is Sale-A-Bration?  Click here to find out!

Thanks for stopping by My Stampin Space.  And if you choose to shop with me please know that I am grateful for each and every customer and will go out of my way to take good care of you.  If you have questions on any products or techniques, don’t be afraid to ask!  I love to share my knowledge of paper crafting!

Come back later, I have a special card to share.

Nancy


My Lucky Stars

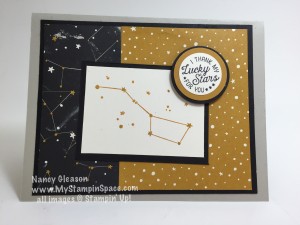
When I saw this sketch by the Freshly Made Sketch challenge, I knew exactly what stamp set I wanted to use.  What I didn’t know was that Cindy Hall, the sketch designer, used the same paper and same stamp set, until just now, when I went to upload my project to their site, and took the time to admire all of the other entries.  I guess great minds think alike!

I thank my Lucky Stars

While Cindy designed the sketch to be used as a joy-fold card, mine is a standard size 5-1/2″ x 4-1/4″ card.

You can see all of the other entries at the Freshly Made Sketch challenge here.

The GOING PLACES product suite zoomed to the top of my ‘Must Have’ list when the Occasions catalog came out.  I’ve always had a love of maps; I got that from my Dad who always drove with a map folded on the steering wheel when we would go on long road trips and family vacations. In fact my office has a wall paper border of world maps.  Even in this day of GPS and google maps, I still love a good paper map, with all its folds, and legends, and…, well I digress!

The suite includes the “Going Global” stamp set, the  “World Traveler TIEF”, an “Going Places” Designer Series paper stack.    A great product suite for projects that lend to a masculine feel, but also for memory keeping for trips and journeys, as well as astronomers and star-gazers.

This card is headed straight to my son Matt.  Even though he still lives at home, I feel I don’t always tell him how much he means to me.  I hope this card, that he’ll find tucked in an unsuspecting place, will let him know I’m so thankful for him, and the joy he brings me!

Thanks for stopping by My Stampin Space.  Come back again soon.  I’ll be sharing another card using this product suite later in the week.

Thanks,
Nancy

shop on lineClick here to start shopping!

Sale-A-Bration What is Sale-A-Bration? CLICK HERE to learn all about Sale-A-Bration and why you don’t want to miss out!

Weekly Deals headerWeekly Deals.  Stampin’ Up! releases new Weekly Deals every Tuesday – some of your favorite products at a discount for one week only (or while supplies last).  To check out this week’s deals, click here.

You’re Invited….

In just a 2 short days, the 2016 Stampin’ Up! Occasions catalog and Sale-A-Bration catalogs will be released!  It’s almost like waiting for Christmas!

Be sure to tune in Tuesday, Jan 5th as I will have the catalogs posted on my blog.  On Saturday, January 9th, you’re invited to attend my Open House where you can come Play & Shop the new products in person!  Get your hands on new stamps, papers, embellishments and tools.  I’ll have different stations set up for Make & Takes, door prizes, and lots of new products and samples for you to explore.  And of course, I’ll have the new catalogs so you can get your hands on paper version of the catalog, in case the e-catalog just isn’t enough for you!

My January & February class schedules will be posted along with samples of the projects we’ll make in those classes, and attendees of the Open House will be the first to sign-up for classes.

I know you’re dying to see a sneak peek of the catalog, and while I can’t post the catalog just yet, here’s a peek of one of the Make & Takes you’ll make if you attend my Open House.

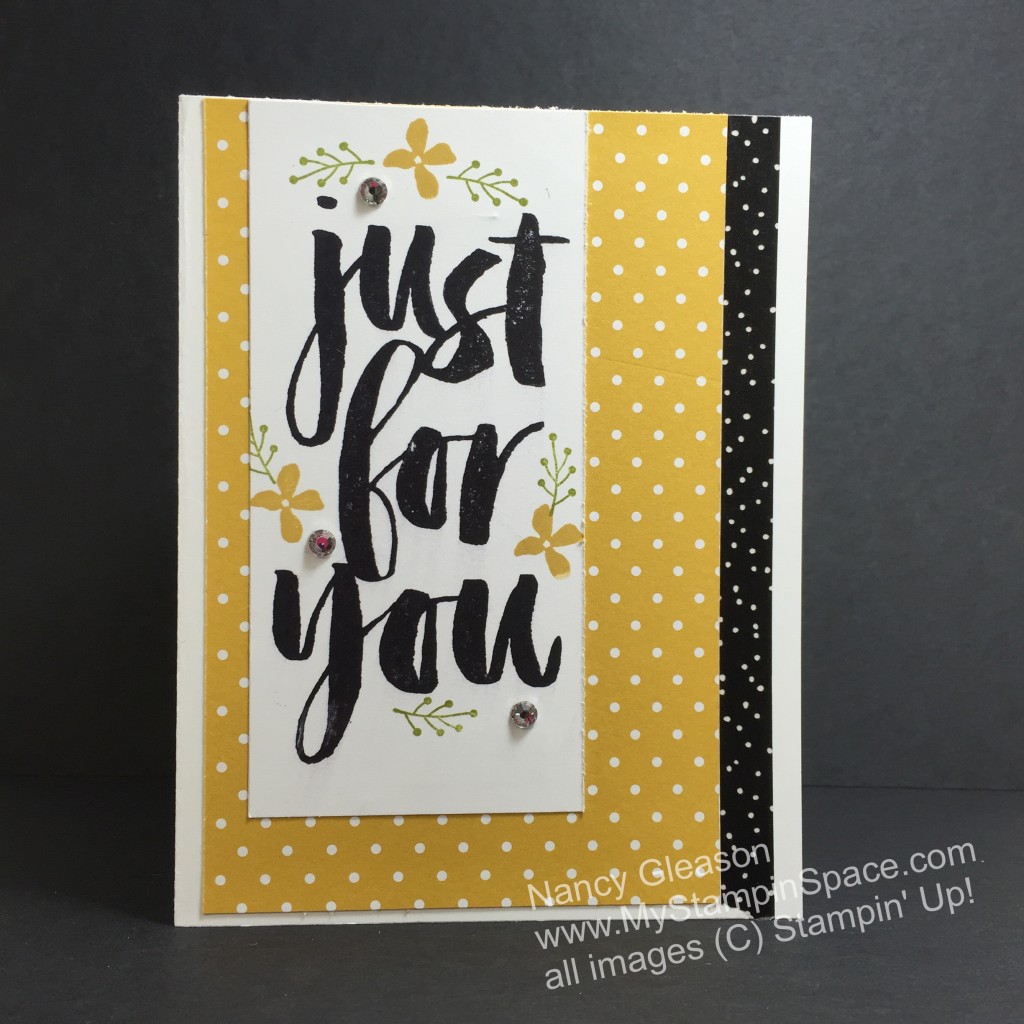
Nancy Gleason, My Stampin Space, Botanicals for You, 2016 Sale-A-Bration

Don’t you just love this bold sentiment?   This is stamp set called “Botanicals For You” and it’s FREE with a qualifying order during the Sale-A-Bration promotion.  This could fit the bill for any occasion, and I can see making this in other color combo’s too.

So, make your RSVP now to attend the Open House;  there is no cost for this event, but you must RSVP to reserve your spot (and catalog, and project kits).

Saturday, Jan. 9th from 1-4 PM in Moosic, PA.  I’ll give directions as needed when you RSVP.  Need more info?  Email me.

And then check back early, early Tuesday morning to view the catalogs right here on my blog.  See you then,

Nancy

Pals Blog Hop: Winter Wishes

2015badge-3

Welcome to the Pals Blog Hop for December; we are thankful you stopped by.  This month we are showcasing projects that feature Stampin’ Up! products that should be on everyone’s wish list. We hope you enjoy our creations.

You may just be starting the Blog Hop or may have come from the previous link from the Line-up on the Pals Blog Hop listing shown below.  The full lineup will help you move along from blog to blog so you may see all the projects.

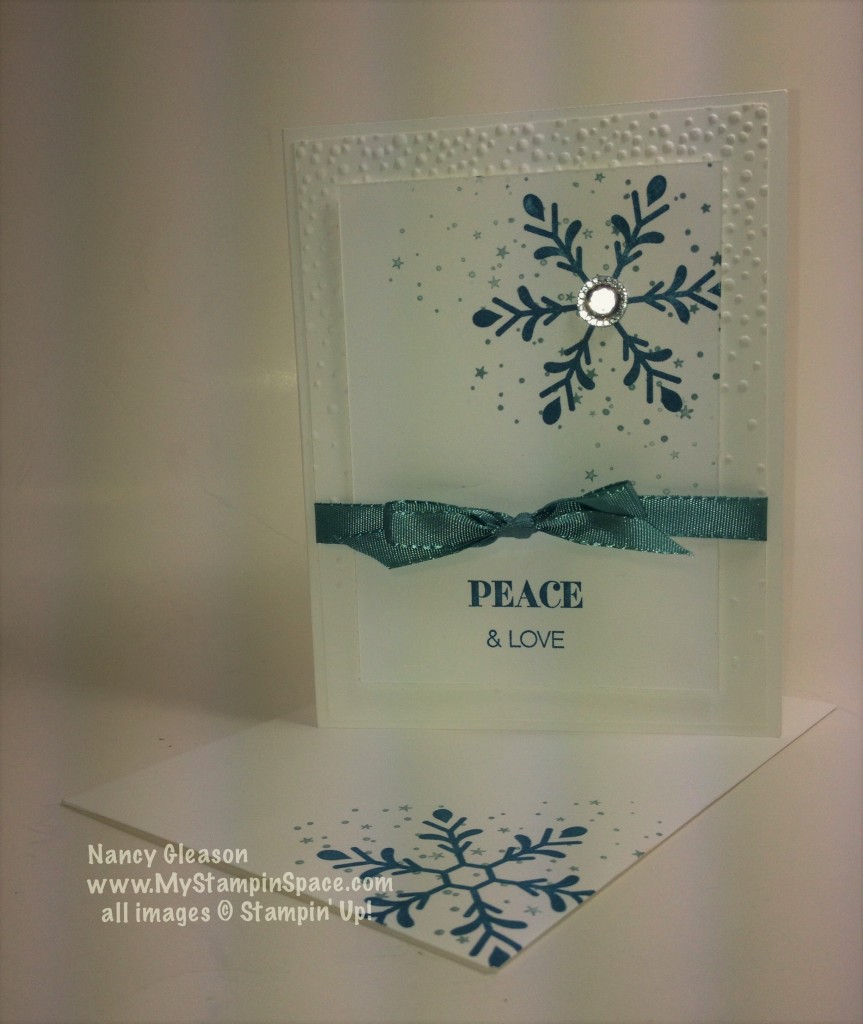
My project features the Holly Jolly Greetings  stamp set and a classic winter color combination of white with blues.

IMG_6014 (2)

The white is hard to photograph so that the picture does the project justice.  Let’s try another background:

IMG_6016Hard to see, but this card features 3 layers, yet it is made from just one sheet of cardstock!  I like to feature quick & easy cards this time of year.  I showed the gals at my first ever Sip & Stamp class the other night how easy it is to make this card.

First, I cut an 8-1/2″ x 11″ sheet of Whisper White cardstock in half to create the card base.  Then I cut a 4″ x 5-1/4″ piece which we ran thru the Big Shot with the Gently Falling embossing folder.  Lastly I cut another piece 3″ x 4-1/4″.  On this layer we stamped the background snow flakes with Lost Lagoon ink several times in the upper right corner.  On top of this we stamped the bold snowflake in Island Indigo ink.  We mixed and matched words to create whatever sentiments we wanted on the lower portion, again in Island Indigo ink.  IMG_6018

The finishing touches included tying a 3/8″ Lost Lagoon ribbon around the top  layer.  The top layer was adhered to the embossed layer using stampin’ dimensionals,  then glue that to the card base.  (The ribbon is retired but is available on our Clearance Rack – SCORE!)  We had our choice of Iced Rhinestones or Metal Rimmed Pearls to embellish the snowflake.

Did you notice that I used one of each on the two cards above?  Pay close attention and you’ll see that I even have two different sentiments, too!

Thanks for visiting. To continue with the hop, please refer to the Blog Hop Line-up below. We hope to see you on next month’s Pals Blog Hop!

  1. Nicole Everitt at Stamp Scrap Love
  2. Nancy Gleason at My Stampin Space —YOU ARE HERE! —
  3. Tricia Chuba at ButterDish Designs
  4. Maggie Mata at Maggie Made Cards
  5. Beth McCullough at Stamping Mom
  6. Jane Knudsen at see jane stamp
  7. Jackie Diediker at Stampin’ Jackie
  8. Susan Itell at Simple Stampin
  9. Kim Jolley at Stampin’ Artfully
  10. Lynn Kolcun at Avery’s Owlery
  11. Mary Fish at Stampin’ Pretty
  12. Katy McGloin at Just Fun Stamping
  13. Peggy Noe at prettypapercards
  14. Jennifer Michalski at Stampin’ Serenity
  15. Ronna Butt at www.cardstockcastle.com
  16. Kalyn Shubnell at The Stamping Chronicles
  17. Shawn de Oliveira at ShawnStamps
  18. Becky Volpp at InkBlossomwithBecky
  19. Wendy Klein at Doggone Delightful Stampin’
  20. Lisa Ann Bernard at Queen B Creations
  21. Rae Harper-Burnet at WildWestPaperArts.com

If you’d like to order any of the supplies used here to recreate this card yourself, click here to go to my online store.

Thanks for stopping by.  Leave me a comment and let me know which embellishment you like best; the pearl or the rhinestone.

Nancy