Lotus Bloom Meets Irresistibly Yours

A Match made in Heaven!   Yesterday I shared with you my favorite paper from the Sale-A-Bration Catalog; a specialty paper called Irresistibly Yours.  You can see that blog post here.

Today, I am sharing with you my favorite stamp set from Sale-A-Bration:  Lotus Bloom.  When Lotus Bloom and Irresistibly Yours went out on a blind date, it was love at first sight and they have been inseparable ever since!

Lotus Bloom is a 3-step stamp.  Yes, 3-step.  That’s not a typo, it is a 3-step; not a 2-step stamp set.   The Lotus flower image is irresistible (probably why it is in love with the paper of the same name!)  on its own, but the font in the sentiments is to die for.  lotus bloomNow let me show you the magic that happens when you stamp all three flower images, one of top of the other.
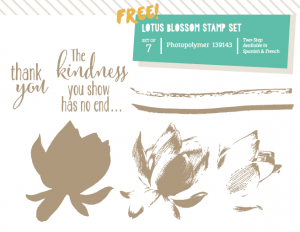
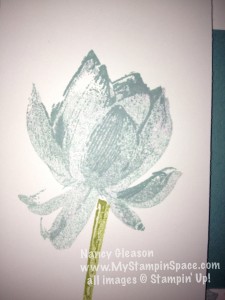
IMG_4531See the gorgeous depth & detail?   This is actually created from just one color ink; Lost Lagoon.  But by layering the 3 stamps, and stamping off between layers, you can create various shades of the same color.

Now, for the font:  IMG_4528I love when a print and a script are combined.   Excuse me if this is a little blurry; it got distorted trying to zoom in & crop such a small area.
Now when Lotus Bloom and Irresistibly Yours are going steady; this is the result:
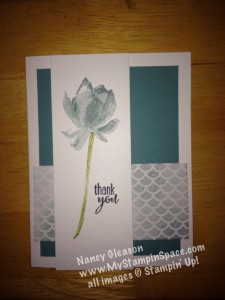
IMG_4528Don’t you just love these two together?  They make such a cute couple.  I think I hear wedding bells….   The Irresistibly Yours paper and sponge daubers allow you to create light & dark areas on the paper; it mimics the light and dark areas on the flower.

I bet you didn’t even mind waiting until last to see the final project.  I usually show you the final project first, then zoom in on the details but today I flipped it around.

Want to see more on how to use this 3-step stamp?  Watch the video:

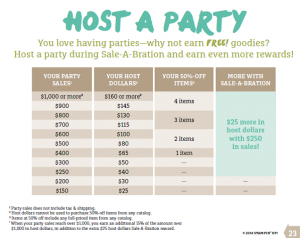
Remember with Sale-A-Bration, every item in that catalog is FREE with a qualifying purchase.   $50 (before tax & shipping) earns you one FREE Sale-A-Bration item, $100 earns you two and so on.  Don’t forget, when you reach $150 in one order; you’ll start to earn host reward dollars too.  So $150 product order gets you 3 FREE Sale-A-Bration AND $25 host reward dollars.  SAB Host RewardsWhether you host a party, or place an order for yourself, or gather orders from yourself & some friends, the Host Reward Dollars are the same.  See the chart for all the details.  You can see how your FREE merchandise really adds up.  No wonder Sale-A-Bration is the most popular promotion of the year.
Click here to shop online now.  Email me if you’d like to host a workshop; whether in person if you are in the Scranton, PA area, or online.

Share this post and video with your friends.  Then leave me your comments on Lotus Blossom.  Do you plan to add this to your stamp collection?

Nancy


A treat for you

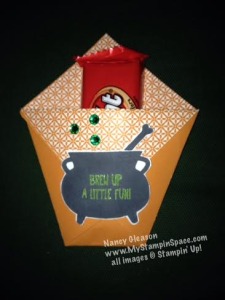
Want a cute and quick way to give someone a candy bar this Halloween?  This little treat holder is the answer.

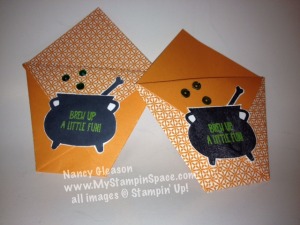
treat holderIt’s adorable, right?  And it’s made with only a 6″ x 6″ piece of double sided paper.  That means you can get 4 of these out of one 12″ x 12″ piece of DSP!  Just fold the paper in half, point to point, then fold the left point over to the right.  Fold the right point over, and finally end by bringing the top fold down.    It’s that simple.  You don’t even need to glue it if you don’t want to.  But I do recommend using your bone folder to get sharp creases at every fold.   Come back tomorrow and I’ll post a quick video showing you step by step exactly how to make these.

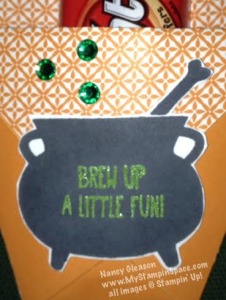
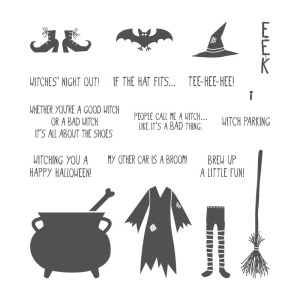
treat holder emptyI used the witches cauldron from the Tee-Hee-Hee stamp set to decorate this, but you could use almost any stamp, sentiment & paper combination for whatever occasion you wish.  A candy bar is always in season!  You could also put movie tickets inside.    treat holder close upFirst I stamped the witches cauldron in Momento Tuxedo Black ink.  Then I used my stampin’ buddy and Versamark ink to stamp the sentiment onto the image I just stamped.  Wild Wasabi embossing powder makes the sentiment pop on the black ink.  A few Rhinestone jewels, colored with a sharpie marker, look like bubbles rising from the creepy potion being brewed!  My paper snips make it so easy to fussy-cut the cauldron.

135125GI’m giving away this stamp set;  all you have to do is leave me a comment and one lucky winner, randomly chosen, will be the winner!  Of course, the winner will have to get back in touch with me to give me their address so I can mail the stamp set to them.  I can only ship to the United States, so my apologies to my blog readers from Canada and beyond.

So, leave me a comment at the end of this post.   I’ll give my readers until 10 PM Friday night to leave me a comment to enter to win the stamp set giveaway.  A winner will be chosen and will have until Tues to claim their prize.  Good luck to all who enter!  I’ll post the video late Friday night or Saturday afternoon showing how to make these.

Thanks for stopping by,  see you soon.

Nancy


Treats for your Trick-or-Treaters

I like to give special treats to those special trick or treaters in my life; whether they are in costume or not!  (Yes, I mean “my boys”, my co-workers and other family).  Of course, you could make a whole bunch of these to hand out to every trick or treater at your door if you really wanted to!

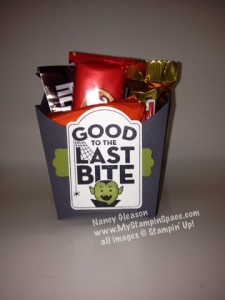
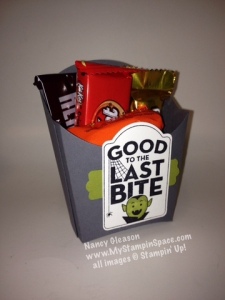
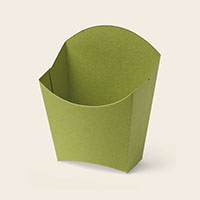
photo 2I used the Fry Box die and Basic Gray cardstock to make the box.  The image is from the “Merry Everything” stamp set.  I love the little dracula, and the little spider behind him.  This set has a coordinating punch, Note Tag Punch, which made cropping out the shape a snap.   Now, you know how I love the coordinating products.  But I love saving money just as much too!  And when these two products are bundled together, you save 15%!  Bonus!

Momento Tuxedo Black ink is my new favorite black ink.  It is crisp and dark, and doesn’t run when you color in it.  I stamped the image with that, then  I used my Old Olive Stampin’ Write Marker to color in his little face.   Old Olive cardstock and the Modern Label punch made a little splash of color behind the image.

photo 3

I love how this fry box can be stuffed with candy.  And it holds a pretty decent amount of candy.  I’m also planning on making these for Thanksgiving to set at each place setting.  I may fill a clear bag with either candy corn , or cookies to put in the box.   This little box is so versatile;  I could see it filled with nail polish & lip stick for a little girl’s birthday party.  Or Legos or Matchbox cars for a little boy.  What will you put in yours?

Don’t forget, I’m giving away the Tee-Hee-Hee stamp set on Halloween!  All you have to do is leave me a comment.   All comments received this week will be entered in to win.  I’ll pick a winner on Friday!

135125GAnd if you’d like to order any of the items I used to make the treat box above, you can click here to go to my store, or click on the picture below.

My Take on #155

I needed to make a project for a workshop and I knew I wanted to use Endless Wishes.  I wanted it to be simple, yet ‘stepped up’ a bit.  As soon as I saw the sketch for this week’s Freshly Make Sketch Challenge, I had my layout!  I love it when things just come together like that!

Here’s the sketch:

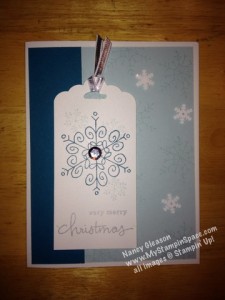
And here is my card:Paper Players # 155

I love the simplicity of the snowflakes in this set; the blues & silver just beg to be used.  I used Soft Sky cardstock and a strip of Island Indigo cardstock on the base.  The tag was cropped & shaped using the Scallop Top tag punch.  I used Soft Sky ink to create the tone-on-tone effect on the Soft Sky cardstock.   I love all the possibilities of the sentiments and the font style in the set too.  The snowflakes & silver sequin from the Frosted Sequins are the perfect embellishment and give it just the right amount of bling.  Soft Sky & Island Indigo ink create the snowflakes on the focal point and Silver Metallic ink is reserved for the sentiment.

And, by the way, the ladies at my workshop loved it too!

Don’t forget:  You can stamp with me too, regardless of where you live or your hectic schedule.  My Virtual Stamp Club begins in a few short days.  Click here to find out more and to sign up.

Thanks for stopping by My Stampin’ Space.  I hope you enjoyed todays post.  And I hope to see you in my Virtual Stamp Club soon!

Nancy

New Hues Review: 28 projects to get your creative juices flowing!


Welcome to the July Pals Blog Hop. This month we are featuring a New Hues Review. Let the new Stampin’ Up! In Colors for 2014-16 inspire you – With 28 bloggers participating, we hope you will find great inspiration from our creations!  Let me start by introducing the new colors to you:  Blackberry Bliss, Lost Lagoon, Mossy Meadow, Hello Honey, and Tangelo Twist.

color collections

You may just be starting the blog hop or may have come from Nicole Watt at Pixel Maven’s Retreat on the Pals Hop. If you get off track at any time, the full lineup below will help you move along from blog to blog so you see all of the amazing creations.

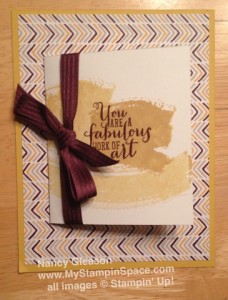
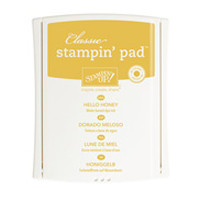
When the new 2014-2016 In-Colors were introduced, I immediately fell in love with Blackberry Bliss.   Paired with Hello, Honey, it became a color combination I reached for over & over again (thanks in part to the new Moonlight DSP Paper stack).

IMG_3452[1] IMG_3453-002

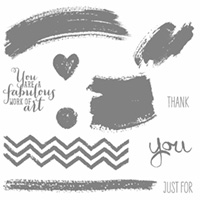
See what I mean about this color combination? And the Moonlight DSP?  Don’t you just love the Blackberry Bliss ribbon as much as I do?  I used the new “Work of Art” stamp set for these cards.

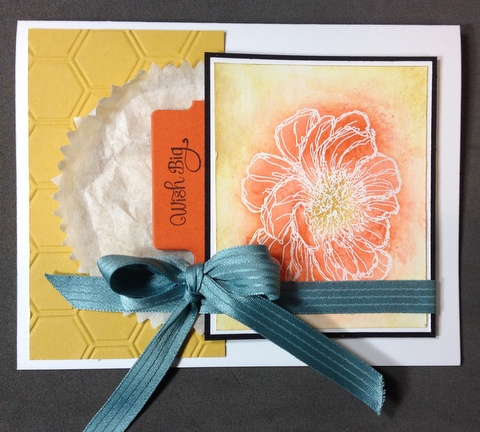
While I really was getting mileage out of these two colors, I had somewhat neglected the other colors.   So I created the next card purposefully to expand my horizons and reach for other colors.  I used Hello, Honey, Tangelo Twist and Lost Lagoon in this card. Ok, so maybe I didn’t reach too far because it still uses Hello Honey as a primary color but at least I did resist the urge to pair it with Blackberry Bliss!   Instead I choose Tangelo Twist with an accent of Lost Lagoon. IMG_3526

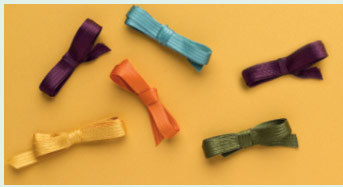
This card features heat embossing and emboss resist as well as a watercoloring  technique.  It uses the new “Bloom with Hope” hostess stamp set.  The sentiment comes from “A Dozen Thoughts”.  The flower was heat embossed using Versamark ink and White embossing powder.  My aqua painters were used to create the watercolored background and to color the flower.  The ribbon is Lost Lagoon and I have to tell you how much I love this new 3/8″ Stitched Satin In-Color ribbon;  I have already used an entire roll of Blackberry Bliss Ribbon and Hello Honey Ribbon!  That’s alot of ribbon!  But thank goodness, I can still buy more – oh, don’t worry!   I already have.  I’m on my second roll of each of those colors!

Please let me know what you like about my projects and don’t forget to tell me which of the new colors is your favorite color!   Thanks for stopping by My Stampin’ Space today.  If you want to order these products, or any others, please stop by my on-line and shop securely.   Just click on any hi-lighted item above or click on any item in the table below.  Thanks!

The next stop is Susan Itell at Simple Stampin on the Pals Blog Hop! Thanks for visiting and  I hope to see you next month.

2014julhop_back

2014julhop_next

  1. Susan Lankford at Stamp and Create With Susan
  2. Natalie Bradley at Natalie Bradley Events
  3. Jackie Diediker at Stampin’ Jackie
  4. Katy McGloin at Just Fun Stamping
  5. Debra Simonis at Deb’s Stampin’ Grounds
  6. Diane Roberts at Score at Four and a Quarter
  7. Mary Fish at Stampin’ Pretty
  8. Debbie Mageed at Secret Stamper
  9. Amy Hoptay at inkingofyou.com
  10. Martie Pollard at The Crafty Bandit
  11. Kerry Willard Bray at Peonies and Paper Chains
  12. Maggie Mata at Maggie Made Cards
  13. Nicole Watt at Pixel Maven’s Retreat
  14. Nancy Gleason at My Stampin Space —YOU ARE HERE!—
  15. Susan Itell at Simple Stampin
  16. Donna Kopenski at craftycardmaker.wordpress.com
  17. Beth Beard at My little craft blog
  18. Patti MacLeith at Papercrafts by Patti
  19. Dawn Tidd at Tiddbits from Dawn
  20. Cheryl McAskill at A Stampin’ Holiday
  21. Peggy Noe at Pretty Paper Cards
  22. Michelle Gleeson at StampinMojo
  23. September Gray at Septembergray.com
  24. Kelly DeTommaso at Kelly’s Creative Corner
  25. Wendy Klein at Doggone Delightful Stampin’
  26. Amy Williams at Stamps and Spice
  27. Lisa Ann Bernard at Queen B Creations
  28. Rae Harper-Burnet at WildWestPaperArts.com

I Believe!

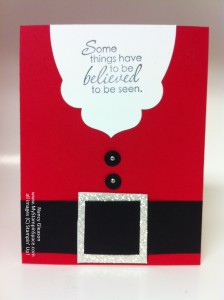
I Believe in Santa ClauseI love this card!  This is not my original; it is my version of a card I saw on Pinterest.  I wish I knew where I first saw it and/or who first designed this so I could give credit where credit is due.  I’ve actually seen several versions of this.

To create the card, I started with  card base from Real Red cardstock.  I cut the beard from the Apothecary Accents framelits die.  The belt is a piece of Basic Black card stock.  The belt buckle is a square of Silver Glimmer paper; I cut 2 slits and slipped the black card stock thru.  A small circle punch and a silver brad make the buttons.  The sentiment is from a retired stamp set but the sentiment is just perfect for this occasion, don’t you think?

Let me know what you think of this card.  Have you seen this design before?  Have you attempted to re-create this card yourself?

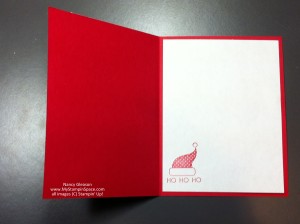
And what did I do with the inside of this card?  2013-12-08 20.27.01

I use a plain sheet of copy paper cut slightly smaller than the inside and glue it just along the top edge.  A little coordinating stamp from Embellished Events finishes off this card.

Quick & easy for you to recreate this card for the last minute cards you need to make.

Happy Stampin!

Nancy

Festive Flurries…Just in time for Winter

Winter is officially here; we woke to our first snowfall this morning.  Not a lot, but just enough to add some white to our trees.

Just in time for Snow and your Christmas decorating, Stampin’ Up! has introduced the Festive Flurry Ornament Kit: this kit helps you make ten beautiful ornaments for just $14.95!

Festive Flurry Ornament Kit

Add a little festive flare to your holiday decorating with our new Festive Flurry Ornament Kit! Top presents, embellish cards, create a wintery garland, or trim the tree. How you use them is up to you!

The kit includes everything you need (minus adhesive) to create 10 snowflakes, including

  • 10 feet of Soft Sky Ribbon
  • Printed cardstock – die cut and scored, ready to be assembled (Soft Sky, Crumb Cake, Whisper White Cardstock and Silver Glimmer Paper)
  • Large Rhinestone Basic Jewels (40)

Festive Flurry Ornament Kit
Item #: 135813       Price: $14.95

Available starting 11/12/2013 – while supplies last.  Don’t wait, order yours today!

————————————————

Remember to get your Holiday Tag It bundles before it is too late! The bundles are only available through November 19.  Click on the photo to get more information and to place your order before they’re gone!

————————————————

And also be sure to check out our MDS Seasonal Sale (30 percent off select holiday downloads and print projects). Ends November 30.

————————————————

Holiday Sale: This year’s online holiday sale (formerly known as Online Extravaganza) will be November 20-December 2.   Get ready for your holiday shopping!  I’ll have all the info for you on November 19, so make sure to check back then.  This Holiday Sale will kick-off with a 24-hour doorbuster sale you won’t want to miss so make sure to stop back here on November 20.

————————————————

  • My Digital My Digital StudioStudio: Check out our newest downloads here! (PDF)
    • We’re introducing three new MDS online classes. Learn more here.
    • Enter our My Digital Studio Facebook Giveaway for a chance to win November’s bonus My Digital Class.
    • Don’t have MDS yet?  Click here to get a free 30-day trial of the software.  Try it before you buy it!

Congrats to the Newlyweds!

Some of you may have been wondering where I’ve been; I haven’t been posting very much lately.  I’m still here but I’ve had a lot going in my life lately; all good I must say!  The most exciting is that my step-daughter just got married this past weekend!   We are so pleased to welcome Brian into our family, and with him, his 2 sons!

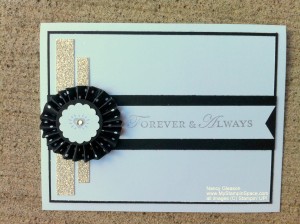
Below is the card I made for the newlyweds.  It is simple and elegant, with a black & white theme and just a bit of silver sparkle thrown for good measure.  The sentiment, from “Loving Thoughts”,  is my wish for them and their marriage; Forever & Always!

Forever & AlwaysI apologize that the color isn’t spot on; I do seem to have trouble photographing white.

This card is made from Whisper White card stock with a layer of Basic Black and another layer of Whisper White.  That skinny little layer of black adds so much don’t you think?

A strip of Basic Black is the perfect backdrop for the Whisper White banner sporting the sentiment “Forever & Always”; my wish for their marriage!  A rosette made from Basic Black DSP (from the Neutrals Designer Paper Stack) is placed atop 2 strips of Silver Shimmer Paper.  The diamond image on the tiny scallop circle is from the new Photopolymer stamp set “Another Thank You” stamped in Silver ink and a little Rhinestone Jewel for added bling.

Loving Thoughts - Clear-Mount Stamp                       Another Thank You Photopolymer Stamp Set

Loving Thoughts #125845 (Clear)                                      Another Thank You Photopolymer Stamp Set #133454

 If you would like to recreate this card, and need any supplies mentioned here, be sure to stop by my on-line store where you can shop securely 24/7 and your order will be shipped directly to your door!  Shopping Rewards are available to all my customers; place an order of $150 or more ( before shipping & tax) and earn $25 in free product!  How cool is that?

Should you wish to leave a comment for the bride & groom, be sure that I’ll pass it along to them!

Thanks for stopping by My Stampin Space today.  Be sure to come back soon, you won’t want to miss the Pals October Blog Hop on Tuesday, Oct. 8th.  It will be a ghoulish good time, complete with Tricks & Treats!    See you then!


Avoid the Frenzy – Start Planning for the Holidays Now

Every year, I think I am going to start my planning for the holiday season early to avoid the frenzied chaos I usually wind up in, but my good intentions don’t always pan out.  My problem is, I don’t have a PLAN for my planning; no way of organizing what I’m planning in my head. I write things down (sometimes) but then I can’t find my notes. I cut out a recipe, but don’t remember where I put it. Sound familiar?

But this year, Stampin’ Up! has my back. They’ve actually given me a plan for my planning, an organizer for my organizing.

If my story sounds like yours, then we both need The Season of Style This & THAT journal. Watch the video below to see how this will organize your holiday season so you can keep it all together this year.


Season Of Style This And That Journal
Season of Style This & That Journal
# 132277 $10.95
Naughty And Nice This And That Rotary Stamp
# 132278 $5.95


Season Of Style This And That Designer Stickers
#132276 $ 4.95
Season Of Style Designer Washi Tape
#132155 $4.95


I’ve even made it easy for you to order your This and That journal.  Just click on any picture and you’ll go straight to my on-line store.

This makes a great practical gift, too.  So don’t forget your sister, your BFF, or your co-workers.  Anyone who could use a little help getting their holiday planning under control.

Now, go enjoy your perfectly planned, stress-free holidays!  On behalf of Stampin’ UP!, you’re welcome!

Nancy

Get Well Wishes

IMG_2364

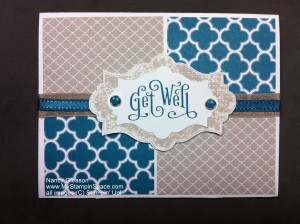
I needed a get well card for a man so I wanted something clean & simple and with masculine colors. Sahara Sand and Island Indigo DSP pair up beautifully for a wonderful color combination that’s masculine but not drab.

“Everything Eleanor” and “Perfectly Penned” were the stamp sets I used.  I stamped the background in Sahara Sand ink on whisper white cardstock; my paper snips made easy work to accurately cut this out.  The Get Well sentiment was stamped in Island Indigo ink onto Whisper White paper.  The Apothecary Accents framelits popped out that die cut shape in no time.  I used the Candy Dots in Island Indigo (Regals Collection # 130932)  and the Candy  Dots Brad Bases to accent the die cut shape and sentiment.  They really add a finished touch, don’t you think?

You can click on any of the underlined items listed above and be instantly and magically transported to my on-line store where you can purchase that featured item along with anything else your heart desires!  If your order totals $150 or more (before shipping & tax) you will even earn bonus dollars so you can maximize your purchasing power – that’s right.  More power to you!

Everything Eleanor Clear-Mount Stamp Set
#131987 (W) $ 36.95
#124164 (C) $26.95
Perfectly Penned
# 128703 (W) $16.95
#122892 (C) $ 12.95

Thanks for stopping by My Stampin’ Space.  I hope this simple layout and color combination inspired you when you need to make a masculine card, or just want something quick that doesn’t take alot of time.  Please leave me a comment, and come back to My Stampin Space again!

Happy Stampin’

Nancy


August Pals Blog Hop


Thank you for joining us for the August Pals Blog Hop. Even though it’s only August we want to provide some inspiration for your upcoming holiday projects. This month’s blog hop will showcase new products from the 2013 Stampin’ Up! Holiday Catalog. We hope you enjoy seeing how we use the new stamps, new punches and other accessories!

You should have just left stop number 14 on the Pals Hop – Nicole Watt at Pixel Maven’s Retreat. If so, you are in the right spot. If you get off track, the full blog lineup below will help you move along from blog to blog so you see all of the amazing creations.

Have Yourself a Merry Little Christmas


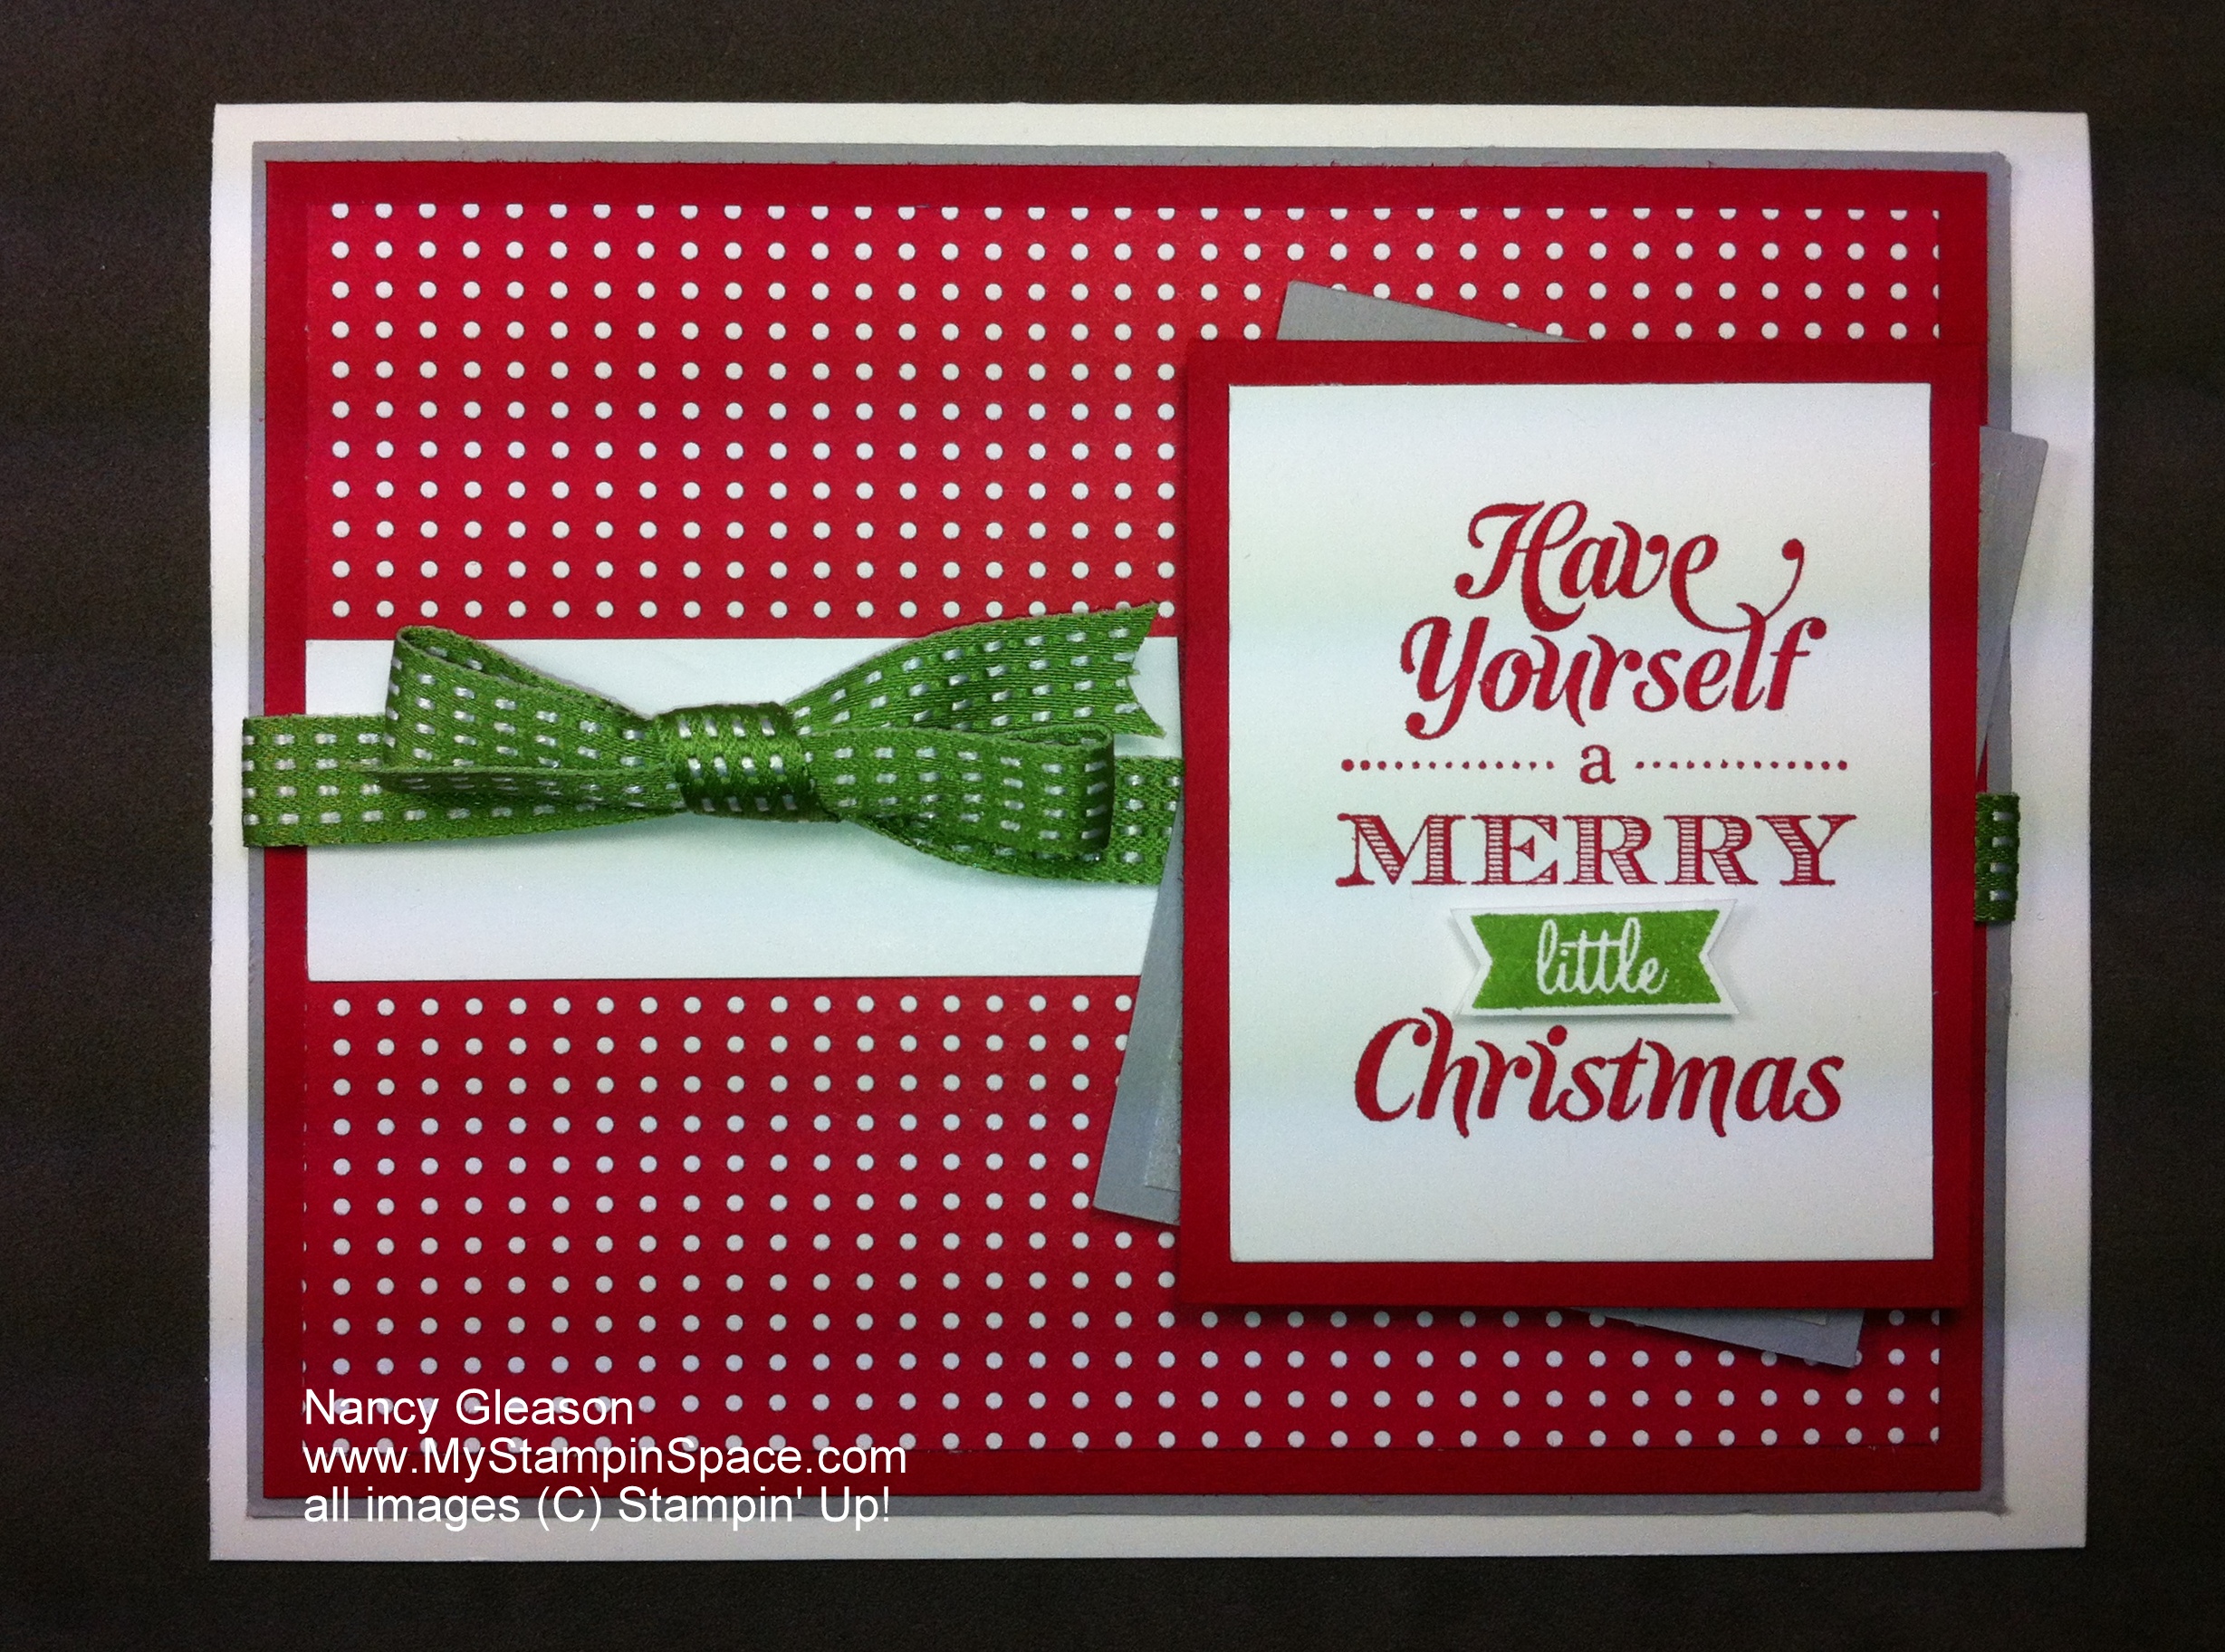
“Merry Little Christmas” (#131826-wood, #131829-clear) was a stamp set that went straight to the top of my wish list my first trip thru the 2013 Holiday Catalog.  Why?  Because it’s part of a bundle!  Anytime I see a product bundle, I know that A)  the products will coordinate well together, and B) I’ll save money!

This catalog is full of kits, great for the busy crafter!  This stamp set comes bundled with a card kit for easy card-making without a lot of fuss and includes everything except ink & adhesives (basic supplies you probably have on hand).

For this card, I used a gray, red & green color combo.  There’s a layer of Smoky Slate card stock, then a layer of Real Red followed by a piece of DSP  (retired – I am bound & determined to use as much of my retired DSP as I can!)  .  The image is stamped in Real Red onto Whisper White cardstock.  I then stamped the image again on Whisper White using Gumball Green and snipped out the ‘little’ banner using my paper snips and popped it up on stampin dimensional.  The little bit of grey behind it offset gives it some flair.  The finishing touch is the Gumball Green ribbon.

The next item I had to have were the Expressions Thinlits Dies #132171.  I loved the font and the size of each word.  IMG_2601Check out the spread on pages 10-11 in the catalog for some great ideas with this die.

These two cards were whipped out in minutes!  (Thanks to the Pals for the great tip about using wax paper to help get the cardstock out of the die! – No thanks to my family for leaving an empty roll in the wax paper box in my cabinet and not letting me know we were out!  – But that’s a different story!)

Red Glimmer Paper and Silver Glimmer Paper and punches created the designs.  (The Mosaic Madness punch and a line of mini pearls makes a great ornament, don’t you think?)  Need a quick card that you can mass produce but doesn’t cut corners on cuteness?  These thinlits will get the job done for you!  Another reason I like this set – it spans 3 holidays.  Plus I could see using the Love sentiment for more than just Valentine’s Day.

IMG_2602You can order any of these products from me.  Just click here to go directly to my store and start shopping!


The next stop is Beth Beard at My Little Craft Blog, stop number 16 on the Pals Blog Hop! Thanks for visiting – and I hope to see you next month!
2013aughop_back

2013aughop_next

  1. Colleen Mollema at My Crafty Habit
  2. Peggy Noe at Pretty Paper Cards
  3. Lisa Ann Bernard at Queen B Creations
  4. Angie Blake at Angie’s Musings
  5. Debbie Mageed at Secret Stamper
  6. Diane Roberts at Score at Four and a Quarter
  7. Barb Furlong at The Love of Stamping
  8. Mary Fish at Stampin’ Pretty
  9. Debra Simonis at Deb’s Stampin’ Grounds
  10. Laurie Chilton at Stampin’ Ink
  11. Penny Nichols at Sierra Stampin!
  12. Amy Williams at Stampin’ on the Range
  13. Shannon Jaramillo at Ezpeasycards
  14. Nicole Watt at Pixel Maven’s Retreat
  15. Nancy Gleason at MyStampinSpace
  16. Beth Beard at My Little Craft Blog
  17. Linda Callahan at Stampin’ Seasons
  18. Patti MacLeith at Papercrafts by Patti
  19. Sherrie Gross at Stampin’ Sunshine
  20. Kerry Willard Bray at Stampgoodness
  21. Brian King at Stamp With Brian
  22. Nicole Picadura at Scraps & Stamps
  23. Kim Czenszak at Live Love Stamp
  24. Rae Harper at Wild West Paper Arts
  25. Michelle Gleeson at Stampin Mojo
  26. Shannon Hokanson at Paper Works
  27. Dawn Tidd at Tiddbits from Dawn
  28. Lynn Kolcun at Stampin with Avery’s Owlery
  29. Susan Itell at Simple Stampin’
  30. Martie Pollard at The Crafty Bandit

Thanks to the talented Nicole Watt for creating our blog hop badge and buttons! This month’s badge and buttons feature the most excellent color combo featured in the Winter Frost product suite: Bermuda Bay, Coastal Cabana, Island Indigo, Pool Party and Smoky Slate.

And thanks to you for stopping by My Stampin’ Space today.  If you liked what you saw, please leave me a comment or sign up for my mailing list.  Please come back again!  See you soon!

Happy Stampin,

Nancy

Cabana Madness

This week is birthday week at the Gleason house!  3 daughters, 1 son-in-law, 8 days!  Whew! My card making  madness was in overdrive!  Boy, does that make me happy!

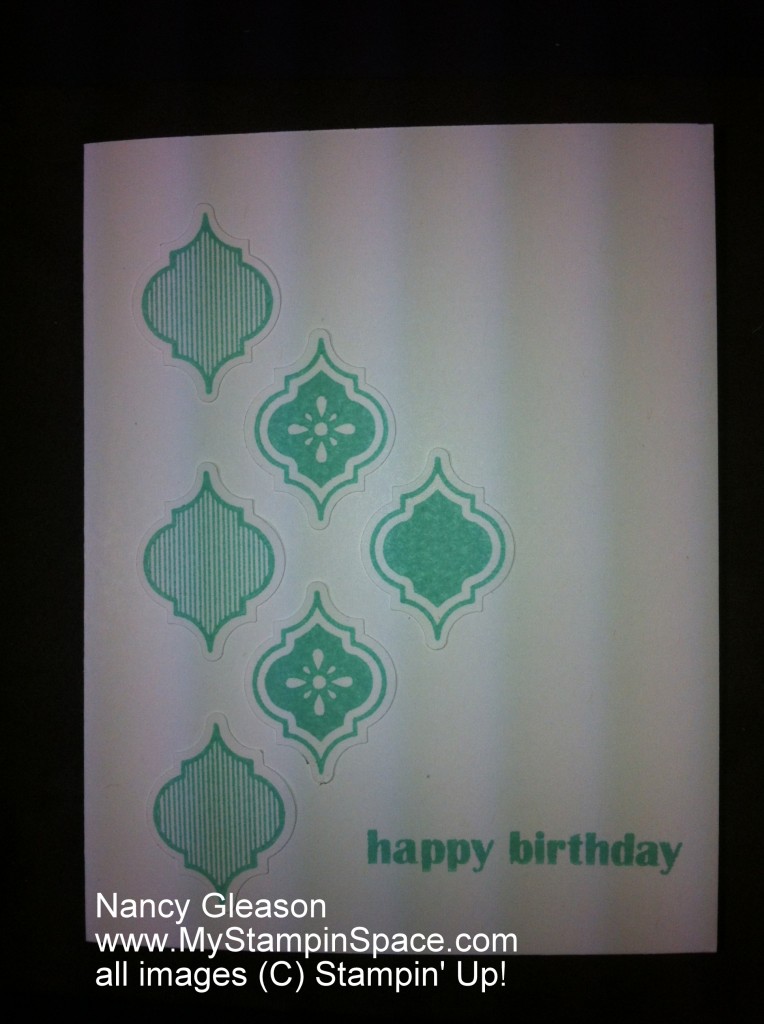
Soft, cool blue is Jenn’s color; just like the color of her eyes.  Coastal Cabana just shouted “use me for Jenn’s card, use me!”.  And so Coastal Cabana and Whisper White were chosen as the color palette.  Cabana Madness

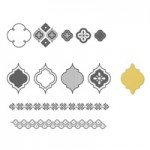
Mosaic Madness, the new stamp set with a coordinating punch were all calling out to be used.  I love that this stamp set has several different patterns of the same stamp; they work perfectly together but yet are different enough to provide just enough interest.  When a punch can pop out a perfectly cut shape in a single squeeze, I’m a happy camper!  These five shapes were stamped up and punched out in no time.  1 down, 3 to go.  Come back tomorrow for more birthday wishes.

If you want to order any of the products used, just click on the item icon below and you’ll instantly be transported to my on-line store where you can shop safely & securely from the comfort of your home and have your order shipped right to you.  Sounds just as easy as making this card!

Mosaic Madness Stamp Set & Punch Bundle Clear # 130249      Wood # 130246
Mosaic Madness Stamp Set & Punch Bundle
Clear # 130249 Wood # 130246
Coastal Cabana  Classic Ink Pad # 131175
Coastal Cabana
Classic Ink Pad
# 131175
Whisper White  8-1/2" x 11"   Card Stock # 100730
Whisper White
8-1/2″ x 11″
Card Stock # 100730

All Dressed Up!

This is a card that we made at our last Stamp Club.  It features new and old products.  A;; Dressed Up!

The stamp set is All Dressed Up and I’m tickled pink that this set and the coordinating framelits dies are being carried over into the new 2013-2014 Catalog.

I love the Baja Breeze Blue, Basic Gray and Whisper White color combination.  If you do too, you need to stock up on Baja Breeze cardstock, ink, accessories, etc. as this color is being retired due to our Color Refresh.

My Big Shot made easy work of cutting out all of the shapes for this card.  I stamped this dress in Baja Breeze ink onto Whisper White cardstock.  The coordinating framelits dies made cropping out this shape a snap!  The dress form was cropped out using Basic Gray cardstock also with the Framelits dies.  The dress fits perfectly on the dress form.

I used the Ovals Framelits dies to create the oval shape and offsetting the oval off of the card base creates an interesting background.

TIP:  I used SNAIL adhesive to glue the oval to the Baja Breeze cardstock layer first and then, using my Stampin’ Trimmer, I sliced off the portion of the oval that was hanging off.

The sentiment, also from the All Dressed Up set was stamped with Basic Gray ink onto the Baja Breeze layer.  This layer was adhered to the Whisper White carstock base and then a Basic Jewels Pearls necklace was added as a final, finishing touch.

All Dressed Up Bundle Clear
All Dressed Up Bundle
4-pc. Stamp Set & Coordinating Framelits Dies
Clear Mount Bundle # 131095, Wood Mount Bundle # 131096

Would you like to re-create this card?  You can shop with me anytime at my on-line store securely 24/7 by clicking on any of the items listed above & underlined or Click Here and go directly to my store.


Farewell Button, Button!

Well, with the Retired Stamps posted, I thought it was only appropriate to post some photos of my favorite projects using soon-to-be retired stamps.  Button, Button

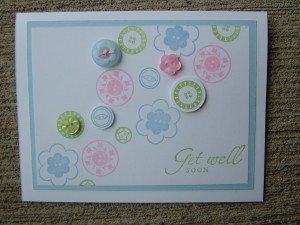
Button, Button (#122026-wood; # 122040 clear).  This stamp set was actually one that was never on my wish list; I won the stamp set through  meeting a sales goal.  Once I got it, I used it so much – far more than I ever thought I would.  It is such a simple, versatile set that could be used for any occasion.  I am going to miss this set in the new catalog.

Button, Button Stamp Set - by Stampin' Up!With 17 images in one stamp set, it’s easy to find just the perfect shaped & sized button to, well, button up your project!
I chose to make this card using Pretty in Pink, Certainly Celery and Bashful Blue ink- all colors that are now retiring due to the Color Refresh announced 2 weeks ago.  A few designer buttons, alongside a few stamped images, punched and propped up on dimensionals are all this card needs.  Any sentiment can be used to make this card an all-occasion card.

If you like these stamps too, but they’ve never made it from your wish list to your order list, now is your last chance to get them.  Stampin’ Up! will continue to manufacture stamp sets to fill orders thru June 3rd, but after that, they will be gone for good.  Retiring Accessories. will only be on a ‘while supplies last’ basis so if there is an item(s) on the retired accessory list, get it now.  Many items in the retiring colors are already sold out.

Head over to my store and start shopping now.  Don’t be disappointed.

Tell your friends to like me on facebook too.  I’m hoping to reach 100 fans and need your help.  Thanks, see you tomorrow with another farewell tribute!


Butterfly Birthday

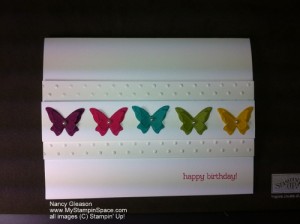
Here’s a quick and simple card that is short on time to make, but big on style!  butterfly birthday
A simple white on white background with just a bit of texture is the perfect backdrop for all this color!
The butterflies were a cinch to make; just a quick trip thru the Big Shot machine with the butterfly embosslits.  I layered a smaller butterfly on top of a larger one for added interest.  The line-up features Rich Razzleberry, Melon Mambo, Bermuda Bay, Lucky Limeade & Crushed Curry butterflies each accented with a Basic Pearl Jewel.

Did you notice I used 2 retired colors?  Well, they will be coming out of retirement when the new annual catalog is released this Spring.  Yes, Bermuda Bay & Crushed Curry will be making a comeback.  See my post for the color refresh just announced to see which of your favorite colors will be returning, and to see which colors will go into retirement.

Easy Peasy!

Make sure you stay current with all the news you need to know by subscribing to my newsletter.  Just click on the box to the right.